Quilling for the new year scheme. Heading: Christmas crafts. #2 DIY quilling caramel Christmas decoration
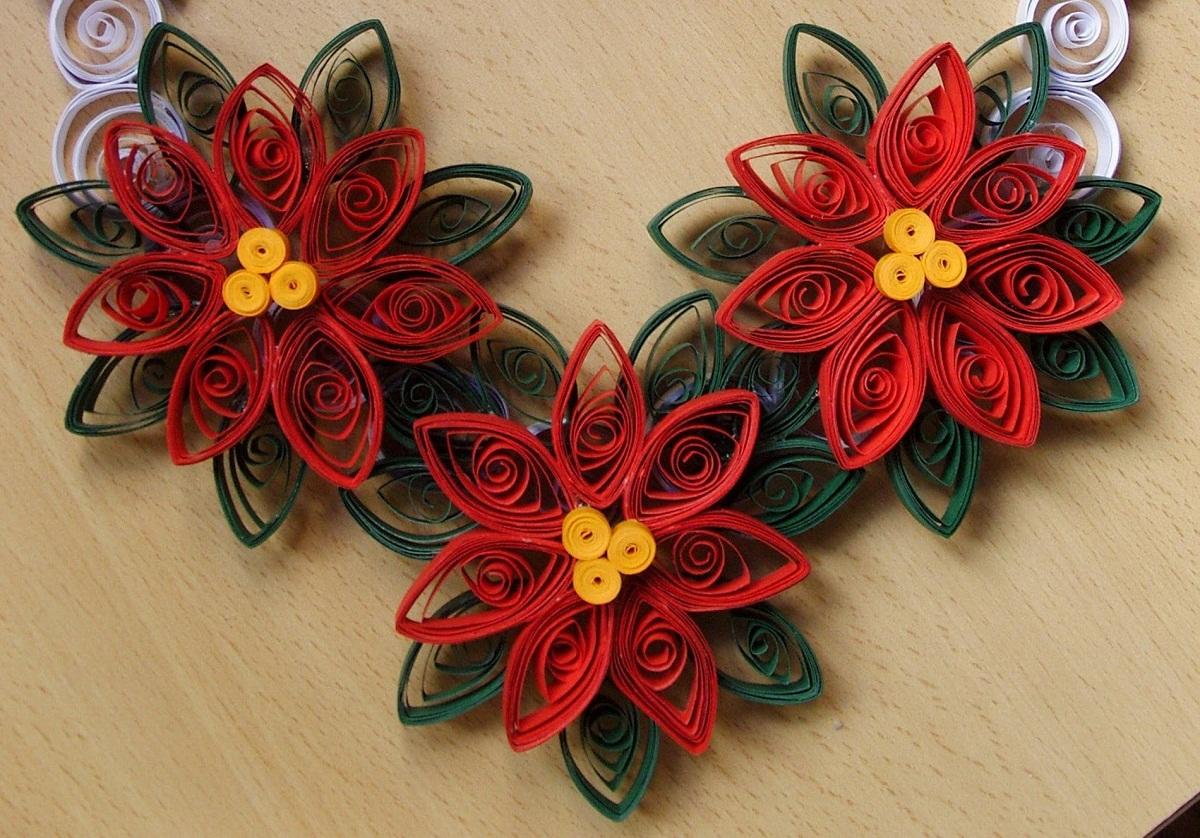
The quilling technique as a kind of applied art continues to gain momentum. It attracts with openwork and ease of creating crafts. For those who are not in the know, let us explain: quilling is a technique of twisting strips of paper, shaping them into the desired shape and creating compositions. The latter, by the way, can easily receive a prize and the title of a masterpiece.
Most often, the quilling technique is used to create holiday cards, they are decorated with openwork crafts. By the way, wonderful snowflakes are made from twisted paper for the New Year, so in December the theme of decorating postcards is especially relevant.

Crafts using the quilling technique for the New Year
Snowflake
We will need:- glue;
- strips of colored paper (you can use blanks from the store);
- scissors;
- threads;
- matches;
- beads.

1. Wind the strip around the match
Take a match and use a sharp knife to split its edge. Pinch the edge of the paper strip into the crevice of the match and start wrapping it around the match. Make it not very tight so that the detail is more beautiful.
2. Make paper blanks
You will need 12 pieces of such blanks, so repeat the action 12 times.
3. Make a snowflake
Start shaping the snowflake. Gently squeezing the round blank, give it the desired shape. Start gluing the pieces together, forming a snowflake out of them.
4. Glue the beads
Glue beads around the perimeter of the entire snowflake. Make a loop out of the thread and attach it to the snowflake. This craft will successfully decorate the Christmas tree in your home.
Christmas tree. Option 1
We will need:- glue;
- toothpick;
- strips of green paper;
- scrap paper;
- beads;
- glitters;
- greeting printouts;
- corner punchers;
- ribbon;
- snowflakes.
Wrap the prepared strips on a toothpick and fix with glue. You should get a tight bud.

On one Christmas tree leaves 10 buds. Stick the buds on paper, and then fluff each one with your fingers, and you will see how the buds open.
Finish the corners of the rectangles with a decorative hole punch.
Make a ribbon bow and glue beads in the center. Cut paper towel into 1cm x 1cm squares.
Using the trimming method, make a snowdrift. For the tree trunk, use a paper bag handle.
Glue a printout with congratulations on the back of the card.

Using green glitter, cover the lush buds of the Christmas tree with glitter. The forest beauty will sparkle, as if thousands of lights were lit on it.
Christmas tree. Option 2
If you twist the quilling paper not into such dense rolls as in the previous master class, but give them a shape, you will get original Christmas trees.


Volumetric Christmas trees made of paper
If you glue and assemble quilling paper into one piece, you can get a voluminous Christmas tree. Decorate the crown of such a beauty with a gilded star. Don't forget your Christmas tree decorations. Glue beads that will replace Christmas balls on a paper tree, apply artificial snow and sparkles.

Postcard with quilling decor
We suggest you make two postcards using the quilling technique: the first one will show a snowflake with a spruce branch, and the second one will show a Christmas tree with gifts.Snowflake with fir branch
We will need:- pin;
- openwork hole punch;
- white, yellow and green paper, cut into strips (the width of each is no more than 0.5 centimeters);
- ruler with circles of different diameters;
- thick postcard paper.
Take a sheet of paper and cut it into small strips. They are intended for the future snowflake.
Start twisting the strip, and then insert the roll into the diametral ruler. The end of the strip must be glued so that the roll does not lose its shape. Then squeeze the edge of the mug - you should get a drop.
Make a few of these. When there are several details, you can begin to select the location for them on the postcard and form the snowflake itself.

Make the same details in green. From them make a spruce branch.
Similar details are needed in yellow: they will form a candle.

Christmas tree with gifts
We will need:- pin;
- openwork hole punch;
- green and pink paper, cut into strips (the width of each is no more than 0.5 centimeters);
- thick paper for postcards;
- glue.
Cut green paper into strips, and then twist them, as you did in the previous version.
Make a drop by gently squeezing one edge of the workpiece.
Fold the finished parts into a Christmas tree, after attaching it to a postcard.


Make gift boxes. Use pink stripes for this. Sometimes, to twist small parts, use a pin.
As soon as all the details of the future postcard are ready, start collecting them into crafts. First glue the Christmas tree. And place gifts under it.
By the way, use beautiful cardboard as well as a quilling kit for your crafts. In this technique, you can create many New Year's motifs. Options for postcards, photos will come to your aid.


Tips for beginner quilling masters
To get a tight roll, you need to wind the paper tape tightly, and then fix the tip with glue.If you wind the strip at first tighter, and then slightly release it, you get the so-called loose roll. You can give the workpiece and the shape of a half-rhombus or, for example, a drop, for this you need to flatten the part with your fingers. Most often, this technique is used in the manufacture of petals for a flower.
For each form, experienced craftsmen use different techniques.
Eye shape. It is necessary to compress the round billet simultaneously from both sides. "Square" shape. First, make an "Eye" shape, then rotate it vertically and squeeze the part again on the sides.
Rhombus shape. Make this part from the "Square" blank, flattening the figure a little.
Triangle shape. First of all, make the “Drop” detail, then grab the corner, and flatten the base of the triangle.
Arrow shape. Twist the “Triangle” blank, and then press the middle of the short side inward with your index finger.
Crescent shape. This detail is made almost like the “Eye” blank, only with a curved shape. The corners of the part are pinched with a shift, and not opposite each other.
Open Forms:
"Heart". Fold the strip down the middle. Bend both free halves inward.
"Horns". Fold the strip down the middle. Screw both halves out.
"Curl". Mark the middle of the strip, but do not fold. Twist the ends to the middle, only in different directions.
"Twig". Bend the strip approximately in a ratio of 1: 2. Twist the ends to one side.
Hello quilling lovers! Each of us on the eve of the New Year holidays makes decorations for the Christmas tree with our own hands. Again and again we make new, unusual, unique toys for the Christmas tree so that each time it is decorated in a completely different way than last year. It is for this that I want to present you my new quilling master class - do-it-yourself Christmas tree decoration in the form of a penguin. Using this master class, you will learn how to make a penguin from simple quilling elements - a decoration for a Christmas tree, and you will be able to create different New Year images for your product.
13 DecHello quilling lovers! I want to bring to your attention a photo of 10 different Christmas paper decorations. Different color combinations, different decorations, different motifs. 10 different images of crafts - deer quilling, for every taste! In the article, you can choose your paper deer and repeat it to decorate your Christmas tree or as a gift.
Published in: Marked: 12/13/2018 02 But I Published in: Marked: 02.11.2018 01 But IHello quilling lovers! Today I picked up a very interesting master class for you. Using it, you will learn how to create a penguin with your own hands from paper using the volumetric quilling technique. In addition, you can create a pair of penguins with your own hands. Or make entire families of penguins with young children. Thanks to the master class, you will have the opportunity to personalize your family in the form of penguins and decorate your home with cute and funny paper crafts. Use my quilling master class with a detailed description and step-by-step photographs of making crafts - a do-it-yourself penguin from paper.
Published in: Marked: 11/01/2018 30 OctHello quilling lovers! Many times I shared with you the ideas of crafts in the form of Santa Claus using the volumetric quilling technique (3D quilling) in the heading. And still she could not decide to make a flat toy for the Christmas tree in the form of Santa Claus. Having worked a little on the idea, I created a whole collection of options on how to create a Santa Claus toy using just one of my master classes. Using the base template, I created 23 different Santa Claus looks. Making a Santa Claus toy is very simple. Use my quilling master class with a detailed description and step-by-step photographs of making crafts - Santa Claus toy for the Christmas tree.
Today, quilling is not only fashionable, but also useful. This technique allows you to calm your nerves, tune in to mechanical, but at the same time creative work that develops thinking, fine motor skills and creative imagination. With the help of quilling, you can create large paintings, panels or small postcards. In any case, handmade works will bring satisfaction to the master and joy to the one to whom the gift is intended. Quilling New Year's crafts will make the holiday not only fun, but also sincere.
Quilling style postcards are distinguished by openwork and ease of execution. The quilling technique involves twisting strips of paper of different sizes. Then the finished rolls are given a different shape and an image is already made up of them.
You can make flat and voluminous crafts - such forms are especially relevant for creating New Year's decorations.

To create crafts, you will need a standard set of quilling materials. You can cut the winding strips yourself. But to keep them neat, it is better to buy them in a professional needlework store.
Crafts for the New Year:
- "Snowflake". The strips are wound on a toothpick. For one snowflake, you need a dozen blanks. From blanks make "petals", "eyes" or "squares". Before gluing the parts, it is necessary to draw up a preliminary composition.
- "Christmas tree". Fringes are cut on strips of paper. After that, buds are formed from them. The Christmas tree is formed on cardboard. Before sticking the buds, the cardboard can be decorated with a backing and beads around the edges.
- "Volumetric tree". A voluminous Christmas tree can be assembled from parts in the form of a “drop”. The Christmas tree can be decorated with decorative elements: glitter or beads.
- "Christmas wreath". It can be made up of "eyes", "arrows", "hearts" and simple rolls.
- "Cock". It is very easy to make a New Year's rooster. To do this, you need to print a stencil and paste it over with multi-colored rolls, which can be shaped into “eyes” or “drops”.
The execution of work must be accurate and scrupulous. It is very important that no excess glue gets on the paper. Crafts are easy and simple to do, but for beginners it is better to use diagrams that will help to assemble the image into a single composition.
How to make quilling crafts for the New Year
On New Year's and Christmas holidays it is customary to give gifts. They don't have to be expensive. Sometimes it is important to do something with your hands, because handmade products are always valued more. Christmas crafts can be done without any special material costs.
All you need for crafts is strips of colored paper, PVA glue with a brush, a toothpick or a long stick, scissors and tongs.

Quilling crafts are made using the technique of winding strips of colored paper. After that, a roll of the required shape is made from paper. It is easy to give it to the roll with a light touch of the hand.
How to make a snowman craft:
- Prepare white strips of paper.
- Wind the strips, glue the edge of the strip so that the roll does not unwind.
- Rolls must be different sizes.
- After all three rolls are connected, the snowman can make a hat from a strip of a different color.
- From small stripes, you can twist the eyes and nose for a snowman.
This craft can be glued on cardboard. If you decorate the cardboard with a beautiful substrate and an inscription, and stick a snowman on top, you get a beautiful New Year's card. You can hang the craft on a thread and decorate the Christmas tree with a snowman.
Thematic crafts for the New Year: quilling
To make a pleasant surprise for your family and friends, it is not necessary to buy gifts. You can make a gift with your own hands, which will certainly be appreciated much higher than any purchased gift. Interestingly, quilling can be done by both children and adults.
If children are doing crafts, they should definitely be told about safety precautions and the rules for working with sharp objects and glue.

Making crafts from strips of colored paper, children will develop fine motor skills, thinking and imagination. Usually, children do not need diagrams, as their imagination can do just fine without them. But for novice adults, if they want to do the craft neatly, but do not differ in artistic abilities, at first the schemes will help a lot.
How to make a craft "Snow Maiden":
- Prepare a blue and white strip of paper.
- Twist the white stripe - this will be the face of the Snow Maiden.
- Twist a smaller strip - this will be the neck.
- Wind the blue stripes, and make “drops” from the rolls.
- Make a snow maiden dress from ready-made elements.
The whole composition can be collected on cardboard. And you can glue the elements and decorate the Christmas tree with crafts. Some decorate the granddaughter of Santa Claus with beautiful wings, representing her as a fairy fairy.
Christmas and New Year crafts from quilling
The drop shape is one of the most common elements in quilling. With its help, you can create original New Year and Christmas compositions. New Year's crafts can be done with the family - such an activity will unite relatives and give moments spent together.
Professionals advise using special machines for twisting and forming rolls for making paper crafts. This will prevent hand fatigue.
The most common forms are "drop", "eye", "rhombus", "triangle", "heart", "arrow", "crescent", "horns", "curl", "twig". All these shapes can be made by pressing, taking into account the force of pressing and the angle. The more forms the master masters, the more interesting and unique his compositions will be.
How to make an angel step by step:
- Prepare white stripes.
- Spin the rolls. Their number is determined by how big they want to make an angel.
- The rolls need to be slightly dissolved, glued so that they do not fall apart.
- From each roll you need to make a "drop".
- Form the body of an angel from the drops.
- The head is made from a tightly rolled roll.
- Rolls for wings are formed from golden strips of paper. They are also made from "drops".
- The composition is connected with PVA glue.
You can hang an angel on a Christmas tree or decorate a chandelier with it. He will protect the house and the family that lives in it. Ready-made Christmas crafts are decorated with sparkles, beads and rain. Quilling can be done by people of all ages. This is a very useful type of needlework, especially since it does not involve high costs for the purchase of raw materials. On the Internet you can find many diagrams and examples of work for inspiration. Professional craftsmen produce amazing masterpieces. You can become a professional through experience and the acquisition of relevant skills.
New Year's crafts from paper and quilling (video)
New Year and Christmas 2018 have already been celebrated. But this does not mean that the gifts are over. Crafts using quilling technique will be a wonderful handmade gift. Quilling involves the use of multi-colored paper strips, twisting them into rolls of different sizes and shapes, and composing images from these elements. New Year's themes involve compositions depicting New Year's heroes, Christmas trees, snowflakes, etc. You can make crafts yourself by looking at the instructions and recommendations of professional craftsmen on specialized sites.
Christmas balls made using the quilling technique can become a small work of art. It would seem that it could be easier than twisting paper ribbons and gluing them together. If you approach the process creatively, you can turn the house into an illustration for a New Year's fairy tale.

Principle of operation
Quilling involves twisting strips of paper and gluing the resulting parts together. You can shape them with your fingers so that you get not only circles, but also petals, hearts, rhombuses, etc.
In the first photo you see an illustration of the idea of updating an old ball. Surely, in a box with Christmas toys, an old one will be found that has lost its appeal. It can be updated by pasting paper figures.

If you want to please your loved ones not only with a beautiful handmade postcard, then here is an interesting idea for you to complete it.

It is worth trying to make a more complex type-setting ball from many elements. The presented photos of finished products will surely inspire you to make a beautiful one.
Materials and tools:
- a set of quilling paper (or colored sheets);
- transparent glue;
- wooden stick.
Among the additional tools is tweezers, with its help it is convenient to glue the parts together without crushing the paper. You will also need multi-colored rhinestones, beads and sparkles.
When forming a ball, take your time, connect several elements together, wait for them to dry completely, and only then continue.

Strips of paper can be cut out yourself, but pay attention to the quality of the material, the sheets should not be too thin, otherwise they will soak and deform when in contact with glue. Experiment with colors and their combinations, bright Christmas decorations look the most impressive.
Get down to business with a good mood and you will definitely succeed. DIY decorations will decorate the house and help create an atmosphere of New Year's magic.


Winter is a magical time of the year, the time of the first snow, fabulous holidays, and frosty patterns on the windows. Works using quilling technique will be able to convey all the beauty of crystal winter landscapes. Crafts from thin twisted strips of paper attract with lightness and beauty.
It is not difficult to complete a picture on the theme of winter. A step-by-step master class with a detailed description, photo and video will help you master the quilling technique.

Tools and materials
Try to make a winter fairy tale with your own hands. A composition using the quilling technique “Winter Patterns” will help create a magical mood. Paper extravaganza will give joy, and will not melt at the first rays of the sun.
For work we need: 
- colored paper;
- cardboard;
- quilling tool;
- glue;
- simple pencil;
- ruler-template;
- scissors (ordinary and curly);
- picture frame (A-3 format);
- decorations (beads, sequins, rhinestones, sparkles).
Photo master class
Consider step by step how to make a winter quilling composition.
Prepare paper strips from colored paper. Make them yourself, or use special quilling strips. The composition is formed in blue and white shades of paper strips.
The next stage is the manufacture of figures for the picture. The winter landscape is created from the following quilling elements: 
- eye;
- a drop;
- free spiral;
- ears;
- tulip;
- curl;
- flower;
- twig.

To create a composition, you need a drawing of a tree. Draw it yourself, or choose a ready-made template.
Transfer the sketch of the tree to the base of the picture, and proceed to design the composition. Arrange flowers and decorations on the surface of the leaf.
Connect all elements of the composed composition with glue, dry, and insert the picture into the frame. 
After adding words of congratulations and wishes, use this landscape to create a postcard for the New Year.
Winter theme. Ideas for inspiration
Quilling is becoming a popular type of needlework. The paper rolling technique is used to create paintings, panels, postcards. Openwork elements adorn notebooks, albums, photo frames. The quilling technique is ideal for creating gifts for various holidays. Crafts from twisted paper on the eve of the New Year and Christmas holidays are becoming relevant. Beautiful crafts for the New Year are made from thin strips of paper: snowflakes, Christmas toys, decorative decorations for the interior.  You can make a gift or a New Year's card with your own hands to please family and friends.
We invite you to view a photo selection of crafts made in the winter theme to be inspired by ideas for creating your own handmade masterpieces.


Video with picture ideas for winter quilling
Stencils for creating winter patterns


