Sew napkins for cutlery yourself. Table setting: choice of fabric napkins. Three ways to fold napkins
Table linen. This includes tablecloths and napkins.
The tablecloth is the basis of table setting, but not only its decoration, as many believe. In general, any table setting item has its own meaning and function. The tablecloth has three of them. First of all, of course, it is aesthetic - without a tablecloth, the table looks bare and not so elegant. Secondly, the tablecloth muffles the sound of plates and cutlery on the tabletop (any noise during a meal is considered bad manners). Thirdly, it reduces the sliding of plates on the table (imagine how inconvenient it is to eat, for example, a piece of meat from a plate on a bare table with a knife and fork).
Today, stores offer ready-made sets of tablecloths and napkins. The classic material for them is linen and cotton fabric. But these high-quality and dense fabrics wrinkle quite easily. Therefore, for table setting, it is advisable to purchase table linen made from mixed fabrics - this is more practical.
Ready-made tablecloths for table setting in the most common sizes: 130x160, 130x230 cm (for rectangular tables) and 130x150, 160 cm in diameter (for round folding tables).
However, it often turns out that the purchased tablecloth is not suitable for setting the table; the dimensions of the tabletop do not have a clear standard, such as table height. Therefore, the most reasonable solution is to sew a tablecloth, having first taken the necessary measurements. Here you should remember the main rule: according to the rules of etiquette, the length of the tablecloth descending from the tabletop should be no more than 15-25 cm. So, for example, the size of the tablecloth for serving a square table of 1x1 m will be 150x150 cm, and for serving a rectangular table measuring 1.3x1, 6 m-180x210 cm.
But that is not all. In upscale restaurants, at respectable receptions and other feasts with a high level of service, it is customary to lay not one tablecloth, but two, for table setting. The lower tablecloth, in contrast to the elegant upper one, is sewn from only one type of fabric - cotton flannel, white or bluish. It is small in size - it covers the tabletop, and the length of the descent is equal to the thickness of the tabletop. From each corner, two ribbons are sewn to this tablecloth, with which it is tied to the legs of the table so that it does not slip.
If we talk about color, then a white tablecloth still remains unrivaled for table setting, but only at formal formal feasts. Of course, it looks very elegant, but it’s too much trouble: after all, if there is even one pale spot on it, it’s already indecent to use such a tablecloth. In addition, white linen tablecloths must be properly starched, not over-dried after washing, and ironed without stretching.
For informal events, colored tablecloths are ideal for setting the table: they are practical, and in addition, bright, rich colors lift the mood and give the feast additional charm. The color can be any, but one condition must be observed: the tablecloth must be in harmony in color with the dishes, otherwise you will deserve reproaches for poor taste.
Modern etiquette invites you to show your imagination and, instead of the usual linen and cotton, use tablecloths made of non-traditional fabrics and materials for table setting. It can be gauze, brocade, lining silk and even faux fur with a small pile. If the fabric is too narrow (most often the fabric width is 90 or 150 cm), you can sew two fabrics together.
In addition, as a “tablecloth” you can use plastic film, foil, wallpaper, etc. The latter is very convenient: in stores there is a large selection of wallpaper of various colors that can be matched to any set, and after use, throw away.
In modern life, the prevailing tendency is to simplify the rules of etiquette at the table, which, of course, affects the rules of table setting. More and more often, housewives are abandoning the classic tablecloth in favor of table napkins - sets. They are suitable for a feast at any time of the day: for breakfast, lunch, and dinner. The set should not be less than 30-40 cm, so that there is enough space for plates, cutlery and glasses. Rectangular and oval shapes are especially practical. For table setting, you can use both those sets that are sold in stores, as well as those made by yourself (which is especially appreciated).
When choosing a set, always consider what table it will be on and what kind of dishes the table will be served with. For example, materials such as canvas, cork, and sanded wood are ideal for table setting in a rustic style. For a more elegant presentation, it is better to use beautiful cotton fabric or lace.
You can simply and quickly make an original set using a ready-made plastic one: you just need to cover it with self-adhesive varnish colored film, which is now sold in stores in a variety of assortments. The simplest set can be made very quickly: take a piece of medium-thick cardboard measuring 30-40 cm and cover it with colored gift paper. After use, such a set is thrown away. Needless to say, how convenient and practical this “tablecloth” is!
Napkins appeared in most European countries during the Middle Ages. Before this, they used either their own sleeves or the ends of a tablecloth that hung to the floor instead. In Ancient Greece, more than 3,000 years ago, fig tree leaves served as napkins, with which slaves wiped the lips of their masters. In Russia, napkins became widespread only in the 18th century.
Woven napkins, as a rule, come complete with a tablecloth, harmonizing with it in color and material. Napkins in the same color as the tablecloth will look better if their fabric is thinner than the tablecloth's fabric. If the napkins are slightly different from the tablecloth, the material may be the same.
Their sizes can be different: napkins 32x32 cm and smaller sizes are used for breakfast, and napkins from 40x40 to 60x60 cm are more suitable for lunch and dinner.
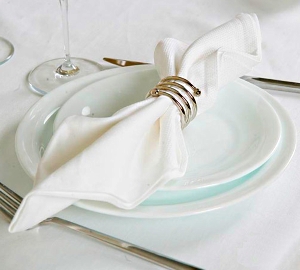
There is a whole art to folding such napkins. Size is of great importance here: from small napkins you can fold only very simple shapes, and from those larger ones (the most common size is 50x50 cm) - literally any: the shapes “Bag” and “Tower”, “Banana” and “Corn”, “ Spanish Wall" and "Swan". The classic version, when the napkin is rolled into a tube and threaded into a ring, is still relevant.
The type of fabric also plays a role - linen or cotton is best suited for table setting. Starch is of decisive importance for giving napkins a particular shape: in order to fold some shapes, you can only lightly starch the fabric, but in most cases, strong starch is necessary. Folding a starched napkin correctly will require some experience (you can practice on square sheets of paper).
You need to starch napkins immediately before use: do not store them in this form in the closet to avoid the formation of creases. In addition, it is necessary to ensure that when ironing napkins they do not stretch, since strictly square shapes are the key to success when folding.
Using cloth napkins is also an art. First of all, you should remember that they are intended only to protect clothes from accidental drops, crumbs, etc.; you cannot wipe your mouth and hands with them.
Table etiquette at the beginning of the century required placing a napkin in the collar of one's clothes, while modern table etiquette rules require it to be laid out on one's lap. During breakfast, the napkin is placed on the lap in a straightened form. During lunch - folded in half, folded towards you.
How to open a napkin correctly? Taking it with one hand from the top plate, move your hand to the side and lightly shake the napkin, then place it on your lap, bringing it to the side. When you leave the table, either permanently or temporarily, casually remove it from your lap and place it, without folding it, to the left of the plate.
And about one more “little thing”, which, nevertheless, is quite important. Quite often, a napkin slips off a lady’s lap and falls to the floor. The rules of decency require that the man sitting next to him pretend not to notice anything. The lady herself must pick up the napkin - of course, only if the floor is clean enough and the napkin has not fallen far under the table. Otherwise, it is better to ask the hosts or waiter to bring a new one.
Along with cloth napkins, there should be paper napkins on the table, which are intended for wiping fingers and lips. It should be remembered that these napkins (as well as paper plates, cups, tablecloths) are disposable, that is, they can only be used once. However, you often see that such a napkin is used repeatedly until it finally turns into a greasy lump.
Napkins cannot be served directly from the pack; they must be cut into triangles. There are special stands for such napkins: two planes, located at a distance of several centimeters from each other, are mounted on a third. But such a stand “works” only when it is tightly packed with napkins, otherwise, when one is pulled out, the rest will fall out. Now about how to use paper napkins. Having pulled out one thin triangle, fold it in half, bending the top to the base and carefully ironing the fold, then bring it to your lips and wipe them with a “collecting” movement (rubbing and blotting your lips is considered vulgar). Crumple the used napkin (but do not roll it into a ball) and place it under the edge of the bottom plate. Don't forget that you need to wipe your lips not only while eating, but also every time before you drink - traces of lipstick and oily lip marks on the edges of glasses and cups look very unpleasant.
To wipe your fingers, you must also first fold the napkin in half and take it with the fingertips of both hands. To avoid tearing the napkin, you need to make movements only with your thumbs. Wrinkle up the used napkin and place it under the plate. When you finish eating, place all dirty napkins on a plate along with the used utensils.
Every housewife knows that a homely atmosphere is created from the little things. So, ordinary do-it-yourself fabric napkins can transform the kitchen and turn an everyday meal into a cozy family feast. Napkins perform not only a practical, but also a decorative function. And sewing them yourself is quite simple, even without much experience in sewing.
Selection of fabric for napkins
To make such products, special attention should be paid to the choice of material, since the appearance and functionality of the accessories will depend on this. And in order for everything to look harmonious in general, it is advisable to think about it at the stage of choosing a suitable fabric.
Material
The material for kitchen napkins should be quite dense, but at the same time light, easy to wash and retain its original shape.
Traditionally, the following types of fabrics are used to make table linen:
- Satin.
- Cotton.
Important! For everyday use, cotton napkins are more appropriate, since they are not too easily soiled and retain their shape well. The option made of satin and linen looks more festive, but at the same time there is much more hassle with washing and starching such decorative elements. If you decide to choose the second option, be sure to keep a few ways in mind.

Colors
Conventionally, the color palettes that are used for sewing napkins are divided into several groups:
- Pastel shades.
- Silver and golden (indigo, emerald, purple).
- Classic colors (pearl, white).
Important! The choice of colors will depend only on your personal preferences. But at the same time, the products must be in harmony with the tablecloth and the overall design of the room, both in color and texture. Harmony is not only a complete match of colors, but a successful contrast or mix.
Depending on the specific occasion and the upcoming celebration, also consider ways to decorate the table. We offer the following articles to help you:
Choosing the color of napkins if you are matching them with a tablecloth is quite simple. To do this, take into account the density of the fabric:
- If the napkins are inferior in density, they should be a little darker.
- If the material of the tablecloth and decorative elements are the same in structure, you can safely choose napkins of the same color as the tablecloth.
Important! Cotton fabric must be washed before cutting, as it shrinks greatly - the finished product may lose its appearance after the first wash.
Tools and materials
The materials and tools that you will need to sew napkins for table settings with your own hands can be easily purchased at any sewing store, and you may find some of them at home:
- Textile.
- Thin needle.
- Thick threads.
- Sewing machine.
- Scissors.
- Pen (for marking).
- Iron.
Important! To cut fabric, it is advisable to use sharply sharpened scissors. Otherwise, the edges of the material will begin to crumble and the cut will come out uneven.
Stages of work
To make a napkin, you must proceed as follows:
- Decide on the size of the future product. The best option would be a size of 50 by 50 cm, where the size of the workpiece will be 58 by 58 cm.
- Mark the fabric and start cutting. All cuts must be perfectly even so that the napkin can be folded in different ways in the future.
- Place the pattern wrong side up. Fold the edges in on all 4 sides by 1.2 cm and press well. Then fold the edges in another 2.5 cm and press well again.
- Unfold all folds from the point where the folds intersect, draw a line at an angle of 90 degrees to the diagonal of the napkin.
- Cut the corner along this line. Then step back 1.5 cm from the cut and make a stitch on the machine.
- Before turning the sewn corners right side out, iron the fabric on each seam on both sides. Turn the corners right side out and stitch the edges of the product around the perimeter.
- Starch the finished napkin and iron it thoroughly.
Table decoration using napkins
There are many ways to decorate your table beautifully using napkins. Let's look at some of them.
Accessories
On sale you can find many different accessories for napkins, including clips and rings. These small decorative details can help create an unusual composition:
- Rings allow you to achieve rigor and elegance in your design. They can be decorated with rhinestones, feathers, flowers, personalized letters, made of different materials.
- Ribbons are designed for tying napkins and, if you look at it, they function as rings.
- Clips are also used to secure napkins. Additionally, they can be decorated with flowers or rhinestones.
Folding methods
There are so many options for folding paper or cloth napkins. But from them we can separately highlight several of the simplest and most successful:
- A sail is perhaps the most laconic way to design napkins. For this option, fold the napkin in half, with the fold facing away from you. Then fold the top corners to form a triangle. Next, fold the resulting figure in half (along the seam).
- Roll is most appropriate for official receptions. Fold the napkin in half with the fold facing you. Cover the cutlery with the left and right edges of the triangle. Wrap the resulting envelope.
- French is a very elegant option. Fold the napkin along a diagonal line so that the folded edge remains on the left side. Next, bend the top corner down, leaving about 2 cm of the right corner open. Now fold the right side down.
- The pyramid looks strict, but quite impressive. Fold the napkin diagonally and then fold the left and right sides together, end up. Next, bend the future pyramid along the center line.
- Fan - a product folded like a fan can be placed in front of a large serving plate. A fan in a glass would also be an original solution.
Important! Having chosen the method of decorating napkins that suits you and starting to set the table, also find out
DIY tablecloth. It would seem that it’s so difficult? Cut out a piece of fabric of the desired size and simply hem the edge. But there is one subtlety. A good tablecloth should have properly formed corners. And one more advantage of a tablecloth sewn by yourself - you can sew napkins from leftover fabric, treating the edges and corners in the same way.
Materials and tools:
sewing machine;
threads of the desired color;
ruler;
pencil or chalk;
pin;
iron.
We sew a tablecloth and napkins with our own hands:
Cut a piece of fabric of the size you need so that the “overhangs” on all sides are 30 cm. From the remaining width of the strip of fabric, cut out square napkins.
Fold the edges of the napkin to a width of 1 cm. Iron the folded edges.
Fold the edges again by 1 cm and steam again.

Fold the napkin diagonally, right side inward, wrong side out, and pin together. Draw a line perpendicular to the diagonal fold of the napkin from the corner to the edge of the hem.

Using a sewing machine, sew the seam along the marked line.

This is what the seam will look like. It is very important that the beginning of the seam exactly matches the corner of the napkin.

Cut the corner of the napkin close to the seam (at a distance of 2 - 3 mm). Also cut off a small piece of fabric in the corner of the napkin.

Treat all corners of the napkin in the same way.
Press the seams on both sides.

Turn the seams right side out, steam the hem and corners of the napkin with an iron.

Hem the napkin exactly along the edge of the hem. Iron the napkin again.

Hem all the napkins in the same way.
To hem the tablecloth with your own hands, do the same, first fold the edges to a width of 1 cm, and then to a width of 2 cm. Iron the edges.

Also fold the tablecloth diagonally, pin it, and mark the seam line perpendicular to the fold line.

Sew by machine. Trim off excess fabric.

Press the seam on both sides.

Turn over and smooth out the corner.

Sew along the edge of the tablecloth hem.

The edges of a tablecloth and napkins, sewn by yourself, look neat and are no different from the edges of a purchased tablecloth and napkins.

After you have mastered this technique of hemming a tablecloth “on the corner,” you can experiment. Sew a tablecloth with your own hands with embroidery, hemstitching, appliqué, etc.
Hello!
Today we have our first full-fledged lesson :) It consists of two parts: work based on the sample and the product (today it is a napkin for table setting)
Many of you will find working on the model boring, but I strongly recommend not skipping this stage - the girls who completed the preliminary task from the previous post were convinced that such an experience would not be superfluous. (I thank the girls who sent me their homework! You helped me get my bearings :))) And the new task will seem difficult to you, but there is no need to be afraid of anything - the one who walks will master the road! A little practice and everything will work out.)
Using the sample, we will practice the seams and techniques that will be needed in the manufacture of the product; Such training will allow you to acquire the necessary initial skills.
So, let's begin:)
1. For a sample, take a plain piece of cotton (light fabric with a pale pattern is also suitable) measuring 20*50 cm. Iron it and place it in front of you with the wrong side up. From the left edge at the top and bottom we retreat 1 cm and draw a thin line.

2. Align the left edge with the drawn line and iron it. We retreat 6 cm from the resulting fold and draw another line.

3. Align the fold with the line, sweep and iron. 
4. Sew close to the edge. Stitch length 2.5 -3 mm. Iron.
5. Turn the sample face up. We got one of the options for bow folds (when sewing clothes, they are used as straps for fastening blouses/shirts) There are many options for using them in applied sewing :)


7. Fold the sample along the very last line (wrong side in) and iron.

8. Retreat 1 cm from the fold and stitch.

9. Iron the resulting fold to the side (any)

10. Now we will design the tucks. You and I have already drawn lines for them. The principle of folding and ironing is the same as with a fold. Fold along the marked line, iron and stitch at a distance of 2 mm from the fold.


11. Iron the resulting tucks in one direction. (take a photo of this stage)

Such finishing folds and tucks are mainly used as decorative finishing. The location can be both vertical and horizontal. They are performed on the fabric before cutting the product, or taken into account in advance when making the pattern.
We don't throw away the sample - we will continue to work with it in the next lesson.
I suggest you take a little break, stretch your back or drink coffee, and with renewed vigor start sewing our napkin :) Soon the holidays, guests, festive treats and of course a beautifully decorated table. The method of decorating a corner that we will study with you will be useful for a napkin, a tablecloth, and for processing a cut on a skirt (made of warm, thick or woolen fabrics). In general, using the proposed method, you can create any angle of 90 degrees :)
in my case, the finished napkin was 45*45 cm, the calculation looked like this:
45+(3+0.5) x 2 = you need a piece of fabric 52x52 cm.
1. Take a rectangular piece, wrong side up. From each edge, retreat 2 cm. Draw thin lines.

2. Align the edge of the napkin with the pencil line and iron it. Repeat on all four sides.

3. Now we calculate the width of the hem. The desired width (I have 3 cm in finished form) must be multiplied by 2 and set aside to the left and right of the corner. 3*2=6 cm in each direction. We put marks and draw lines.

4. Connect the marked marks with a thin line.

5. Fold the fabric face inward, aligning the marks. We're scribbling.


6. step back from the line 1 cm and cut off the excess. At the fold, cut the allowance at an angle of 45 degrees (in order to get a neat corner when turning it inside out)

To check whether you have cut enough, lay out the seam allowance and look: if the edges of the seam allowance do not extend beyond the fold, then you have cut enough and nothing will bulge when turning it inside out.

7. In this way we process all four corners. Carefully turn it out.

8. Lay out the napkin. We straighten the angle allowances on the inside to the sides. To carefully iron the corners, use a rectangular piece of drawing paper - insert the paper into the corner and iron, aligning the fold with the marked lines.


9. Walk along all sides (take a photo of this stage) This is what you should get


10. Now all that remains is to sew our hem close to the edge. We start stitching from the corner, lowering the needle exactly into the seam.
For those in the group who sew by hand, at this stage there are two options: 1. hem with a hidden seam.2. Sew decorative thread with the seam facing forward on the needle.

To stitch to the edge at the same distance, I use the notches on the foot as a guide. Take a closer look at your paws and choose the most suitable one.

In the previous task, the main difficulty was in the passage and turns at corners - stop in advance and turn the car wheel manually if you have trouble controlling this stage at speed. We also turn: the needle is in the fabric, exactly in the seam, raise the presser foot, turn the fabric, lower the presser foot, and continue stitching.

the corners should be clear

you need to start and end the line at the same point (take a photo of this stage)

bring the ends of the threads to the wrong side and fasten

ready! you can sew a napkin from fabric contrasting to the tablecloth, decorate it with embroidery or appliqué, in general you have enough imagination :)
And I will embroider a snowflake using chain stitch :)

You have 2 weeks to complete your homework. I have marked the stages, photos of which you should add to the collage along with a photo of the finished work and send for the report.
We call the report and collage the same and write only in Latin: sew_1_your nickname. The photo size should not exceed 1000 pixels on the larger side. The deadline for accepting works is October 20 (Saturday) at 12 noon.
I will publish the second lesson on October 20. A report on your work will be published on Sundays. Good luck in job! And don’t forget, questions and suggestions can be sent by email [email protected] or leave a comment here - we'll figure it out together :)
See you,
Every housewife knows that atmosphere is created in the house from little things.
Yes, ordinary napkins can transform the kitchen and turn everyday meals into cozy family feast.
Napkins are not only decorative, but also practical function. A sew making them yourself is extremely simple.
Selection of fabric for making napkins
Material
The material for making napkins must be dense, but light, easy to wash and keep original form.
Traditionally for sewing table linen The following types of fabrics are used:
- cotton;
- linen;
- satin
For everyday best suited for use cotton napkins, since they are not easily soiled and retain their shape quite well. Option from flax and satin looks more festive, but at the same time hassle with washing and starch there will be many similar decorative elements more.
Conditionally color palettes used in the manufacture of napkins can be divided into some groups:
- pastel colors;
- golden and silver colors;
- rich noble colors (purple, emerald, indigo, etc.);
- classic colors (white, pearl).
Choice colors depends solely on your desire, but the napkins should harmonize with tablecloth and general decoration halls both in color and texture. Harmony means not only complete matching of colors, but also successful contrast or mix.
Choose shade napkins if you pick them up under the tablecloth, easy enough. To do this you need to take into account density material. If the napkins are inferior in density, they should be a couple of tones darker. If the material of the decorative elements and tablecloth is the same structure, feel free to choose napkins identical with a color tablecloth.
Important! Cotton fabrics should be washed before cutting, as they shrink strongly and the finished product may lose its appearance after the first wash.
Materials and tools
 Tools and materials that necessary For manufacturing DIY napkins, easy to purchase at any sewing store, and you probably have some of them Houses:
- textile;
- dense threads;
- thin needle;
- scissors;
- sewing machine;
- iron;
- pen(for marking).
Helpful advice: Use only sharp scissors to cut the material. Otherwise, the edges of the fabric will begin to fray and the cut will turn out uneven.
Stages of work
 To begin, decide on size future napkins. The best option is 50 x 50 cm(workpiece size – 58 x 58 cm).
Lay out the pattern inside out up. Bend the edges 1.5 cm on all four sides and iron. Wrap up edges another 2.5 cm, iron again.
Expand all folds and from the intersection point of the folds, draw a line under direct angle to the diagonal of the napkin.

Cut off corner of the napkin along this line. Step back from the cut 1.5 cm and stitch.

Before turning out the sewn angles napkins on the front side, you need to iron the fabric on each seam on both sides. Turn the corners out facial side and stitch the edges of the napkin along perimeter.
The finished napkin can be ironed and starch.
Read about how to make original seats for chairs.
Table decoration using napkins
Accessories
 You can find many on sale accessories for napkins, including rings, clips, etc. These small decorative elements will help you create an unusual composition.
Rings for napkins allow you to achieve elegance and rigor in design. They can be personalized, decorated rhinestones, flowers and feathers, made from different materials. Canteens are laid under the rings devices.
Ribbons serve for dressing napkins and, in fact, perform the function of rings.
Clamps also fix the napkins. They can be additionally decorate using adhesive rhinestones or flowers.
Folding methods
 In fact ways folding napkins like paper, and fabric ones, there are a huge number. But from them we can distinguish some the most successful and simple ones.
Perhaps the most laconic napkin design option - sail. Fold the napkin in half, with the fold facing away from you. Bend the upper corners to form triangle. Next, fold the resulting figure in half (along the seam).
Roll. This method of folding napkins is suitable for official techniques. Roll up a napkin in half, placing the fold towards you. Cover the dining areas with the right and left edges of the triangle devices. Wrap the resulting envelope.
French way the design of napkins is very elegant. First you need bend napkin along a diagonal line, leaving the folded edge on the left side. Further upper the corner bends down, leaving open a couple of centimeters to the right corner. Last but not least right side folds down.
Pyramid
Looks pretty impressive and strictly. In order to fold the figure, you need to bend the napkin along diagonal lines, then fold the right and left sides end up. In the final step, bend the future pyramid along the center line.


Fan
Folded napkin fan, can be placed in front of a large serving rack plate or on the plate itself. The original solution is a fan in glass.


Horizontal envelope
A simple and strict horizontal envelope, or horizontal sachet, used for dining rooms only devices.


There are more complex ways to design napkins:
- crown;
- bishop;
- arrow;
- rose;
- calla and many others.
 The main question that worries a person who finds himself behind served table, is rules use of certain devices. Napkins are also necessary be able to use correctly.
Cloth napkins don't wipe hands or mouth. They should be placed behind the collar or on knees(depends on the etiquette standards accepted in a given society). Napkins protect clothes from crumbs and random stains.
Lay out A napkin is placed on the lap after the host of the feast. If she's too much long, You can turn up the edge or corner.
After the meal, the napkin should be left on the table, near with a plate. Placing it on a chair or dish is not allowed according to the rules etiquette.
For more information on how to make beautiful edges and corners of a napkin, see video:


