Fabric pigs. Patterns of pigs, piglets, pigs Sew a beautiful pig for a competition
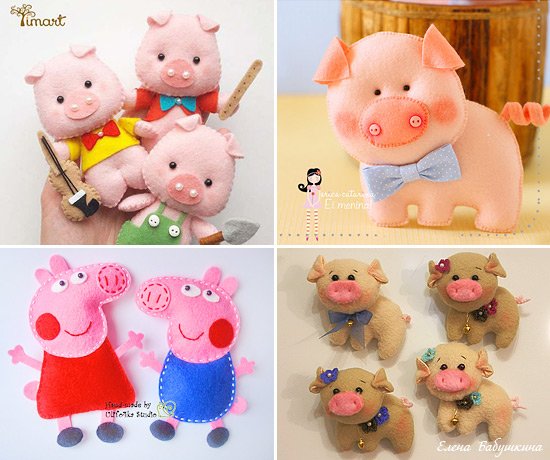
If you want to please your children with a new soft toy, then you will probably like our today's master class and fabric piglet patterns! Some may immediately wrinkle their nose and say, “Eww, those are pigs!”, but for most children, soft and funny piglets will become their best friends for many months, or even years. In addition, we will learn how to sew not only simple, but also cartoon pigs - the favorite characters of all kids! Piggy will also be a wonderful gift for the New Year 2019, of which it is the symbol, so you can please not only children, but also colleagues, friends and all family members with an original hand-made toy. Well, the textile piglet patterns proposed in this lesson will greatly simplify sewing a soft toy and will help you create any pig in just a couple of hours!
tools and materials:
- pattern paper;
- pencil;
- chalk or soap;
- sharpened scissors;
- a needle;
- white and lilac sewing threads;
- a piece of wire for the tail;
- a large piece of lilac fleece;
- just a little white fleece for the wings;
- acrylic paint black or dark brown;
- brush;
- pins;
- Chinese stick;
- filler (holofiber, padding polyester, cotton wool or padding polyester).
Print out the pattern. The pig itself is life-size; we recommend drawing the wings by hand.


How to sew a piglet in Tilda style: a detailed master class
Stage one
First, transfer the pattern to a standard A4 sheet. The size of a pig sewn according to patterns of this scale is 24 cm in length and 15 cm in height. If you need to sew a larger or smaller pig, print the pattern in a different size. We cut out all the blanks.
Fold a piece of lilac fleece in half and pin all the details to it. We outline them taking into account small seam allowances. We will need two body blanks, four ears and 8 legs (on the fabric folded in half, respectively, one body, two ears and four legs).
We also fold the white fleece in half and circle the wing twice, in the end we should have four blanks.
It is extremely important now to decide what kind of pig we want to get in the end. If it is short and plump, we position the pattern in such a way that the body stretches in height, but if you need a slimmer and longer pig, we position the lobe thread accordingly so that the body stretches in length.

As soon as we have finished tracing the patterns, we proceed to the next stage of our lesson.
Stage two
So, now we will start stitching off all the outlined parts.
Without cutting out the blanks, we sew the parts together clearly along the drawn lines using a sewing machine or by hand.
On the body we leave a hole in the abdominal area (this place is indicated on the pattern with a dotted line). We do not sew the ears and wings on one side (pay attention to the pattern!), we sew the legs completely - we will still fill them with holofiber, but in a different way.

Stage three
Now we need to carefully cut out all the parts, retreating 3-5 mm from the seam.
The cut out parts of our future pig currently look like this:

We make small cuts in concave and convex places, cutting almost to the very line - the fleece practically does not wrinkle. Notches are made so that the part looks neat, can be easily turned right side out and does not wrinkle.

Since Tilda’s legs are completely sewn together (which is exactly what the original description requires), we proceed further as advised


On the inverted wings we stitch or stitch “feathers”, as shown in the photo below. The lines along which the stitching runs are marked on the pattern.

Stage four
Now let's start stuffing the parts. To do this, we will need any soft filler and a sushi stick, with which we will push the filler into hard-to-reach places (for example, when working with a snout and stitched parts of wings).
For the body we will need a large amount of filler. If the pig is not stuffed completely, it will turn out loose and thin. Well, what kind of pig is on a diet?! 🙂
Sewing the original tilde pig involves stuffing the ears too. Since we are using loose and bulky fleece, padding would be inappropriate here. If you are planning a standard textile doll, lightly fill the ears with holofiber.

All blanks stuffed with holofiber, in addition to the wings, will be sewn using hidden stitches.
We sew up the legs with regular stitches - the seam will not be noticeable, since it will hide behind the body of the toy.

This is what all Tilda pig blanks look like at this stage of work:

Stage five
Now let's do the ears. We place them on the pig’s head, choosing the ideal position, and then pin them with pins.

Sew the ears to the head using hidden stitches. We go along the entire perimeter of the bottom of the ear.
When the seam reaches the inner corner (located closer to the center of the muzzle), we pierce the needle into the head under the ear and bring it out through the snout. We poke it out not in the center of the nose, but slightly offset, creating the first nostril. Next, pulling out the thread, we stick it on the other side of the patch, forming the second nostril, and bring the needle to the inner corner opposite the stitched ear. This is what it looks like:

By tightening the thread, we will notice how the nostrils of the snout are formed. At this stage, it is extremely undesirable to tighten the thread too much, otherwise we risk ruining the shape of the muzzle. Notice how neat a mess we got!


Stage six
We mark the places where the legs will be attached: we examine the pig from all sides and try on its limbs. As soon as we understand that everything looks perfect, we pin them with pins.
There are two types of Tilda pigs: sitting and flying. In the first case, we position the front legs so that they stand vertically, and the rear legs should be located at an angle. In the second case, both the front and rear legs are arranged as if spread apart. Since our pig is flying (and flying while sitting is somehow inconvenient), we will sew the legs like this:

We sew the legs and body with hidden stitches. We go around the circle twice to fix the part more reliably.

Stage seven
Now we work with the wings of our pig.
First, you need to baste the hem (pay attention to the pattern!), then mark the place to which the wings will be attached, and pin the workpiece with a pin. It is more convenient, of course, to sew on one wing first, and then the second.

The wings are sewn on, as are the ears - we go around the entire perimeter with hidden stitches.
Our pig is almost ready to fly!

Stage eight
All that remains is to work on the “navigation” of the flying symbol of 2019 - with eyes and tail :)
The tail is made extremely simply - we twist a piece of wire with a diameter of 4 mm into a spiral with a small leg.

We stick this “leg” into the right place, right into the seam. It is unnecessary to attach the tail in any special way - it already stays in its place remarkably well.

Now let's make the eyes. There are a huge number of options for how to depict them! Beads, beads, buttons, paint... It is the last option that looks most natural with this toy, which is why we recommend choosing it.
Mark with a pencil or pierce with pins with beads at the end the place where the eyes will be located.

Next, use simple acrylic paint to depict beady eyes. Since we use shaggy fleece for sewing, and not simple cotton, for example, the paint may lie slightly unevenly, so it must be applied as carefully as possible. If in the end the contour of the eye is not perfectly smooth, carefully trim the pile with scissors.

That's all, Tilda pig is ready!
Pig according to an old pattern: video master class
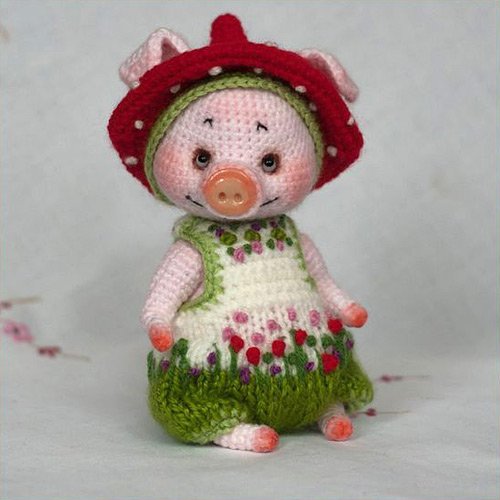
A simple pig hat for a matinee

We prepare the following for the lesson tools and materials:
- a piece of light pink felt 50x50 cm made of natural wool;
- scraps of red or crimson felt;
- two black buttons for eyes;
- sewing pink and black threads;
- a needle;
- sharpened scissors;
- pattern paper;
- pencil;
- red felt-tip pen or acrylic paint with a thin brush.
How to sew a pig-shaped hat: master class
Fold a piece of pink felt 50x50 cm in half, measure 30 cm from the edge and cut it out in a semicircle. As a result, we will get two semicircular hat blanks 25x30 cm.
On the front part of the future hat, we cut out an arc along the base of the semicircle so that the hat does not fall on the face: in the middle we retreat 5-6 cm upward and draw an arc to each of the two edges.
We cut out the piglet and ears by eye, maintaining the general proportions.
We put a patch on the front of the cap, and two elongated red ovals (nostrils) on it. Sew on the patch, stitching only along the nostrils! The edges of the patch remain free.
We mark the place where the eyes will be located and sew two black buttons. If desired, they can be replaced with black beads or pieces of black felt (glued or sewn).
Having tried on the hat, we remove all the excess into the dart on the back of the hat (located clearly in the middle, it goes 8-10 cm in height). We paint the lines of the ears with a regular red felt-tip pen or acrylic paint and a thin brush.
The matinee hat is ready!
New Year's pig: MK video
Coffee pigs
Piggy with the aroma of coffee, cinnamon and vanilla - the perfect New Year's gift for a true coffee lover!

We prepare the following for the lesson tools and materials:
- a piece of white or milky calico;
- light sewing threads;
- holofiber, padding polyester, padding polyester or ordinary cotton wool for stuffing the pig;
- any instant coffee;
- a little cocoa;
- freshly ground cinnamon;
- vanillin (vanillin is better, but if you don’t have it, vanilla sugar will do);
- PVA glue;
- black gel pen;
- acrylic paints;
- thin brush;
- an old toothbrush;
- a needle;
- sharpened scissors;
- a glass for dissolving the coloring liquid.
We offer you two options for patterns:


The pattern is full size. You can print it out or copy it from the screen, scaling the pig to the desired size: using these patterns you can sew both a small keychain and a full-fledged sofa pillow! If desired, the pattern can be slightly modified.
How to sew coffee piglets: step-by-step master class
Stage one
Having folded a piece of calico in two, we attach a ready-made cardboard template to it and trace it. For one pig we need two patterns.

Without cutting out the blanks, we sew them clearly along the drawn lines, starting the stitch between the legs, going around in a circle and ending a few centimeters from the place where we started sewing - we need this hole to turn the part inside out and then stuff it with holofiber.

Now is the time to cut out our blank. Important! We retreat about 5 mm from the seam so that our seam does not unravel. We cut out teeth on the seam allowances, as shown in the photo (there is no need to make teeth opposite the unstitched areas!). This is done to make it easier to turn the fabric inside out, and the fabric with such notches does not bulge.

We stuff the turned-out workpiece with well-fluffed holofiber, giving the pig its characteristic plump shape. Having achieved the desired result, we sew up the hole between the legs with hidden stitches. Attach the sewing thread between the ears.

Stage two
Let's start painting the toy. To do this, we make a special aromatic solution: pour one teaspoon of coffee with about 70 grams of boiling water, mix well and... no, don’t drink it :) Add half a teaspoon of ground cinnamon and the same amount of vanillin to the aromatic potion. Mix thoroughly again with a spoon. Now we make the seductively smelling mixture undrinkable: pour one and a half teaspoons of PVA glue into it. Stir well again and start painting the pig (you can even use a still hot solution).
As practice shows, it is more convenient to paint coffee pigs not with a regular paint brush, but with an old toothbrush, which is what we suggest doing. Rub the liquid over the fabric, trying to apply it carefully, blotting only the fabric and leaving the holofiber as dry as possible.
To do this, take a very small amount of liquid onto the brush and quickly rub it over the fabric.

Next, we tie the toy to the oven rack by the strings between the ears. Dry the product over very low heat for about 15 minutes, then check. If there are still wet spots, dry the pig in the oven again, but with the heat off.
Thanks to the presence of PVA glue in the painting liquid, the surface of the finished product becomes hard and slightly rough - just right for final painting!
Stage three
Let's start coloring the product. Here you can really have a blast!
We draw the details of the pig: eyes, pupils, nose, you can add a bow or tie to the pig. We draw a cake or candy for the fat pig;)
Using the same acrylic paints and a brush, we paint the pig’s clothes (funny panties with polka dots or a dress - depending on your taste) and hooves. Remember to dry each coat of paint thoroughly before applying another color on top or next to it.
To ensure that the pupils are the same, we draw them by dipping the back of the brush into the paint.
We draw polka dots on the panties with a toothpick.
When all the paint has dried thoroughly, we make the final touch - we outline the eyes, snout, bow, arms and pantaloons, draw eyelashes, nostrils and a smile on the piggy.

With a little creativity, you can sew piglets that are completely different from each other - even these scared and sad ones! 🙂

The most pleasant thing about such a gift is that for another couple of months the pig will smell subtly of coffee, cinnamon and vanilla, creating a good mood for the person to whom it will be gifted.
Finger toy pig: video master class
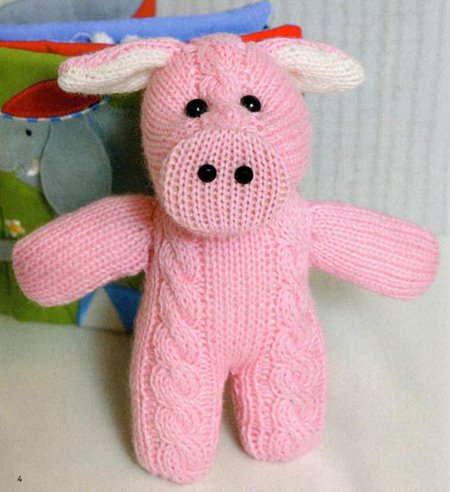
Piggy pillow


We prepare the following for the lesson tools and materials:
- a piece of fleece (pale pink and white for a girly piggy and dark pink for a boy piggy);
- any soft filler (holofiber, padding polyester, padding polyester, cotton wool);
- sharpened scissors;
- a needle;
- sewing thread to match the fabric;
- pins;
- satin ribbons;
- floss threads;
- a small piece of organza for the skirt;
- paper flowers;
- pattern paper;
- pencil or chalk.
Sew a pig pillow: step-by-step master class with photos
Stage one
We start working with a pattern: we redraw it from the monitor according to the template (for an ordinary soft toy) or draw it by hand on a large sheet of paper (for an interior pillow). We cut out the parts and attach them to the fleece. We outline with a pencil.
We need to prepare two fabric blanks for the body (we cut them in a mirror!), one strip for the snout, four ears, one snout, eight legs and one tail.
We cut out the parts taking into account the seam allowance (about 5 mm).
Note! The body of the pig is cut out in a mirror, so that both parts are “fur” on the outside and “fabric” on the inside.


Stage two
Let's start sewing the pillow parts together. First we sew the ears and feet, leaving a little space for stuffing. On the ears we combine light pink and dark pink fleece.

Having turned the legs out, we stuff them with holofiber more tightly, helping ourselves to compact the filler with a pencil or a Chinese stick.

We sew together two blanks of the pig's body, leaving a little space for turning and stuffing.

Sew the finished legs to the pig's body.

Turn it inside out and stuff it. If you wish, you can put a small heart inside :)
We sew up the place for turning inside out with hidden stitches.


We stuff the ears with holofiber and sew them to the head with hidden stitches.

We sew the patch together, as shown in the photo below, and stuff it with holofiber.

We sew on the pig's eyes, then, having pinned the snout with sewing pins, we sew it to the face with hidden stitches.
Using floss threads we embroider a smile, eyebrows and nostrils.


All that remains is to sew on the upper legs and tail. Piggy is ready!

You can sew a bow on Hrundel’s neck and give him a bouquet of paper flowers, while Hrundel can sew a skirt and put on an artificial pearl bracelet.
Little pillow: MK video
If the word “pink” makes you think of piglets and pigs, then you definitely need to sew at least one pig. Soft toys are quite easy to sew, especially since you can find a huge number of master classes offering descriptions of the detailed sewing process, as well as patterns for making pigs in a wide variety of options.
Therefore, you can safely get to work, and very soon you will have some charming piggy made by yourself.


In the world of homemade toys, everyone can find a convenient sewing method for themselves. It is better for novice seamstresses not to immediately take on complex and intricate patterns, so that the work process does not tire or disappoint you, because there are a lot of easy and accessible master classes and simple patterns that even a child can understand and cope with.
While experienced craftsmen can come up with or look for new options and ideas, as well as try in practice various methods of making soft toys with their own hands.
So, it would seem, a pig - what could be unusual, new or interesting? However, the variety of all kinds of crafts proves us the opposite!
- Firstly, toys can be sewn from any fabric - beautiful pigs are made from felt, velvet, cotton, linen, plush or fleece; if you love fur, then this is also suitable for sewing.
- Secondly, who said your pig has to be pink? If you sew a toy with your own hands, then it can be absolutely fabulous, because you are not creating a naturalistic manual, so feel free to make the pig even spotted, even striped, even with a flower or in all the colors of the rainbow - your creation will be beautiful and unique.

- Thirdly, the finished products differ depending on the chosen technique, master class or method of their manufacture. For example, a felt pig can be both flat and voluminous, but it will still not be similar in volume and softness to a fleece, plush or velvet pig stuffed with filler. You can make a pig in style with your own hands, sew a toy from a sock, etc.


- As an image for the craft, you can choose any cartoon character - fortunately, there are more than enough of all kinds of cartoons and animated films with pigs in the lead roles: the cool Peppa Pig and her family, the pig Piglet (completely different in appearance and character in the Soviet version and the Disney version interpretations of Alan Milne's book about Winnie the Pooh and his friends), Olivia the pig, fairytale piglets Nif-Nif, Nuf-Nuf and Naf-Naf, Funtik and many others. You can also come up with your own image for the piggy.

- A handmade product can be more than just a toy - many master classes show how to sew a soft wallet in the shape of a pig, make a baby pillow, a backpack and other useful and functional things. Even a toy can be sewn in different ways: for example, you can make something educational for a child - a pig in the form of a hand-gloved doll for a puppet theater, little piglets - for a finger theater, collapsible pigs (with buttons, buttons - with small children or some objects), entire educational soft books in which the main characters will be piglets or pigs, etc.

And this is only a small part of what you can do with your own hands. When the idea has matured and the image of the future product becomes completely clear, all that remains is to get to work and bring it to life.
Fabric Peppa Pig
You can start by making some simple crafts.
- Take a pattern (the most ordinary one), print it out and transfer it to fabric (the easiest way is to sew a toy from felt - it can even be flat, that is, it will not need to be stuffed).
- Cut the fabric, remembering to leave a few millimeters of seam allowance.
- Sew the pieces on the wrong side, and then turn them right side out.
- If you want your pig to have volume, then fill it with stuffing.
- Then sew on all the elements, embroider, draw or glue eyes, nose and mouth, and then decorate the craft with any decor: buttons, applique, beads or other accessories.


Flat felt pig
Now let's try to sew the favorite of many children - the cartoon Peppa Pig.
- It can also be flat. We cut out the parts from the fabric according to the pattern, as in the first master class, but glue them onto non-woven fabric.
- Place a little padding polyester between the identical parts and sew them together using a zigzag stitch.
- Sew all the elements of the pig to the body-dress - the head, legs and arms, then the tail.
- Use a line to make Peppa's mouth and mark her nose.
- The eyes can be cut out from self-adhesive and glued onto sewn black buttons.
- Using blush or a pencil, draw the pig's cheeks and snout.
- If you sew a flat magnet inside the pig, you can attach it to the refrigerator or any other place.
To make a three-dimensional Peppa, you just need to stuff all the parts step by step with padding polyester (or padding polyester/cotton wool), then turn them inside out and sew them according to the pattern. To ensure that the filler is evenly distributed throughout the toy, use a wooden stick.
Peppa's head can serve as a pillow - both regular and decorative. You just need to cut it out of fabric and sew it according to a template, stuffing it with holofiber or padding polyester. It is better to make appliques of parts on the pillow from fabric, since beads or plastic will interfere with laying on it.
Pig on hand
And here is a master class of Peppa gloves for a puppet theater.
- Cut out the muzzle according to the template in two parts (it is necessary that they be turned in different directions). Sew all the elements to one of them - cheeks, eyes, and also sew the contours of the lips and nose with red thread.
- Cut and sew the ears (if you use felt, they can be single-layer, but for regular fabric you will need stuffing).
- Fold the head parts (the front side should be inside), place the ears in the seams and sew everything together. Fill with stuffing.
- Cut out the glove part in two copies (check the size so that it fits your hand, completely hiding it). Fold them, putting Peppa's prepared head into the seams, plus the paws (make them from fabric too or cut them out of braid). Stitch and hem the edges, then turn and straighten.
In the form of a glove doll, it can also be just a pig to play out any fairy tale. And if you make small felt figures with slits at the bottom, then you will have characters for a finger theater.
To make it interesting for your child to play, sew buttons to the tummy of a large pig and sew several small piglets that will attach their noses to them.

You can create a whole book of adventures, for example, Peppa Pig and her family, placing all the felt pigs in it - on each page there will be a separate series or simply different tasks for the baby: counting, collecting, folding, reading, etc.
Big pig Pukhlya

How to sew such a hero - watch the video.
Little Pig


Pattern and layout on fabric


Tilda Pig
A pig in the tilde style is sewn with wings. You can take a pattern of an ordinary pig or the famous Rose with wings. Here you will also need stuffing, and at the end paint the face of the craft (as a rule, a pencil and blush or acrylic paints are used).


Pattern of a small pig

Another option.

Large pig pattern


Coffee pig
Sew an ordinary pig and dye the fabric with coffee - and you will get a wonderful coffee toy with a pleasant and favorite aroma. The technology for sewing scented toys is described. And the options for coffee pigs can be:


Fabric pig patterns
A selection of ideas and patterns for piglets for every taste.

Pillow pig
Do you want a very simple option? Sew a pillow in the shape of a pig's face:


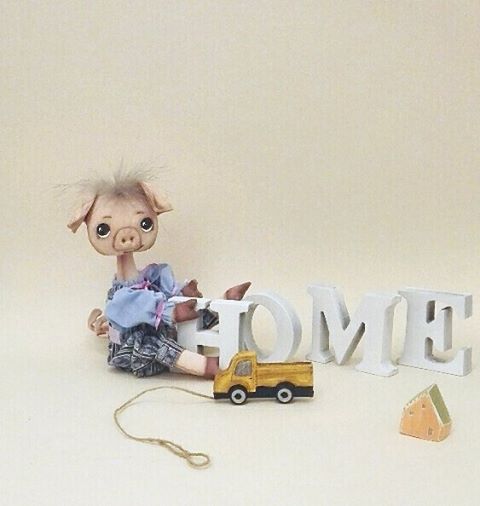
New Year is a time of miracles and magic; it is with this holiday that people pin their hopes for the best. All dreams and desires will definitely come true if you enlist the support of the patron of the year. According to the Chinese horoscope, the new year 2019 will pass under the sign of the Yellow Pig, the element is “Earth”. This good-natured animal brings peace and tranquility with it. We invite you to sew a soft toy with your own hands - a perky pig with a big and kind heart. This is the best gift for adults and children; it can be used to decorate the interior.
Fragrant toy “Pig – symbol of the year”
Materials and tools
cotton fabric (white),
sewing thread (white),
pattern paper,
scissors,
needle,
sewing machine,
pins,
padding polyester and knitting needle for stuffing,
cord, bell or bell (can be replaced with any pendant)
acrylic paints, colored pencils, black gel pen,
brushes, water glass, palette, foam sponge,
PVA glue,
instant coffee, cinnamon, vanillin.
Execution Sequence
On a sheet of paper we make a pattern of the required size. Cut it out. Fold the fabric in half. We pin the pattern with pins and trace along the outline with a simple pencil. We cut out the parts, not forgetting to add a seam allowance of 5 mm. We sew the parts by hand or using a sewing machine, leaving a hole for stuffing. We cut the seam allowances with scissors so that the inverted product does not seem “broken”, and turn it inside out.

 We stuff the toy with padding polyester using a knitting needle. We sew the hole for stuffing with a hidden seam.
We do not stuff the ears with padding polyester. We sew up the hole with a hidden seam and, using a basting stitch, assemble the ears “into an accordion” along the midline. The result was a figure resembling a bow.
 Sew the ears to the body.
Using a needle and thread, we form the hooves; to do this, we make several stitches “over the edge” on each leg and tighten it slightly.
 In the same way we form a “patch”. We make stitches, but not “over the edge”, pulling the front part of the muzzle so that dimples (nostrils) are formed.
 We thread the thread, forming a loop. This part is needed to make drying the toy more convenient.
 Prepare a solution for “aging” the toy:
- 50 ml boiling water,
- 1 tsp. instant coffee),
- 1 tsp. ground cinnamon (you can use vanillin, ginger, etc.),
- 1-2 tsp. PVA glue.
Mix everything and apply the solution to the toy with a wide brush. Do not wet it too much, otherwise stains will appear when it dries. Leave the work until completely dry. To speed up the drying process, you can use a hair dryer or heat fan.
The toy is very simple to make, so painting will not be difficult. We will need acrylic paints (not necessarily for fabric, art paints are also suitable), brushes of different sizes (to paint small details you definitely need brush No. 1), a palette and a glass of water.

 First we draw the image with a simple pencil. Using a red pencil, we give our pig a blush. Then we draw the eyes with black acrylic paint. Eyebrows, nostrils, mouth and tail are brown. Use white acrylic paint to add highlights to the eyes and draw snowflakes. We make one large, draw it carefully, the rest can be drawn with simple dots. Don't forget to dry the parts every time.
Using a black gel pen we draw eyelashes. As an additional decoration, you can paint the entire contour of the toy with brown or gold acrylic paint using a foam sponge. This will give the pig extra volume. If you want the toy to be more elegant, apply gel glitter or glitter to the snowflakes.

 We thread a lace or ribbon into the middle seam on the back of our pig and decorate it with a bell. Here is a New Year's souvenir that will definitely bring good luck and fulfill your most cherished dreams!
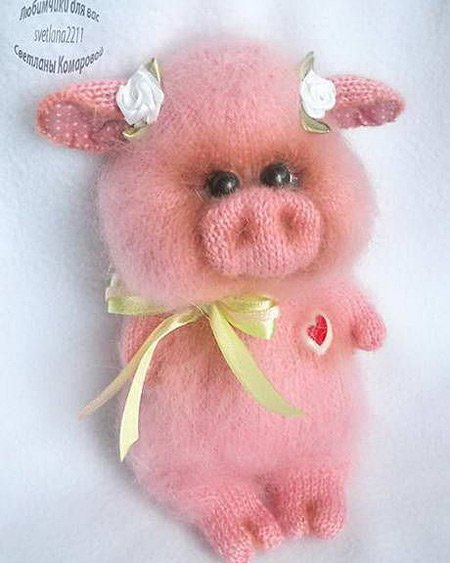
Pink pig
The sewing master class was prepared by Ekaterina Vasilyeva (she also sewed last year ).
The color and materials of manufacture can be any, the height of the toy is 22 cm.

Tools and materials
Pink cotton fabric (possible options: plush or fleece);
synthetic fluff;
white and black sewing threads;
curly scissors;
wooden stick (for stuffing the toy);
black beads (for eyes);
dark pink felt sheet;
acrylic paints (for hooves).
Pattern
1. You can print the pattern on a printer or redraw it on tracing paper from the monitor screen. Or you can try to draw a silhouette of a future toy yourself, resembling a pig in shape.

Cut out the paper pattern pieces.
How to sew a pig with your own hands
2. Cut the fabric. We fold the fabric in half with the right side inward, place the pattern pieces on top, and secure them with pins. Leave a seam allowance of 0.5 cm on each side and cut out the details with curly scissors.


3. Connect the parts. We fold the parts of the body and legs with the right sides inward and sew along the entire perimeter. Exception: the bottom line, indicated on the paper pattern with a dotted line. Subsequently, through these open sections we will stuff the parts of the toy with synthetic fluff.

Second option: first sew along the contours of the pattern of all elements on the fabric, and then cut out the parts with curly scissors.
4. Turn the parts right side out. We carefully straighten all corners with a needle.

5. We fill the parts with synthetic down. Through the open cuts we stuff the body and legs with synthetic down. For convenience, you can use a wooden stick.
Important: the parts must be tightly packed.
6. Sew open sections. We sew open sections of the legs and lower body with hidden stitches. At this stage, we decorate the ears: we lay hand stitches along the line connecting the ears and head.

7. We designate the hooves. To do this, we paint the lower part of the legs with acrylic paints, in this case the color of the hooves is terracotta.
8. Sew the legs to the body. Apply the leg pieces to the upper body and secure them with a few stitches.


9. Sew on the patch. We cut out a patch from felt; no seam allowances are needed. Then we apply the patch to the face and secure it with pins. We designate the nostrils - a series of hand stitches using black thread.

10. We design the muzzle. We sew on two black beads - the eyes, and use hand stitches to make a curved line - a smile.

11. Sew on the heart. Cut out the paper heart pattern and place it on a sheet of felt; no seam allowances are needed. Sew the heart to the body using hand stitches

A perky, cheerful pig will definitely bring you happiness and good luck in the new year 2019!
Pig ballerina
New Year is a wonderful holiday, it gives people a feeling of happiness and joy, and instills hope for a better future. According to the Chinese calendar, 2019 corresponds to the sign of the Yellow Boar. This means that the year will be extremely successful: the Pig is a peace-loving animal, and yellow is the color of joy and wealth. All that remains is to appease the patron of 2019 and sew a soft toy - a talisman for good luck in business and love. This cute yellow ballerina pig will appeal to both adults and children. The height of the toy is 30 cm (photo 1).

Tools and materials
- Yellow cotton fabric;
- synthetic fluff;
- white and yellow sewing threads;
- black beads (for eyes);
- yellow beads (for brooches);
- yellow satin ribbon;
- white tulle;
- white felt;
- curly scissors;
- wooden stick (for stuffing the toy).
Progress
1. Print and cut out the details of the paper pattern (photo 2).

2. Cut the fabric. Fold the fabric right side inward, place the paper pattern pieces on top, secure with pins, and cut out. Seam allowances are 0.5–1 cm (photo 3, 4).


3. Connect the parts. We fold the body parts right sides inward and stitch along all sides.
Important: We leave open the sections indicated on the pattern with a dotted line - the bottom, the junction of the head and ears.
We sew the details of the legs in the same way: the upper cut is left open for the hind legs (the place where the legs and body are connected), and for the front legs the lower cut is left open (we leave it open for stuffing). Ears: the lower cut remains open (photo 5).

4. Turn the parts right side out. Carefully turn all the parts inside out through the open cuts and straighten the corners using a sharp needle. If you get small holes in the corners, sew them up with hidden stitches (photo 6).

5. We fill the parts with synthetic down. Through the open cuts we stuff the body and legs with synthetic down; for convenience, you can use a wooden stick. We don’t stuff our ears (photo 7).

6. Shape the ears. Fold the finished ear piece in half crosswise and iron it. We lay a small fold along the ear and secure it with stitches at the very bottom of the part. As a result, the ears acquire a slightly convex shape (photo 8).

7. Sew up the open sections of the front legs. Sew up the bottom edges left open using blind stitches. These parts are completely ready, we put them aside for now.
8. Connect the hind legs and ears to the body. We insert the legs into the open section of the body and secure them first with running stitches and then with neat hidden stitches. Sew on the ears in the same way (photo 9).

9. Sew the front legs to the body. We attach the legs to the body and secure them with several cross stitches (photo 10,11).


10. Sew on the patch. We cut out a patch from felt, important: no seam allowances are needed. We apply the piglet to the muzzle and secure it with pins. We designate the nostrils - a series of hand stitches with yellow threads (photo 12).

11. We design the muzzle. We sew beads-eyes and stitches a smile (photo 13).

12. Sew on the skirt. If you wish, you can first sew the skirt and then put it on the toy.
The easiest option is to immediately sew the skirt to the body. We cut out a strip of tulle: length - 1 m, width - 12 cm. Apply tulle to the body just below the front legs (the middle of the mesh fabric should coincide with the center of the toy’s belly) (photo 14).

Starting from the middle, we lay counter folds. We arrange the side sections of the tulle into one voluminous fold on the back of the toy. We secure the folds first with pins (photo 15), and then with running stitches (photo 16).


13. Sew on the satin belt. We close the upper section of the skirt with a satin ribbon: length - 30 cm. First we secure it with pins, and then sew it on (photo 17).
7 340 417
The symbol of the coming 2019 is a yellow pig. In this article we will look at several simple step-by-step master classes on how to make a piglet with your own hands.
We will show in detail how you can make your own from materials that can easily be found in every home, such DIY crafts for the year of the pig as a piggy bank, we will make piglets from dough, we will make simple crafts for kindergarten, we will learn how to sew a pig from children's tights and socks, we will make a pig-ball from threads, we will make a coffee toy, and we will also learn how to sew a tilde pig from fabric. And at the end of the article you will find a video bonus: making a pig from pompoms as a gift for the New Year. So, if you're ready, let's get started!
Papier-mâché: piggy bank
To make a funny papier-mâché piggy bank, we will use toilet paper or newspapers, acrylic putty, acrylic paints, PVA glue, an inflatable balloon, foil, and a foil reel.
First of all, you need to inflate the balloon. Then we apply prepared scraps of newspaper soaked in PVA glue and water onto the inflated ball in several layers - so that our piggy bank is not soft, but strong enough, and let it dry.

In a plastic bucket we will prepare the papier-mâché mixture: tear toilet paper or napkins into small pieces and add PVA glue. Mix everything properly! We coat the future pig with the resulting “chewed paper”.

When the papier-mâché frame dries well, the ball must be carefully burst and pulled out. Now we need to close the hole through which we pulled the ball out: to do this, we will seal it crosswise with masking tape and apply papier-mâché, leaving a small rectangular hole - this will be a slot where money is thrown.
We divide the foil reel into four equal parts - it will serve as legs for our pig. Glue the legs to the pig with masking tape. Then we apply papier-mâché. The inside of the legs must be filled with something heavy - this will make our pig more stable. Sand or some small metal object, such as a nut or screws, will do.

We make a snout for the pig from foil, under it we need to form a mouth (upper and lower lip).

Now we need to sculpt eyes and ears for our pig - they can be made either from the remains of papier-mâché or sculpted from clay.

The flexible wire will serve as a tail for the pig: twist it, covering the tail with the remains of papier-mâché. After our pig has completely dried, it must be properly treated several times with acrylic putty and then wiped with a cloth dampened in water - this will level the barrel of the pig.

Our piggy is ready for painting!

First you need to apply dark paint, you can use several different shades. Then red paint is applied to the craft with a sponge.

Then - pink, and as the final stage - pink and white paints are applied. The last step is to apply white paint to the protruding surfaces. Our piggy bank is ready!


We offer you another version of the piggy bank, the step-by-step implementation of which you can watch in the video:
Pig pendants made from salt dough
As a wonderful souvenir gift, you can also make a pig pendant at home from materials that can be found in every home - flour and salt. It is very easy to make such a pig, it turns out very cool and is suitable as a mascot that any child will be happy with, or as a craft for kindergarten. Below are step-by-step instructions on how to make such a souvenir.Simple DIY crafts for kindergarten
Products that can easily be made include a paper craft, a costume for a children's party - a mask and pig ears, as well as a pig in a pen. Let's take a step-by-step look at how easy it is to make these crafts yourself.Paper craft
To make such a toy paper souvenir, we will need: a pencil and a black marker, a ruler, colored paper - pink or red, as well as silver, a stapler and glue, pre-prepared plastic eyes, and a ribbon for decoration.
The body of our pig should be voluminous; For this we will need colored paper - pink or red. We cut out an even rectangle from paper, connect the edges with glue or a stapler so that we get the base body for our craft - a tall and wide tube.

Next, we make the basis for the pig’s face: we take paper of two different colors, from one we cut out a larger circle - the head of our piglet, and two small triangles-ears, from the second - a smaller oval-patch. You can take pre-prepared plastic eyes for the pig, or you can cut them out yourself from other colored paper.

Now we need to connect all the parts we cut out: bend them and glue the ears and snout to the head in sequence. On the patch we will add nostrils and a smiling mouth underneath. We draw eyelashes on the eyes.

Now you need to cut out the remaining details from multi-colored paper - for the pig’s belly we’ll take a silver color, and red for the front legs and tail. We glue the prepared parts: we glue the long legs on the sides of the pig's body, the tail - to the back of the craft, the tummy - in the front.

We tie a thin ribbon around the pig's neck and tie a smart bow. Our pig is ready!

The finished paper pig craft can be presented as a New Year's present, and it will also look good on a decorated Christmas tree as a toy.
You can also make the following craft from cardboard:

Costume: mask and pig ears
It is very easy to prepare such a costume for a children's party yourself, since it does not require sewing and its production will take only a few minutes.
For a costume consisting of a pig's snout, ears and tail, we will need:
- felt or fleece in pink and white colors,
- scissors,
- glue,
- stapler,
- paper cup,
- elastic pink ribbon,
- thin elastic band,
- white thin plastic hair hoop.

Then we take an elastic band, fold it like a belt, attach the tail we prepared in the middle and fasten it with a stapler or glue. Curl the tail like a pig. One piece of the costume is ready!

Now let's start making the patch. To do this, take a cardboard cup of small diameter, apply a piece of pink felt to it, trace and cut out the resulting circle - this will be our patch. Cut off the top of the glass so that the height of the glass is one and a half to two centimeters.

We cut a rectangular strip of the same width from the felt so that we can wrap our cup. Now we glue our cut out parts to the cup: a circle to the bottom, a rectangular strip along the entire cup. It turns out to be a cute pink patch!
We cut out two small oval parts from white felt - nostrils. Glue it onto the patch exactly in the middle.

We make two small holes on the sides of the cup into which we insert a thin elastic band. We tie an elastic band inside the cup-patch on each side into a large knot. We try our nose on our head; it should hold firmly enough so that it does not fall off, but also does not press too much. Our nose for the pig costume is ready!
Let's start making ears. To do this, we need to cut two large pieces in the shape of pig ears from the pink felt. Then we take our hairband, gather our ear, clamp it and wrap it around the headband, secure it well with glue.


Our costume for the holiday is ready!
Pig in the pen

To make such a textile craft we will need:
- empty plastic bottle with a volume of 0.5 liters,
- plastic eyes,
- 4 plastic lids,
- a piece of light felt or felt material,
- a small piece of flexible wire
- a piece of padding polyester,
- nylon white stocking,
- colorful paper,
- several wooden skewers,
- skein of twine,
- shoe cardboard box lid,
- gouache red and white,
- colorless varnish,
- hot glue,
- a few pebbles, acorns and twigs.
We cover the inside of the box with green paper and weave a fence using twine around the glued skewers. We put acorns and pebbles in the pen, put a plastic jar - a feeder for our pig, and arrange tree branches. Our pen is ready!

Now we make a pig from a plastic bottle: we cut the bottle into several parts - the bottom, the middle and the neck. Connect the neck to the bottom and glue it using hot glue.

Using scissors, carefully cut out the mouth under the neck of the bottle. We cover the bottle with padding polyester and also make a mouth hole using scissors.

We tighten the stocking around the body of our workpiece, cut out a hole-mouth and secure it with hot glue.

Our stocking knot on the neck of the bottle must be closed with a snout: to do this, cut out a circle from white cardboard, cover it with nylon, tie it with thread - our snout is ready.

The knot on the bottom of the bottle must also be closed with a wire tail, which we first cover in the area of the butt with nylon.

Cut out the pig's ears from light felt and glue them to the head.

We prepare the legs: take plastic plugs, cover them with padding polyester and nylon, tighten them with thread, secure them and glue them to the pig’s body with glue.

Prepare the gouache: mix red and white colors to make pink. We paint our pig evenly. Apply clear varnish on top. After the craft has dried, glue on the pig’s eyes and nostrils. Our piggy craft in the pen is ready!

We sew a pig from children's tights
Making such a souvenir will not take much time; for this you will need synthetic padding, children's tights or socks and a little imagination. The piggy craft is easy to complete by following the step-by-step instructions below. Ready? Then let's get started!Socks also make good piglets:

Pig ball made of threads

To make such an original craft we will need the following materials:
- pink threads/yarn,
- colored paper,
- scissors,
- round or oval inflatable ball,
- PVA glue,
- a plastic cup,
- needle.

We wrap our inflated ball in a chaotic manner with a thread dipped in glue to create as many weaves as possible. The larger the layer of wound thread, the stronger the craft will be. You can stop gluing the ball when it is almost hidden under a layer of thread.
It is necessary to remember that the glue takes a long time to dry, about a day, so such a craft must be prepared in advance before the holiday.
After the glue has completely dried, you need to pierce the ball with a needle and carefully remove it from the craft.
The legs of a piglet are made in the same way: a sausage ball is inflated, wrapped with thread, then after the glue has dried, the ball must be carefully burst and removed from the legs.

Now you need to glue the legs to the body; While the glue dries, we can start making the pig's face. To do this, on colored paper we first need to draw all the necessary details - a snout, eyes and ears, then cut them out and glue them onto the pig’s body.

Then you need to stretch a long thread and secure it with a loop knot - it will come in handy if we want to hang our craft on the Christmas tree.
Coffee toy
A New Year's pig souvenir in the form of a coffee toy is also easy to make, its design is quite simple, but it will have an exquisite aroma of coffee, vanilla or cinnamon and will give its new owner only positive emotions. Let's start creating a coffee toy!The technique for making such a souvenir is quite simple, and to make naf-naf we will need: light calico, light threads, stuffing material - padding polyester or foam rubber, vanillin or vanilla sugar, cocoa, instant coffee, cinnamon, scissors, PVA glue, needle, old toothbrush, gel pen, small container for diluting fragrance, brushes, acrylic paints.
First, you need to prepare and cut out a template - you can attach tracing paper or thin paper to the monitor screen and trace the outline of the toy from the photo.


The toy can also be cut out to any size; to do this, just click on the picture and its size will increase. It is also advisable to transfer the cut out pattern to thin cardboard - it is more practical and convenient.
Now we will need our pen - we will use it to trace the resulting pattern; This should be done on fabric that is folded in half; if you plan to sew more than one toy, then you need to leave a space on the fabric between the patterns for a seam allowance of about 0.5 cm, while the seam itself is best done not along the drawn line itself, but nearby: the mark from the handle will not be noticeable if the fabric gets wet.

It is necessary to sew two layers of fabric along the line at the same time; the seam begins and ends between the hind limbs of our craft, leaving about 2 centimeters unsewn - this hole is necessary to make it more convenient to stuff the pig. Also, you can’t cut the seam threads so that it doesn’t come apart when we turn and stuff our pig.

We also cut out triangular teeth at the seam allowances, leaving a distance to the seam itself of about 0.2 cm - this will allow the seam on the toy to remain smooth and not bulge in different directions.

Now we turn it inside out and stuff the stitched pig; For particularly narrow spaces, the ends of folded scissors are suitable. We fill the toy with padding polyester using the unsewn holes: the more padding polyester there is inside, the more “plump” and “pot-bellied” our pig will be. It is necessary to carefully sew up the holes through which we stuffed our pig and thread it - this will help us easily hang our pig to dry.

Now let’s prepare the flavoring for our craft: dilute 40 ml of boiling water in a prepared container and add a teaspoon of coffee. Then the remaining ingredients - vanilla, cinnamon, cocoa - add about a quarter of a teaspoon to the resulting mixture.
Stir everything thoroughly and cool. Then you need to add about half a teaspoon of PVA glue to the mixture and mix thoroughly.
Apply the resulting composition to our pig with a toothbrush so that the fabric is stained and not completely saturated.

Now we need to dry our toy; To do this, hang it on a rack in the oven, turned on at low heat, for a quarter of an hour.
If, after drying, there are still wet spots on the toy, you need to turn off the oven and dry our workpiece in this way.
After complete drying, the fabric soaked in the coffee adhesive solution will become rigid, and any funny design can easily be applied to it.
Let's start painting - first with a simple pencil to outline the details, and then with acrylic paints. After the paints have dried, you can attach a loop or magnet to the coffee toy - then you can hang it on the Christmas tree or on the refrigerator.

It is advisable to avoid getting the toy wet. Our wonderful DIY coffee pig is ready!


Sew a tilde pig

In order to make such a wonderful souvenir, we will need a printout of the pattern, cut out and transferred to the selected material. The best material for such a toy is natural, plain light fabric, such as linen, cotton, calico, poplin. You can take materials left over from old clothes or a new piece of fabric.
The pattern itself consists of several parts - the pig's body, ears and legs.

The fabric must be folded in half, the pattern pieces placed on top and traced; Don't forget to leave 0.5 cm on the seams. Now we cut out the resulting parts and sew them together as shown in mk.

Be sure to leave holes for filling the craft with stuffing and in order to sew on the pig's tail. Next, we need to sew the resulting parts and turn them inside out. We fill the craft with filler, for example, padding polyester, holofiber, padding polyester; You can also put a flavoring sachet into the pig.
It is necessary to sew the legs and ears to the body of the pig using a hidden seam. We decorate the muzzle: you can glue plastic eyes, sew on beads, embroider with threads or paint, nostrils can be drawn or embroidered with floss; You can paint a blush on the pig’s cheeks, so it will become more elegant.

In order to make the last detail of our pig doll - the perky tail - we will need to cut out a rectangular piece of fabric suitable in size and sew a piece of flexible wire into it.
We fix the tip of the wire inside the tail with glue.

After the glue has dried, pull the second, free end, and it will take the shape of a pig's curled tail. We sew the tail into the body of our toy.

See below for a few more options for textile piglets:


Video bonus: pompom pig
This video presents a master class that step by step reveals the process of making a pig from homemade pompoms.All the step-by-step instructions presented in the article for making homemade pig souvenir toys - the symbol of the coming 2019 - are very simple; their repetition requires simple materials that can be found in every home. With a little patience, skill and care, you can make any of these toys yourself.
You can arm yourself with threads and nails and make paintings in the style of pig string art:


A pig souvenir is a gift that will not leave anyone indifferent; it will give joyful emotions to everyone! Dare and create with our master classes!
Liked? Tell your friends:
You may also like...
New Year 2019 is the Year of the Pig. If you suddenly thought that this animal couldn’t be beautiful or at least cute, then... it seemed to you! While this article by Krestik was being prepared for publication, I saw from personal experience how charming a hand-made pig can be! Very soon, countless souvenirs will fill this world) So let the piglets, pigs and pigs be magnificent! A traditional exclusive for Krestik readers - a SUPER SELECTION of the best ideas and master classes on creating the symbol of 2019 with your own hands!
DIY paper pigs
Applications in the form of piglets
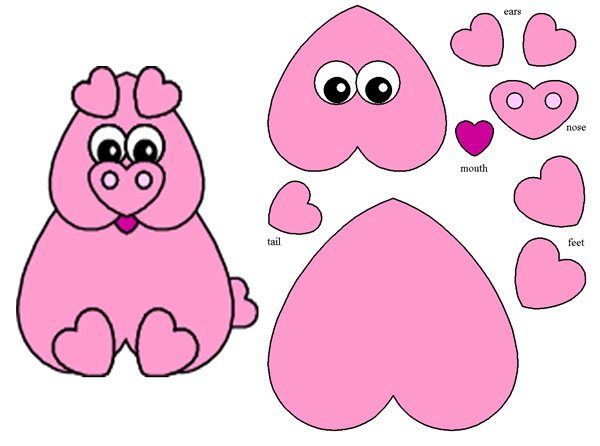
The easiest way to create a craft with the symbol of 2019 is to glue an applique out of paper.
Cut out hearts of different sizes from pink paper and glue the pig together:
To glue the chamomile pig, print the template, cut out the parts from colored paper/cardboard in the desired shades and glue to the base:

Pig is a quite popular character, take Peppa Pig for example :) If your child likes the characters of this cartoon, then let them make an applique out of paper!
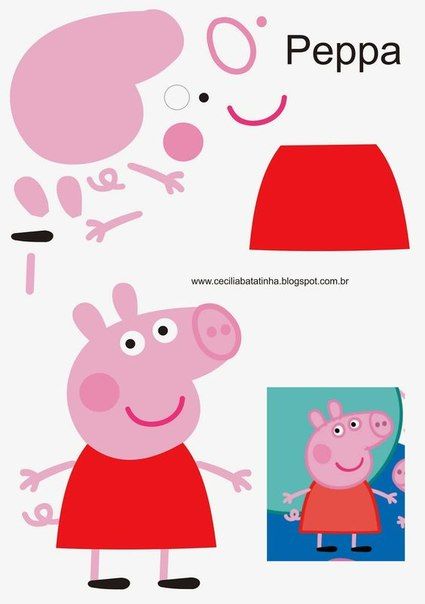

The templates can be printed on a black and white printer, cut out all the details, and then put them on sheets of colored paper and trace them.
See how it's done:
The easiest way is to glue the finished applique onto a square or rectangular one:
which allows you to insert a banknote into a postcardThe same application can be used in different ways:
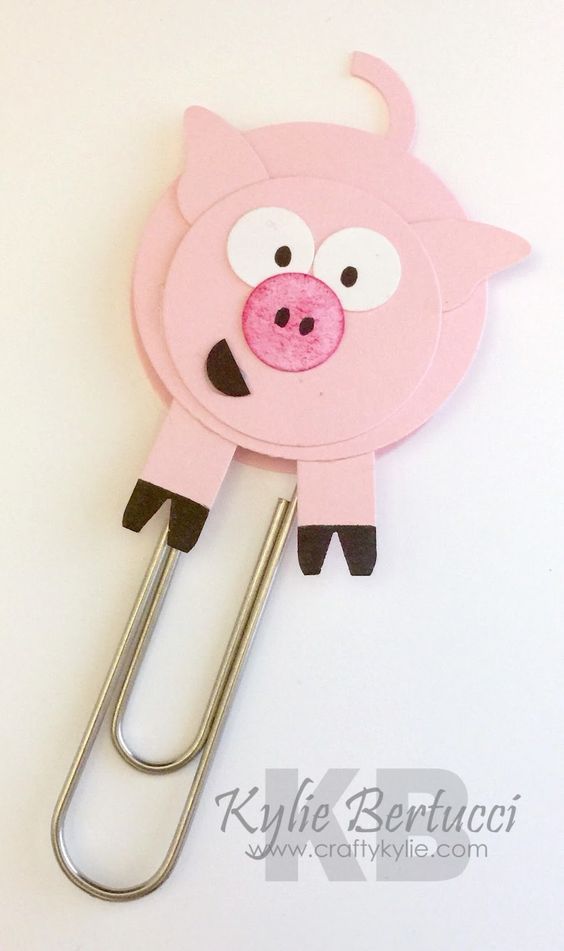
Decoration with a pig for a large paper clip
Even part of the face looks good on postcards:
Half of the face is made of paper and glued to the postcard
The outlines of the pig are completed with a black marker (author - SamfireGreetingCards)
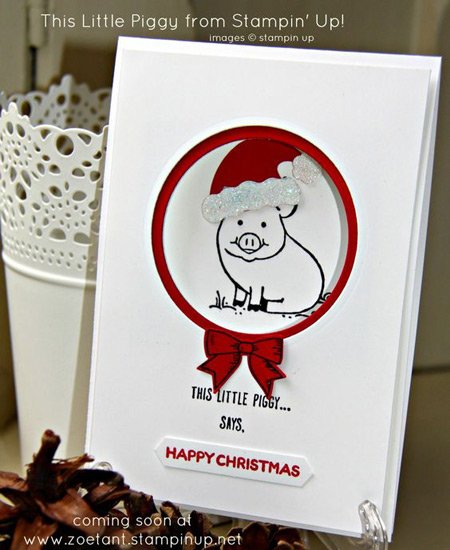
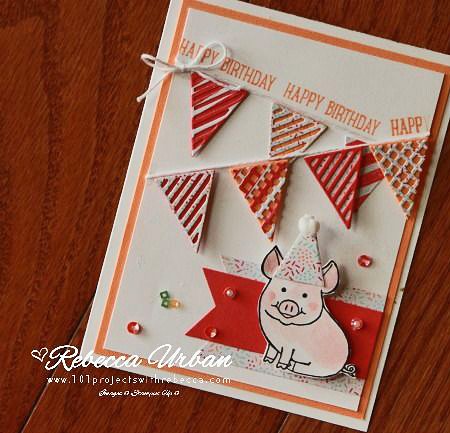
By the way, about painted piglets! They are very suitable for postcards:
There are ready-made sets for sale, so-called stamps. They can be color or black and white:
With their help you can make many different New Year cards:
If you can’t find ready-made stamps, you can draw the pigs yourself.
Fancy smth in his video he shows how to make 5 simple cards, including one with a PIGGY (see video from 6:40)
Don't want to draw at all? Then print out these painted pigs, color and cut them out:
Children will definitely love them, especially fans of cult cartoons and video games!
Having made the base, decorate it with a pig snout:
This is also possible!)
A primitive family of piglets is also very simple to make:
Photo from www.redtedart.com
And these 3D pigs are easy to make, watch the video from the channel ChucAnh's Hobbies:
Let’s complicate the task and make a more realistic piglet with our own hands using the Origami technique:
Channel Child's world makes a similar pig:
Do you want to surprise someone for the New Year? Make a piggy bank out of a banknote like this Julia Miers:
The most difficult to assemble is modular Origami. To assemble an Origami pig with your own hands, you will need 345 triangular blanks! If you are no longer new to this type of creativity, then you can probably handle it. To help - video from the channel papermagia.com.ua:
If we talk about pigs made of paper, then we must definitely mention the protruding pigs.
Openwork piglets cut out on paper will be very useful among lace trees, snowmen, bells and snowflakes.
You can cut out the silhouette of a pig on gift paper and wrap it as a New Year's present. You can cut it out of felt, make a backing underneath from contrasting fabric and sew a pillow.
Stitched pigs
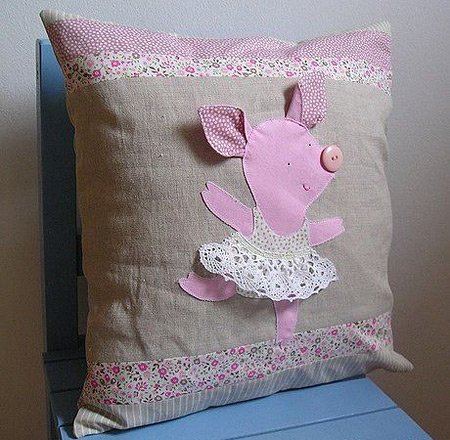
A few illustrative examples of where to “place” a piglet made by yourself:
We complicate the level a little and sew a patchwork Piggy with our own hands using this master class.
You can sew clothes for Piggy, so it will be more interesting for girls to play with it)
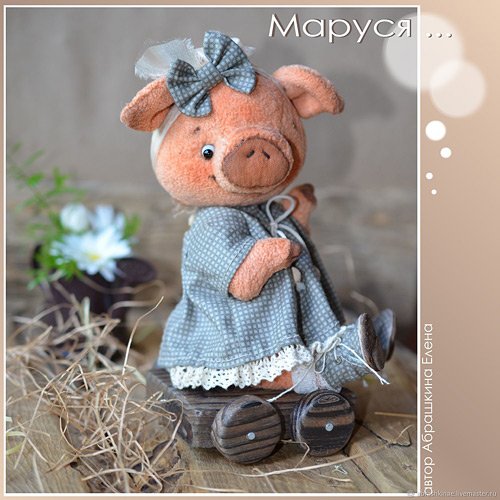
No less adorable piglets are sewn on Territories of Creativity Elma-toys:
More complex toys are ideal as interior dolls:
Workshop ElizaKittenShop sews a tilde pig:
Fairy's Gift Workshop sells Tilda style Christmas pigs:
If you want to sew them yourself, then a master class from Valentina Svetlova:
Every year there are more and more good master classes on knitting the symbol of the coming year, and the toys are more and more beautiful!
According to the master class "" this miracle fits in:
Zaikina Ksenia knitted this couple according to the above MK - take note of the clothing ideas!
Master Class)
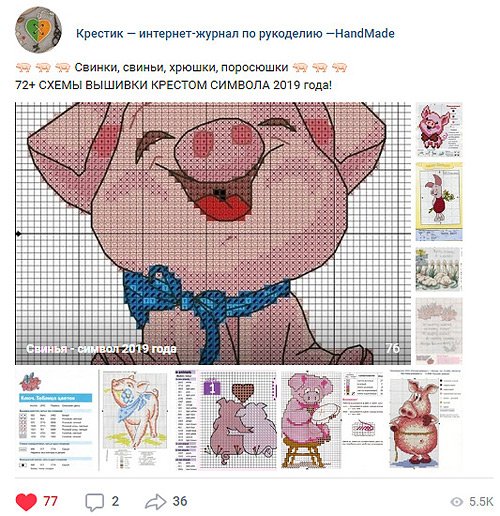
Cross stitched piglets
Traditionally, we don’t ignore embroidery fans! You can embroider a small pig and decorate it, an apron or.
Look for more than 76 different patterns for embroidering cartoon piglets, as well as quite realistic ones, in a special album our VK group :
Author's embroidery patterns for piglets are more interesting; they can be purchased from girl designers. For example, at Maria Nechaeva The “Embroiderer” pattern is ready:
Three schemes with wonderful New Year's piglets have been developed Antonina Tretyakova :
Anna Petunova :
Ekaterina Nemshilova :
Scheme of the ball "Pigs":
It was once created by Vera Kondratieva, and now it is ready to be born again for everyone)
Cool pigs on wheels and rocking chairs for decoupage and painting can be purchased at the store “Everything for creativity (dljatvorchestva)”
Pigs can be used as an accessory for dolls, Teddy bears and their friends
Look for decoupage napkins with images of pigs in handicraft stores in the city or in online stores. They are also available at the Masters Fair:
New Year's humor 2019
Let's end this article on a cheerful note and may the New Year 2019 be positive, joyful and inspiring!!!
And no one objects!
You won't get bored with these!
What a look!
We are all like that)
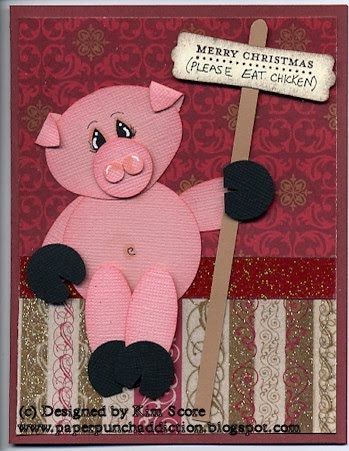
"Merry Christmas (Please Eat Chicken)"
The latest offer for New Year's Eve
A-ha-ha-ha-ha!!!