Types, meaning and methods of making a Chinese fan. How to make a fan at home
In hot weather, a fan is an indispensable thing, but it can also be an excellent interior decoration or an original gift. Making a fan with your own hands is not difficult, the necessary materials for its manufacture can be found in almost every home. We offer interesting workshops on making a fan with your own hands.
Children's
Materials and tools:

- colored paper;
- PVA glue;
- scissors;
- brushes;
- stapler.
Master Class:

three-layer
Materials and tools:

- colored paper - 3 sheets of different colors and sizes;
- glue;
- scissors;
- hole puncher.
Master Class:

From paper on skewers
Materials and tools:
- A4 paper - 3 sheets;
- PVA glue;
- scissors;
- flat skewers - 2 pieces.
Master Class:


From paper on clothespins

From plastic forks
Materials and tools:
- disposable forks - an odd number (from 19 pieces);
- wide lace - 1 meter;
- decorative elements (rhinestones, feathers, satin ribbons);
- white cardboard;
- corrugated cardboard;
- CD;
- cup;
- Super glue;
- pencil;
- scissors.
Master Class:
- Circle the disk on a sheet of cardboard, cut it out, and divide it exactly in half.

- On a sheet of corrugated paper, circle the neck of the glass, cut out the resulting circle and divide it in half in diameter.
- Glue a small one to a large semicircle, aligning them along the cut edges.
- Insert plastic forks into the holes of corrugated paper until they stop, gluing them to the main semicircle, trying to make the cloves of adjacent forks touch (only an odd number is required).

- Glue the second large semicircle on top of the corrugated cardboard on the blank.
- Glue a satin ribbon on one end of the fan and twist it between the forks. Continue weaving to the teeth, then fasten the tape at the edge and glue.

- Glue a decorative feather on each fork.

- Close the attachment point with an openwork tape.


- Glue velvet and a ribbon flower onto a cardboard handle.


From fabric
Materials and tools:
- piece of fabric;
- thin plywood;
- thin ribbon;
- paper;
- lace ribbon;
- awl;
- pencil;
- compass;
- Super glue;
- scissors;
- stationery knife.
Master Class:
- Measure and cut 15 strips of plywood measuring 1 by 40 centimeters.

- Fold the resulting strips together. Measure 1 centimeter from one edge and pierce all the strips with an awl through and through.


- Pull the braid through the holes in the strips and tie tightly. Cut off the excess length of the ribbon.


- On a white sheet of paper, lay out the resulting workpiece in an even semicircle, observing the same distance between the strips, and circle it with a pencil.

- In a large semicircle, use a compass to make a small semicircle (radius 10-15 centimeters) and cut it out.
- Attach the resulting template from a large semicircle to a piece of fabric and cut it out.
- Glue the fabric to the strips, starting with the one that is located at the bottom in the folded fan. Glue the fabric to the bottom of the last plate so that the fan closes comfortably.


From feathers

Materials and tools:
- piece of fabric;
- cardboard;
- lace;
- feathers;
- simple pencil;
- compass;
- ruler;
- scissors;
- glue.
Master Class:
- Trim the feathers to the same length and measure the "bare" part of the feather.
- Draw a circle on the cardboard, the radius of which is the length of the bare part of the feather. Divide the circle in half.
- Cut out 2 identical semicircles from the fabric using a cardboard blank.
- On the reverse side of the cardboard blank, glue the feathers one after the other. Glue the second cardboard semicircle on top with the reverse side inward.
- Stick pieces of fabric on both cardboard parts.
- Glue a strip of lace fabric along the top edge.
From newspaper tubes
- a sheet of cardboard;
- thin newspaper tubes;
- pencil;
- ruler;
- paint can;
- glue;
- decorative elements (artificial flowers, lace, satin ribbons, beads, and so on).
Master Class:
- Cut out 2 identical blanks from cardboard, as shown in the photo.


- Glue newspaper tubes on one of the blanks at the same distance from each other. Glue the second piece of cardboard on top.


- Braid the bottom of the fan with newspaper tubes, passing them between the "rods" with a snake.


Master Class:

Silk Chinese
Materials and tools:
- piece of silk fabric;
- thin plywood or thick cardboard;
- ruler;
- scissors;
- a bolt with a nut or a rivet (diameter 2-3 mm);
- fabric glue.
Master Class:

- Following the dimensions in diagram A, cut out the elements of the fan frame from plywood: 13 planks 1 and 2 planks 2.
- Put together all the strips, place large ones at the edges. At a distance of 28 millimeters from the bottom of the planks, make a through hole (in diagram A under the number 3) and fasten (diagram E) with a bolt.
- Cut out the desired piece of silk from silk, following the dimensions in diagram B.
- At the same distance, lay out the strips of the fan according to the size of the fabric.
- Paste the left large bar with a cloth completely. On the smaller and on the right large strip, apply glue only to the lower part, which lies on the fabric (cross section in diagram D).

floristic

The Chinese fan has its own history, philosophy, many legends and beliefs are associated with it. Gradually, this subject became part of our culture. It is used as a fashion accessory or Chinese-style interior decoration. A wide range of fans will allow you to choose a product for every taste.
Chinese fans differ in shape, appearance, size, themes, patterns. Images always carry a philosophical meaning, which symbolizes good luck, happiness, love; symbols are drawn in the form of landscapes, birds, flowers. Fans are made of various materials: plastic, wood, silk, lace, paper. You can also make a Chinese fan with your own hands, which is made of sandalwood. The smell of sandalwood eliminates insomnia, depression, improves mood. Also, fans were used in martial arts.
Chinese fan
A variety of drawings on the fan attract happiness, health, good luck, so it will be a wonderful gift for relatives and friends. For example, cranes, depicted on a Chinese fan, symbolize longevity; the ship will attract wealth and success in business, work; lotus, peacock, sakura - symbols of love. Fans from China relieve fatigue, depression, give a charge of vivacity and health.
According to Feng Shui, if you hang a fan on the wall correctly, it will become a talisman, a talisman. A favorable flow of energy will fill your home with happiness, prosperity, strengthen marriage, and attract wealth. The fan is placed with an open fan directed upwards. Choose a place for this item that you need to activate. You should not place a large fan in front of the front door, as it can sweep away the positive directed in your direction. And also do not place a fan over the head of the bed, as it can excite you and disperse sleep.
In the office, place a fan behind the chair, then it will help attract success, finances.
The color of the fan plays a big role:
- golden color means longevity, eternal life;
- a red fan symbolizes good luck;
- green shade will give peace and hope;
- pink shade symbolizes love and fidelity;
- white fan - a symbol of innocence, modesty.
By hanging a fan on the wall, you will not only gain a talisman, but also decorate the interior of your home. After all, the variety of fans allows you to choose it for any situation. Choose the size of the fan depending on the size of the room. In a small room, it is better to hang small fans. But in the living room or in a room where size allows, a large fan will look harmonious.
Mirror fans or panels with the image of this object look interesting in the interior.
Fans can be one-sided and two-sided. The latter are used not only for the interior, but also for dancing. In China, dancing with fans is an unforgettable sight. Beautiful outfits, fan movements that shimmer with patterns, drawings, open and close. Ballerinas in dance emphasize movements with miniature fans. All this fascinates and delights.

Dance with fans
We make a fan ourselves
If you are a creative person and want to show your imagination, make a fan on the wall with your own hands. To do this, stock up on the necessary materials:
- paper or fabric;
- wooden skewers;
- decor materials;
- threads, needles;
- glue.
If you have decided on the size and color of the fan, it's time to get to work. Cut out the workpiece from the base material, fold it with an accordion, while smoothing the folds, fasten the edges to wooden skewers. Threads and needles are needed in order to connect the ends of the fan. With the help of decor, you can decorate the fan as you like, for this you need a glue gun and a variety of ribbons, rhinestones, beads, braid. The handle can be made from cardboard, plywood and glued using superglue on both sides. After your work is done, fasten the fan with the fan up.
Chinese fan as an accessory
A fan on the wall is not the only purpose of this item. Fans are also used as a fashion accessory for women. It folds easily, has a small size, looks feminine and spectacular. The fan is used at fashion shows, for photo shoots; they are loved by designers, stars, making their image brighter. Feather fan to complement the image of a bride in a magnificent dress, and this accessory is also appropriate at a ball, party, theater. Chinese young ladies with the help of gestures with fans expressed feelings and emotions in relation to the interlocutor.
In addition, the fan will save you from heat in places where coolness is not available.
Chinese fans burst into our culture and fashion, becoming an indispensable thing. After all, they are not only an accessory, a piece of furniture, but also a symbol of happiness and prosperity.
Popsicle stick paper fan
Such a fan is easy - it's fun and interesting. It is easy to make it, and the creative process itself will bring a lot of positive emotions. Such a thing will save you from the summer heat and will be a great toy for children. Enjoy creative moments with your family and develop your imagination!
We will need:
- Material: paper about a meter long and 13-15 cm wide (the easiest way is to glue 4 A4 sheets and cut off the excess or cut the desired piece from the wallpaper)
- Popsicle wooden sticks - 2 pcs.
- Paints and a brush, colored pencils or felt-tip pens
Step-by-step instruction
Step 1.
Paint the paper the way you want. It is better to use warm and bright colors. Such a fan will look positive.
Step 2
If you painted with paints, wait for the drawing to dry for 15-20 minutes, and then fold the paper like an accordion. Make folds about 1 cm wide. This is the most important step. The quality of the fan will depend on how you fold the sheet of paper.
Step 3
Carefully glue wooden popsicle sticks to the edges of the sheet so that they protrude about 2 cm from the edge.
Folding fan made of fabric or paper

Making such a folding fan will take longer, but it will last you much longer! It looks more elegant and stately. Such a fan will be a great additional accessory to a costume party. Try to combine this option with the image of the majestic lady at the evening ball. How to make a fan?
We will need:
- Material: a sheet of paper (beautiful wallpapers are still suitable) or any elegant fabric. - 4 × 36 cm
- Wooden chopsticks for coffee - 12 pieces
- Rivet or screw and nut (pick up a nice option at the hardware store)

Step-by-step instruction
Step 1.
Make a hole in each stick (with a screwdriver or a special hole punch), stepping back 1-2 cm from the edge.
Step 2
Take a sheet of paper and fold it like an accordion, stepping back 1.5 cm. If you are using fabric, then just make appropriate notes. Be careful! If you make uneven indents, then the fan will look asymmetrical.
Step 3
Glue the sticks to the paper or fabric near the fold line (stepping back by the thickness of the stick).
Step 4
Fold the resulting structure and fasten the sticks with a rivet or a screw with a nut.
Congratulations! Now you will have beautiful photos with a fan, from which you can make a cute collage in a family photo calendar. Get an original gift from us!
A few simple steps and you know how to make a fan for yourself and your loved ones. We are waiting in the comments for stories about how your accessory turned out, and what else would you like to make?
article from
In the photo there is a fan called plie.
There are three types of fans - plie, plyan and fan.
Fan- this is at least a program in the theater. Or the feather of the Firebird. It doesn't add up.
Plie- this is a fan machine, on the cat. attached (now usually glued) pleated fan screen. In the open state, such a fan is held by a screen made of fabric, paper, etc.
Plian- this is a fan machine made of plates without a fan screen. Just plates or they are decorated with feathers, etc. In the open state, it is held by a thread, ribbon, cord passed through the plates.
Components of a fan.
The machine is a rigid rigid part of the fan, consisting of main plates and rim plates.
The main plates have two parts (solid or glued) : the carrier plate (part of the plate), to the cat. a screen is attached, and an artistic plate (part of the plate) - the lower part of the plate, cat. remains visible in the open state.
Material for the main plates - wood, bamboo, ivory, plastic.
Usually there are 14-20 plates.
The rim plates are external, often richly decorated, protecting the fan when closed.
A hole is drilled at the bottom of all plates, where it is inserted
pin - a rod connecting the plates into a single fan machine. The material for the pin is a 7-8 carat diamond, just kidding.
It can be a half ring, to a cat. a loop is attached, bw. wear a fan on his arm, and hung a brush, pompom ... for another "beauty".
The pin is not such a simple thing at all, maybe. he should fix the plates not tight and not loose, but in moderation. These are usually two hollow rods with hats, a cat. tightly inserted one into the other. Or it is necessary to adapt from the available materials.
For a plie fan, a pleated screen is attached to the carrier plates. Decorate it with embroidery or a pattern before pleating. In this case, the bearing part of the plates becomes narrow.
It can be one-sided (alinglez, in English) or two-sided.
Mb. from paper, fabric, lace, specially woven under the shape of lace, combined.
For a prian fan, this fan in general can only be made of plates with carving, inlay, painting, etc. Then the plates look like sectors without narrowing towards the end and are decorative in themselves.
Or the bearing part of the plate is also narrowed and, say, feathers are attached to it, one for each plate.
To hold such a fan, two holes are made at the end of the plates (cm 2-3-4 from the edge). If there is a through thread, then you can use it. Holes are not made on the outer plates.
A ribbon is taken, threaded into holes such as a seam forward needle. The ends of the ribbon are fixed (glued) from the inside of the outer plates. Tuta too, or a technical ribbon, or an element of decor.
Spanish fans are a whole area of arts and crafts. In their manufacture in the past, whalebone, valuable varieties of wood, ivory, various fabrics, precious metals and feathers of rare birds were used. Expensive fans were hand-painted with different subjects, moreover, wood painting, fabric painting, and carving were used. All this is true, but we should not forget that both flamenco and sevillana are based on folk dances. What does it mean - a real Spanish fan should have been available (in purchase or manufacture) to ordinary Spanish people. And that means us too. Making a simple do-it-yourself dance fan is quite affordable.
To make a simple dance fan, you will need 18 wooden or bamboo plates, a piece of cloth measuring 30x60 cm, glue and a screw (or rivet) for fastening.
The base of the fan is wooden plates-knitting needles. They are made of hard, relatively light wood (for example: beech, ash) or bamboo. We do not mention the whalebone, from which such plates were made earlier - it is a pity for the whales. Soft (pine) or very heavy (oak) wood will not work. If there is no suitable material in a “raw” form, then 30 cm student rulers can be used to make knitting needles. However, pay attention to what they are made of - pine will not work! In total, 18 plates are needed - 2 “covers” and 16 inner knitting needles. The fan should fully open 180 degrees, so that when laid out on the fabric, they are located relative to each other in 10-degree increments. The diameter of the screw holes can be changed, depending on the diameter of the screw or rivet.
It is better to take a smooth fabric for a fan (silk or synthetics), because. it should slide open and close. The fan can be single and double. In the first case, the fabric is glued to the spokes of the fan. Glue carefully, having previously made outlines of the position of the plates on the fabric. Use glue that won't show through the fabric. Please note that fabric is glued to one of the “lids” from the inside so that the fan closes.
A double fan is made from two layers of fabric that are folded together. The spokes of the fan, in this case, are covered with fabric on both sides. The fabric can be either glued to the plates or stitched together. The seams should form grooves into which the inner plates are inserted.
A little more difficult to make (cutting is added), but a more "authentic" Spanish dance fan is shown in the following drawing:
The difference between this fan and the model presented above is that its "knitting needles" have a more complex shape:
The inner semicircle of the open fan of such a model is formed by the blades of the "spokes". Due to this, the fan becomes more rigid, and the fingers - a large "capture area". Usually such a fan is made two-layered (see above). When assembling it, first the needles are inserted into the delayed grooves of the fabric fan, and then they are already fastened with a screw.
For decoration, a lace strip can be glued or sewn to the edge of the fan. Fans can be entirely made of lace fabric (there are also embroidered fans), but their manufacture is somewhat more complicated.
The color of the fan is a matter of your taste. Red, white and black fans look impressive, but they can be any other color. The main thing is that the color matches the dress or costume in which you dance.
You can decorate your fan yourself by applying an image to the surface of the fabric with special acrylic paints for fabric or using the batik technique. Fan painting is an important element of many folk cultures and can give you great pleasure.
And further:
The fan can be made by yourself.
Sand thin wood sticks that will be the skeleton.
Fasten the finished sticks with tape.
Cut out paper (it can be cardboard) patterns.
Draw on paper any pattern or application.
Cover the fan with paper.
Well, the most elementary fan is made from a sheet of A4 paper. Just fold the leaf like an accordion and pinch it with your fingers at the base. Veer is ready!
The fan came to us from the East. The first mention of it refers to China of the VIII-II centuries BC. It appeared in Europe at the beginning of the 17th century thanks to the Jesuits and merchants who collaborated with China. And he gained unprecedented popularity and significance at the courts of European emperors. It got to the point that during the Baroque and Rococo period, the fan was part of the ceremonial activities and communication between aristocrats. For example, the ladies could open the fan only in the presence of the queen. As for communication between people, if a woman touched her lips and heart with an open fan, then she told her chosen one that he was her ideal. If you wanted to show the suitor that he did not fit at all, then the fan was applied with the right hand to the left cheek. We invite you to plunge into this world and learn how to make a fan with your own hands.
paper version
There are several options here. The first one that comes to mind is a method from childhood. Namely, we take any paper, fold an accordion out of it, tie it at the base, open it, and now the fan is ready. However, if you want a more convenient and reliable design, then you can make this option out of paper and ice cream sticks:
To do this, simply glue the sticks in the fold line, and make a hole at its other end and tie a thread. Make such a fan can be used as fun for children.
However, we offer you a slightly more interesting option. Namely, a fan of paper tubes. For it we need:
- cardboard;
- newspapers or office paper;
- PVA glue;
- stationery knife;
- pen or pencil;
- acrylic paints;
- ruler;
- ribbons, beads and decor at your discretion.
Cut out two bases from cardboard. To do this, draw semicircles, as shown in the images below. If you have a compass, it will speed up your work.


Now, with the help of a clerical knife, we cut out our details.

Let's put the basics aside for now. We cut strips of about 6-7 cm wide from a newspaper or paper. We take a knitting needle and, starting from the corner, twist the tube. At the end, fix with glue. It is better to prepare more tubes in advance.


We glue an odd number of tubes onto one base, as shown below.

Cover with the other half of the base. We cut off the ends of the tubes that stick out from above.

We also close all sides with tubes with glue.


We take a new tube, fold it in half and bend around the first rack of the fan, thus weaving to the base of the fan.


When everything is ready, paint the entire fan with acrylic paint.

We decorate according to the idea, as in the photo below.

You can paint the fan with stain and then, looking at it, people will get the feeling that it is made of twigs.

knitted fan
For those craftswomen who know the skills of crocheting or knitting, we offer diagrams describing how you can create a fan using your skills.


Such fans can suit you not only on a weekday, but also, for example, for a masquerade ball. You just need to choose a different thread color and use the decor.


Moreover, according to these schemes, you can tie a fan not only with a crochet, but also with knitting needles.
From wooden skewers
This accessory can perform not only the function of complementing the outfit, but also, for example, as a room decor. We offer you a master class on creating just such a fan. Prepare skewers, jute rope, glue and scissors.
Take 10 skewers and put them on the work surface. The extreme ones should be single, but in the middle of the sticks we add them in pairs, and we also fasten them.

Using a jute thread, we twist circles of different diameters in a spiral, fasten with glue. And put them between the skewers.

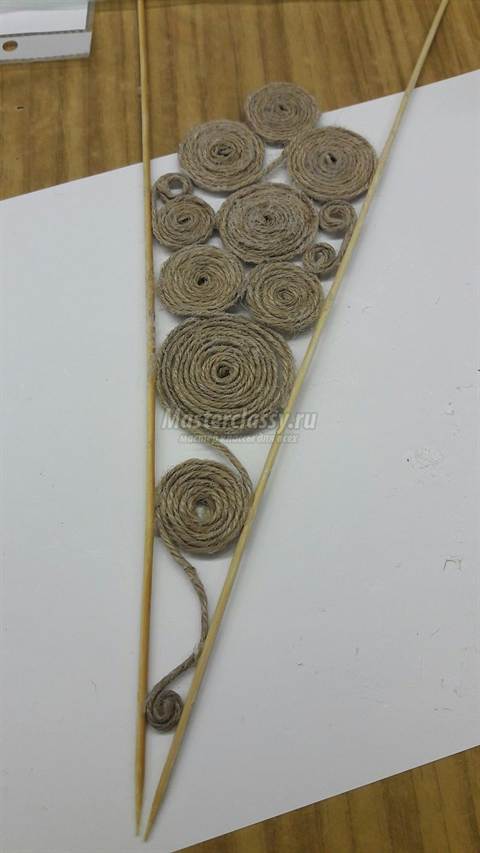
When all the segments are ready, then with the help of glue and the same jute thread we fasten them together.

We also start the thread on top. At the base we glue several jute spirals.

Such a fan will decorate the interior in eco-style, Provence, etc.
Other options and materials
It is also very popular to create fans from non-standard materials. For example, from disposable forks or spoons, as in the video below.
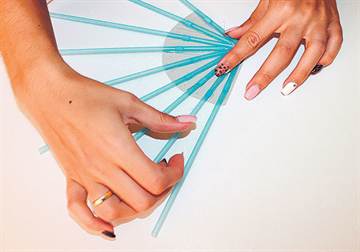
Juice straws also make an excellent specimen.

Glue the tubes on the cardboard base.
If you use a heat gun while working, be careful not to burn yourself and melt the plastic.
At the base, using a stapler, we fix a strip of organza or mesh. We lay a fold on each tube.

We close the cardboard base itself with a cut of beautiful fabric and ribbons.
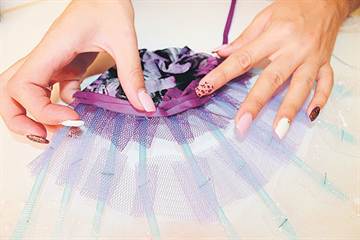
We continue decorating to the top of the tubes.

As you can see from the article, fans can be created in various materials and ways. Whether you know how to knit and / or crochet, whether you like working with paper, non-standard materials, whether you are preparing for the summer or a party, you can always find the option that is right for you.
Video on the topic of the article


