Patterns of leather bracelets. Leather bracelet for men
We will need:
- About 2 meters of leather lace (2 mm) (the length depends on how many times you want to wrap the bracelet around the wrist. 2 meters of lace will allow you to make about 4 turns of the bracelet),
- 1.5 meters of leather cord (1 mm),
- 6 meters of leather cord (1 mm),
- About 140 small beads with a hole large enough to thread a narrower (1 mm) leather cord through,
- beautiful button (optional).
Of course, you can use leather laces and other diameters, the main thing is that they can be threaded into beads.
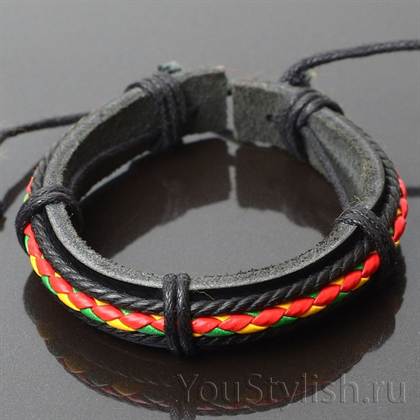
So let's get started! The bracelet on the right (photo above) does not have a button and will fasten with a loop at one end and a knot at the other.
First, take a lace 2 meters long and fold it in half.
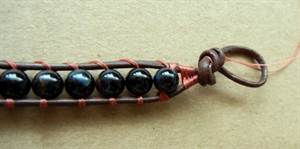
Now we take a cord 1.5 meters long and tie it into a knot around the loop as shown in picture 1.
Then we lean the short end of the lace (in the picture on the left) to the center, and tightly wrap the base of the bracelet with the long end in order to make a beautiful beginning.
It is very important to work carefully, as the laces are very thin and can break. You can first practice strength on some other shoelace.
Now tie a knot as shown in picture 2.
Then we put all the beads on the long end of the cord (the one with a diameter of 1 mm) and tie a knot at the end so that the beads do not move out during work.
As for the short tip (the same cord with a diameter of 1 mm), it can be cut off or inserted into the first bead, if the size of the hole allows.
So, we shift up our first bead.
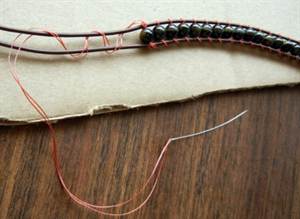
Now we take a 6-meter cord and cut it into 2 identical parts (DO NOT CUT). For example, they can be wound into balls, as shown in picture 1 on the left.
We tie a knot (from a 6-meter lace) right under the first bead.
Well, now you need to carefully follow the steps shown in the pictures from 4 to 14
At first, there is a chance to do something wrong, but do not worry, you need to carefully dissolve what has been done and start again with the second bead. Or maybe everything will work out right away.
It is very important to alternate weaving “above”, and on the next bead “under” a thin cord in the middle (which is with beads). It is necessary to keep the alternation in order to fasten the beads well and beautifully between two thicker laces (2 mm wide).
Well, do you see the alternation?
You can easily get your hands on it, because this process looks more complicated than it actually is!
Do not forget to periodically wrap the bracelet around the brush to see its length.
Finally, place 1 end of the braided lace in the center (for example, the left one), and wrap all other laces with the other. Then we make a knot as at the beginning of the bracelet, shown in picture 4.
Now we take all the ends and tie them into a large knot. We pull tight. Depending on the desired length, you can skip a little space and tie another knot and another, as shown in the last picture.
If you use a button on the other end of the bracelet, then the distance between the two knots will be the buttonhole.
OK it's all over Now! A leather bracelet woven with your own hands is ready!
http://bellezza4u.ru/accessuari/item/61-kojanii_braslet_svoimi_rykami.html
Once again, it's time to stretch our hands a little, exercise our imagination, use the creative spark within us, and make something with our own hands. And not even something, but trendy leather bracelets. What is great about these bracelets is that you can wear them with anything, especially ethnic clothing. In addition, there is a huge variety of different shapes, colors and options, so you can always choose a leather bracelet to match your outfit. Well, to describe how good they look on the hand is not even worth it.
So, let's proceed directly to the process of creating bracelets.
DIY wide leather bracelets
You will need:
. Leather straps (leather straps with a clasp at the end)
. Ribbons
. Metal spikes
. Threads
. Super glue
You can just glue a narrower piece of ribbon on the bracelet and add some spikes.
And you can attach spikes and entangle them with a bright thread (yellow, for example). You will get 2 wonderful bracelets.
A couple more options for the creative process "How to make leather bracelets"
You will need:
- leather laces - you can use thin leather ribbons
- floss threads
- glue
- scissors
- scotch
- needle
Step 1
Measure your wrist by wrapping the leather cord around your wrist loosely twice, then add an extra 10cm to tie. Glue one end of the leather cord to the surface so that it does not move and, stepping back about 5 cm from the edge, drop glue on the leather cord and attach your first floss color to it.
Step 2
Continue winding the floss around the leather cord until you've made a strip of the width you want, then cut off the rest of the thread, securing the end to the bracelet.
Step 3
Take a different color of thread and do the same procedure with it again. Continue doing steps 2 and 3 until you have made about 5 cm of different colors.
Step 4
When you are done wrapping, take the needle and pass it under yours. If you want, you can add a small drop of glue to make sure your floss doesn't come off.
Step 5
Tie the end of the lace closest to the wrap around the other end of the lace. Make a simple knot. The knot should be strong, but the leather cord should be free to go back and forth, to slide through it.
Advice: Before tying a leather cord, dampen it a bit and remember to make it softer and easier to tie. This will also help make a strong knot.
Step 6
Leaving at least 10 cm on the other side, repeat steps and 1, 2, 3, and 4 again.
Step 7
When you've finished wrapping your bracelet on the other side, tie off the loose end again on the other side.
You will get wonderful multi-colored bracelets.
Well, now more complex options:
You will need everything that is at hand: leather laces and strips, beads, chains, glue, threads.
1. Bracelet with beads. Take 2 laces, put beads between them and attach the beads to the laces, passing the threads through them and wrapping the laces with these threads. In the photo: the first from the wrist.
2. Multi-strand bracelet with beads. Just take a few suede threads, a couple of clasps for the ends, and beads with beads through which your threads can pass through. String your beads and beads on strings, tying the thread after each with a knot. Fasten the clasps at the ends.
3. Braided bracelet with beads. This is also the easy way. Just start braiding suede threads, adding beads here and there, fasten the fasteners at the ends, and you're done. Such a woven bracelet can also be made with a chain. Just add a thin chain instead of one of the threads and start braiding.
Don't stop your imagination. You can make your own versions and variations. The main thing is that you do not have to buy such wonderful bracelets in the store.
DIY leather bracelets (video)
LiveInternet.ru
Leather bracelets are versatile accessories that have been in fashion for several seasons and remain popular. Women's baubles are woven and flat, because the preferences of girls are different. But many agree that handicrafts are interesting and look much more original than those sold in stores.
They come in different colors, sizes and shapes, you can use a wide variety of weaving patterns and a huge selection of methods for weaving leather products.
Such products can look both elegant and extravagant. It depends on the weaving method. How to learn to weave leather bracelets? First you need to purchase small pieces of leather and cut them into strips. There are many weaving patterns, but it is better to start with the simplest ones.
Braid bracelet
This is one of the simplest and most elegant solutions for a leather bracelet.
Weaving products can be done in several directions.
- Wrap a long leather strap around your wrist and add 2 centimeters to this length, this should be enough. The width of these strips can be different. You can try to weave from narrow strips with a width of 1.5 to 3 centimeters;
- Using a hole punch, make holes at the ends of the strips;
- In the holes, you can fix a metal button or thread laces through them. These are standard ways to fix the ends of products;
- This blank can also be decorated with rivets or patterned holes;
- Then, you should weave a traditional braid of three strips.
You can weave a slightly unusual braid in a different way
- Using a ruler, a wide leather ribbon should be divided into three parts of the same width and evenly cut along, but not completely. The ends can be decorated with decorative buttons;
- As a result, you get three stripes, from which you need to weave a braid: No. 1 - on the left, No. 2 - in the middle, No. 3 - on the right;
- You can start weaving. One edge of the bracelet must be passed between strips No. 2 and 3 and lowered down. As a result, the stripes will be twisted;

- Then you need to pass the edge of the bracelet between strips No. 1 and 2 and lower it down;
- We repeat the previous steps one by one until the bracelet is ready;
- The last step should be straightening the bracelet.
Different types of leather behave differently depending on its softness, dressing and thickness. Some bracelets will turn out tight, some more loose, it all depends on the technique and quality of weaving, as well as on the skin and its plasticity.
If you have mastered one version of leather weaving, you can continue to learn how to weave bracelets using various techniques.
Baubles with embroidery

You can add a leather ribbon decorated with appliqués, colored threads or interesting studs to a thin woven bracelet.
This can be a strap about 3-4 cm wide. You can buy special leather for baubles or take an old belt, bag or upper part of a soft old boot.
Leather can be black, it will contrast beautifully with bright embroidery, brown leather also looks beautiful and stylish.
You should also stock up on metal embellishments, such as heart-shaped ones, which can be purchased at any craft or scrapbooking store.
You can embroider with thick stitches of bright thread or decorate the product with decorative elements. Such a product can be fastened with an ordinary button.
How to weave a bauble out of leather
You will need:
- narrow strips of leather or leatherette of any color;
- thick cord or wire;
- lighter;
- large lock with a hook;
- scissors;
- Super glue.
How to weave a bauble:
- Cut a piece of wire or lace 15 cm long;

- Scorch the ends of the lace with a lighter or other fire;
- Make a loop;
- Using glue, you need to attach the loop to the surface on which you will weave the bracelet;
- Insert the leather cord ok under the wire;
- Braid the wire like a double flat knot used in the macrame technique;
- Repeat until you have tied the entire cord. Knots can only be placed on one side or on two;
- Cut off excess cord;
- Glue the lock at the end, hiding the ends of the wire and both ends of the leather strip underneath.
It is not at all difficult to learn how to weave various leather accessories. Such products are probably not suitable for a business lunch or a trip to the theater, but in other cases, they can be actively used as an interesting accessory.
They will look especially good with country, casual or ethnic style clothes.
Girls, summer is coming and wouldn't it be time to take care of updating the jewelry box? I propose to start today with a couple DIY leather bracelets- They are easy and simple to make. Interested? Then let's go gutting Mom's old leather jackets and Dad's belts. The only request - do not succumb to nostalgia for parenting and cut your father's straps into thin stripes. Go.
Option one.

This is a braided bracelet. Delicate, beautiful, thin. He asks for a pair in his hand, so I advise you to immediately weave a few pieces. To make it, you can buy a blank made of leather, or you can make it yourself: Cut a wide strip of leather in two lines along, and put buttons on the ends with an awl.

Now is the time to start weaving. Pass the lower end of the bracelet alternately through the honey with three strands and straighten the twisted strips so that the bracelet is flat.

Each of the braided bracelets differs only in the thickness of the braids. Don't worry if you can't weave the bracelet the first time. Train and become a pro.
Option two.

This bracelet is made in pastel lavender colors. It is gentle and thin. Perfect for spring and summer outfits.

We will need:
- white, light green and lavender thread (about 40 cm each)
- strip of white leather (40 cm)
- silver chains about 20cm
- silver plug with clasp
- scissors and glue
Step 1: Cut the thread into nine pieces about 20 cm, two for each color (green, lavender, white and white leather) and a silver chain. Put them in groups of three, as in the photo. Fasten the edges of the ribbons.
Step 2: Start weaving. To get an even pattern, make sure that the multi-colored threads remain in the middle of each strand.
Step 3: When you get to the end, secure before cutting off the ends. Glue the ends of the bracelet and clasp together.
Step 4: If the bracelet is too short, extend it with a chain.
That's it - your bracelet is ready!
Option three.
For this bracelet, you will need some sewing machine skills, but the result is worth it. In our version it is white and pink DIY leather bracelet, but you can swap colors and choose a different composition.
So, get ready to go:
- scissors, knife;
- a piece of white leather measuring 3x25 cm;
- dense pink fabric;
- hooks;
- ruler;
- sewing machine.

Cut the skin into nine strips 0.33 cm wide. Divide the strips into three parts: three strips each and weave the braid.
Fold the pink fabric as shown in the picture and sew it to the skin. Fasten the hooks. Everything, the bracelet is ready - it's time to show it to your girlfriends.
Option four.
This bracelet is fundamentally different from the previous three in that it is not woven with braids. Measure your hand and calculate the length of the leather strips (you will need two of them). In addition to them, stock up on coarse thread and follow the instructions shown in the figure. Good luck.
Option five.
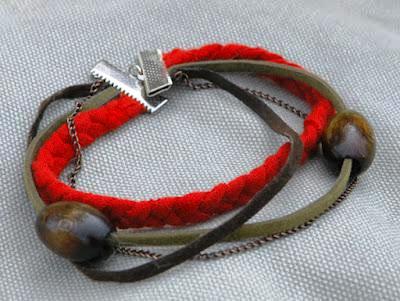
This cute bracelet contains a lot of elements: braided braid, stones, and even chains. I recommend you be well prepared.

Materials:
- knitted fabric
- thread, needles, pins
- scissors
- ruler or tape measure
- leather cord
- thin metal chain
- 2 wooden beads
- 2 clasps
- jewelry pliers

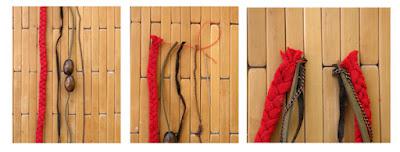
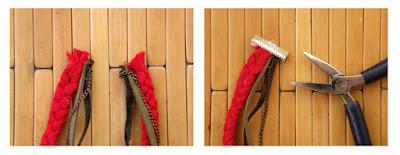

Following the instructions in the photo, you will get a beautiful bracelet. Remember to measure your wrist at its widest point - at the thumbto know the exact length of your bracelet.
![]()
Jewelry and accessories made of leather always look very interesting. For any style of clothing, you can choose the right product. and with their own hands from the remnants of the skin from old unnecessary things. For example, it will take only half an hour to weave a leather bracelet, and you do not need to have any special skills or tools.
Leather of any dressing and color is suitable for such a stylish decoration: a simple pigtail-shaped bracelet will look great both from rough thick leather and from thin, well-dressed.
To make a leather braid bracelet you will need:
DIY leather bracelet in the form of a pigtail: a master class
On the wrong side of the leather cut, use a pen and a ruler to draw a “pattern” of the bracelet. The length of the pigtail bracelet should be at least 19 cm. You need to make two cuts along the middle (not reaching the edge) to get three cords. The width of the cords is 3-6 mm (the thinner the skin, the narrower the cords should be), respectively, if the width of the cords is 4 mm, then the width of the bracelet will be 1.2 cm. The length of the slots themselves is 16 cm.

Cut out the blank with sharp thin scissors.

You can start weaving. It is more convenient to put the workpiece vertically, mentally number the cords from left to right 1, 2, 3.
Weaving consists of repeating four steps.
Step 1. Unscrew the lower part of the bracelet between cords 2 and 3.

At first glance, such an “abracadabra” should turn out.

Step 2 Gently straighten the cords to get the weave: 1st to 2nd, 3rd to 1st, 2nd to 3rd.

Step 3 Turn the bottom of the workpiece from front to back between cords number 3 and 2.

Step 4 Distribute the weave neatly upwards, as a result, the initial arrangement of cords 1, 2, 3 should be obtained.

Repeat steps one through four. As a rule, a double repetition of the steps is enough for such a length of the bracelet to get a neat finished weaving with a pigtail. Spread all the cords evenly with your hands.


Round the edges of the workpiece with scissors, make holes for fastening on each side of the leather bracelet with an awl.

For a lock connection, you need a thin leather cord: cut off a strip of leather about 20 cm long and about 3-4 mm wide with scissors.
![]()
Now, for a lock-connection, it is necessary to glue a blank from several small pieces of leather (size no more than 1.5 × 1.5 cm). In general, it is better to do this procedure in advance (a day in advance), because it takes about 24 hours for strong bonding.

When the stack of leather pieces is glued together, trim the edges in a circle, for a neater look, you can sand the edge. In the middle, make a hole with an awl (you can pre-heat it).

Pass the prepared thin cord through the holes on the edges of the bracelet (from the inside to the front side). This is where tweezers with sharp and thin edges will help very well, because you need to thread the cord in such a way that the holes do not expand much, otherwise the mount will not be tight.

Then also thread the ends into the prepared circle of leather, measure the required length of the cord, cut and tie knots at the ends.

A leather bracelet in the form of a pigtail with your own hands is ready.
A leather bracelet will look even more interesting if you weave it so long that it goes around the wrist several times.
The option is more complicated - make the bracelet wider, for example, by 9 cords, but weave in the same way, dividing the cords into three groups.


How to make weaving from leather? How to learn quickly? How to become a master and give beauty to yourself and your loved ones? We'll talk about this in the article. Fashion does not stand still. Very often in magazines, at fashion shows, leather dominates. Previously, leather products were reflected in clothing, but recently leather accessories are gaining popularity. Consider the basics of working with the material.
Needlework progress
The history of leather work is quite interesting. Processing began to be practiced from the Stone Age, when clothes made of skins, belts, belts and bags gradually appeared.
Weaving is a variant of leather processing, where craftsmen combine several techniques to create a product. Often in jewelry practice there are woven macrame elements made from lace.
What can you create from? It is easy to use unnecessary leather things. For example, gloves, briefcases, etc. But do not forget about the quality of the material. Pay special attention to thickness, elasticity and coloration. It will be more difficult to work if the product has a pattern or some kind of ornament.
But the masters advise not to remake the old into the new. It is better to spend money on new leather so that the accessory is worn longer and is attractive. Each thing has its own expiration date, so often unnecessary things can ruin all the work. Leather is sold in specialized stores. I am glad that there are many colors and options for products.
For beauty
It is easy to make bracelets with your own hands, which are becoming more and more popular. Such products look elegant and beautiful. It all depends on weaving. You need to purchase pieces of skin that will become the basis and cut them into strips. It requires few materials and a lot of attention to make.
So, let's begin. Consider several weaving options that are suitable even for men. The first option is a pigtail bracelet.

It is thin, delicate and looks beautiful on the hand. Such an accessory is multifunctional, because it can be worn at any time of the year.
We need a leather blank. If there is none, then cut a wide strip of leather, put buttons at the ends, as the diagram shows.
Depending on the fittings, the style of decoration changes.

The second option is "Women's Secrets". The accessory is suitable for bright summer outfits. You can choose the color yourself, for all the will of ideas. The technique is simple, even a child can handle it.
Take a thread of three colors, a strip of leather, several chains, a plug with a clasp, scissors and glue.
- We cut the thread into 9 parts (20 cm in two pieces). We lay them out in threes, after fixing the edges.
- We start to weave. Follow every movement so that the product is smooth and beautiful.
- At the end, pay attention to the clasp. Fasten the bracelet before trimming the ends. Lubricate the ends of the bracelet and clasp with glue. Accessory is ready!
To make sure it works correctly, look at the photo:

The third option is an unusual braid.
- To get a wicker product, we take three identical leather ribbons.
- Remember the numbering of the strips: 1-left, 2-in the middle, 3-right.
- We start weaving. We pass the edge of the product through No. 2 and No. 3, lower it down. The stripes are twisted.
- We pass the edge between No. 1 and 2, lowering down.
- We repeat the previous movements until the end of work on the product. We straighten.

Types of bracelets masters are divided into categories. They differ in design.
- Thin and thick accessories:

- Accessory with buttons, clasps:

- With patterns or rhinestones:

- With several turns around the wrist:

In addition to the usual weaving, there is a circular weaving. In addition to thin skin, you will need a rope. It is she who is braided with cords.
Progress:
- There are four birch cords about 2 cm long. We are preparing a rope of the same length. Pay attention to the diameter - from 3 to 5 mm.
- With glue (preferably "Moment") we connect the ends in a circle (in length - 15-20 mm). We fix the place of gluing with a thread.

- We divide the cords into two parts. Remember the left and right parts, mentally numbering. We take the left in the left hand, and the right - in the right.
- Let's use a schema.
- When the length is about 130-140 mm, then we fix the end with a thread.
- Lubricate the non-woven ends with glue. Leave to dry.
- Flatten the ends of the tubes. Make a place for the fixer, install.
Here is a result that looks like a whip:

Leather bracelets are not eternal, because they are made of delicate material. High-quality products are not always found in stores, so check its strength at the time of purchase, the presence of excess - threads. Of course, the leather belt also needs to be checked. Often they can wear out, wipe out and lose their shape. It is dangerous to buy products in online stores, there is no way to check the quality and verify the authenticity of the brand. Try to make your own accessory. It's easy to enjoy the job. But it is even more pleasant to wear a thing made by yourself.
Video on the topic of the article
The creation of woven leather products is an art that came to us from ancient times, at first glance it seems incredibly complex and incomprehensible. However, this is not at all the case, because there are a lot of types of weaving, and they all differ in the complexity of execution. For items such as belts and bracelets, the most common ways to weave leather are braid, braid, and single puzzle. Today we will tell you how to make accessories woven from leather material with your own hands. If you decide to make something out of leather yourself, then you will definitely need the lessons on how to weave leather, presented below.
Jewelry made of leather or leatherette is suitable for both men and women.
Circular braiding method
Any technique of weaving four cords, including this one, shrinks the skin. For this reason, it is better to cut the laces slightly longer than necessary. As for the thickness, it is recommended to use a thin cord for circular weaving, because the product will turn out to be more voluminous.

Cut four cords and tie the ends together. For convenience, we will denote them as A, B, C and D starting from the left and ending with the right. Fix the blank on the paper holder, or by gluing it to the table with tape.
To avoid confusion, for the first time it is better to weave from multi-colored laces, or mark each one by tying a colored thread to it.
Weaving a voluminous bracelet
Weaving begins with cord D. Bring it to the left over B and C, so that the order changes to A, D, B, C. Then move B to the left, behind D, to make A, B, D, C. Throw the A-lace to the right through B and D, then braid with cord D. If done correctly, the ends of D and A will be in the center, B will be on the left, and C on the right.
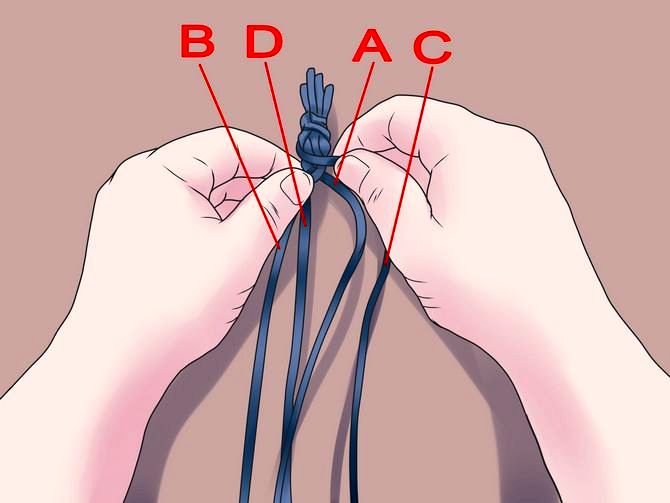
Take B and A in your left hand, and D and C in your right hand. Pull them in different directions to tighten the weave. Pass cord C over D and A, then move A to the left through C. Move cord B to the right through A and C, and C, in turn, through B. Tighten the weave again, spreading the pair of laces to the sides.
Repeat all the steps several times until you get the desired length of the product. Finishing work, tie the ends of the laces. To connect braided cords into a bracelet, special fittings, such as end clips or ready-made clasps, are ideal.
Single puzzle method
Cut a long strip of leather and cut longitudinal strips in it. The ends must remain intact. You will get a strip of leather cut into three cords.
Fix one end of the strip in place. Pull the lower end towards you, and then pass it between the 2nd and 3rd stripes - this will make weaving easier. On top of the braid, wind the first cord onto the second, and then pull it between the second and third. Throw cord 3 through the first, the second through the third. At the end, pull the end of the weave back on yourself and pass it between the laces 2 and 3.

Repeat these steps following the pattern until you are done. At the end, make a loop again by pulling the strip between the cords.
To make women's bracelets, add various beads, rhinestones and other details to the weave.
Weaving a leather whip
To weave a whip yourself, you first have to cut the skin to prepare the first knee (the one below). It is better to weave from thin strips 5-7 mm wide. A knee may consist of 5 or more stripes. It is advisable to use long and straight stripes.
Before you start cutting, mark a piece of rawhide, marking a strip equal in width to all the strips, and step back from the end 5-10 mm for fastening.

The lower knee is woven like this: spread the strips to the sides and alternately weave them, weaving the strips either on the right or on the left. Make sure the pattern is symmetrical. The knee should gradually thicken. To do this, add an insert made of rawhide or similar material to the middle of the weave. About 5 cm before the end, stop increasing the diameter of the weave and weave another 8 cm without the liner.
The next parts of the whip should be thicker than the previous one. To do this, either increase the volume of the liner, or the width or number of stripes. The whip is made from an ordinary stick. You can cut various patterns on it, or leave the surface flat - as your fantasy tells you.
Braided strap
Using various weaving techniques, you can make a variety of leather accessories, including a belt. Prepare 3 shoelaces made of leather, leatherette or suede, each about 5 meters long. A round steel ring is suitable as a buckle. You will also need superglue.
Fold the laces in half, forming a loop - you need it to secure the buckle. The last cord on the right will be the basis of weaving.
 Tie a knot by stretching the cord as shown in the photo. Tighten the ends well. Weave the rest of the knots in the same way.
Next, turn the main cord to get a wavy pattern. Continue to knit knots, now in the direction from right to left. Weave as much as you need. If the cord is too short, lengthen it with glue.
We continue the topic of hande-made bracelets again. We make leather ones for this one.
Once again, it's time to stretch our hands a little, exercise our imagination, use the creative spark within us, and make something with our own hands. And not even something, but trendy leather bracelets. What is great about these bracelets is that you can wear them with anything, especially ethnic clothing. In addition, there is a huge variety of different shapes, colors and options, so you can always choose a leather bracelet to match your outfit. Well, to describe how good they look on the hand is not even worth it.
Photo: www.ispydiy.com, www.trinketsinbloom.com,
So, let's proceed directly to the process of creating bracelets.
DIY wide leather bracelets


You will need:
Leather straps (leather straps with a clasp at the end)
. Ribbons
. Metal spikes
. Threads
. Super glue
DIY leather bracelets


You can just glue a narrower piece of ribbon on the bracelet and add some spikes.
And you can attach spikes and entangle them with a bright thread (yellow, for example).
You will get 2 wonderful bracelets.
How to make leather bracelets photo
A couple more options for the creative process. You will need:

- leather laces - you can use thin leather ribbons
- floss threads
- glue
- scissors
- scotch
- needle

Step 1
Measure your wrist by wrapping the leather cord around your wrist loosely twice, then add an extra 10cm to tie. Glue one end of the leather cord to the surface so that it does not move and, stepping back about 5 cm from the edge, drop glue on the leather cord and attach your first floss color to it.
Step 2
Continue winding the floss around the leather cord until you've made a strip of the width you want, then cut off the rest of the thread, securing the end to the bracelet.
Step 3
Take a different color of thread and do the same procedure with it again. Continue doing steps 2 and 3 until you have made about 5 cm of different colors.
Step 4
When you are done wrapping, take the needle and pass it under yours. If you want, you can add a small drop of glue to make sure your floss doesn't come off.

Step 5
Tie the end of the lace closest to the wrap around the other end of the lace. Make a simple knot. The knot should be strong, but the leather cord should be free to go back and forth, to slide through it.
Tip: Before tying a leather cord, dampen it a bit and remember to make it softer and easier to tie. This will also help make a strong knot.
Step 6
Leaving at least 10 cm on the other side, repeat steps and 1, 2, 3, and 4 again.
Step 7
When you've finished wrapping your bracelet on the other side, tie off the loose end again on the other side.

You will get wonderful multi-colored bracelets.
DIY leather bracelets
Well, now more complex options.
You will need everything that is at hand: leather laces and strips, beads, chains, glue, threads.
1. Bracelet with beads. Take 2 laces, put beads between them and attach the beads to the laces, passing the threads through them and wrapping the laces with these threads.

2. Multi-strand bracelet with beads. Just take a few suede threads, a couple of clasps for the ends, and beads with beads through which your threads can pass through. String your beads and beads on strings, tying the thread after each with a knot. Fasten the clasps at the ends.

3. Braided bracelet with beads. This is also the easy way. Just start braiding suede threads, adding beads here and there, fasten the fasteners at the ends, and you're done. Such a woven bracelet can also be made with a chain. Just add a thin chain instead of one of the threads and start braiding.

Don't stop your imagination. You can make your own versions and variations. The main thing is that you do not have to buy such wonderful bracelets in the store.
In this master class, we have collected the best bracelets that can be made from leather. They will help to complement the outfit and create a complete image.
Tools and materials Time: 1-2 hours Difficulty: 4/10
- artificial or genuine leather;
- buttons, rivets;
- hole puncher;
- pliers;
- scissors;
- hammer.
A simple leather bracelet with an unusual shape

This simple leather bracelet, the master class of which we will show below, is done quickly enough, and the result will exceed all your expectations.
We'll need

1) Piece of leather


4) Hammer
Step by step master class
Step 1
Cut out the base for the bracelet
Here is a piece of skin we had from the very beginning:

Measuring the width of the wrist

Step 2
Cut out the base:
Was:

It became:

Before cutting leather, you should have a complete idea of what you want to get. We got the base like this:

Step 3
Making notes for buttons
Our base is ready:

Now we attach the blank to the hand and insert the pin in the place where we want to make the button


You need to stick the pin deep enough to make a mark on all layers. Be careful not to pierce your hand.

We pull out the pin, remove the bracelet, lay it on a flat surface, stick the pins into places with holes.

There will be buttons in these places.
Step 4
Cooking buttons and tools
We take out our buttons and tools from the package.

For work, we need 4 types of buttons, and for each of them, there must be its own nozzle


The black circle is needed in order not to damage the surface on which we will put the buttons.
A piece of rod will be needed to insert buttons
Step 5
Skin preparation
Now we will make holes for the buttons (if you have a hole punch, then everything will be much faster. Just punch holes in the places with pins)
Pulling out the pins

We put a black circle under the hole

We insert a piece of the rod, with a sharp end to the skin and beat with a hammer


This is how the hole should look like:

We do the same on the other side

Step 6
Insert the top of the button
Tools and materials for insertion:

We put nozzles on a plastic plate


Ready! The top is done.
Step 7
Insert the bottom of the button
Each part of the buttons needs its own tool. For the bottom, it's like this:

We put nozzles on the plate

Now carefully look at the pictures and insert the button in the same way. Don't confuse


Here's what happens:


The bracelet is almost ready

Step 8
Decorate the bracelet
To make the bracelet more interesting, let's add another button.
We put the button at the desired distance (about 1-1.5 cm) and press it against the bracelet to leave a mark


Punch a through hole with a pin

Repeat steps 5 and 6 and get a super cool bracelet


This is how it will look on the hand:


Don't be afraid to get creative with your shape selection. Experiment!
Leather bracelets for men
Bracelet from an old belt

Sooner or later, the leather belt wears out. In order not to throw it away, we suggest you make a vintage bracelet.
We will need:
- Old leather belt
- Hammer
- Nail
- Scissors
- Pencil
How to do:
- Wrap the strap around your wrist 3 times
- We put a mark at the end after the 3rd time
- Cut off excess with scissors
- Using a nail and a hammer, we make a hole so that the bracelet closes with a clasp
All! Just a few minutes and the bracelet is ready!
But no, here's another thing, such a bracelet can be made for a girl using her old belt

Creative bracelet with iron clasp

This creative leather bracelet is quick to make and perfect for practicing the first steps in working with leather.
We will need:

- Metal clasp (it is not necessary to use exactly the same as ours, any will do)
- Hole puncher
- Hammer or button inserter
- Rivets
- Scissors or craft knife
- Ruler
- Lacquer (optional)
- Glue (optional)
How to make a leather bracelet for men with an iron clasp?
Step 1
Cut out a strip of leather 5 cm larger than the wrist. The width should be 2 cm more than the fastener. To do this, use a knife or scissors.
Step 2
We bend 2.5 cm of skin on each side (we cut off the excess, so we have a larger bend). Can be glued on or left as is.

Step 3
We wrap the wrist, attach the clasp and put marks on the place of its fastening

Step 4
We punch holes with a hole punch (in extreme cases, you can use a knife) and insert the rivets, hammering them

* The main thing is to choose the right diameter of the rivets so that they are larger than the hole in the fastener

Step 5
Do the same on the other side

Step 6
Optionally, the bracelet can be varnished

Leather bracelets for women

For lovers of arrows, they made such a bracelet.
We will need:

- Old leather belt (should be thin enough to cut with scissors)
- Chain
- Scissors
- Hole puncher
How to make a cute leather bracelet:
1) Cut out 2 rectangles from the old belt

2) Cut out the arrows from the skin (we did not use a template, but you can draw it and cut it out already)

3) We make 2 holes on the arrows: one in front, the other in the back. For this we use a hole punch.

4) Pull the chain through the holes

5) We wrap the chain around the wrist (if it is long, you can cut it with pliers)


We will need:

- Buttons
- Nozzles for inserting buttons
- Hammer
- Scissors
- Paints
How to make a colorful bracelet with patterns

1-2) Cut out strips of leather 2.5 - 5 cm larger than the circumference of the wrist. Our width is 1.5 cm, you can make any other
3) We apply the first layer of paint in the form of geometric patterns. Let dry
4) Apply the second coat of paint


This bracelet will be a great gift for your girlfriends! Be sure to do it :)
Bow bracelet
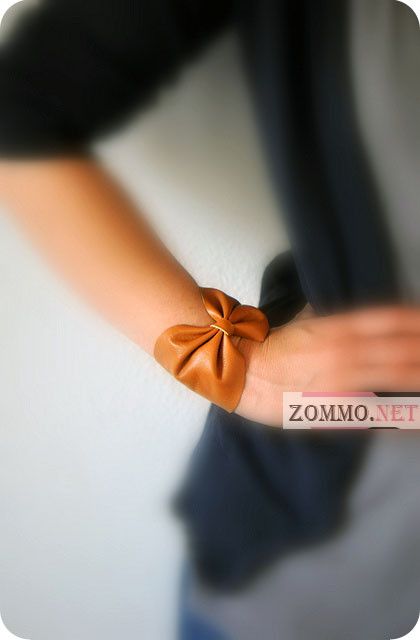
We will need:
- Piece of leather 22 x 10 cm
- Scissors
- Threads
- Buttons
How to do:
1) Cut out an oval piece of leather, measuring 22 cm x 10 cm (you may have a different one, depending on the width of your wrist)

2) Fold the skin in the middle, as shown in the figure below

3) Around the fold, wrap with thread
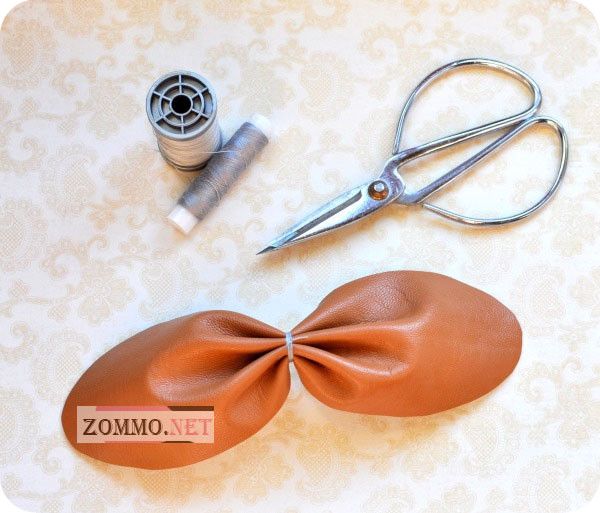
4) Cut out a small piece of leather, approximately 4 cm x 1 cm
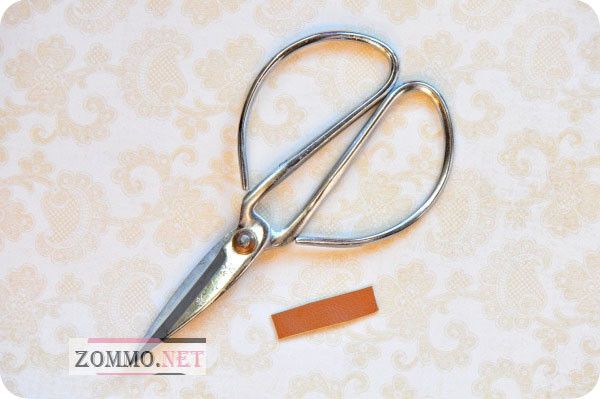
5) On top of the threads, glue a small leather rectangle

6) With the help of threads, we sew buttons on opposite sides of the bracelet


Weaving leather bracelets
Bracelet weaving patterns
Now we can look at an example of how to weave a leather bracelet:
Bracelet with carabiner

We will need:
- Leather or suede band
- Scissors
- Pliers
- Clamp tool (not only specialized, but a simple clothespin will work too)
- 2 clamps
- 2 rings
- Carbine
How to do:
1) Cut off a piece of tape so that you can wrap your wrist 3-4 times (we cut it 4 times)

2) Cut off 2 more pieces of the same length

3) Lay out the laces in a straight line, put on the clip and fix it with pliers

4) Using the clamp tool, we fix the laces and weave a pigtail (how to weave is up to you, everyone has their own method. You can see the main schemes a little higher)

5) We wrap our wrist with our unfinished bracelet, it should turn out 2 turns. We cut off the excess, leaving 1-1.5 cm

6) We put on the clamp, as in the 3rd paragraph
7) Using our pliers, we put on the rings. Close one, leave the other open

8) We put on a carbine and close the ring

If you did everything right, you will get such a woven leather bracelet.

True, we already have 2 of these on hand :)

Do not be afraid to experiment: make the bracelet longer or make several of them, change the color of the skin or weave.
Several video tutorials on weaving bracelets
Why are these leather bracelets the best?
They are quite simple to perform. It took us more time to write the master class than the work itself.
They are durable. Bracelets made according to our MK will be worn for a very long time.
They are unisex. Although we have broken the bracelets into categories, in reality they are all unisex. Even men's bracelets can be made of pink leather, then they will become women's :)
Similar content
A large selection of style elements is offered to us by the accessories market, but how to make a leather bracelet with your own hands? Both leather and its substitutes occupy a large place in the modern choice of material. It does not require difficulties with processing and effectively complements the image. Leather is used in bracelets for both men and women.
Bracelet styles
We offer to consider several examples of bracelets and instructions for their manufacture.
Leather thin strips and waxed leather cords are sold in stores by the yard. Take the right amount and choose the colors. Cut the strips into pieces and secure with cords. Collect different types of cords in one bracelet. Add metal jewelry or beads.

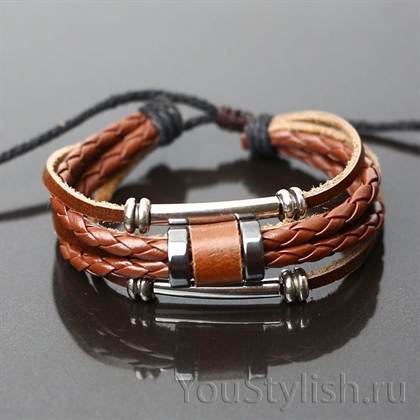
Take a long cord so that it goes around your hand several times and fasten special fasteners at the ends.
Note! The caps can be glued on with super glue or hot glue from a heat gun.

Braid several blanks of metal bracelets with a leather cord like a wicker basket. The scheme of work is very simple, the master class will not take much time.


The simplest type of woven leather bracelets is the “pigtail” method. You can weave different types of laces and stripes. Ordinary brown and black colors are suitable for various styles of clothing, more colorful ones are chosen for bright summer looks.


An interesting version of weaving with a leather cord and beads has recently become fashionable. For such bracelets, the road of fantasy is open in terms of a combination of colors of threads and beads.
Graceful cute laces interlaced with beaded thread are tied with dense bright denim threads.


Take beads from 4-6 mm and twist with threads among two leather cords. You will need a needle to help with this.


Wide model
A more complicated, but still affordable way to create your own individual accessory is to make a wide bracelet like a strap or wristband.
Clasps can be buckles or buttons. On a dense piece of leather, spikes and rivets are glued or attached, holes are made through which cords can be threaded for decoration.
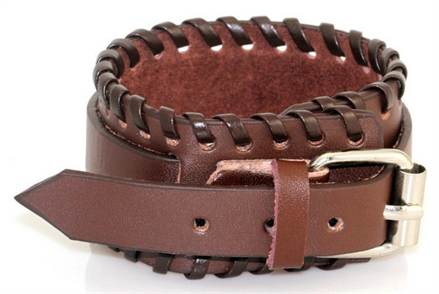


We find suitable material in the form of pieces from an old jacket, bags or boots. Buckle clasps can also be taken from the straps of old bags, buttons get new ones.
It is enough to fasten thick skin with buttons, force out the pattern, paint with paints, paste over with half-beads, embroider with threads.

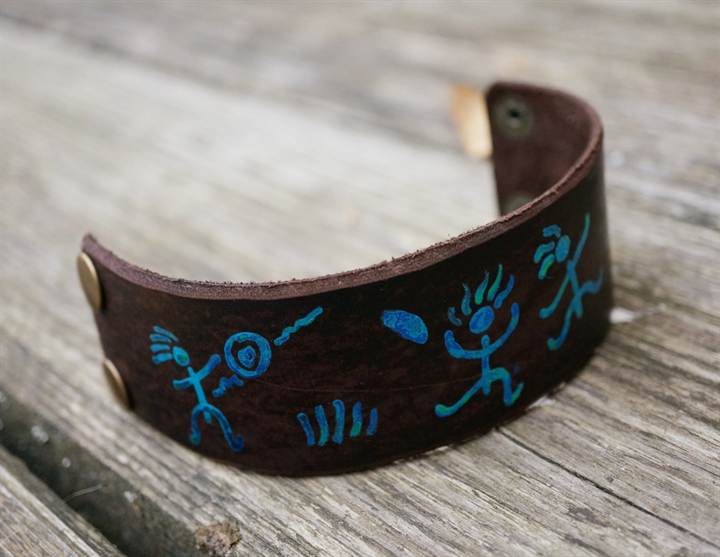
Thin leather and suede are glued to steel or plastic blanks for bracelets. They are sold in hardware stores and can be of various widths and sizes.
Most often, needlewomen use this material for beadwork. It is not necessary to make bracelets from a single piece of cloth, small pieces of leather can also serve as material for creating jewelry. Fasten geometric shapes or cut out leaves with leather glue. A leather flower, fastened with a button on a strip, becomes a glamorous detail in your look.


Men's options
Common associations of a men's bracelet as rock attributes or an addition to the inspiring image of bikers. However, it is still relevant to add fittings, metal inserts engraved with a name, club or ornament, spikes and rivets to such accessories. But in contrast to the informal movement, leather bracelets entered the style of the urban man. Many stars wear such jewelry, and they look no less masculine.


Some types of bracelets pass into the category of purely male work. It is difficult for a girl's delicate hand to cut any detail out of thick calfskin. But on the other hand, such bracelets will look very impressive with some folk ornaments, which is very fashionable now. Although the task is simplified if it is possible to glue the embroidery over the skin, and the material itself will play the role of a strong base.


