How to make from cardboard that shoots. Learn how to make origami pistols. Volumetric model of a paper gun
Having made a truly shooting gun out of paper, you can spend a rainy evening having a pleasant and useful time. You can make an origami pistol or a pistol with a trigger that shoots paper bullets. With a little practice, you can create your own collection of small arms out of paper.
Steps
Paper tube gun
- The thickness of the paper tube should resemble a pencil. If you find it difficult to roll the paper into such a thin tube, you can use a pencil or pen as a template. Just take a pencil and roll the paper around it.
-
Twist the second piece of paper around the first tube. To make a gun, take a second piece of paper and wrap it around the first one. As a result, you will get a paper tube of a larger diameter, from which you will shoot. After twisting the second tube, carefully remove the first one from it. So, you have a second hollow paper cylinder, thicker than the first.
Secure the paper tube with a strip of tape. After twisting the tube, fix it with tape. Tape the tube with strips of tape on both ends so that the paper does not unwind. After that, trim the uneven edges of the tube with scissors. It is necessary that the tube has even and smooth edges, without protruding pieces of paper.
Twist two more of the same tubes, then cut them into tubes with the lengths shown below. Take two more sheets of paper and twist them around the template as you did with the previous sheet. After that, using scissors, a ruler and a marker, mark and cut the resulting tubes into several segments of the following length:
- Trunk: you will need two tubes 15 cm long.
- Lever: you will need seven tubes 5 cm long each.
- Trigger: you will need one tube 8 cm long.
-
Make a handle by gluing all 5 cm tubes together with hot glue so that they are slightly slanting. Place the short tubes one above the other, sliding them at a slight angle (to resemble the handle of a real pistol, move each tube slightly to the right compared to the adjacent tube located above it). Glue the tubes folded in this way with heated glue, thereby obtaining a long handle.
Glue an 8 cm tube to the top of the resulting handle so that the extra 3 centimeters protrude above the handle to the right. This tube should protrude from the back of the handle. In other words, if you are holding the gun ready to fire, the extra 3 centimeters should be facing you. This will be the trigger of your pistol.
Glue two long, 15cm tubes together and attach them to the top of the gun. This will be his trunk, so you should glue them so that they protrude above the front of the handle. Align the rear edge of the barrel with the center of the handle and glue it to it.
Twist paper into two thinner tubes. This time there is no need to ensure that there is a gap inside the tubes. Roll the paper (it's good if it is a different color from the previous sheets) into cylindrical tubes, a little thinner than the ones you made earlier. The diameter of these tubes should be such that they fit into the previous tubes. To achieve this, twist them without a template. To reduce their thickness, do not twist the paper to the end, cutting off the last 10-13 centimeters diagonally of the sheet.
Bend a thin tube into a “U” shape and thread one end of this tube into the trigger and the other end into the top tube of the pistol grip. Trim too long edges of the thin tube so that it protrudes only 6 millimeters from the trigger, and does not protrude from the back of the barrel at all. The curve of the "U" should be on the side of the trunk. This will be your trigger, and when pressed, the tube will protrude from the rear edge of the pistol's trigger.
- Make sure the thin tube slides back and forth freely. After all, this is the trigger, when pressed, a shot occurs.
-
If desired, you can make a trigger guard using another thin tube of paper. Bend this tube into an “S” shape, flattening the bent sections if necessary. After that, place one free end of the tube in the handle (in the second tube on top, below the trigger), and glue the other with heated glue to the bottom of the barrel. Cut off the tube if it protrudes ahead of the gun barrel.
Flatten the thin paper tube with your fingers and seal the back of the handle with it. This tube should be flattened so that it forms a long and thin rectangular strip. After that, glue it with hot glue to the back of the handle, bend under the handle forward and circle around the trigger guard (if you made it). This is necessary in order to close all the holes in the handle, especially in its top tube, just below the trigger.
- NOT close the rear hole in the trigger. It must be kept open for free movement of the trigger when fired.
- And finally, you will frame the bottom of the gun - it is also better to use paper of a different color for this.
-
Remove the spring from the old handle and insert it into the top tube of the handle. Pull the trigger out of this tube and insert the spring into it. In this case, the spring should rest against the tube covering the back of the handle, slightly compressing when the trigger is pressed. The spring will serve to feed back the trigger after the shot.
Make a trigger out of paper and rubber bands. Fold the piece of craft paper in half so that you have a long, narrow strip. Roll this strip into a thin tight tube. Tape the ends of the tube with tape to keep the paper from unwinding, and cut them so they are even. You will get a long thin tube of paper. Then...
Insert a thin tube into the down tube of the gun barrel. Cut off the rubber-free end of the thin tube so that it does not protrude from the front of the gun barrel.
Pull the elastic forward, hooking it between the two tubes. At the same time, make sure that the back of the thin tube with the rubber band still protrudes from the barrel. When the trigger is pressed, it, moving out of the back of the trigger, pushes a short hook to the side, as a result, the rubber band pulls a thin tube forward along the barrel, and it pushes the bullet out.
Load the gun with a paper bullet and fire it. Now that the gun is ready, it can be fired. Roll the bullets out of small pieces of craft paper. Cock the trigger by pulling the tube on the elastic back and hooking it with a short hook on the rear edge of the trigger. Place the bullet in the barrel from the front side opposite the grip and trigger. Pull the trigger. At the same time, he will move out of the trigger from behind, pushing the hook off it, the tube will be released and, under the action of the rubber band, will move forward, pushing the bullet out of the barrel.
origami gun
-
Prepare two long, thin strips of craft paper. For the origami gun, you will need two pieces of paper. Take a large rectangular piece of craft paper. Fold it in half and cut into two smaller and wider rectangles. Then fold each of these rectangular sheets as follows:
Bend one of the strips into a horseshoe shape. Take one of the two strips of paper and fold it in the middle. Then unfold the strip back. You will get a fold in the middle of the strip. Grasp the right end of the strip and bend it at a 90 degree angle. Then do the same with the left half. As a result, you will get a figure that resembles a small paper horseshoe.
- The central part of the horseshoe should be about half as long as each side segment. To do this, put a second, straight strip in the center of the first and bend the edges of the first strip around it.
-
Bend the edges of the horseshoe again at an acute angle inward. Leaving the folds in the same place, fold the edges so that you get a teardrop shape with straight edges and sharp corners. In the center you will get a regular triangle. Strange as it may sound at this stage, but you have just made the trigger and trigger of the future pistol.
Fold the resulting triangle in half and fold the halves together so that you get the "handle" of the gun. You will end up with a figure that resembles a lowercase Latin letter “L”, with small bevels along the edges. It will be necessary to bend in half and the second strip of paper.
Pass the edges of the second strip of paper through the holes in the handle of the first strip. This is a difficult stage, so be careful. Take the second strip and fold it in half. After that, insert its edges into the handle:
Fit the strips so that the gun has a trigger, then pin the barrel and handle with paper clips to each other, fixing them. Now the outlines of your gun should be guessed. In doing so, you will see a small fold of paper protruding from the bottom of the barrel. Gently pull this crease down until it sticks out more. Now you can click on it - this will be the trigger.
-
Stock up on everything you need. Before you start creating a gun, select the necessary materials. Here's what you'll need:
Roll a piece of paper into a tube, starting at the corner and moving diagonally. To begin, take the first sheet of paper and twist it into a thin tube. Gently roll the piece of craft paper into a thin cylinder, taking care to leave some free space inside. As a result, you will get a thin tube of thick paper. It will serve as a template around which you will twist the other parts of the paper gun.
which shoots. It may immediately seem that this is impossible, but it is not. With some skills and desire, anyone can do it. Of course, you will have to sit for several hours with paper and glue, but the result will exceed all expectations.
Why is a gun made of paper?
People make weapons out of paper for various reasons. First of all, this is entertainment and such a peculiar type of recreation. For many, this activity has become a hobby. At the same time, you can make not just a shooting gun out of paper, but a sample that will be the pride of its owner. There are various diagrams and drawings that make it easy to figure out how it is constructed. They even make machine guns out of paper, pistols from different times with a silencer and a real sight. Such paper products also come to the rescue in the case when a child is planning a New Year's carnival in a kindergarten or at school. Of course, today you can buy almost any attribute for a costume, but it is much more interesting to make it yourself. Every child will be proud of their father who knows how to make a paper gun that shoots. Given the complexity of such structures, not everyone can succeed the first time. To begin with, it is better to try to make the simplest design for training and gaining skills in this matter.
What materials will be needed?
Naturally, first of all, for designing, you need to prepare suitable paper. It should not be just any blank sheet, but a denser material. Good for these purposes, medium-density cardboard is suitable. It is from it that shooting pistols are made. Weapons made of paper that will crumple easily will not work. This is inconvenient and impractical. In addition to paper, you need to prepare PVA glue, with which all parts of the gun will be glued together. You can not do without scissors, which should cut cardboard without problems. It will also come in handy with adhesive tape, which can be glued in places where PVA will not hold paper. It is better to work on the table, where all the details will lie neatly and will not wrinkle.
Let's get to work, make a gun barrel

Before you make a paper gun that shoots, you need to carefully plan everything and decide what will fold first and what will finish the job. So, first you need to make the barrel of the gun. To do this, take an A4 sheet. It must be carefully folded into a rectangle on the long side. The sheet is bent so to the end, and then folded in half. All this must be done in small folds. The result should be a gun barrel. It should be removed to the side and proceed to other details.
Making a pistol grip

Next, in order to make a paper gun that shoots, you need to start designing the handle. For these purposes, it is necessary to take a sheet of cardboard of the same size. Fold it should be exactly the same as in the case of the trunk. Only now it is necessary to make it so that it is larger in width. It also needs to be rolled up. After this part is ready, it is connected to the previous one. To do this, two blanks must be straightened. Next, you should carefully place a thin piece of paper on a thicker one and glue it. The lower part, which is larger, is mentally divided into three parts. They must be equal. The next step is to fold the right side to the center. Then you need to bend the left side in the same way. After that, the part is bent again to the center. We can assume that this work has been done. It remains only to cut a small hole, which should be at the base. To do this, you need to use scissors.
Making a trigger

Of the majority of all kinds of paper origami, a shooting pistol is considered one of the most difficult in terms of execution technique. It's not easy, but it's fun. To make the trigger, you will need a new sheet of A4. It must be turned towards you from the short side and begin to fold in small steps. You need to do this exactly to the middle. The rest of the sheet will have to be cut off with scissors, and then folded in half. After that, the future part should be inserted into the cut hole in the trunk. The next step is to thread half a thin blank into the pockets formed on a thick piece of paper. All edges are carefully bent and all corners are aligned. As a result, the outline of the gun should appear. Unnecessary back part can be cut off. Now you can modify the handle a little. To do this, take another sheet of paper and fold it on the short side. Its width should match the handle. When this is done, the last edge must be sealed with tape. The resulting handle can be put on a pistol.
Finishing touch

Finally, one more detail needs to be done. To do this, you need another sheet. On the short side, you need to start bending it in the same thin way as before. The resulting strip must be folded in half and gently bend its right edge to the left. The corner must be exposed. If so, then everything is done correctly. It should be cut. This blank is threaded into the back of the resulting pistol muzzle. Now the edges will quietly go into the pockets of the gun. The question remains, how to make a paper gun that shoots? Now you can do this as well. To implement this idea, it is necessary to thread the rubber band along the muzzle of the gun, which will serve for shooting. By pulling it and pulling the trigger, you can make a real shot. Small balls of paper can be used as cartridges. The work on creating a pistol can be considered finished. To transform such a weapon, it can be painted with any paint. Moreover, they also use a copy of this pistol printed on colored paper. So it will look realistic and look like a real one. The main thing is to choose the right model.

Sometimes you just want to get away from the usual things and do something with your own hands. Paper crafts are not only affordable, because every home has such material, but also spectacular and very interesting.
A paper gun can be a great idea, such creativity may interest both children and adults. Moreover, you can come up with a lot of games and entertainment with the fruits of your labor. There are several ways to make a gun out of paper, among which everyone will find the right one for themselves.
Origami gun
The easiest way to make a 1-sheet gun out of paper is not more difficult. You will spend only a few minutes on it, and if you use thick enough paper, such a craft will delight you and your child for quite some time. There are some easy options.
Fold a square piece of paper in half horizontally, and in half again. Visually divide the strip into two parts, one of which is slightly larger than the other. We bend the smaller part diagonally so that its parts go around the fold line from the outside. We bend the future muzzle in half inward. The gun is ready.

Fold A4 sheet horizontally four times. Fold the resulting strip in half. Diagonally fold the side with a fold inward. The craft is ready!

Shooting paper gun
You can make a pistol that will not only be beautiful, but also shoot. Such entertainment should appeal to children of all ages, although it is worth warning that you can only shoot at inanimate targets, because there are no, but also weapons.
In order to better understand how to make a paper gun that shoots rubber bands, we will illustrate each step. We will need:
When all the materials are prepared, you can get to work.
Lay a sheet of paper horizontally and fold it 4 centimeters. Then, along this fold, wrap the sheet to the end. To secure the part from both ends, wrap with tape and fold the resulting strip in half.

Fold the next sheet of paper in the same way, only the fold width should be narrower than 2.5 centimeters. Also secure this part on both sides with tape and fold in half.
Another sheet must be folded in the same way, secured with tape and folded in half. The width of the fold this time should be 1 centimeter. this way we get three parts of different widths, but the same length.
Take a part 4 centimeters wide and straighten it. Now you need to cross its ends so that the distance between the folds is about 5 centimeters, and they intersect at the bottom point of the central fold. After that, bend the part again in the center so that the bent ends are inside. After that, cut a hole 1.5 centimeters wide and half a centimeter deep on the center line. The handle of the future pistol is ready.

Take a strip 2.5 centimeters wide and thread it through the handle so that the fold of the part is fixed to the top of the handle, and the ends pass through its bent part.
It remains to insert into the cut hole and cut off the excess on top.
The gun is ready. For strength, you can fix the joints with tape.

How to make a gun out of paper, you learned. Now it remains to charge it. Pull the rubber band from the muzzle to the end of the gun so that it rests on the trigger. Now put the mechanism in action by pulling the trigger, and the gun will fire a rubber band.
As a rule, picking up paper, a person plans to draw something on it or fold some figure. Of course, creating a real firearm in this way will not work, but making a kind of toy or an interesting imitation is quite realistic.
Pistol drawing
The easiest way to make a gun out of paper is to simply draw it and cut it out. On the Internet you can find many pictures that you can redraw yourself or just print. You can find detailed diagrams of a particular weapon in order to be able to accurately convey all the details.

Papier mache
This technology allows you to create almost anything, including a gun. To do this, small pieces of paper are moistened in glue, and then the necessary shape is formed from them, in this case, a gun. It will be much easier to create it if you make the base of the case from a strong wire, and glue the paper on top of it.
Shooting paper gun
There is a rather complex assembly of a kind of origami pistol, which can even shoot, but at a very short distance. To create, you need thick enough paper, suitable glue and the right drawing, which can be found on the Internet.


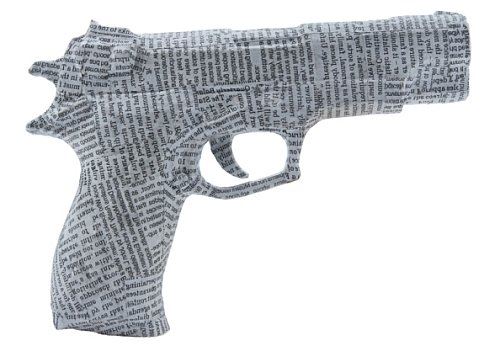
Not so long ago, a new kind of art came into fashion, for which you only need paper, scissors, glue and a printer. It's called papercraft. With it, you can make a figurine of your favorite character from a movie, game or cartoon out of paper. You can create a whole panorama with houses, animals and landscapes. It is also possible to make almost any weapon. All you need is to find a suitable scheme on specialized sites. Thus, it will be possible to create a highly detailed weapon, which in the photo will not be distinguished from the real one.
Of course, making papercraft figurines is not so easy, it will take some time to learn, but a gun made in this way will look almost like a real one. You just need to print the selected scheme on a color printer and glue everything according to the instructions that are usually attached to each model.

Video instruction
All boys are warriors and fighters at heart. And how they like a variety of weapons. Did you know that you can make a wonderful safe toy out of paper yourself? This article is devoted exactly to how to make a paper gun, which can become an alternative to purchased products, and will bring a lot of pleasant minutes to a child, and even to other family members, because making it is a very exciting experience.
The creation of the pistol takes place using the Japanese origami technique, or the method of paper modeling and design. To make such toys, you only need paper, scissors, adhesive tape.
We assemble a simple paper gun in 5 minutes of work
Following the diagram, follow the necessary steps.
- Get your materials ready and start folding paper. We fold two sheets with an accordion to end up with two strips (ideally of different widths). When folding, iron each fold with a fingernail, ruler, cap, coin to give the product hardness. So that the ends of the paper do not diverge, you can completely glue the resulting strips with tape.
- Then carefully fold each paper strip in half.
- The part that is a little wider will be the "handle" of the gun. We make a loop out of it (look at the diagram), which is put on a narrower paper strip.
- The end result is a pistol.
- Calling on fantasy, you can decorate it with inscriptions, stickers, drawings and symbols. And with the help of paper, add such a detail as a sight. At the end, you can find a video that describes the creation of a similar pistol that can shoot.
Another, more complex and realistic model of a pistol, which also knows how to shoot, can be performed by following the proposed instructions.

Materials for its manufacture: Thick paper, pen / pencil / black felt-tip pen, scissors, rubber band for money.
- Focusing on the picture, we draw the outline of the future weapon on paper, having previously folded it (paper) in half.
- Then you need to carefully cut the model along the contour with scissors, and unfold the sheet: we have an image of a pistol in a mirror image.
- With the help of a felt-tip pen or a pen, we paint the gun, adding small details to make our product more believable. We fold the workpiece in half.
- We cut a slot in the upper part of the gun barrel, along which we then press part of the barrel inward. Thus, we get a small groove where bullets can be inserted.
- We cut an incision near the trunk with scissors, where we insert one end of the elastic band, and fix the other end on the other side of the trunk. We hope that the rubber band does not bend the gun, but when released, is able to capture the bullet.
- As a bullet, you can use crumpled paper, paper mugs, fruit seeds and pieces of foam.
We assemble the original model of a pistol from plain paper
As it turned out, making pistols with your own hands is not so difficult. Especially if it's a toy for children. But adults, especially men, also have a weakness for weapons. Therefore, the following example will show how to make a pistol model that will look like a real weapon. This is more difficult than the previous options, and will require much more time, as well as perseverance and accuracy.
To do this, first, it is necessary to determine the model. On the Internet you can find a variety of photos and three-dimensional three-dimensional images. But even if you have meticulously understood the device of any model, it is unlikely that you will be able to draw high-quality diagrams and details for cutting yourself. Therefore, it is better to use a ready-made scan, for example, this one.

Now you need to enlarge the image and transfer it to thick paper or thin cardboard. The most budget option would be to copy the image using tracing paper, or paste the image for cutting onto cardboard using PVA. But if you want the assembly to be easy, and the finished product does not look sloppy, it is better to use the services of a photo salon.
Now that you have finished sheets with a printed scan in your hands, you can start cutting. At this stage of work, do not rush. For cutting, be sure to use a clerical knife and nail scissors to cut out small details. Remember that the more accurately and accurately the details are cut out, the easier it will be for you to assemble the model.
Then, before direct assembly, take a pointed match, toothpick, needle or knitting needle and draw along all the fold lines. Then it will turn out much more accurately.
For gluing, glue-moment is best suited. You can also take PVA, but with carelessness, small parts can get wet, and the glue itself dries for a relatively long time. When gluing, also do not rush. Start by gluing small parts, which will then be glued to larger parts. In order for everything to hold well, fix the glued elements with rubber bands, paper clips and paper clips.
Now let your craft dry for about 6 hours indoors, and then you can proceed to painting. You can paint with acrylic, thick gouache + PVA, car paint. Try, experiment with colors.
Promised videos on the topic of the article
After watching the video, you will learn how to make interesting models of pistols for games. Teach your child this, and he will be able to teach his friends how to make such toys. So your family can start a wonderful tradition of playing with homemade toys.


