Do-it-yourself topiary 8 step by step instructions. Sweet candy topiary: a delicious festive bouquet. The original version of the manufacture of topiary from sisal and fruit
The art of topiary came to us from Ancient Egypt. In those days, the talent to give plants unusual geometric shapes was highly valued. An example of this is such a wonder of the world as the Gardens of Babylon.
Today, the topiary is a small tree made of natural and artificial materials. We will share decor ideas with you and tell you how to make a beautiful tree yourself.


Secrets for Beginners
Having created a tree of happiness, you can both decorate your own home with it and present it as a gift for a wedding, housewarming, anniversary. The dimensions of the product are different, depending on your preferences and range from 15 to 50 cm.
Important! Topiary has an exclusively decorative function. And it depends on your imagination whether you will make a small original tree in the shape of a heart, or unusual models of shells.


The simplest improvised materials for making topiary are as follows:
- pasta;
- money;
- branches;
- coffee beans;
- napkins;
- candies;
- cotton pads.


Advice! A popular option is a money tree. It is made for a gift using small bills. It symbolizes wealth, luck and success in business. Suitable for placement in the kitchen or any other room.
Typically, the money tree is made in mini versions for installation on window sills. Also, such a present can be in a small outdoor pot, which is placed near a coffee table or sofa in the living room.
How to make a do-it-yourself topiary
If you decide to decorate the house yourself, then before you make a composition, consider the design of the main components:
- bases for topiary;
- crowns;
- trunk;
- stands.
Paper, old newspapers, polystyrene foam, polyurethane foam, a children's ball are suitable as a basis. What to do, you decide.
Advice! Experienced craftswomen use foam plastic for figures in the form of letters, numbers, hearts.
To make a trunk simply from strong wire, branches, plastic tubes. When choosing what to make a trunk for a topiary, consider the size of the future product. If this is a small model, use a simple pencil, if it is a floor model, use one even thick branch.
The crown is the part of the craft that will attract the most attention. Suitable paper, polymer clay, beads, buttons, shells.
Depending on the size of the product and the idea, an ordinary flower pot, a toy bucket, a flat wooden board will serve as a stand. Decorate it with fabric, lace, decoupage or paint it with paints. How to do it is up to you.
Advice! An ordinary cup, which you no longer use in everyday life, is perfect for a stand.
Step by step instructions for crafts
For those who are carried away by this wonderful idea, we will tell you how to make a beautiful topiary step by step. Before you start crafting, think carefully about the idea of \u200b\u200bthe future tree and prepare all the necessary materials for the trunk, crown and stand.
When creating your topiary, follow the following sequence:
- prepare the crown. For manufacturing, use improvised materials or specially stocked shells, beads, beads. For a non-standard crown shaped like a number or letter, cut out the desired shape from the foam. Be sure to make a hole for the barrel;
- prepare the stem. Depending on the idea, use branches, sushi sticks, plastic straws. If you plan to make a large floor topiary that you will place in the garden or on the street in a private house, use wooden sticks wrapped with twine or varnished in the desired color. Install the crown on the trunk;
Advice! If the crown is round, just put the base on the trunk. If your topiary has a non-standard look, additionally fix it with glue.
- stand. Use pots or planters. Pre-place the foam in the pot and fill it with a weak cement mortar or alabaster, level and dry. This will serve as a reliable frame for crafts.
Advice! Since novice craftswomen do not always guess with the proportions of the solution, experienced needlewomen advise using the consistency of liquid sour cream - too thick a mass will not fill the space between the pot and the foam.
Such an interesting craft can be easily made with children to decorate the garden or any room in the house.
Simple master classes of topiary
Wonderful trees can be bought in souvenir shops, as well as made by hand. A common topiary model is created from foamiran. Master class on how to make an unusual tree, see the video
Gentle original foamiran topiary.
Make your own bead topiary. The master class includes the following steps:
- preparation of materials. Buy beads, ribbons, twine, barrel wire, pot, plaster, glue. Use tweezers to easily stick the beads to the base;
Advice! Use a regular ball as the basis for the crown or cut out another shape from the foam, for example, a heart. Such a topiary will be an excellent gift for St. Valentine's Day.
- glue the beads to the base;
- for the trunk, take the wire, wrap it with twine or ribbon, bend it as desired;
- insert the crown into the trunk and secure with glue;
- install the second end of the barrel in a previously prepared pot with pieces of foam;
- fill with plaster and leave to dry;
- decorate the stand.
The product is ready. This MK is used by many novice craftswomen.
The tulle topiary looks beautiful. Watch the video master class. You will be told step by step how to make a craft with your own hands.
A few more interesting ideas for tulle topiary.
Interesting do-it-yourself topiary from cotton pads. A step-by-step master class is presented in the video:
For advanced needlewomen, it is interesting to make a beaded topiary with your own hands. With this choice, various wood weaving techniques are used: knotted, French circular, dense oblique, American tourniquet. A detailed master class is offered in the video:
Below are two more works of art - beaded trees.
The easiest option is do-it-yourself pasta topiary. Indeed, in every kitchen there is pasta in the form of shells, horns, spirals. You can decorate the glued pasta on the base with various paints or spray it. The master class, according to the manufacturing principle, is similar to a tree made of beads.
Advice! Crafts from cones, buttons and threads look interesting and creative.
Which crown to choose
Among the common types of crowns, you can choose the option that suits you best. So, the shape of the crown of your topiary can be in the form of:
- hearts;
- flying cups;
- bicycles;
- Christmas trees;
- bird nests;
- ships;
- birdhouses;
- sun;
- apple trees;
- umbrellas;
- shoes;
- roosters;
- fairy houses with nests.
The craft made of beads in the form of a glued nest with birds looks beautiful. For lovers of non-standard solutions in any room or office, a floating cup will look great.
Flying cup idea
A heart-shaped design or a tree with dollars are suitable as a gift. For spring mood, make a fruit tree. For memorable events, build a product in the form of letters or numbers.
Marine crafts decorated with shells, sand and other natural materials look great. Craftswomen like to additionally decorate the crown with a nest of branches, flowers. An interesting option is a vintage burlap topiary decorated with a real small clock. Marshmallow topiary looks festive. If you don’t have enough indoor plants in your house, make a lagurus craft.
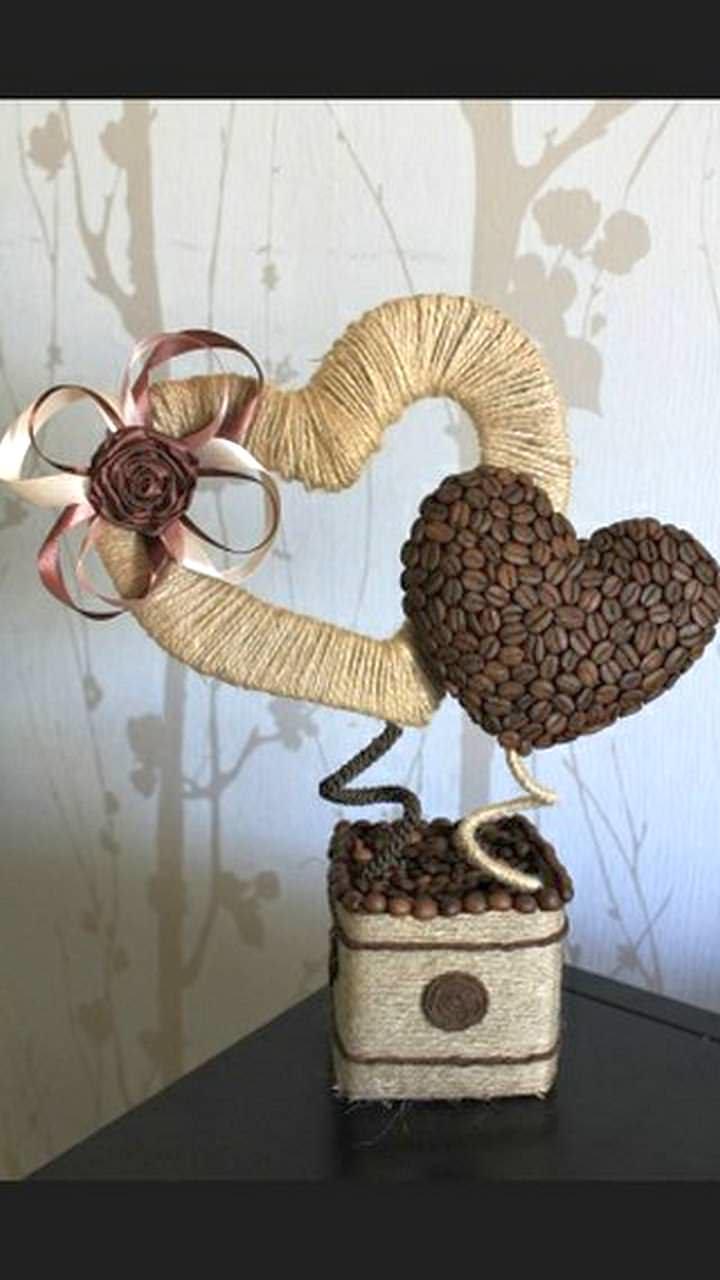
coffee tree


Usually, it is customary to give flowers for the holidays, but now you will hardly surprise anyone with a bouquet. Candy bouquets or topiary are gaining more and more popularity. Topiary made of sweets, lollipops or marmalade is not only tasty and unexpected, but also a beautiful gift that will decorate and diversify any festive table. The article below outlines a master class on creating a topiary from delicious sweets, armed with which everyone can create a candy tree with their own hands without spending a lot of time and nerves on it, but a step-by-step photo and video at the end of the article will help with this.
We study a master class on do-it-yourself candy topiary
For work you will need:- Flower pot
- Gypsum mortar, similar in consistency to sour cream
- Stick under the tree trunk
- Newspaper, woolen threads, foil
- Candies
- Depending on the type of sweets, you will need such fasteners as a hot glue gun, toothpicks, chocolate, caramel, double-sided tape.
- Decorations for the topiary at will, it can be ribbon bows or hearts on a skewer, beads, flowers, rhinestones, sisal, pieces of fabric, etc.
A thick gypsum mortar is laid out in a clay or ceramic flower pot, in the center of which a stick is placed, this will be the trunk of the future candy tree. The stick can be painted with paint, wrapped with satin or floral ribbon, glued with gold or put rhinestones or sparkles on thermal glue. After you need to let the gypsum set, this happens somewhere within half an hour, but the gypsum dries completely only within 24 hours. Further work on the manufacture of candy topiary can be continued with already set gypsum, but donate, of course, not earlier than in a day.

The base for the topiary can be purchased ready-made, usually a foam or piaflor base is sold in specialized stores. If there is no desire to look for a ready-made base, then you can make it yourself. To do this, several sheets of newspaper are crumpled into a dense, heavy ball, which is then tied with woolen thread to secure it. After the base of newspapers is wrapped with thick foil in several layers.

But it is possible that the base can be replaced with a large apple, orange or bun of pastry. In this case, the entire crown of the candy tree will be edible, but do not forget that such a gift will be stored for no more than 2-3 days.
Assembly of candy topiary.As noted above, all further work on assembling the candy tree of happiness depends on the type of candies you have chosen and the base for the topiary.
Option 1.The basis is a newspaper or foam ball, round candies in foil or paper packaging, as in the photo below.
Candies are glued to the glue gun with a tight ring until the entire base is filled. The glue gun can be replaced with double-sided adhesive tape, then the base ball must first be wrapped with a continuous layer of adhesive tape, and then sweets can be glued onto it. This method is convenient not only for its simplicity, but also because the sweets can be easily removed from the wrapper.
Option 2.A newspaper or foam ball is taken as the basis, sweets in candy wrappers are attached to toothpicks with the help of narrow masking tape. And then they stick into the base in rows. This is not only a simple, but also a practical way, the sweets are simply removed from the toothpicks.

In this method, the base is edible, it can be an apple, an orange peeled from the zest, or a bun made from pastry. Chocolate candies without packaging or marmalade are attached to the base with caramel or thick cream in dense rows of rings. Perhaps the most delicious option. The downside of such a sweet tree is its perishability.

Chupa-chups or other lollipops are stuck into the foam base with dense rings. Such lollipops can also be made with your own hands, for example, by melting sugar or wrapping marmalade in cling film, and then strung on a stick.

There are some easy ways to decorate sweet topiary:
- Glue rhinestones, beads, beads on candy packaging
- String satin bows, paper or plastic hearts on skewers or toothpicks and stick into the base
- Wrap in a circle with rare beads
- Lay out the top layer of gypsum mortar with glass beads, shells, beads, candies
- Decorate the pot with a cloth, tying it with ribbons or applying a pattern with acrylic paints
Video selection on the topic of the article
As you can see, there are many options for a European candy tree, and to help you make a choice, we bring to your attention some interesting videos on how to make a do-it-yourself candy or marmalade topiary.
What do you think can be common between a plant and sweets? Let's say that the first character will act as the shell, and the second will be the content. As a result, you can get a candy topiary - an original souvenir in the form of a "sweet" tree. What is this miracle? Is it possible to do it from sweets with your own hands? Useful tips and tricks will help you make such an unusual little thing.
What is a topiary?
According to various encyclopedias and reference books, this is the first name given to green plants decorating the street interior. Topiaries are shrubs and trees skillfully crafted in the form of decorative figures. The history of their origin is rooted in the distant past - during the existence of the Roman Empire. Later, the newfangled tradition spread to Europe. At the same time, decor elements began to decorate with their bizarre forms not only gardens, alleys and parks, but also the interior decoration of the premises. Later, original man-made interior items, similar in shape to a round or conical shape, were also called topiaries. Creating green sculptures is a whole art. At the same time, the implementation of ideas and plans requires a certain amount of time and special patience. To grow a large topiary, a professional gardener will need more than one year. Consider what methods and methods are used to form such living plantations.

Topiary types
Forming a plant is quite difficult. You can create the required crown in the classical way - by cutting as new branches and shoots appear in the plant. Such a rather laborious process can be greatly facilitated by installing a special form during planting. Adhering to it, cutting the plant is easier and easier. This is how simple geometric shapes are created - a square, a ball, a cone. There is another, less laborious, way to get topiary - frame. The main difference and advantage from the previous method is mobility. If classical green sculptures are usually stationary, then those grown on special frames can be easily moved around the site to the right place according to the changed composition. This is due to the fact that the topiary is grown according to a new method directly inside the frame on the located soil and irrigation systems. Usually, for the formation of such landscape sculptures, products that braid their shoots around an artificial base are used in a few weeks. And if, in addition to greenery, the composition consists of flowers, then the result is amazing.
Mini-topiary - original interior decoration
As you can see, to get a living green sculpture of a bizarre shape, it takes time. In order not to wait, one of the most impatient craftsmen decided to create a man-made image of a tree himself. So there were original modern decorations for the interiors of the premises. The content of indoor souvenir mini-plants has become downright unpredictable. Everything that comes to hand is used: flowers, paper, natural material (cones, acorns, needles, etc.), napkins, various seeds and fruits. One of the most useful and enjoyable is candy topiary. The main thing when creating an impromptu souvenir is to use all your imagination and fantasy. Consider several options for making candy topiary. Photos clearly demonstrate the infinity of options for making sweet surprises. Try and make an original gift with your own hands, for example, on March 8 or
What should be the basis?
Such sweet compositions are very similar to candy bouquets. Topiaries with their external richness hide the internal structure of the structure. What does the base consist of, and how can various objects, including sweets, be strengthened on it? Firstly, you can purchase the necessary products in stores specializing in the sale of materials for applied arts. The most commonly used shapes for making candy topiary are ball and cone. The necessary foam blanks and, as a rule, can always be found in assortment in such needlework shops. If it is not possible to purchase a ready-made base, you can try to make it yourself. Some craftswomen adapt suitable items for this purpose, such as, for example, an old Christmas tree toy or a ball. Consider the option of making a newspaper ball, from which you can then make a candy topiary. The master class is presented in the form of instructions with useful tips.

Making a paper ball from newspapers
Most importantly, the base should be fairly light. After all, after decorating with sweets, such a home-made crown will need to be firmly installed on an improvised trunk of a souvenir tree. Therefore, the most suitable material in the manufacture of the base for the topiary is thin paper. Take an ordinary newspaper and sewing threads. Tear the paper material into small pieces about half the size of a notebook sheet or slightly smaller. To begin with, crumple a dense ball with a diameter of 3-4 cm from a small piece. Then start applying other newspaper blanks to it, forming a ball. The number of layers will directly depend on the desired size of the base. When the ball is ready, wrap it with thread, moving in different directions. If the future candy topiary is planned to be made hanging, fasten it with newspapers between the layers when layering. And in the case of making a tree souvenir, insert a stick at the initial stage into the middle of the ball, which will then be the trunk. For greater strength, you can lubricate the workpiece with a thin layer of PVA glue.

How to fix the trunk of a topiary in a pot?
A homemade tree usually "grows" in some small container. As a rule, a small pot or bucket is used for this. And so that during further work it would be more convenient to decorate the topiary by attaching various objects to the base, it is advisable to immediately firmly install the trunk. But before that, do not forget to decorate the tube or stick with decorative elements: wrap it with colored paper or bright ribbons to match the entire souvenir. Then pour a thick freshly diluted mixture of gypsum or alabaster into the pot, filling the container with about 4/5 of the total volume. Until the mass is completely frozen, insert the topiary stem into the middle of the pot to a depth of about 5-6 cm. Wait until the mixture has completely hardened, holding the round base in an upright position. You can also work in a slightly different way. In the finished pot with a pre-filled mass, drill a thin hole equal in diameter to the tree trunk. Then the product will be semi-collapsible.

Master class (MK) "Candy Topiary"
Consider how you can fix sweets based on a souvenir. To get an elegant product, use colored or shiny paper for decoration. Cut out 6x6 cm squares from it. They will act as a decorative “fur coat” for sweets. Paper blanks can also be round or any other shape. You can make a very original topiary of sweets with your own hands in the form of a bouquet. First, wrap each candy (preferably round) in shiny paper. Then, from corrugated paper, cut blanks in the form of petals. Wrap them around the candies to create mini buds. Immediately insert one end of the toothpick into the sweet. Fasten the other free side of the sharp stick into the round base of the topiary. With a simple design, put sweets in paper blanks rolled up in the shape of a funnel, and then fix them on the crown of a souvenir tree. The easiest way to make crafts is to use ready-made lollipops. They stick into the crown with their sticks and, if desired, are decorated with ribbons and other decorative elements.

Pot decoration
The final step in creating a do-it-yourself topiary is the design of the container in which the crown is fixed. When filling the pot with gypsum mortar, it was noted that it was necessary to fill the mass not to the brim. For what purposes is it provided? Of course, you can comply with this condition at will. Beginning craftswomen, when creating their first souvenir, mainly pay attention to decorating the crown of a tree. The easiest option is to fill the space with rolled up cotton balls. Improvised green grass from cut paper of the corresponding color will very refresh the craft. Free space in a pot can be arranged in a very original way in a slightly different way. Lay a thin layer of clean paper or napkins on top of the plaster, and then sprinkle bright candies or other goodies on top. It is also possible to provide for fixing several sharp sticks in it at the stage of pouring the hardening mixture into the pot. When decorating, sweets wrapped in paper are additionally fixed on them.

Features of using sweet topiary
Recently, it has become very fashionable not only to present home-made sweet trees as a gift, but also to decorate the table with them when serving. Especially such items when organizing banquets are admired by children. Indeed, immediately at first glance it is impossible to guess that an unusual object is an original stand for sweets. Therefore, such topiaries are usually used several times. Each new candy filling option can be completely different in its content, both internal (in a pot) and external (crown). When preparing children's holidays, involve the kids in creating such souvenirs. They are happy to prepare a future treat for their guests. As you can see, it is quite simple to make a candy topiary. The master class described in this article will surely become the basis for the implementation of new ideas and ideas. Create magnificent crafts that please the eye and amaze those around you!
Photos, which can be considered a small advertisement, show how beautiful and perfect the topiary is. A small souvenir tree will complement one interior, the second will transform, the third will make it brighter. And you can do these transformations with your own hands. Numerous photo and video tutorials show in detail how to create a new image from the most ordinary things. How to make a topiary yourself, what is needed for this, and what subtleties should be taken into account?
This master class is, let's say, a universal recipe. It doesn’t matter what kind of topiary you are going to make, this master class will describe in detail each stage and its variations.

The first thing that usually starts work is the search for materials. Craftswomen who do more than one craft with their own hands are used to stocks. To make stocks means to purchase not one blank, but five at once. So, do not pass by beautiful chestnuts, rowan twigs, dried flowers. Bring everything home to your handmade treasury.
Similarly, with a possible decor - shreds of fabric, beads, buttons, rhinestones, ribbons, threads. All this can become the basis for decorations that you make with your own hands.

Tips for beginners:
- Drop photos of your favorite topiaries in a separate folder, save the desired master class, step by step instructions.
- Sort everything into boxes: threads in one, natural materials in another, fabric in a third, and so on.
- Check out craft shops. There you can find various blanks that will facilitate your work. And yes, they are inexpensive.
If you have already got at least one successful topiary, think about the fact that the process is worth filming. It can be a photo or a video, but such material may be useful to you again, and you can place it on special resources and, by the way, sometimes they pay for it.
Fragrant dried herb topiary (MK video)
We make topiary: step by step instructions
So, next you need to make directly the elements of the topiary. They usually start with the basics. The base is what the crown will rest on. And the crown in the case of a souvenir tree is its main part. Therefore, the base ball must be made strong, reliable, solid. You can buy a ready-made foam part, this blank will fit any tree.

But you can make a ball with your own hands:
- Method one. Newspapers, thread, glue. You need to make a wad of newspapers that is dense and firm. It should be impregnated with glue and tied well with threads until a ball is obtained.
- Second way. Ball, polyurethane foam, knife. Inflate the ball, but not much, a little less than the size that the base should have. Then you put the ball on the balloon with foam, and so fill it up. The foam swells, so fill up a little. You can do this at night in order to find a noticeably enlarged ball in the morning. Next, just remember how you cut the peel from an orange with your own hands. So you need to do it here, until you get the base ball you need.
- Third way. Papier mache. You probably remember this step-by-step instruction from childhood. Find the object whose shape you are going to repeat, and glue it with paper or napkins in several layers. Then you cut it, take out the object, fasten the figure.
The latter method is more often used if the basis for the crown is not a ball, but a heart.
Do-it-yourself base ball for topiary (video)
How to make a do-it-yourself topiary
The crown has to stand on something. At the tree, this mission is performed by the trunk, and the souvenir tree follows the same path. Different workshops offer different options. Some say that only branches can be a beautiful, natural trunk. Others use both wire and aluminum cable for this purpose.

If you examine in detail any photo master class, you will see that the most unexpected things are used as a trunk. For example, sushi sticks.
To create a trunk, you may need:
- Cardboard rods from rolls of paper towels;
- Pencils;
- Drumsticks;
- Wine corks;
- Figured door handles.

Yes, it is the handles that can become a trunk - if you remove all unnecessary from them, leaving only an elegant vertical part, this may well become a trunk for some elegant money tree.
Basically, what serves as the basis for the trunk has to be decorated - painted, wrapped, glued, etc.
Topiary barrel: decorating correctly (video master class)
How to make a pot with your own hands
The tree usually stands in a pot. The easiest way is to buy a new one, which you don’t have to decorate. But it happens that you look at the photo, and you want to do everything according to this photo.

For example, from a simple penny plastic cup, you can make an exquisite pot with your own hands.
The master class is very simple:
- Spray paint cup the color you want;
- The vase can be textured- sparkles, salt, cereals, all this can change the glass, making it embossed;
- Textile decor is appropriate- it can be a satin ribbon, matching in color or with a pot, or with a crown, as well as braid, lace, twine, twine;
You can attach a small photo to the pot with a decorative clip, for example, where you are with your loved one, or with the one to whom this tree is intended as a gift.
Pot for topiary (video)
Step-by-step instruction: creating shapes
A souvenir tree may have an unusual shape. To create various figures, more than one tricky trick is used. You can do unusual things with your own hands, and few will guess how you did it at all.
To construct figures you need:
- Use of flexible materials;
- Sketch of the future composition;
- An elegant decor that hides the entire mechanism of the product.

The construction of figures is usually discussed when the production of garden sculptures is meant. Such unusual landscaping is captured in numerous photos. For figures, certain manipulations with knitting or carpentry wire are necessary. You will get topiary sculptures, whole compositions of green figures.
Making them is not so easy, but modern devices have facilitated the process. So today, the manufacture of figures is simplified by the acquisition of special figured nets or metal frames. They are put on the plant, it is, of course, thus limited in growth. When the shoots make their way through the net, they need to be cut.
So you can get some graceful figures on your site. For beginners, there is advice - take simpler frames for the first time, do not try to build several figures at once, this requires care and some skill.
Do-it-yourself topiary: design mistakes (video)
A souvenir tree, a tree with an ideally shaped crown - numerous master classes suggest how to create such beauty yourself. If you live in an apartment, do not have your own plot, then start bringing your dream closer step by step. First, a figured tree at home, on a table, and then it can be scaled in its natural environment.
Happy ideas and their implementation!
Do-it-yourself topiary examples (photo)


March 15th, 2015  ale4ka
Candy topiary is a handmade sweet bouquet of flowers and an unusual tree in one design! A sophisticated gift for real gourmets, inspiring a desire to eat it, you can safely present it on March 8, on your birthday, wedding or any other holiday. Making such a topiary with your own hands is quite simple - you need to arm yourself with the necessary material and make a little effort.
Below you will find a detailed master class on creating candy topiary.

So, we need:
- pot (planter without a hole in the bottom, glass or bucket),
- pieces of foam,
- building gypsum (alabaster),
- barbecue skewers,
- twine or ribbon for decorating the trunk,
- floral oasis (can be replaced with polystyrene, polyurethane foam or newspapers),
- floral corrugated paper green and pink,
- toothpicks,
- food film,
- thin tape,
- tape,
- sewing thread,
- organza,
- various beads and other decor for decoration,
- tools: scissors, hot glue, knife, stapler,
- and of course, the most important thing - sweets.
Creating a frame with your own hands, fixing it in a pot
We will use wooden barbecue skewers as a trunk. Put together 8 sticks, tightly wrap them with twine and fix its ends with hot glue. It is not necessary to wrap the workpiece completely; in the finished product, the ends of the barrel will be invisible.

From a piece of a floral oasis (in this master class we use it, but if you wish, you can use foam or crumpled newspapers) with a knife and your hands we form a bar, cut off the corners and bring it closer to the shape of a ball. There is no need to achieve an ideal, inaccuracies will still not be noticeable under the frame of the crown. Then we insert the barrel into the base ball from the oasis.

Now fix the frame in the pot. We place the barrel in a pot, fill the space between the walls and the stick with pieces of foam. Then we fill it all with a pre-prepared solution of alabaster in density resembling thick sour cream. We set aside the base for the topiary for a couple of hours until it dries.

Candy preparation
In order for the topiary to remain intact and continue to delight us, even after the destruction of the sweet filling, we will not fix the sweets directly on the toothpicks, but first we will wrap them in cling film. To do this, we bend the ears and wrap the candy with a film. We wind the collected film on a toothpick and fix it with tape. In this way, the sweets will be removed without harming the entire composition.

Flower making and assembly
sepals we make it from green corrugated paper, for this we cut the paper into strips, and then the strips into squares with sides of 6 cm. On the one hand, we cut out the cloves, which we then twist, as shown in the photo:

Rose petals you can do it separately, but in this master class I prepared a ribbon of petals. We cut out strips from corrugated paper - 7 cm wide, then fold the strips with accordions - 5 cm wide. And then cut out the petal as shown in the photo:

We give the petals a shape. First, stretch the top edge of the tape, and then twist the corners with a toothpick. After that, in each petal we make a recess for sweets, also stretching the paper with our own hands (see photo):

Petals for the flower core we do it separately, in the same way we cut out small rectangles, give them a shape, stretch and twist the corners. The result should be two types of petals as shown in the photo:

Collecting rose. We put the candy on a toothpick, a kind of “chupa-chups”, into a narrow petal for the core, then we put it on and wrap it with a wider petal. Attach with a drop of glue. Then we wrap the resulting bud with a ribbon of their petals, sometimes fixing the structure with glue, but try to keep the glue as small as possible so as not to weigh down the flowers. We wrap the base of the flower with a thread. Next, glue the sepals to the base and wrap the resulting stem with tape (see photo). We love the finished flower. We make the required number of roses.

We make organza fungi. We cut out the squares, I got them 12x12 cm, fold the squares into triangles (so that the corners do not slightly coincide), then we fold the triangles into an accordion in 3 additions (see photo). We make as many pounds as possible.

Collecting topiary. Surely the base for the tree has dried out well during this time. Now we have to stick the oasis with roses. We leave enough space between them for greenery.

Finishing touch (decoration)
There is very little left: we fill the gaps between the roses with small pounds, we also mask the “soil” in the pot with organza. We decorate the finished product with beads (see photo):

The master class has come to an end. Here is such a tender and sweet tree in the end we got it! It is made by hand, and this is the most valuable thing in every gift, and any sweet tooth will be happy with such a gift.


