Beautiful handmade paper butterflies. How to cut a butterfly out of paper: several ways for every taste
No wonder handicrafts are highly valued, especially if they can be used in everyday life. Sometimes the ability to craft from paper is very helpful when you need to make an original postcard, decorate the interior of a room, a gift, decorate a stage for a performance, etc. In our article, we will talk about several ways to make a butterfly out of paper. By spending time doing this activity, you instill a sense of aesthetics and at the same time develop fine motor skills in the brain.
Content:
Butterfly made of paper - origami
Crafts made using the origami technique always look advantageous, and, importantly, they are usually made without the use of glue or tape. Origami paper butterflies fit beautifully into bouquets of flowers, gift wrappings, and interiors of rooms.
Making a butterfly is not difficult if you have 20 minutes of free time, a double-sided sheet of paper of any color, it is desirable that it be square and its dimensions are from 7 to 9 cm.

Using the diagram and the following tips, you can easily implement your plan:
- Take the paper and fold it in half, first lengthwise, unfold, then crosswise and unfold again.
- Make lines by connecting diagonally opposite corners and unfold again.
- Make a triangular shape out of the sheet by inserting a border on the right and left sides, following the fold lines made in the previous paragraphs.
- Find the bottom corners in the workpiece. They will need to be bent up to make oblique folds.
- Straighten the figure, and bend the top. The highest point of the folded corner should protrude slightly beyond the extreme outlines of the workpiece. Now in this position, the future butterfly needs to be fixed.
- Fold the workpiece in half across. End of work.
Advice! Do not press too hard on the paper when folded. Otherwise, the butterfly will not work with a beautiful volume.
Paper butterflies on the wall

The decor with the help of butterflies turns out to be cheerful, lively, creating a joyful mood. For the manufacture of colorful insects, we may need different materials. For example, you can decorate a wall with a butterfly made from a colored magazine.

Do the following:
- Take a sheet from a magazine and fold it in half.
- Draw a triangle so that one of its sides falls on the fold line.
- Cut out and unfold. You should get a rhombus.
- From the same sheet (if there is enough space), cut out the second rhombus, only slightly larger than the previous one.
- Make an accordion out of the two resulting figures (start from the center), and then grease a little with glue to fix it.
- Connect the two rhombuses also with glue.
- Pull a little on the harmonica with your fingers so that the wings are slightly spread.
- From a thin wire or a strip of paper, make antennae, wrap them at the ends and attach to the center.
- End of work. Butterfly is ready.

In the same way, you can make moths from colored paper, which can delight the eye of a baby in a crib, be an ornament to any postcard or even a festive table.

Corrugated Paper Butterflies
The advantages of corrugated paper were appreciated back in the USSR. Now its popularity is still high, as crafts from it are durable, beautiful, and it is convenient to work with it.
Corrugated paper butterflies are made very quickly. To do this, prepare:
- different colors of corrugated paper;
- thread with a needle;
- glue;
- scissors;
- ruler;
- simple pencil.

Step-by-step algorithm for making butterflies:

Beautiful paper butterflies
Whatever the butterfly is made of, it will still be beautiful. Paper butterflies look more natural, because the lightness inherent in these flying representatives of the fauna is respected. Therefore, needlewomen know several options for creating such unusual decor items.
colored crafts
In order to make an ordinary butterfly, one side of which you will stick to the surface, you just need to take one-sided colored paper, fold the sheet in half, apply the contours of one side of the butterfly so that the fold line falls into the middle of the future craft, cut and unfold. You can draw completely different butterflies, with different wing shapes, sizes, etc.

Butterflies made from a newspaper or magazine look very beautiful and stylish. They can even be opened with clear varnish.

Colored cardboard also looks great for this kind of craft. The image is very clear and more or less solid.

Openwork butterflies
To create openwork butterflies, cardboard or thick paper is usually used. It folds in half and the torso (thickened) and wings are drawn. A pattern is made on the wings, which is then cut out. Cardboard can be of different colors.


It should be taken into account that when cutting out, you should take a sharp knife, and also know that the unnecessary pieces in the pattern on the wings are first removed, and only then the entire contour is cut out.

Multilayer bulk
To create a three-dimensional insect, take any material: colored paper, cardboard, newspapers, magazines, music books, etc., draw and cut out several butterfly outlines of different sizes. And then glue them and lift the wings as you like.

Multi-layer butterflies made of openwork material and plain paper look very interesting.

A beautiful butterfly is obtained in the following way:
- Take any paper and cut out 2 rectangles from it. One should be more, the other less. This is done in order to make wings for our butterfly.
- Fold their corners diagonally on one side and the other.
- Bend the sheet inward along the marked diagonals 2 times. A triangle should come out, one larger, the other smaller.
- Fold the material inward on the left and right. Focus on photo 3.
- With a simple pencil on these geometric shapes, draw the wings as you like.
- Since the large wings will be from below, the pattern should be located at the edges, and on small ones you can make squiggles over the entire surface.
- Cut out the intended, put one wings into the others and fix with glue.
- Draw and cut out the butterfly's body and antennae. Glue it all in the middle.
- Spread a little and lift the upper wings. It turned out a voluminous openwork butterfly.


Video instructions
Our videos will help you quickly navigate and make any paper butterfly.
Origami butterfly:
Corrugated butterflies:
Openwork butterflies:
Helpful Hints
Butterfly with your own hands. Clay butterfly.

You will need:
Cardboard or thick paper
Pencil (marker)
Scissors
Aluminium foil
Plastic bag
Clay and papier-mâché
Knife and stationery knife
1. It is worth noting that butterflies with thin wings are much more difficult to make than those with rounded ones. Prepare cardboard or thick paper to draw the base of your future butterfly on it.
2. Now cut out the butterfly along the outline and bend its wings up a little.
3. Prepare aluminum foil and make a butterfly body.


4. To attach wings to the body of a butterfly, use a thin strip of tape.
5. Turn the butterfly over and place it on the plastic bag. Get your clay and papier mache ready and start spreading them evenly on one side of the butterfly. You can use a knife to help.


7. Clay must dry. Since the layer of clay is quite thin, it will dry quickly. An additional heat source will speed up the drying process.


8. After the clay has dried, you can begin to apply a thin layer on the other side of the butterfly. Then repeat steps 6 and 7.
9. After drying, you need to remove excess glue around the edges. You can use a utility knife for this. With sandpaper, you can remove some of the bumps and edges of the wings.


10. You can paint a butterfly. Acrylic paints will help, but pencils and felt-tip pens will also work.
* For more resemblance to a real butterfly, you can add antennae from threads.
How to make a butterfly for a bouquet with your own hands

Such a butterfly can be made to decorate a flower bouquet.
You will need:
glossy magazine
Scissors

1. Find a bright pattern in a glossy magazine and cut out 2 squares from the page with such a pattern: one 12x12 cm, the other 8x8 cm.
2. Now each square needs to be folded with an accordion.
3. Poke a hole in the middle of each accordion with an awl or hole punch.
4. Get your skewers and beads ready. Start by putting one bead with a small hole tightly on a skewer, after which you need to insert a large accordion, then a small one, then 4 more beads with a large hole.
From below, you need to fix the structure with a paper tape, on which you first need to apply glue. Next wrap the ribbon around the skewer.
5. It remains only to insert the butterfly into the bouquet.
Butterflies on the wall with your own hands


DIY paper butterflies

You will need:
Floral wrapping paper (preferably fiber-based)
Scissors


Volumetric paper butterflies

You will need:
Old coffee filter (can be replaced with paper)
Acrylic paints
Scissors
Pin
Jewelry to taste

This simple but very original butterfly is made using a coffee filter. Of course, you can replace this material with thick paper, for example.
The filter or thick paper can be dyed and then cut to look like butterfly wings.
Pinch the media down the middle with a paperclip and allow the paper to dry.
DIY wall decor with butterflies

You will need:
Styrofoam sheet
acrylic paint
Spray white acrylic paint
wide brush
Stationery knife
1. Draw a butterfly on the foam sheet with a pen.

2. Using a clerical knife, cut along the contour of the butterfly.


3. Paint one half of the butterfly with any acrylic paint you like. Remember that Styrofoam is highly absorbent, which means you will need to apply several coats of paint.

4. Let the paint dry and then spray white paint on top.

5. Apply some glue to the back of the butterfly, select the spot on the wall you want to decorate and glue the butterfly to it.

* To make the composition interesting, prepare a few of these butterflies.
How to make paper butterflies. Composition.

You will need:
blank canvas
acrylic paint
Paper for watercolors
Watercolor paints
Scissors or a special butterfly-shaped hole punch
Double-sided tape

1. Paint your canvas with acrylic paint.

2. Get your paper ready and start applying paint. You can safely use several colors to make the butterfly colorful in the end. It is not necessary to draw any specific shapes, just multi-colored spots.

3. Leave the paper to dry overnight.
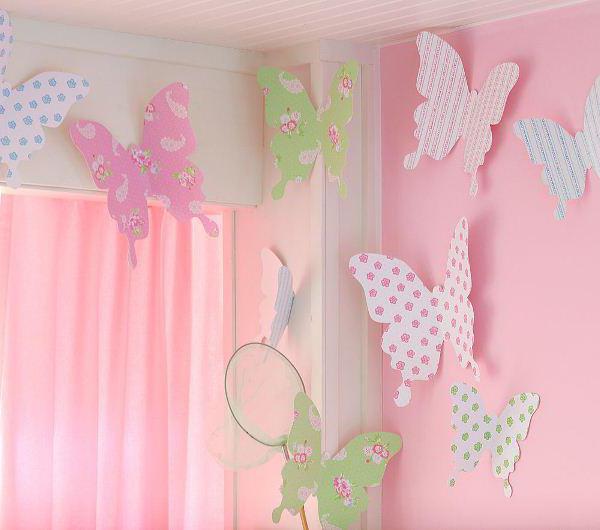
Such charming bright and cheerful butterflies can decorate a children's room.
You will need:
colored paper
Double-sided tape
Scissors
1. Prepare 6 sheets of paper of different colors.

Take a close look at the picture:
A - sheet for the upper wing of a butterfly
B - sheet for lower wing
C - antenna paper
D - paper for connecting the wings.
You can also cut out a small butterfly body, then glue it to the junction of the wings.
2. Take a piece of paper of a suitable size for you, and draw one wing of a butterfly.
3. Cut out the wing and start folding it like an accordion.

4. Repeat steps 2 and 3 with another sheet of paper, and then glue both wings together.
5. Cut out a small oval from paper - this will be the butterfly's body. Draw eyes and a smile on the body.

6. Cut out the antennas and glue them to the body, which in turn needs to be glued to the wings.
7. With the help of double-sided tape, you can attach the butterfly anywhere. Just cut off a small piece of tape and stick it to the butterfly. And use the other side to stick it to the wall.
Anyone who has ever made repairs wants to add personality to the finished interior and bring in some original idea. And vice versa, when you do not intend to make repairs in the near future, but you want to change something in the interior. In both cases, decor with butterflies on the wall will help. You can create such a decoration with your own hands. This will help ensure that all family members will be carried away by an interesting creative process.
Preparation for work
Such a design decision as the use of butterflies for interior decoration has become one of the popular trends in modern society. These decorative elements add an atmosphere of lightness and romance. It is not difficult to find butterfly patterns on the Internet. from paper for decorating the interior, so you can safely experiment and take on their manufacture.
Before starting work, you should clearly define the following actions:

Do not take on the creation of butterflies intricate shapes. This will only create additional difficulties, but it will not greatly affect the final result. In addition to the fact that do-it-yourself butterfly stencil templates for decor can be downloaded on the Internet, you can also make them yourself. To do this, you need to have a fantasy elementary skills of the artist.
Paper butterfly making
 The easiest and cheapest way to make moths is paper cutting. They can be made in any shape and color. Showing imagination, even beginners will create a beautiful decoration and rightfully be proud of it.
Absolutely any material is suitable for making paper crafts (magazines, newspapers, colored paper, etc.). Butterflies made from old glossy magazines will look beautiful. They will turn out bright, multi-colored and will decorate the wall of your house or apartment in an original way.
If you do not want to bother with making templates, then you can simply download and print ready-made ones. After that, you just have to carefully cut them out. Ready-made butterflies are hung on the wall in a predetermined order and, thereby, enliven it.
Cardboard moths
 It is much more difficult to make a butterfly out of cardboard than out of paper. The advantage of this material is the ability to create more complex and bizarre shapes. Cardboard moths are easy to change shape. It is enough to moisten them with water and fix them with a load. After drying, the workpiece will have the desired shape.
Such butterflies are best placed on the wall in flocks flying from one end to the other. A heart made of moths or a large insect made of small details will also look beautiful. Before placing on the wall, the future pattern should be applied with a pencil, and then ready-made moths should be attached to it.
Vinyl and plastic products
 Butterfly figurines for decorating a room can even be made from vinyl. Surely everyone has old collections of records that no one needs and only take up space. Butterflies will help give them another chance to be useful.
For manufacturing, we take a moth template and apply it to the plate. Draw the outline with chalk or a piece of soap. To cut a butterfly out of a plate, you need to make its material more pliable. To do this, put the vinyl record in the oven. After a few minutes, a moth can be cut out of it. If the process is delayed and the plate has cooled down, then repeat the heating and finish the job. After cutting, clean the edges of the workpiece with sandpaper.
Vinyl moths can be given an interesting and bizarre shape. To do this, bend them until the vinyl has cooled down. After cooling, the butterflies will retain their shape and look great on the wall.
Attach such products with double-sided tape or silicone glue.
Another easy way to make a moth is to cut it out of plastic. For work, take the middle part of a plastic bottle and decorative elements. Using a stencil and a marker, transfer the image to the plastic. The workpiece is cut and painted in a bright color. You can add wire antennae to the finished butterfly and decorate with beads or rhinestones.
Crafts from fabric and metal
 Moths made of cloth perfect for walls with liquid wallpaper And. To make such butterflies, an image is applied to the fabric and cut out. Attach finished insects with glue. To add volume to the composition, use a thin cloth dipped in soapy water. The moth is given the desired shape and dried. Butterflies made of fabric give the interior lightness and warmth.
The absolute opposite are moths made from tin cans. It will take a lot of effort and patience to give the desired shape to the workpiece. Cut out figures are painted with golden spray paint and give them the desired pattern. Such moths will perfectly complement the interior of the men's room..
Butterflies in the form of a picture
One of the most striking ways to decorate the interior with moths is to place them in the form of a picture. To make, follow a few simple steps:

glowing moths
To create an effect glow we will use phosphor paint.
Place a drawing on the wall next to the light source. Then glue the templates to the wall and apply paint. After drying, we remove the templates and admire the beautiful moths.
To enhance the effect of the glow, the wings can be circled with blue paint.
Ways to mount products on the wall
There are many options for attaching finished products to the wall. Of these, the following are distinguished:

When attaching cardboard figures, it is worth considering their large weight.
It doesn’t matter which of the described options you choose, the main thing is that the figures made for decor will add uniqueness and emphasize your individuality.
Attention, only TODAY!
Butterflies are, without a doubt, the most beautiful insect on planet Earth. Agree that butterflies have the most unusual colors (more precisely, some representatives of a large family of butterflies). Thanks to the magnificent color, images of butterflies are used both on fabrics (to reproduce unusual prints), and for the design of a children's room, and for decorating all kinds of accessories. You can make a beautiful insect from different materials. For example, from leather, fabric, even metal. But, probably, the most familiar material for butterfly crafts is paper. We offer you to make a butterfly yourself from plain paper using the Japanese origami method.
- So, for crafts, you can use plain white paper or colored paper.
You can choose the size for the craft yourself. We propose to make a butterfly out of A4 paper. Let's prepare the sheet.
To make a beautiful paper butterfly with your own hands, we need a square. You can get this figure in a simple way. It is enough to connect the edges of the paper so that a regular triangle is obtained. We cut off the excess piece of paper using scissors.

We have a square, one diagonal of which has a fold.

For further work, we need to bend the square along another diagonal. By the way, in order for the folds to be “clear” and even, you can walk along the place of the fold with a ruler.

Then fold the square in half again on each side. It should turn out as shown in the photo.

We fold the square so that we get a double triangle.

We turn the corners of one formed triangle and bend to the top.

Flip the triangle upside down. Then we bend the top of the triangle to the base so that the corner sticks out a little (this is the head of a butterfly).

Bend the butterfly in half in the center.

We bend the wings, holding the butterfly by the "torso".

That's all. Our paper butterfly is ready.

A butterfly made of paper can be left white (there is also such a type of butterfly) or painted as you wish. By changing the size of the side of the square, you can make small butterflies. You can use the resulting butterflies to decorate the interior of a children's room.

The final look of the craft. Photo 1.

The final look of the craft. Photo 2.

The final look of the craft. Photo 3.

The final look of the craft. Photo 4.
Decorations for various rooms, made with your own hands, can emphasize the individuality of the owners of the house. At the same time, you can give style and showiness to the interior. Various motives are used for this. Various decorative butterflies harmoniously fit into the interior of the bedroom or children's room. Having shown imagination and creativity, you can create various wall decorations for such a motif.
To make decor in the form of butterflies yourself, you do not need special knowledge or skills. Therefore, almost everyone can bring gentle beauty to the design of the room.
General principles
There are many ways to transform an existing interior. Butterflies are associated with summer and youth. They carelessly flutter from flower to flower. They are light and beautiful creatures. It is not surprising that they can decorate a variety of interiors, adding style and grace to the design.
Decorative butterfly stickers sold in specialized stores. However, it is much more interesting to create compositions with such motifs on your own. In this case, you can show imagination. Butterflies are applied to walls, ceilings and other interior elements with paint or their three-dimensional figures are created.
You don't have to be good at drawing. Templates can be found in various sources and printed on a printer. You can create a decorative panel on one or all walls, the ceiling in the room. There are many approaches to creating butterflies from different materials.
Where to begin?
Any decorative decorations should fit into the general style of the interior. Butterflies can be made from various materials. The overall impression of the panel depends on their choice. Moth figurines can be made of hard, durable materials, such as cardboard. They will keep their shape well, allowing you to create clear pictures. Such types of jewelry are considered the most durable.
If you use light paper or even film, corrugated paper, butterfly figures will be light and delicate. If you fasten them only in the center, this will allow the wings of the moths to flutter from the slightest breath of wind. Such a composition will be incredibly light and airy.
The color scheme of the room must be taken into account when choosing the colors of the decor material. It will depend on this whether the butterflies will harmoniously fit into the existing interior. Each moth must be clearly visible. Therefore, it is better to give preference to contrasting shades.
Decor configuration
making decorative butterflies on the wall, you should take into account a number of tips from professional designers. First of all, they recommend making figures of moths of different sizes. This will bring some dynamism to the created panel.
It is better if the wings are not mirror identical. In the manufacture of figures, one should be guided only by the reception of horizontal symmetry. The top and bottom wings are best made in different sizes.

When choosing a blank for a butterfly from various sources, you should not give preference to intricate figures that have a large number of details. Cutting ruffles will be extremely inconvenient, and the decorative effect may not meet expectations. One composition will require many butterflies. Therefore, it is better to give preference to a simple configuration.
Composition formation
Before you make a decorative butterfly or a whole group of them, you need to consider their location in the room. First you need to evaluate the pattern of wallpaper or other wall decoration. In places where the composition harmoniously fits into the interior, you can place several moths.
The composition may look like a flock of butterflies, which smoothly moves from one corner of the room to another. Their concentration may be stronger in the center or on one side. The chaotic distribution of the figurines creates a stylistic effect of unique beauty. It is initially recommended to draw it on a piece of paper.

Also, a group of butterflies can form a certain shape. For example, it can be a flower or a heart. There are no limits for imagination in this direction. The intended pattern should be marked on the surface of the wall with light lines. They should be barely visible. It is best to use a thin simple pencil. It can then be wiped off the surface.
Paper and cardboard
Decorative butterflies, as mentioned above, can be created from various materials. Cardboard and paper are very popular. It will be very easy to cut moth figures from the latter. Coloring the wings of such butterflies will also be easy. This is one of the most inexpensive ways to decorate the interior.

You can purchase white or colored paper. It is also possible to use the pages of glossy magazines or newspapers. It all depends on the style of the interior. They are grouped by color. Paper butterflies are easy to attach to the wall.
Butterflies made of cardboard are known for greater reliability. These are strong, dense figures. They are quite difficult to cut. However, it will be much easier to form different bends of the wings from them. At the same time, the workpiece is dipped in water, and then it is fixed in the desired position. After drying, the material takes on the desired shape. These moths need a secure mount.
Film and fabric
Can be created from film or fabric. In the first case, a special vinyl material or a wide range of "self-adhesive" is used. Moths will have a glossy texture. If you create the right lighting in the room, their wings will reflect the glare. The room will be elegant and bright.
The production of figurines from film is fully consistent with the technology in which cardboard is used. If the material has a special adhesive layer on the reverse side, the butterfly can be fixed on the wall simply. To make the moth flutter, the wings are not glued to the base. Only in the center of the workpiece is the protective layer removed.
Fabric butterflies look original. The blanks are completely glued to the base of the wall. If you want to make the fabric dense, able to keep its shape, it is impregnated with a mixture of water and PVA glue. For very thin materials, a soapy solution is used. The composition is applied to the fabric, the workpiece is fixed in the desired position. After drying, the butterfly will take the desired shape.
Making paper butterflies
By creating decorative butterflies for the interior certain instructions must be followed. Before starting work, it is necessary to prepare the required materials and tools. First of all, you will need colored, white paper or wallpaper trimmings. The template is printed on the printer. You will also need cardboard, a pencil, scissors and glue.

First, several butterfly patterns of different sizes are printed on the printer. They are cut out and applied to a sheet of thick cardboard. The contour must be circled with a simple pencil. Next, you need to create a stencil. The inner material of the butterfly is cut out. It turns out a blank for figurines of moths.
On the reverse side of colored paper or wallpaper, you need to draw a lot of butterflies using a stencil. They are cut out and slightly bent in the center. This will create a fluttering effect.
Mount type
DIY decorative butterflies on the wall can be fixed in different ways. You can use glue for this. Paper and cardboard are firmly attached to the base with PVA. To do this, glue is applied to the center of the butterfly or over its entire surface. Next, the workpiece is pressed against the surface. It is necessary to ensure that the glue does not protrude beyond the edges of the wings. When applying PVA on the reverse side of the butterfly, you need to control its amount. Surplus is immediately removed. If the glue is applied only in the center, in this place the butterfly is pressed tightly against the wall with a finger. This allows you to clearly fix it on the surface.
Pins can also qualitatively and quickly fix the moths in the places provided for them. This option is not suitable for painted or plastered walls. But for other types of decorative finishes, pins will be the best solution. If desired, the butterfly can be moved. At the same time, there are practically no traces left on the wallpaper.
Butterflies can be hung with threads from a cornice or ceiling. You can also use thin fishing line for this. Butterflies that will be hung in this way must be made of cardboard. Moths folded according to the origami method will also look spectacular with this method of fastening.
Moths from a vinyl record
Original decorative butterflies made from vinyl records. Making them is easy enough. In addition to the plates, you will need to prepare white and black chalk or pencils, moth patterns and scissors.

Using a template and crayons, you need to apply the form to the center of the plate. White chalk is used on the black field, and black on the label. Next, you need to put a plate with a drawn butterfly on the foil. She is sent to a preheated oven (upper compartment) for 45 seconds. During this time, the material will become soft.
With sharp scissors you need to cut out the moth. In this case, the material will quickly cool and harden. It will need to be sent to the oven several times. After the butterfly is ready, its wings need to be bent a little.
Other decor options
They can decorate not only the wall. Having shown imagination, they can decorate the ceiling, chandelier, cornice, etc. There is a technology for creating butterflies using origami. They will also look original in the interior.
From paper, cardboard blanks, you can create a beautiful chandelier. Moths seem to envelop the ceiling. In this case, you can choose any color for staining. It is correlated with the chosen colors in the interior.
White paper butterflies can be painted with acrylics. On the fabric, you can make an additional finish with beads and rhinestones. It all depends on the imagination of the master, as well as the availability of a large amount of free time.
Having considered the basic approaches to creating decorative moths, everyone will be able to decorate the interior of their home with the help of these motifs.


