Paper ball from modules. We make origami balls for the holiday. Folding kusudam can be divided into three parts
Kusudama, or the ball of happiness, is one of the most popular and beautiful directions in origami, which sooner or later all origami artists try to master. Kusudam folding is a traditional art, in fact, it is the forerunner of the modular technique, only the modules here are not triangular, but pyramidal, most often in the form of stylized flowers. The article contains various options for kusudama balls, video and photo instructions will teach you how to properly fold the modules and assemble them together.
Origami kusudama from 6 modules
This small Kusudama ball consists of six modules. For work, it is better to choose double-sided colored paper, and so that the sides are of different colors, so that the product comes out bright and beautiful. If you don’t have such paper, you can use plain one-sided paper by folding the sheets with each other with the white side. The size is arbitrary, depending on the size of the ball that you want to end up with. You will also need glue to assemble the parts together.
We start making origami Kusudama from paper, diagrams and step-by-step instructions are located below. We fold a square sheet of paper along two diagonals. In the process, you need to make clear folds to make it easier to work later.

We bend the sheet horizontally and vertically. We straighten.


"Valley" bend the sides of the square to the center.


Now fold the top and bottom of the workpiece in the same way.


From the inside of the figure, we try to carefully draw out the four corners.

Flatten so that the corners lie together.

We do this on the opposite side as well.

We open the figure according to the arrows in the photo.

If everything is done correctly, we get just such a square blank.


We bend two corners of a small square to the base, as in the photo.

We also add the corners of the remaining three squares.

We open each of the resulting triangles, gently straighten.

We bend the corners of the triangles to the opposite side, turn over. It turned out the Kusudama module.

Performing the steps in sequence, make five more such modules.

Assembly diagram:
We connect the two parts with glue, smearing the protruding corners. Let's dry.


Once everything is assembled together, the product is ready!

Origami kusudama "Luminescence"
This magic ball is made according to the scheme of the famous master Marcel Aldo. Many of you are probably already familiar with his work. The work is called Luminescence, which means "glow" in translation. We hope you enjoy it.

Materials:
To work, you will need 30 sheets of paper with sides corresponding to 1: 2 proportions (for example, 5 cm: 10 cm, 6 cm: 12 cm, etc.), several hours of time.
The modules are assembled quite quickly: you will spend 8-10 minutes on the first of them, then the work will go much faster. It is also not very difficult to assemble it together: you don’t even need glue for this, all the elements are held together thanks to the design of the modules.
And here is the video of the master class itself.
Kusudama "Loop"
This is a modular origami - kusama master Saburo Kaze called "Loop", which translates as "loop". The work performed according to this scheme turns out to be very beautiful and does not require extensive knowledge of the technique and skill of the origamist.

Each ball module is made up of a square sheet of colored paper with a side of 15 cm, but less is possible: with these proportions, the kusudama comes out very voluminous. A total of 30 sheets are required. The module is a square blank with petals and is very similar to the basic origami shape, but it folds up much more interesting. It will take you about 7-8 minutes to work on each module at first, and after the tenth module, this time will be significantly reduced.
The modules are assembled in origami kusudama balls very simply: each of them has ledges and pockets that are inserted into each other, forming the shape of a ball.

You can also assemble a ball from a smaller number of modules, however, such a magnificent ball, like the author’s, will be obtained from only 30 elements.
Japanese origami has long been popular among the population of different countries. This technique allows you to build amazing masterpieces from plain paper. Moreover, it is not so difficult to master; almost everyone can make simple fakes. One of the directions is spherical models, which are assembled by gluing different shapes. This technique is called kusudama. For beginners, it is the best fit.
Kusudama appeared in Japan many centuries ago, even at the time of serving the cult of the Sun, it was used in various rituals. The sun was depicted as red carnation balls with medicinal herbs inside (“kusuri” in translation - medicine), which were hung on the four cardinal points. This tradition is still preserved, and kusudama can be seen at every Japanese holiday.
But there is another theory of the origin of this word, but it is also associated with healing properties. Previously, the healing fruits of the camphor tree (“kusu” in translation - camphor) were invested in fakes and placed in the room in order to free it from harmful microorganisms and disinfect the room as a whole. It was believed that the aroma of camphor can heal the human body and soul.
But, no matter where the story begins, in any case, it is associated with treatment, which means it will be useful to know how to make kusudama on your own.
Preparation for work
Before you start creating a masterpiece, you need to take care of a set of necessary tools and materials. As already clear, the most important step is the selection of paper.

It can be absolutely anyone, moreover, at the very beginning it is best to experiment on plain colored paper, which children work with in creative classes.
After the technique is more or less mastered, you can look for a professional basis in the shops of the city or use the glossy pages, they will give the future ball an individuality.
Of course, you can’t do without sharp and adhesive objects, as well as decor. Required:
- scissors;
- PVA glue;
- a spool of thread in a matching or contrasting color;
- needles;
- beads, ribbons, sequins, buttons, etc.
 By the time the material is prepared, the idea of \u200b\u200bthe future product should already exist, kusudama diagrams in pictures for beginners can be searched using the Internet or books. Most often, balls are assembled from separately made various modules, for example, a bell, a lily, a rose, as well as sakura flowers.
If there are no ideas at all, then you can use the classic scheme, which has been known for many years.
Classic version of the product
To make a classic Kusudama ball pattern for beginners, you will need 24 sheets with equal sides, in other words, squares of paper. They can be either the same color or contrasting. You also need the tools listed above. Assembling a magic item step by step begins with the folding of the component parts or modules. For this:
- One square is taken and folded in half diagonally to end up with a triangle. Its sharp corners are bent to the center so that the result is a square again.
- Further, the folded corners are bent in the opposite direction from the center, while maintaining their shape.
- With the help of a finger, the resulting triangles are straightened on the sides so that the central line of each is extended to the surface.
- The protruding parts of the triangles are bent to the center from the top to the sides so that the lower part again takes the form of a square, after which two wings should be obtained on both sides. Glue is applied to one of them and the figure is fastened in a semicircle with paper clips or clothespins. Another 24 elements are made in the same way. In the photo, the diagram looks like this.

After each petal is ready and the glue has dried, the origami flowers are harvested. They consist of 4 modules, but you can use more if you want the figure to be more voluminous.
At the final stage, you should get 6 flowers that connect to each other. Four in a circle, and the fifth and sixth from above and below. The classic version is ready. Of course, you can also decorate the ball with decor, if there is such a desire.
Usually, when getting acquainted with the technique, they start with the classic kusudama schemes for beginners, because they are the easiest to understand.
But this does not mean at all that they are less beautiful, so you should not immediately chase after complex options, but you should pay attention to simple products.
Master class balloon Butterfly
Another good and simple version of the paper kusudama ball pattern for beginners is considered a butterfly. It is very beautiful and is said to bring happiness to its owners. It differs from the classic version in that in this case, not squares, but rectangles will be needed, and the smaller side should be related to the larger 1: 2. For a more original performance, it is better to use plain paper and corrugated paper in equal proportions. Thus, you need to prepare 30 sheets of one and the other. Start with a strip of plain paper:
- Fold an even rectangle in half, then unbend and bend the upper left and lower left corners to the center.
- Next, the corners are folded again towards the center so that the result is a rhombus.
- Free opposite corners are bent in half. The resulting rhombus is folded in half into a triangle, after which the product is returned to its original state and proceed to work with the corrugation.
- The sheet is folded in half with the wavy side inward. Next, the two sides are bent to the middle, two rectangles should be visible from above and one - from the bottom in the center. The lower right and upper left corners are evenly bent.
- Now proceed to the assembly of the module. The second one is laid on the first blank in the center and the lower part is folded along the pre-marked lines to fix the corrugation.
- Before the last folding into a triangle, glue is applied to the corrugated paper and fixed until dry. We can assume that the first module is ready, the remaining thirty pieces are also added.
- The last step, as always, is the general assembly. In more detail, all steps can be seen in the image.

The main thing is not to forget to glue the tape or thread in the center if you plan to hang the figure.. Additionally, the butterfly can be decorated with rhinestones and sequins, but you don’t need to get carried away much, because the resulting masterpiece already looks wonderful.
Origami kusudama is a rather interesting hobby that can be mastered with children, and the ball patterns presented on the net will help you acquire a new hobby on your own and easily.
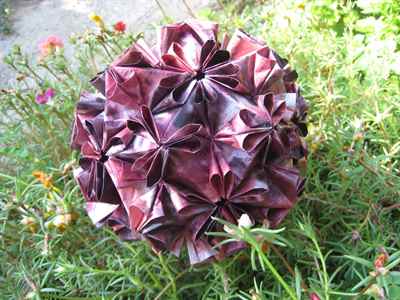
After all, I was just looking for some information on creating these flower dolls made from modules of the classic Superball kusudama, and having found so much information and beautiful photos with these paper balls, I can’t help but collect them in one post. Let it be all together)

You have probably heard of origami, the ancient Japanese art of paper folding. Usually each such figure is made from a square, and neither glue nor scissors are used in the work. The famous classic of this art, Akira Yoshizawa, said that origami is an abstract geometry that is absent in the human soul and in nature.


Kusudama is one of the most ancient and decorative traditional Japanese origami products. They are a variety of balls, consisting of paper flowers, rosettes or parts of various shapes gathered together. Such individual parts are often referred to as modules.


What does the word "kusudama" itself mean? “Kusuri” in Japanese means “medicine”, “tama” means “ball”. The word "kusudama" can be translated as "medicinal ball". It turns out that originally kusudama was used by the Japanese during the Shinto religious mysteries of kagura. This was the name of the rituals that developed on the basis of the magical solar cult.
At the same time, the sun was symbolized by huge bright red balls, the surface of which was created by the heads of paper carnations tightly pressed against each other. The balls were located at the corners of the quadrangular area. Multi-meter poles with flowers strung on them protruded from the balls in different directions. And today, not a single Japanese holiday on the street, in a temple, or in a house is complete without kusudam.


For some, they are just decoration, while others give them a magical meaning. Such a ball can be hung over the patient's bed and recharged with positive energy by raising your palms to it. Mystic? Which way to look...
Having received such a work as a gift, the ill person will involuntarily perceive it as a symbol of the wish for a speedy recovery. That is, as a kind of sign of universal attention and care. Such psychological support will certainly bring the moment of recovery closer!


On the other hand, what do we know about the influence of geometric shapes on space and energy? Almost nothing. The great physicist of the 20th century, Albert Einstein, connected mass and energy in his famous formula, but he did not say anything about the form of this mass. At the same time, since school we have heard about the phenomena of resonance... Who knows, perhaps the classic, time-polished kusudamas have the properties of bioenergetic locators or transmitters? At least many people who already folded and collected kusudami during mild illnesses noted the beneficial effect of such work on the recovery process. If we ignore the possible healing properties of kusudam, then they can serve as just a wonderful decoration for any interior.


How it's done
Making kusuda requires more time than figures made from only one square - after all, dozens of modules are required to make some balls.
Manufacturing takes place according to schemes that are much more complicated than the schemes of ordinary figures. Sometimes a sheet of paper has to be folded more than 10 times.
Any paper is suitable for this. If only it was dense and elastic, so that it does not fray the edge with numerous folds, so that it does not tear when intricately folded.
Parts are made first. They are then held together with glue. Here you need to be a very careful person so that the kusudama seems whole, and there is no gap. I haven't yet been able to achieve complete absence of gaps, but the more I stack them, the higher my skill is.
Kusudamas are hung on a thread, cord or thin colored rope from the ceiling or lamp. I hang on shelves and curtains. From below, for decoration, you can attach a brush of floss threads, but I attach colored beads.


A small master class) * I hope you will understand from the drawings)


this is a classic kusudama and is made from only six pieces!!
Double boat: 
And further according to the scheme. In order to assemble the Kusudama completely, six such modules are required. At the end, glue is applied to the bent triangles and they are connected to other parts. 
What about those coolers? First, a double boat is made, and then so


more patterns for kusudam can be found
Kusudama module "Superball"
Classic Kusudama Superball (Flower) consists of 40 modules

For kusudama, it is better to use double-sided colored paper.
Turn the square back to you. Bend and straighten diagonally. turn over

Bend and unfold in half vertically and horizontally. Turn over.

Fold along all the marked lines at the same time. To do this, bring together the two halves of the horizontal diagonal. Top and bottom should be two squares

The result is the basic shape of a double square.

Fold towards the middle.

Open your pocket and flatten it. 
This is what the pocket looks like

Flip right

Do the same with the other pocket and also with the two back pockets. 
Open the shape in front of you with the empty side. Fold towards the middle. 
Turn up the corner. 
Scroll through the sectors and perform operation 10 - 11 three more times. 
It turned out such a figure. Now it needs to be fully expanded.

It turned out the original sheet of paper, but with the intended folds

Press in the middle to make the sheet concave. Now we assemble the final module. Let's start from the top left corner. Take hold of the edges of the square where the dotted lines are. Bring the folds back, around the corner of the square. The folds marked with a dotted line should meet at the back, at the diagonal of the square. 
Here's what it looks like. Fold to the middle along the previously marked folds. 
Fold the corner in

Flip the right side of the resulting figure to the left

Fold the next corner of the square in the same way. And again bend the sides and fold the corner.

Flip all the resulting sectors to the left and perform the same folding on the remaining two corners of the square. 
This is what the resulting module looks like from the end

This is what the module looks like from the side.
Malvina and Piero (c) author
The most touching and romantic fairy-tale hero, Pierrot, sighs for his beloved. Such dolls can be made as a gift for the holiday. After all, they are not just dolls, but rather a symbol of a beautiful dream, lofty relationships. The technique for performing these characters is a kind of modular origami..
Prepare white office paper for Pierrot's costume, Color paper for Malvina's dress. For a dress, it is best to take colorful wrapping paper, which is sold in rolls in gift wrapping departments. Then there will be no limit on the size of the paper sheet. For hair, you will need double-sided black and blue paper.
First you need to choose how to make the head for the doll. There are different options. You can use a ping pong ball or a styrofoam ball. There is a more complicated way, it is often used by paper doll makers. Wrap a cotton ball on a stick, coat with PVA glue, dry, sand. Cover with corrugated paper. I used the white mass for modeling from the children's set. (I clay, Amos, South Korea). After sculpting, after a while, it hardens in the air, becomes light, dense, but elastic, like an eraser. It is good to draw on it with felt-tip pens. A ball measuring about three centimeters wide is put on a toothpick. 
To make hair, take strips of paper 3x6 cm and cut a very thin fringe (about 1.5 mm). Then cut into narrower strands

Use a toothpick to curl your curls. Half of the strands should curl in one direction, the other half in the other

Glue the first row of strands

Then, a little higher, the second row

The third row already covers the entire head

Glue on the bang. In total, this hairstyle took about 20 cm of fringe. Of course, there can be a huge number of hairstyle options. You can even make them from threads. 
For Pierrot's head, curls need to be made shorter. Strips 4 cm long. They can be slightly curled with your fingers.

The head is also pasted over in three rows and ends with a bang.

Now you need to fold the modules themselves. Lay them out according to the scheme Kusudama module "Superball". For Pyro, you will need white modules from squares of the following sizes. Torso - 1 module from a square from A4 with a side of 21 cm, sleeves and trousers - 4 modules from 12 cm squares, cuffs - 2 modules from 8 cm squares, collar and cap - 10 modules from 8 cm squares.
Take the sleeve module and insert the cuff module into it. Make sure that all the folds are evenly distributed.
Take a thread with a needle, make a large knot and sew the sleeves to the body

Glue inside modules-trousers. Jewelry can be made using the quilling technique. A strip of paper (27x0.7 cm) is cut with a very small fringe, tightly twisted onto an awl, glued, then fluffed up. 
Collect 9 modules for the collar on a thread. 
Assemble the whole figure, put the cap on the head

For the Malvina costume, fold the following modules. Dress and petticoat - from squares with a side of 26 cm, sleeves - 2 modules from 12 cm squares, cuffs - 2 white modules from 8 cm squares, wreath - 9 modules from 7 cm squares.
Insert the petticoat into the dress and the cuffs into the sleeves. Sew the sleeves to the dress.
To make the collar, follow steps 1 to 9 of the Superball Kusudama Module. Open like this.

Cut all layers together. Then open and straighten the ruffled collar.

Gather 9 modules for a wreath on a thread. Inside each flower, you can glue a bead or a ball of mass for modeling. 
Collect the entire doll. Pierce a hole in the dress and in the collar. Insert the toothpick on which the head is attached, strengthen the wreath. The dress can be decorated with a flower (module from a square of 6 cm).
Kusudama for beginners is an activity for creative people. The art of origami and kusudama came to us from Japan, where children are taught from childhood to make paper birds, animals, boats, lanterns, and so on. As it turns out, a lot of things can be created from such an affordable and inexpensive material as paper. Adult Japanese also willingly engage in the art of origami and kusudama. Remember your childhood - you also folded origami out of paper: boats, planes. And now you have a good opportunity to decorate your house with the help of origami and kusudama, make an interesting craft with your own hands, come up with and put together an original gift for loved ones.

The art with which you can create interesting and original paper things with your own hands is called origami and kusudama. Kusudama is a kind of origami, a paper ball figure made of sewn or glued modules (as a rule, these are flowers from a square sheet of paper).
Kusudama and origami are a great opportunity to decorate a house, give someone a gift, and finally, please yourself. These classes will help you escape from worries, calm your nerves, tune in to the good and positive.
Kusudama and origami develops logic, mathematicians love it very much. Creating flowers and paper balls does not require special material costs, it is available to both adults and children. Anyone can engage in this hobby, regardless of profession and age. Here are the main notations by which kusudama and origami are folded:

In Japan and Europe, it has long been confirmed that origami, kirigami (origami using scissors) and kusudama help improve memory, attention, and have a good effect on the well-being of adults and children. Kosudama is usually made in the form of a ball. Our master class is about such a lily ball.

Kusudama shouldn't be too difficult to assemble, so we'll learn using the Kusudama Lily step by step tutorial. Our master class includes 36 flowers - lilies, which are sewn into a ball with the help of threads. Lilies can be made in one color, but a ball of three colors of paper looks more interesting. You can make a "tail" at the ball from any thread.

For work you will need:
- Thick paper (colored paper sets are available at any office supply store).
- Threads, needle.
- Ribbon, beads (optional).
First, we will make the main element - a lily. To do this, take a square sheet 9/9 cm. Bend the sheet in length. Smoothed over with hands.


We press the middle of the sheet and fold the paper in such a way that we get a “double square”.

This is how the "double square" turned out.

We must unbend and iron each face of the square, as in the photo, and so 4 times (4 corners).

We end up with this figure:

We bend the corners to the center of our figure.

We straighten the "pocket", bending the lower part of the "pocket" up. And so 4 times.

We bend the “tail” of the unfolded figure up.

Turn the workpiece over so that there is a flat side. We bend the corners of the figure to the center.

We straighten the petals, bend each petal down.

We straighten and twist the petals with scissors. Lily is ready.

If something is not clear to you, watch a short video in which the lily assembly technique is shown in more detail and clearly:
Next, we continue the master class of kosudama lily. We need to make 36 of these lilies. We take a thread with a needle and sew 3 lilies together, then the next 3 flowers, and so on. We leave a long thread, it will be needed at the end of the work. In conclusion, we connect all 12 groups of lilies together. A ribbon or a ribbon with a tassel can be sewn to the “center” of the kusudama.
The video shows the assembly process of the Kusudama-ball:
Kusudama for beginners is an occasion to give such an interesting gift to friends. And what is a gift without packaging? We make a box for a beautiful decoration. The master class of the box will be in origami style. Master class and box folding scheme:

The box can be made from any thick paper.

We bend our square sheet diagonally and vertically.


Tuck the glued edge in towards the center, making a fold on the paper.

To begin with, let's figure out what kusudama is, where this term came from and what it means. Kusudama is such a paper spherical figure, as well as a type of origami, it is made from several identical origami figures that are glued together. Kusudama is also the forerunner of modular origami. This term came to us from Japan. And originally it meant a medicinal ball, the Japanese placed medicinal herbs in it and hung it over the patient's bed. Also, this ball served as a storage for incense and aromatic mixtures from dried herbs and petals. But now these balls are called balls of happiness, and they are used as a home decor item or are a great decoration for a wedding, birthday and any other holiday. Kusudama can also serve as a gift for relatives and friends for any celebration. Therefore, we propose to make origami kusudama together.
First, we suggest viewing the image of this figure, as it comes in different sizes, shapes and colors.


There is also an opinion that kusudama is not a type of origami, as it is done with the help of many parts with the participation of glue and scissors, while others, on the contrary, believe that this is just a type of origami, since earlier this art also involved scissors and glue.
Introduction to technology
To begin with, we suggest that you make one of the easiest types of this craft to get acquainted with this figure. This will be a kusudama flower, and we offer you a scheme for assembling this figure. This is how all the elements of this figure will look, which then will need to be glued and shaped into a ball.

For work, we need 60 square sheets of paper measuring 7/7 cm and PVA glue. From this amount of paper, we should get 12 flowers, which will consist of five such forms.
We bend our square sheet of paper so that we end up with a triangle.

Now we bend the corners of the triangle to the top point and get a rhombus.

Then fold the previously folded sides in half.


And now you need to bend the upper corners of those sides that we bent so that they are even with the main figure.

Fold both sides in half and glue the resulting triangles together.

And now we need to make 5 of the same petals and glue them together to make a flower.

You can watch the video for more detailed information and find out the answers to all your questions:
Now, in order to get a ball from these twelve colors, we need a few more minutes.

For this work, we need glue, string or a beautiful ribbon and beads for decoration.
Take 6 flowers, place one of them in the middle, and glue the other five around the central flower.

Now we will glue the flowers together, we will apply the glue little by little, starting to the right of the center fold line.

When the glue sets well, we move on to gluing the next flower.

Glue very carefully, first the first six colors, and then we get one hemisphere, and then the remaining six, and we get the second hemisphere. By themselves, they look very beautiful and can already serve as a decor item. But still, let's finish our figure.

Now let's make a lace or ribbon, depending on what you choose, on which the kusudama will be held. To do this, take the beads and string them on a cord. We fix the first and last beads with a knot to fix them in place.

It remains for us only to connect the elements of our future ball, for this we need to apply a small amount of glue inside the fold.

Then we glue the lace to the upper and lower petal, but the glue must be applied exactly in the center of the petal. We will glue the second part of the ball when the glue dries on the first one.

Well, that's all, our kusudama ball is ready. You can hang it above your bed, in your living room, or use as holiday decor. And also it will serve as a great gift.

You can also watch a video on how to assemble this ball correctly.
star model
There are a lot of Kusudama models in the world. And this kusudama resembles a three-dimensional star.

In order to make such a ball, we need 30 square sheets of paper 7/7 cm in size, they can be of different colors, then the figure will come out more beautiful, scissors and glue.
We present you a video that explains in detail how to make such a ball.

Ball with magic
The magic ball is slightly different from the kusudama, as it is folded from one sheet of paper, but you will have to invest a lot of strength and patience. Because for this we need to make several hundred folds and folds. But in the end, you will not regret how much you worked, as you get an original toy, gift and decor.

For this craft, let's take a sheet of paper measuring 15/30 cm. Let's watch a video to learn how to make such a beautiful figure.
Video on the topic of the article
And now we present to you another selection of videos, thanks to which you will learn how to make other kusudama balls.


