Star costume for girls for the New Year. Detailed master class with photos. New Year's Crown made of tinsel for your “Snowflakes How to make a New Year's star costume
- Silver fabric, about a meter,
- About three meters of white tulle
- Star shaped sequins
- Silver trim
- Glue gun.
- Rubber.
Starlet Costume


A star costume will always be relevant for any girl. I would like to offer, for example, this version of the costume:
As you can see, the main role is given to the kokshnik and bracelets.
And here is a variation that you can sew yourself at home:


In general, in this costume the main thing is to make a beautiful kokoshnik to match the color of the chosen dress.
Here are more patterns:


In order to make the Star costume for the New Year, we need to stock up on the following materials:


There is one idea - to make a petticoat in the shape of an asterisk (everything is simple here, carefully cut out the fabric with a zigzag, attach a belt to it, which we then tie) and don’t forget to put an asterisk on your head, too, as in this photo:

It happens that there is very little time to create a costume. And I really want to make a beautiful image. Especially if it’s as bright as Starlet’s costume. The fastest and easiest way is to sew shiny stars of different sizes onto a blue or light blue dress.

If the star should only be yellow, gold. For example, a suit like this is suitable, only the top is a bright yellow T-shirt - T-shirt, and the bottom is made of yellow tulle.

You can learn how to quickly create such a skirt on this website.
For those who know how to sew, this outfit of Zvezdochka is suitable.


The color of the outfit is at your request. The top layer of the dress is made of organza.
You can see how to make this kit in detail here.
This year my daughter will also be a star at the New Year's party in kindergarten, so I'm looking for options that I can sew myself. Here I found a simple mster class, the star costume turns out very cute:

For a carnival costume you will need:


Personally, my idea is to make a fluffy tulle skirt, according to the American principle, and sew star rays on top.
To make/sew a festive costume for Star for the New Year 2013. You will need threads, needles, scissors, fabric with shimmer or shine. We sew such a dress, you can put a headscarf of the same color on your head. You can make a star using cardboard.
Pattern for the New Year's costume Star:


It is advisable to sew a star costume from shiny fabrics. Preferred colors are gray, blue, white, yellow. There are several options for tailoring a star costume. The easiest way is to draw a star template, transfer it to the fabric, sew around the edges, leaving space for the neckline and sleeves. You can wear a headband with a star, a headband with a star, or a hat with a star on top. For example, this one:

Tutu skirts also look pretty good combined with a top. You can also put a headband with a star on the girl’s head:

You can simply wear a blue or silver dress, decorating it with stars:

For a very little girl, this unusual, but completely easy to sew suit will be suitable. We cut out the flared skirt and cut out the edges, like a star. Cover them with foil.

You can put a crown in the shape of a star on your head. The second dress is also not difficult to sew, it is for an older girl.

To sew a dress for the Star suit, you need to cut out a regular rectangle, immediately mark the neckline and armhole. Length above knee. We sew like a regular one-piece dress and a belt with a drawstring, maybe an elastic band, or a ribbon. But the third part, the zigzag flounce, is sewn separately. And it will be beautiful if it is made of transparent fabric. The fabric color for the entire suit is blue. The collar and headband with a star are sewn separately.

You can always get by with one detail - a poncha cape and a star-shaped applique on the chest.

The New Year's image of a heavenly star is an excellent solution for a festive carnival.
 New Year's costumes come in different varieties, but if you want to make an unusual New Year's costume for your young lady, you should pay close attention to the wonderful little star costume.

New Year's delight!
Children are looking forward to the New Year because this is the time when kindergartens and schools hold fun and entertaining matinees. And these matinees require original, beautiful costumes.

This original costume is easy to sew with your own hands at home.
Of course, first of all, this concerns girls; long before the pre-holiday preparations, they dream of the image in which they will appear on the New Year holiday.
For parents, the New Year's party is a wonderful occasion to bring joy to their little daughter and make her a beautiful costume. Moreover, it is an easy process.
 There are several ways to create a New Year's star costume. Here are the simplest ones. How to make such a beautiful New Year's costume with your own hands?

Everyone’s darling is so good and there’s a star shining in her forehead!

- Buy a dark blue dress and carefully stick golden stars on it.
- Of course, this outfit will be a little similar to a night out, but still, it’s worth considering as an option. Especially if you need to make a costume in a short time.
- If you need to make a costume very quickly, we recommend watching the following video. It explains very clearly how to make a beautiful carnival costume from foil. If this method seems too sloppy and the result is fragile, replace the foil with shiny fabric and the tape with a sewing machine.
Because the idea of the costume itself is simple and ingenious.
Gold or silver star
Buying a New Year's costume for a child today is not particularly difficult. Almost all retail chains and the Internet offer an unlimited assortment of holiday outfits.
However, making carnival costumes for children at home has long become a family ritual in preparation for the New Year. And besides, this is a pleasant opportunity to learn something new, to make a one-of-a-kind, exclusive carnival outfit.
The choice of theme for a costume that can be made at home is limited only by imagination and the ability of mothers and grandmothers to hold scissors and a needle in their hands.

Stars can easily be sewn on top, real, golden stars!
Anyone who imagines a golden and yellow star can try to make a costume as follows.

You can also make a magnificent crown from thick wire, beads and beads. How? Watch the master class:
Feel free to use your imagination to the fullest, give freedom to your creativity, so that your daughter’s costume looks beautifully original, as if it were made by a famous fashion designer!

You can make the costume dark and place the star as a crown on the child's head

But most often this choice is made by kindergarten teachers or school teachers, and the child’s role in the children’s party is clearly stated. In this case, you have to make a costume on a strictly defined theme.
Stars take part in almost every New Year's performance.
Making such an outfit will not take much time, large material costs and high sewing skills.
When choosing materials for making a costume, you should remember that they should all be hypoallergenic and as comfortable as possible when in contact with the baby’s skin.
1. TOOLS NEEDED
Scissors;
Chalk and a simple pencil for marking fabric and cardboard;
A ruler at least thirty to forty centimeters long;
Glue gun;
Regular spool threads in matching colors;
Sewing needle.
2. SUIT DETAILS
Crown in the form of a star;
Shiny top;
Skirt - tutu;
Accessories.
3. MATERIALS REQUIRED
Light transparent silk fabric or yellow tulle (can be interspersed with golden elements);
Silk ribbons in golden and silver colors;
Wide elastic band;
Shiny beads and sequins of various shapes and sizes;
Plastic hairband;
Silk cord of yellow or golden color;
Filler. It can be cotton wool or foam rubber;
A transparent plastic bottle, jar or other unusually shaped container;
White and silver glitter;
Shimmering and sparkling hair clips.
The amount of fabric needed to sew a costume is calculated depending on the individual parameters of the baby. It is necessary to measure the child’s height, waist circumference, desired length of the skirt and top, and chest circumference. Any sales consultant at a fabric store will tell you how much material you need to buy. If the skirt is planned to be multi-layered, then multiply the amount of fabric by the number of layers.
4.PRODUCTION
Crown.
- carefully wrap the plastic hairband with a yellow silk ribbon and secure the ends with a glue gun; glue sparkling beads and sequins along the entire length of the headband;
- cut out a star of the desired size from golden fabric, sew it on the wrong side and turn it right side out, to add volume, fill it with cotton wool or foam rubber;
— Using a pistol, firmly attach the star to the rim.
Top.
— we cut out a rectangle from the fabric corresponding to the circumference of the child’s chest and process the upper and lower edges of the top manually or by machine;
- we sew the edges of the fabric along the width by hand or on a sewing machine;
— we make straps of the required length from silk ribbon and sew them to the top.
The skirt is a tutu.
- divide the total piece of fabric by the number of layers, fold it together and sew the edges of the resulting bundle along the width;
- make a hem equal to the width of the elastic plus half a centimeter;
— insert an elastic band (length equal to the child’s waist) into the hem and secure the edges of the elastic with a thick thread;
- using a glue gun, decorate the lower edge of the skirt with sequins and beads in random order.
Accessories.
- we make a star from gold fabric (exactly the same as for the crown), sew one of the rays exactly in the middle of the silk cord. We “fluff” the edges of the cord and use a brush. We fix such an improvised handbag with a cord on the hand;
— the remains of a silk ribbon are used as a belt, tied at the waist and tied with a voluminous bow;
— pour silver and white sparkles into the prepared transparent bottle, which will be used during the holiday, like twinkling star dust.
Light silver or gold shoes and a festive hairstyle, generously decorated with shiny hairpins, will complete this stellar look.
Star jumpsuit
Another option for a “star” costume - jumpsuit, that is, the arms, legs, and head are the rays of the star, only a hood in the form of a cap is also put on the head. If a child spreads his legs to the sides and spreads his arms, he will get a star.

It's easy to shine in the New Year's sky!

A cheerful star is what you need for the New Year's holiday!
But this outfit is unusual for a girl and perhaps few will choose it. To each his own. The most important thing is that the girl is happy with her outfit, and the New Year holidays leave her with a lot of pleasant, unforgettable impressions.
Heavenly and pop stars
What stars do you know? Stars are different! First of all, when we hear the word star, we imagine luxurious stars shining in their endless and mysterious beauty in the dark sky. However, this expression is often used figuratively to refer to beautiful celebrities and successful people whom we call stars!


Guitar is the best assistant of a rock singer
Your beautiful girl will be able to choose the image of both a real star and a human star - a pop star! It’s so interesting: try yourself in different, new images!

Glamorous sparkle and chic!
They say that wishes made on New Year's holiday come true, who knows, maybe this will come true too?
 After all, we learn to dream from early childhood! Even the smallest ladies will be able to take part in different images, even rock singers!

Hard Rock!
Of course, you will have to work hard and sweat to achieve your goal, but it is worth it. It is true what they say that patience and work will grind everything down. At the New Year's party, a girl can try herself in the role of a Hollywood star, a famous singer, an actress, or a person in any other creative profession!

Above, you were able to get acquainted with the beautiful carnival costumes for the New Year, which the girl boldly tries on as a twinkling star from the sky. 
Now, you can carefully look around at these photographs in which the girl acts as a show business star on stage.

It’s good when there is a large choice in everything, so that at the New Year’s ball, the girl can look not only beautiful, but original!

I'm so daring!
It is the costume of a real star that will emphasize the individuality and special uniqueness of a young beauty in kindergarten or school.

New Year's singer - socialite
Let the New Year's ball be fun and leave behind unforgettable, best memories in life!
Songs of the 90s
A little star costume can suit not only a girl, but also a girl. You can wear it to a New Year's party with friends or to a corporate carnival. The main thing is to feel free and relaxed. Be fashionable and enjoy your beauty!

And to get even more inspiration, read our articles about various New Year’s costumes:
We hope that you will find an outfit to your liking and enjoy the upcoming holiday with us! All outfits are good, just sew from the heart!

Necessary materials:
Silver fabric – 1 m
- white tulle – 3 meters
- rubber
- hot glue
- star sequins
- silver bias tape
Manufacturing process:
1. Make a skirt from tulle, cover it with sequins using hot glue.
2. Glue triangular-shaped wedges to the belt (they must be made of shiny fabric). In this case, the skirt will look like a star. Beads must be sewn onto the ends of each wedge. This will allow the skirt to lie more beautifully.
3. Cut a rectangle from silver fabric. The width of the rectangle should match the width of the child's chest. Additionally, it is necessary to make allowances for the seams. The length of the top should be such that it can be easily tucked into the skirt. Sew the side seam and overcast it. If the fabric does not stretch well, sew in a detachable zipper.
4. Cover the bottom of the product with bias tape.
5. Glue the sequins to the top trim.
6. Make straps and sew to the top.
7. Gather the top from the front side.
8. Using rhinestones, beads, cardboard and tulle, make a star and secure it on a bandage, trim or ribbon. This design will become a decoration for the head.
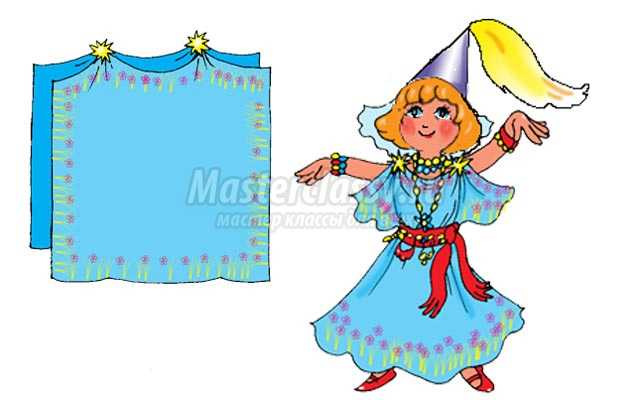
New Year's star costume for girls
The costume is based on a dress, a star-shaped crown and decorated shoes. For shoes, you can choose white sneakers or sneakers, which can simply be decorated with sparkles or multi-colored paper stars. By the way, you can also wear a matching sweater and leggings along with the dress. They will go perfectly with white shoes. If you don’t have suitable clothes, you can easily sew them from knitwear.Dress.
To create this you will need a piece of shiny knitwear. The length of the piece should be 2 times the length of the product. In addition, you need to add a few centimeters for processing. Take any width you want. If necessary, the fabric can be gathered. Fold the cut in half. The neckline and shoulder seams will be on the fold line. Find the middle of the line, set aside the length of the neck, divided in half, on both sides. Make a cut. Try the blank on a girl, place folds along the shoulders, and sweep. You can additionally make several folds along the waist and chest line. Sew the folds, lay the side seams, and overlock the neckline and bottom of the dress with an overlocker. Decorate the dress with pieces of foil, beads, beads, etc.

Make and.
To create a crown you will need:
Drawing Tools
- foil with paper base
- velvet paper
Draw a crown on a sheet of velvet paper, cut it out, and glue the ends. Cover the surface with foil with a paper base. The number of rays can be any. Moreover, they may differ from each other in length. When you draw the base, there is no need to make allowances.
The headdress can be made differently. Cut a strip out of cardboard, cover it with foil, and glue the edges. Glue a star at the seam location. The seam can be disguised with beads or seed beads.
Raincoat for a boy.
A star costume can be made not only for a girl, but also for a boy. It can be made from a plain training suit. It is best if it is black. Decorate it with foil stars. The crown is made exactly the same as in previous master classes. In addition, the boy will need a raincoat made of shiny knitwear or velvet. It’s very simple to make: cut out a circle from a piece of fabric, the radius of which should be equal to the length of the raincoat. In addition to this figure, you must add the radius of the recess for the neck. Don't forget to add a few centimeters for assembly. Cut out the notch and circle and make a slit. Finish the edges and neck with tape. Hem the bottom. Decorate the cloak with stars made from foil.
Your baby will love it too.
Star costume for the New Year photo:

A raincoat can also be made from a pleated skirt. Gather the skirt at the waist, cover the formed gathering with a collar made of thick fabric, non-woven fabric or colored paper. Make a shuttlecock as follows: cut out a large circle and make a hole in it. The resulting ring must be cut. This will be one half of the shuttlecock. It is necessary to sew the second half of the shuttlecock to it. Cut out stars of different sizes from foil and sew on the cape. In the wrist area, pin the fabric with a pin. Attach several colored shuttlecocks. All that remains is to make the cap. It is cut out from paper and rolled into a cone.
Star costume for girls photo:

A crown for a costume can be made in several ways. We offer some options.
Cardboard crown.
You will need:
Glue
- pencil
- foil
- cardboard
- scissors
Stages of work:
1. To ensure that the crown fits well on the head, measure the circumference of the child’s head. Make the crown a few centimeters larger, because it will need to be fixed on the head. Once you decide on the length, cut out the cardboard strips.
2. Crown height may vary. It will be possible to draw “teeth” on top and cut off all excess exactly along the contour.
3. Unwind the foil roll and coat one side with glue. Place the greased side on the foil. Step back a few centimeters and cut off the foil.
4. Tuck the remaining part of the foil along the craft and glue it to the other side. Leave the craft for a while to dry. Cut the foil between the cloves and wrap each one in foil. To finish, simply roll the strip into one circle.

There is another option for creating a cardboard crown. Take a sheet of cardboard, scissors, a pencil and a stapler. Draw a crown with teeth on the cardboard. Cut out, closing in a circle using a stapler. Decorate the craft with beads, rhinestones and sparkles, wrap it in foil or decorate it with tinsel.
Wire crown.
Necessary materials:
Wire
- pliers
- beads
- glue
Stages of work:
Using pliers, bend the frame away from the white wire. Wrap the frame with silver rain. You can choose any shape for the frame. However, the dimensions of the frame must be suitable for the size of your child's head. Please note that the creation process will take you a lot of time, so you need to plan it in advance.

Lace crown.
Necessary materials:
Scissors
- beads, stones and beads for decoration
- brush
- glue “Moment”
- thread
- needle
- acrylic paint
- starch
- lace ribbon with scalloped or curly edges
Stages of work:
1. Cut the lace to the required length and roll it into a circle. Sew carefully so that the threads are not visible. Starch the craft, place it on a glass jar, and leave to dry.
2. Paint the crown with paint. You can apply paint to the entire surface, or only to the edges.
3. After the paint has dried, fix the beads, stones and beads on the craft.

Crown from a plastic bottle.
You will need:
Paper
- nail polish
- scotch
- rhinestones, large beads, colored sand, small jewelry
How to do:
1. Take the prepared bottle, make a section in the center that should correspond to the width of the crown.
2. Cover the edges of the segment with a sheet of plain paper.
3. Draw the top outline of the crown on the sheet and cut it out.
4. Remove the paper.
5. Decorate the crown with varnish.
6. Glue beads, seed beads, and various decorative details.

Certainly, buy a star costume much easier. However, its creation is a real creative process in which you can involve your child. He will appreciate such an outfit much more; he will wear it for many years.
Creating a New Year's costume is a fascinating process. Some options and elements are invented during work. And this is simply wonderful, because the outfit will turn out not to be a template, but an original one!
Thinking about what costume to choose for the upcoming matinee, holiday or theme party? Do you want something new and unconventional? The asterisk is a costume that is quite rare. It’s quite simple to make, but it looks impressive and is perfect for glitter lovers. In addition, a star is a costume for which there are no established traditions of appearance, such as, for example, for the image of Cinderella or other popular characters.
For any age
The photo shows a version of the outfit for an adult girl, but using this technique it can be adapted for a child.
The basis of the costume is golden leggings and a T-shirt or bodysuit. Since metallic colors are in fashion, finding them in the store will be easy. Shoes can be either golden Czech shoes or old sneakers painted with golden spray paint.
But to make a real star, the costume will have to be supplemented with special decor.
To make it you will need:
- thick cardboard measuring 50 by 50 cm;
- golden paper for creativity - 2 sheets measuring 50 by 50 cm;
- stationery knife;
- glue;
- a golden hairband (you can take any color, but then you’ll have to spray paint it with golden paint);
- glue gun;
- knee-length socks;
- many ribbons in different shades of gold (the footage depends on the height of the wearer of the outfit).
How to make a star costume
The process is simple and does not even require sewing:
- Cut out a star from cardboard and glue a sheet of beautiful paper onto it.
- Place it on the workpiece, circle it, cut along the contour. If necessary, paint it with gold paint. Then glue the headband to the star using
- Cut off the socks of the knee socks and cut the gold ribbons into long pieces. Glue them to the nylon fabric.
- Complete the look with glitter makeup.
Star costume for girls for New Year
If you are faced with the task of making a unique outfit for a matinee, then you will have to work a little more. But the result is worth it.

To work, you will need different materials, many of which can be found in departments with New Year's toys:
- glue gun;
- elastic;
- wide elastic band;
- a ready-made large star or thick cardboard with glitter to cut it out;
- golden branches;
- a lot of golden ribbons;
- golden and white tulle with sparkles;
- decorative wire with stars;
- beautifully shaped bottle;
- white sparkles;
- golden leggings or knee socks;
- beige or golden bodysuit
- wide braid with sequins;
- scissors.
Let's make a small miracle

Non-standard solutions
Most often they are made in golden tones. And this is quite logical - after all, it should literally glow from the inside. But in order to see the stars, you need night and darkness.
How do you like this star:

The costume is made in dark but sparkling colors and is perfectly set off by the golden headdress, which is made in the same way as in the very first version of the costume. A T-shirt with sequins, a fluffy skirt, cardboard decor - this outfit is quite simple to make.
Here is another example of such a suit:

Here the main attention is also paid to the crown made of wire and decorative paper.
Falling star
You can make this charming meteorite:

To do this, you need to cut a “tail” out of a long piece of felt, decorate it with silver paint and glitter, and make loops to secure it to your shoulders and wrists.
Cut out 2 stars from yellow fabric, sew them and stuff them. Attach to the tail.
And from lush tulle with sparkles you need to make a skirt: take an elastic band, cut the tulle into ribbons, fold them in half and fasten them to the elastic with knots.

If you still like the golden color, then you can make such a cute tutu using the same method:

As you can see, when creating a “star” costume there is a huge scope for imagination and creativity.
What is the most important thing in preparation for the holiday?
Mood! How to create it?
Simple, quick and easy to make a crown for your little girl to make her feel like a princess or queen.
If you have a lot of time to prepare, then we make a kokoshnik on a frame, or using cardboard, we cut out a template, according to which we will make a crown for the Snow Maiden or a snowflake.
Unfortunately or fortunately, our kids are designed in such a way that they need a crown instantly, literally in a few hours, or even better in a few minutes.
Notice the crowns above. Each of them is done quite quickly, which cannot be said about these crowns in the next photo.
 The first one is made using the kanzashi technique. A fairly well-known technique that has gained popularity is when a product is made step by step from ribbons. This first photo, you see, is beautiful and exclusive, but very fragile and not suitable for children.
The second photo is a creation made from beads; it can be either on a wire frame or without it. Look how sequins and large stones fit in here.
The rest of the beads complement and add charm. You will find all these details in any bead store, there will also be wire, stones and everything else that is required for such a creation.
Photo 3 is a kokoshnik embroidered with threads with beaded elements and made on a frame. Such beauty requires a lot of patience, attention and perseverance from needlewomen.
These crowns are very beautiful, but they are not suitable for little girls, since the time required and the amount of labor exceed the few minutes that little girls are willing to endure.
Therefore, we will consider quick ways to create crowns, at the same time they are very impressive and beautiful, not at all inferior to kokoshniks, having the main advantage - they are light!
- from foil;
- from a plastic bottle;
- from a peat pot;
- from a cardboard roll;
- frame decorated with tinsel;
- from lace;
- from paper.

We chose exactly 7, since hundreds of thousands of variants are made using these templates; they will differ only in details in execution or decoration.
Having begun to master the creation of a crown, we invite you to remember that it also requires. Lots of ideas and tips from slippers, tights to finishing touches on accessories and crowns.
How to make a suit from what you have at home or decorate a dress to create an exclusive outfit.And the crown will look perfect on the hairstyles specially selected in this article. They are suitable for snowflakes and queens, Christmas trees, Cinderellas and princesses. Many photos and videos available will show how to repeat them on your girl’s head, which will make it easy to recreate them.
It's time to practice and make one of the suggested ones or your own version based on photo ideas.Have you already chosen a hairstyle for your princess?
Foil crown
 To create such a crown, you need a roll of baking foil, tear it off and make voluminous rolls, creating a ring, then attach the top to it.
The foil bends well and maintains its shape. In addition to the crown, you can make other signs of royalty.
It’s very easy to add new parts or entire units, the only disadvantage of this material is that if it’s compressed too much, it’s very difficult to straighten it out, but we recommend using everything you have at home and decorating it in 2 layers, giving it a “silver” look.
Crown made from a plastic bottle
We immediately found 3 options, they differ in the method of adding color and decoration, but the basis is the same - these are familiar and familiar plastic bottles that are found in every home.
Golden
 The gold crown is a plastic bottle painted with varnish, its main advantage is that it is not closed in a ring, it covers ¾ of the head, which allows anyone to wear it, a decoration according to their own opinion and taste.
Pay attention to the photo, painted plastic is well decorated with stones and other decorations.
You can buy them in the store or look for them from the needlewoman’s mother in her “hamster” supplies. Often purchased just in case. Choose sew-on stones or ones with a flat inner side.
What is the crown decorated with?
The stones are glued using a hot gun or superglue. Sequins are glued around them; one bag will be enough to decorate the entire surface. Beads are also suitable, but we recommend choosing small ones, they weigh less.
Diadem


To create a tiara, you need a 2 liter bottle and a template, according to which we will draw a design with sparkles. Then we carefully cut it out and it is ready, if there is still time, then we paint it and glue rhinestones and stones, so it looks more valuable.
Lilac
 The base is a plastic bottle wrapped in glitter paper, and the front is decorated with rhinestones in the shape of shells or sequins.
- Prepare a 5 liter bottle and draw the outline of the top part on it, first measure the baby’s head. The volume of the head should be equal to the length of the resulting shape and bottle.
- To make it look beautiful and without alterations, draw the outline for the first time not with a permanent marker, but with a proofreader or pencil, and only after correcting mistakes with a marker. We want to reassure you, even if it didn’t work out the first time, it’s okay, because the front part will be decorated and the flaws will be hidden.
- We cut out the edges and make sure that they are 1-2 mm larger than the contour, because By running a lighter along the edge, we will make the edges less sharp and dangerous for the child.
- We cover the inside with shiny paper, this can be wrapping paper or from gift bags. We do this using tape, a hot gun, or whatever superglue we have on hand. Remember about double-sided tape, it will stick perfectly to the plastic and hold the paper.
- We glue the sequins using a hot gun or superglue, applying from bottom to top so that the bottom layer overlaps the top.
- We decorate the lower part with matching tinsel. For better fixation, use a stapler; it will speed up the fastening process and the staples will not be visible, because she's brilliant. Double-sided tape will also work.
- To make sure the structure is strong, turn it upside down before trying it on, let it dry for several hours so that the glue sets everywhere, if you used it.
This crown is suitable for a queen or a mermaid, or maybe a butterfly or a queen. It all depends on the chosen color of the suit and the mood of your beauty.
Crown made from peat pot and cardboard roll
And these materials are definitely available in every home.
You will need: a cardboard roll of foil or baking sleeves or film, possibly toilet paper, paint, a washcloth, stones and sequins for decoration, a mustache clip, a hot gun or superglue, a paint brush and a pen.  Its production is very similar, with a crown made from a cardboard roll, so we will not give the second description.
- We draw peaks on the crown so that we can see the necessary cutouts.
- We paint with white paint, it’s better to take acrylic, we need to paint our future crown inside and out;
- We cover it with golden paint so that our crown looks like a real one, we use a sponge for this.
- We decorate with rhinestones, beads, sequins, then glue a hairpin for fastening.
When making from a cardboard roll, you need to make a bottom. Leftover rolls are perfect. 
- Place the crown on cardboard or any thick paper. Draw a circle according to the shape, but you should get 2 circles. One is equal to the diameter of the crown, and the second is 2-3 cm larger.
- We cut out in a larger circle and make cuts, right up to the second circle, we bend these sections, we glue them inside so that the bottom holds tightly.
- It is extremely important to glue inside, because... the outside will look less aesthetically pleasing, so make sure that you don’t get confused and that all the tails of the bottom are inside.
- The remaining points are similar.
Frame decorated with tinsel
 Tinsel or rain is wrapped very tightly on the finished frame, preferably with glue or 2-sided tape; if possible, add beads to the peaks of the peaks.
It is important to check and remove any sharp or scratched parts using tape or other means. If there are sharp ends, drop them on them using a hot gun or dip them in PVA glue and let them dry.
Talk to your child about what shape of crown she wants, show different options, and choose not the most complex ones.
Tinsel with a steel vein has appeared in stores; if you find it in a store, you will speed up the manufacturing process several times. There is no need to wrap anything, you just need to connect the individual parts.
We make a beaded crown on the frame, but such a crown cannot be called simple and quick, so it was left out of the top, but crowns sometimes turn out simply breathtaking. To make it you will need: pliers, round nose pliers, wire, beads and beads, a lot of time and patience.
Lace crown
 We starch any lace you like or grease it with PVA glue (or rubber glue), let it dry, paint it with acrylic paint and give it the desired size (put it on a jar or bottle).
What to do if you don't have lace?
Take a closer look, perhaps there are some lace curtains or an unnecessary blouse with openwork elements. This will do too. You just need to cut out the desired openwork element of the required length and then everything follows the algorithm, so don’t worry, even if this piece is stained or stained.
The advantages of this crown are its simplicity and accessibility, the disadvantage is the time it takes to dry.
The video will teach you how to make a lace crown:
Paper crown
Paper is a material that is found in every home, so it is the easiest way to make a crown in a matter of minutes. Naturally, it will be far from festive and will be simple, but if you spend a little more time decorating it, you will see that it will surprise and delight many guests of the holiday party.
Which crown options are the simplest:
- according to a paper template;
- origami;
- diadem;
- kokoshnik;
- from a paper plate.

Nowadays, many templates have appeared on the Internet; if you print them out and place them on a hard base, you will get a crown; an alternative option is to glue them to cardboard.
Pay attention to the 5th and 6th crowns, just cardboard or paper decorated with sequins, and in the second case lace and some beads are glued on.
Before you start cutting out the crown, measure the child's head to determine whether it will be elastic or will fit tightly.
How to turn a simple crown into a work of art?
- Choose a suitable simple template, the simpler the better. Apply it to whatman paper, print it out and transfer it in a pencil, or immediately draw peaks on whatman paper.
- Cut according to the template to the required length. If the whatman paper is not very dense, then glue the inside into another layer or with colored silver paper.
- Purchase from a craft store: silver-colored snowflakes, braid with rectangular or pointed, silver-colored rectangular parts, glitter glue or glitter (gel glitter), simply replace it with PVA glue and glitter.
- On the cut out template we apply a pattern in shape reminiscent of drawing frost on the windows only in a very simplified version, leave room for snowflakes - they are the main accent of the crown, glue them using a hot gun or super glue. Lay a braid along the edge so that each bend has a border of them. If you don’t want to draw, then choose a piece of fabric with such a pattern in white or transparent.
- Try on the finished crown and sew on an elastic band if you have planned one, but pre-treat the edges with tape or glue a wide elastic band if you did not glue the 2nd layer of whatman paper.
It is important to choose everything in silver color, then white + silver will look elegant and in the style of snow.
This crown is suitable for both a snowflake and the Snow Queen, as well as a princess or other fairy-tale characters.
For a crown using a template you need: a crown template, cardboard from a box, silicate and super glues, beads, beads, sequins, a hoop, rhinestone stickers, a container for glue, brushes for glue and a tool for laying out beads.
How this can be done at home is shown step by step in the video:
Crown for the Snow Queen
A kokoshnik is made from paper in the same way, as is a tiara, for decoration, tinsel or rain is often used, but the braid looks more advantageous, as do snowflakes instead of sequins.
Kokoshnik
Using origami technique
 You will need: a sheet of paper and strictly follow the folding instructions, decorate it with rhinestones, sparkles, snowflakes, beads and seed beads to match your princess’s costume.
But that's not all to make a high crown using the origami technique. It is enough to bend the required sides correctly.
Please note that there are 2 instructions in the photo, so choose the version of crowns that you like best.
Our top is all closed, but one more type of crown is left out. The reason for this is that they are easy if you master the crochet technique.
Note for needlewomen
Simple crowns or kokoshniks, with and without beads
If you know the beading technique, you can make crowns like these for your pet. We recommend making crowns on a wire frame, then the problem of maintaining the shape will not worry you.
Crochet crown

To crochet a crown, we use non-cotton threads; remember, threads with lurex will make sequins and small rhinestones invisible.

Delicate crowns for snowflakes


We suggest right now to knit a crown in 30-40 minutes, even for a beginner!
You will definitely know the answer to the question of where to get it with video lessons for beginners.
Here is a crown on a headband, a hair clip, ideas for creating a crown for any head size. Just take 30 minutes and grab a hook and thread, and then the magic of transformation will follow.Tie any of the crowns of the desired size and volume, all special calculations are given.
A few more secrets about tying beads, pay attention to the photo.
What to do if the threads are the wrong color?
When making a crown from threads of the wrong color, you shouldn’t be upset, you can paint it, but then you shouldn’t tie in beads, it’s better to sew them on later.

If you are knitting along the edge, another option is to put the beads on a loop, but if you want them to be on top of the product, then it is better to string them on a thread before knitting and knit them through a double crochet, so all the beads will lie on top. Single crochet, we show 2 knitting methods in the photo. 1 is an option on the Russian-language Internet, and 2 is an English-language option.
Now you have a lot of ideas and ready-made instructions for implementation, if you found our review useful, click on the buttons on social networks.
If you have a boy, then we offer you variations of crowns. So which crown will suit your knight? It's time to choose and make a crown with your own hands according to his order. Moreover, master classes with photo and video instructions.
And also New Year's costumes: squirrels, hedgehogs, bunny, for everyone who wants to look original and surprise their friends and those invited to the holiday.
And if you need more creative ideas and tips, then pay attention to this link l. Many will receive a prize for the original costume! It's time to start right now and create your own version of a New Year's costume, because you are limited only by your imagination.
Step-by-step master class on making a universal crown

This crown is ideal because it has no size and is simple, suitable for both a very young snowflake and an older one.
You will need: a thick elastic band or stretchable bandage, a plastic glass, snowflakes, lace and all the beautiful sequins and half-beads for decoration.
- Cut out a shape similar to a tiara from a glass.
- Sew the elastic band to the plastic form on both sides.
- We cut off the bottom of the glass, where there is a curved sill, and decorate it with lace, sew it to the bottom with stitches using a needle and thread. We glue half beads on top of the lace to create the desired accents.
- We lay out a tiara from snowflakes and glue it using a hot gun or superglue.
How to make a universal crown for any size head for a snowflake, video master class:
Tiara crown
We will need: an old tiara, a mesh with sequins, tulle in 2 densities of blue and white, a snowflake, scissors and threads, a sewing machine.
- In order for our snowflake to be fixed and stay on the tiara, it is necessary to make a hard backing from tulle.
- To do this, measure the size of the snowflake, applying it to the tulle and make a cut with a margin. From the resulting piece we make a dense, dense assembly either with a needle or with a machine. The denser the base, the better, so we make assemblies frequently.
- The resulting volumetric part will not suit us; we need to make it flatter and evener using an iron with the tulle or guipure mode.
- We adjust the blue tulle onto white.
- The third layer is a thin white tulle, it will be the background for the snowflake. Therefore, we lay it in an uneven fold and then attach it.
- We cut off the lower uneven edge of the tulle, then glue the tiara to it on top, thereby covering the seam. Glue using a hot gun.
- Similarly, glue a snowflake in the center.
- We cut off all 3 layers giving the crown a shape similar to a diadem. We move from the sides to the center, where our snowflake is located. Check that it is symmetrical.
- Then use an iron to add volume and fluffiness to the back layer.
- The fairytale princess's crown is ready, it's time to try it on and go to a ball or matinee at school or kindergarten.
Video on creating a crown from an old tiara:
Beaded crown
Beaded crown with bezel
Crown of Autumn
Autumn crowns are another type of individual beautiful jewelry that is the perfect time to delight your girls in the fall, when there are especially many autumn leaves.
How is a crown made from leaves?
There are many options for creating autumn crowns:
- we weave a wreath from maple leaves;
- from maple leaves by darning the tips of adjacent leaves;
- we glue or screw the leaves onto a finished frame made of paper or wire;
- We cut out leaves from paper or other materials and glue or sew them in the desired sequence.
On a rim of leaves
Secure the leaves with tape
Another option with threads for attaching to the rim
Autumn paper crown
Leaf darning method
forest crown
A chic crown made of: hoop, wire, beads and roses.
Detailed video on creating a crown:
Have a great mood and inspiration for creating a costume with a crown.


