A panel of small shells with your own hands. Crafts from natural materials: a panel of shells. How to make an unusual panel
sailboat
We offer to assemble a sailboat with your own hands.
If you are on the coast, do not buy ready-made shell souvenirs.
Better collect a collection of shells yourself and make an elegant, beautiful sailboat with your own hands!
You will need:
Materials:
- one medium rapan for the hull;
- three wooden sticks (thin skewers or branches) for the masts and one for the bowsprit;
- 6 matches for yards;
- a dozen and a half small shells for sails;
- threads for rigging;
- a large shell-scallop for the stand.
Tools:
- a knife;
- glue (superglue Moment is better, it really seizes instantly. You won’t press the shell to the mast for half an hour, waiting for the sail to stick!)
Manufacturing:
We measure the length of the masts, divide the sticks into the desired segments. We sharpen the tops for beauty with a knife.
We glue the sails to the masts: at the top - small shells, at the bottom - larger ones.
If you want to make the model more complex and beautiful, we will also glue transverse yards from matches sharpened at both ends to the masts, on which the “rigging” will be attached.
For strength at the junction with the mast, wrap the rails with thread. Let's wait for everything to stick firmly.


Now we will install the masts in the hull of rapana.
For stability, we recommend inserting them into plasticine balls glued inside the rapana, and then fixing them with glue droplets. We are waiting again: it is important that the masts hold tight. For additional stability, you can glue the lower rails to the body.
In front of the sailboat, we glue a sharpened long stick - a bowsprit. We glue the front sails to it and the hull - a jib and a staysail, and at the stern of the sailboat the rear sail is a mizzen. When everything is glued together, we stretch thin white threads between the upper and lower yards of each mast, as well as between the upper yard of the front mast and the bowsprit.
So that the threads do not unwind, drop a little glue. For beauty, you can also stick flags from multi-colored shell pieces on the tops of the masts. Finally, glue the sailboat to the stand. Ready to sail!
Lily

Mom is pleased to receive flowers as a gift, but is it a pity to throw away dried bouquets later? Does she hate artificial flowers? Here is the solution: craft a bouquet of amazing flowers that will never wither, but you can’t call them artificial either - this is how the composition looks original. If in the summer you have collected various shells on the seashore, then the idea of a flower with your own hands is for you.
For each flower you will need:
- 5 small shells for petals;
- a lump of colored plasticine for the middle of the flower;
- a long wooden skewer (straight stick, twig) for the stem.
Making crafts:
We stick the shell petals with the tips into the plasticine ball and press lightly to hold firmly.
Then we stick a skewer-stalk into the same ball from below.


Here is the flower!
The classic chamomile flower is obtained from oblong white-lilac shells. But you can take shells of any shape and color - scallops, toothless; not only white, but also brown, orange, pink - and you will get a bouquet of amazing beauty!
We also add that plasticine balls do not have to be the same color. Much more beautiful if you mix a few bright colors in a lump! Make three or five flowers with your child - while the baby is interested. And give mom an unusual homemade bouquet of shell flowers on a festive morning!
Shell painting
Who among us has not collected shells! Many even collect. And, returning from a holiday on the coast of the sea or river, they bring more and more new exhibits. If you have a lot of them at home - this topic is for you. Try to dream up, be sure to involve your children in the work and build such a wonderful picture.

Progress:
Collected shells (about a hundred) should be thoroughly washed in running water. If some have a matte coating - do not despair. Shine is easy to return by treating the surface with a toothbrush moistened with a 10% hydrochloric acid solution. Sort the shells by color and size.
Now you can start composing. First, lay out the shells on a sheet of cardboard so that you get the desired pattern. There are many options here, it all depends on the choice of your imagination. Take ordinary organic glass (painted or tinted). Then transfer the shells sequentially to the glass and secure. Use glue "Moment" extra strong. When the composition dries, cover the shells with 2 - 3 layers of varnish. Insert our work into the frame.
Ideas from the Internet
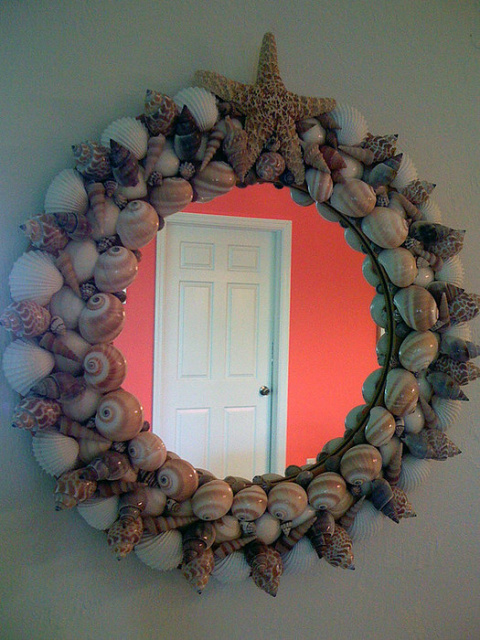
panel


These frames are all made from shells.


Flowers


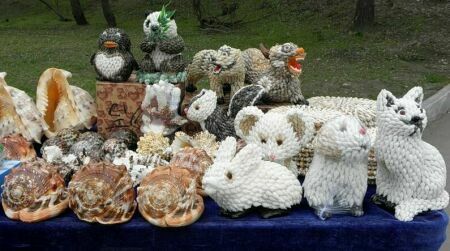
Animals


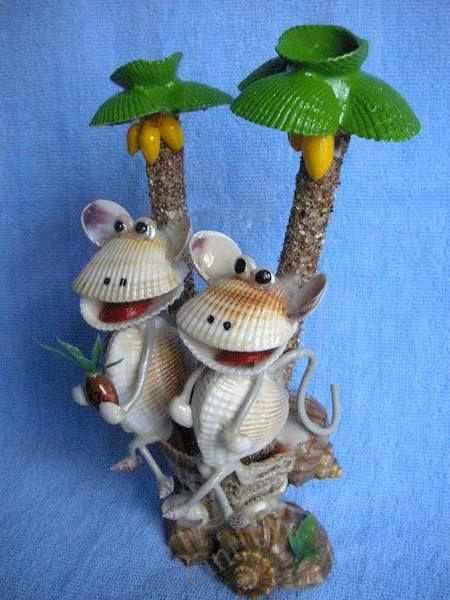


Compositions


Making something with your own hands is quite pleasant, and doing it with your child is doubly pleasant. You can do this not only from those materials that you purchased at a needlework store or in the market. In this case, the items that Mother Nature gave us are also suitable.
Real masters use literally everything that their keen eye has noticed in pursuit of a new masterpiece of art: leaves, pine cones, straw, sand.

Today we will talk about how to make a variety of crafts from shells with your own hands.
These seafood are very beautiful and attractive in themselves, but if they become the base of some homemade little thing, then success is guaranteed to her.

From these materials, you can make a lot of trinkets: bracelets, necklaces, earrings, souvenirs, vases, photo frames, dolls and whole paintings.

The list is quite large, so we stopped only on some of its aspects. If you're wondering how we're going to make all these seashell crafts, stay tuned!

How to make such a craft?
This process does not imply anything complicated, you just need to take shells of the right size (it can be river rapanas, small sea shells, one large and beautiful shell) and decor elements: beads, wire, threads, glue, paints, etc.

Below will be provided instructions for beginners on how to make crafts from shells.
Panel with marine motifs
After reading our article on crafts from shells and stones, you will learn how to make a modular panel from 3 parts. It attracts its attention with warm notes and natural beauty.

In order to make such beauty, you just need to collect the necessary tools: sand, eggs, several plywood sheets measuring 15 by 15 centimeters, glue, varnish, shells.

Now you only need to adhere to a certain algorithm of actions:
- Lay the plywood with adhesive.
- Sprinkle fine sand on top so that it remains in the picture. To do this, firmly press it on top of something solid. After a few hours, you can continue to work.
- Check if the glue on your base is dry so you can continue with your work. Now the base needs to be varnished.
- When the first layer of varnish dries, glue the corners of the future panel with eggshells and apply a second layer of varnish.
- From above we attach shells of different sizes in an indefinite sequence.
- To connect three plywood sheets together to create our marine triptych, we fasten them together with wire.
shell flower
One of the options on how to involve a child and create a masterpiece of needlework with him is a handmade flower.

To create it, you will need quite a bit of time and materials: shells, a frame, wire, beads and beads, a rich red, blue or black velvet fabric, glue and clothespins.

Now you need to follow this instruction:
- In order to make a flower, in our case it is an orchid, we connect three small shells together with transparent glue. If you want the flowers to look as natural as possible, take shells of different sizes for different flowers.
- Varnish the finished flowers, and decorate the middle of each orchid with beads or large beads.
- To the frame, which is the basis of your work, glue the velvet fabric.
- Attach the wire to this fabric, making it look like a stem or leaves. You can create different fancy patterns.
- Along this wire, attach the orchid buds themselves in a scattered manner.
- Wait for everything to dry, cover the frame with glass and place it on the wall.
Applications for children
To please your child and teach him to work, make a collage or appliqué using shells with him.

Such a master class will be very useful to him, as it will teach the baby to perseverance and patience.

To work, you need a very small list of tools: shells, glue and cardboard.
Note!


To make the applique more interesting, use beads and beads, or just take shells of different shades.

You can see a photo of crafts from shells below. We hope that among them you will find something interesting for yourself.

Photo crafts from shells


Note!


It is so nice when the house is decorated with paintings, panels or other handmade crafts. These things have their own special energy, a unique attraction. The author's style is felt in the house. True, in the store things made in the style of hand made are very expensive. But you can make a beautiful fake yourself. It takes a little time and imagination.
DIY shell panel for beginners
Surely everyone will find shells brought from the sea. They evoke pleasant memories of relaxation, the sun and the sound of the sea. Shells themselves are a beautiful work of nature. Making a panel of shells with your own hands is quite simple. You need to apply imagination.
Materials for creating panels are mostly found at home.:
- Glue;
- Framework;
- Board;
- beads;
- Pebbles;
- Groats;
- Beads, etc.
If there are none, you can buy everything for needlework in the store.
Making panels from shells can be a great hobby. This is a fun activity for adults and children. When working on crafts, a child develops incredibly fine motor skills, imagination, imagination, perseverance and attentiveness.
You should remember about safety, since shells are quite fragile material, and they can get hurt.
How to make a panel of shells with your own hands: a master class
Creating a panel develops incredible creative abilities in everyone. Such a panel can be hung at home, for example, a marine-style panel looks great in the bathroom. And panels with flowers or trees, as well as in the form of toys, are perfect for the design of a children's room. In addition, a hand-made panel made of shells is a good gift.
To create a panel of shells you will need:
- Shells of different sizes and shapes;
- Board or plywood;
- Glue;
- Acrylic paints;
- Wooden frame, can be for a photo;
- You can also use various beads, feathers, beads, rhinestones, pebbles, buttons, cereals, seeds.
If none of the above is on hand, you can take nail polish to give the shells a shade. Mother-of-pearl varnishes look especially impressive.
You need to take a wooden frame, you can use a photo frame. It can also be coated with acrylic paint.
The board or plywood should be even, in order to achieve this, you should walk along the surface with sandpaper. The board should be adjusted to fit the frame.
How to make an unusual panel
You can make a panel abstract, that is, just stick shells of various shapes in a chaotic manner, or you can arrange the shells into a pattern.
For example:
- Flowers;
- Tree;
- Ship;
- Doll;
- Car;
- Seascape, etc.
The next stage is a sketch of the panel, made in any way. You can not only draw a freehand drawing with a pencil or paints, but also find a photo you like on the Internet or scan a beautiful picture, photo or even a postcard. Using Adobe Photoshop, you need to make an outline image.
We process the composed panel with acrylic varnish. This will allow the panel to look more finished, in addition, the details painted with varnish shimmer beautifully in the sun.
Panel of shells with a background of sand
A panel of shells on the sand is a panel whose background is sand. Instead of sand, you can use any grain.
The first stages of the frame and the board are performed in the usual way. Then we apply PVA glue to the board. The next step is to apply sand or grain in an even layer, press it as tightly as possible to the board so that it sticks well. Then you should wait a couple of hours until completely dry.
Decorating your own home is one of the most interesting activities. It requires certain creative skills, knowledge and a considerable amount of imagination. However, all those crafts and trinkets that you can buy in modern markets cannot be compared with homemade souvenirs. Therefore, the topic of our article is paintings from shells. It is very easy to make them with your own hands, and now we will look at how such a masterpiece is born.
Necessary materials
So, in order to translate such a picture into reality, you first need a foundation. It can be plywood of a certain size or thick paper. Attaching shells to thin paper is not recommended, as under their weight your entire creation can easily tear. We will also need glue, shells of various shapes and sizes, paints, beads, any accessories that you deem appropriate. Now you can start making paintings from shells.
With your own hands, cut plywood or whatman paper according to the desired parameters. There are no special rules, just keep in mind that large canvases can be supplemented with shells, making the so-called accent with their help. If the composition is small, then it can be completely made up of these "marine accessories". Then we dress the base in a frame, it will look much neater and more beautiful pictures from shells. With your own hands, you can make a bezel from the same shells. Well, if you prefer wooden frames, then it is easier to buy them.

How are these paintings born?
Now let's start creating the composition. It is desirable that in your arsenal there are as many small shells as possible, since it is easier to draw drawings from them. It is better to leave big seafood for the production of souvenirs and toys. Flowers - roses, daisies and lilies - are the simplest shell paintings. With your own hands, you can stick the petals alternately, creating a bud, and then attach a leg and leaves to it from smaller shells. Just teach that if you are working on a white surface, the shells will need to be filled with some kind of paint. You can make the picture monophonic, or you can paint according to all the rules - the foliage is green, and the flower itself - red, yellow, white, etc. On a “wooden” background, black and any other, a composition of shells in its original form will look beautiful.
Several working moments
It is also important to note that you first need to draw up a sketch of the future drawing.

Of course, if you are making chamomiles consisting of five to seven petals, then you can do without this moment. However, sketches are necessary if you are making more complex and interesting shell paintings. Photos of such masterpieces are presented in the article, and you can use them as the basis for further creative fantasies. If you own the "artist's brush", then on a large canvas you can recreate any landscape or still life with the help of shells and paints. Such paintings look not only voluminous, but ingenious.
Abstract creativity
From such natural raw materials, excellent abstract compositions are also obtained. How to make a picture of seashells in this style? Very simple. It is enough to create a sketch that conveys your mood, but does not have an exact shape. If nothing comes to mind, use stencils. Then fill the composition with shells of various sizes and shapes. Color them if necessary.


