DIY simple dresses patterns. Sew a beautiful dress without a pattern. DIY ball gown for a girl
Cotton fabric is ideal for sewing summer women's clothing. If you have a piece of such fabric, we suggest sewing a simple summer dress with your own hands. Great idea for beginners. Even if you don’t know how to make patterns, after reading our master class, you can easily cut out the details and sew something new for the summer.
The style of the dress is very simple, suitable for women of any size, because all imperfections will be perfectly hidden under small natural folds of the fabric. A straight-fit model with a Y-shaped neck, one-piece short sleeves and a thin belt made of the same material, the perfect solution for hot summer or warm autumn days.
To sew a summer dress, you will need:
- cotton fabric - 1.5 * 2.5 m;
- sewing machine;
- matching threads;
- pins;
- tape measure;
- ruler;
- scissors;
- paper;
- pencil or chalk.
Cutting out the details of the dress
Since our fabric is cotton, before cutting and sewing the dress, it must be washed in soapy water, rinsed, dried and ironed with a hot iron on the wrong side.
Lay the fabric out on a flat surface and fold right side to right side lengthwise and then crosswise. That is, we should get a rectangle of 4 layers of fabric. The side of the rectangle that is longer is the length of the dress. The one that is shorter is the width. The intersection point of the folds is the top of the neck of the dress, from which, in fact, we will build the dress pattern.
Please note that the neck configuration can be round, square, boat, etc., mine is U-shaped.
It is better to make the neckline on the pattern small, and when trying on the dress, adjust the sizes.

We also draw lines for the inclination of the shoulder. Measure and set aside the sleeve width.
 \
\

We measure the volume of the widest part of the hips with a measuring tape. Divide this number by 4 and add 6 cm to the result. We measure the required number on the fabric and draw a side line. Under the sleeves we draw a smooth transition to the side of the dress. Cut it out.
From the remaining fabric we cut out a pattern for the future belt. If you were unable to cut the entire length of the belt, then compose it from separate strips.

Master class: how to sew a simple cotton dress with your own hands for beginners
Sew shoulder and side seams. The stitching seam is “linen”. We make the first line along the front side, retreating 5 mm from the edge. We make the second line from the wrong side, retreating 6-7 mm, as if covering the fold of the fabric of the previous seam. This type of seam completely eliminates the need to process the edge after stitching the parts, because it turns out very smooth and everything unnecessary is safely hidden inside.


We are trying on dresses. We outline the neckline. Let's start processing it. To do this, take a sheet of paper and a pencil. Place the front part of the dress, folded in half with the neckline, onto the paper. Carefully align the bottom of the neck and the side of the sheet. They must match. Then we outline the curve of the neckline and the shoulder area.
We retreat from the edge of the neck, along the entire part, 5-6 cm and draw a line by hand. The result is a pattern for the neck facing. Let's cut it out. We place it on the remaining fabric, folded in half and secure with pins. Cut it out identically to the paper blank. We remove the pins and get the details of the neck facing (for the front and back) from fabric.


We sew the shoulder sections of the facings together and press the seams. We apply the facing to the neck of the dress face to face, combine the shoulder sections, and secure them with pins. They must match perfectly. We put a dot in the very middle of the lower part of the front neck. There will be a notch there.
We sew the upper part of the neck, retreating 4-5 mm from the edge. 1 cm from the point we reduce the stitch size several times. We finish this way to the point. At the point, we rotate the line at the desired angle, only with the needle lowered and the presser foot raised. We do 1 cm with the same stitch, then change it to normal size. Finishing it up.


We make one notch to the point.

We stitch the facing, to do this, on the front side, departing 2 mm from the previous seam, we lay a finishing stitch along the facing.

We process the edges of the lining with a zigzag or overlock. We bend the facing to the wrong side, make a edging, and steam it with an iron.

We sew the edges of the facing by hand from the wrong side along the shoulder seams.
Sew the belt from the wrong side. Turn it inside out and steam it. We sew the belt with two finishing lines, top and bottom. We bend the ends of the belt inward and also stitch it.

We hem the hem of the dress and sleeves. The hem is 3 cm on the sleeve and 4-5 cm on the hem.

This is the light summer dress we got.
Julia Pyatnitsa
How to sew a dress with your own hands in one hour?
Every girl's wardrobe should have at least one dress for the warm season, cold weather, and also for an evening out. Therefore, quickly reconsider the assortment of your wardrobe - there is no better way for you to get a new thing, like sewing a dress with your own hands!
Fashionable styles of dresses
Before you learn how to sew a dress, decide on its style. Pay attention to those models that have been at the peak of popularity for several years now to stay up to date with fashion trends.
Asymmetrical skirt
This style was loved by many girls 3-4 years ago for its originality and peculiar audacity - now even in an evening dress for a strict dress code you can coquettishly flaunt your bare legs.
The long skirt at the back, practically stretching along the floor, gradually shortens, turning into a midi and even a mini-length at the front.
A-line silhouette
A dress of this cut is universal: it will suit both thin women and ladies with curvy figures. Due to the straight, slightly flared silhouette, the clothing hides all figure imperfections.
 Choosing such an outfit will tell others about your awareness in the fashion world and your unconventional look at simple things.
Floor skirt
The classic version of an evening dress can now be worn every day! And if 3 years ago the catwalks accepted only straight maxi skirts, now fluffy styles with lining and pleats are returning to fashion.
 But it’s better to avoid tight-fitting long dresses - these days it’s bad manners.
Sheath dress
The statement “classic never goes out of fashion” perfectly characterizes sheath dresses. The tailored cut, knee length and slim silhouette are all you need to become a symbol of elegance.
 Your mother's or grandmother's wardrobe will come to your aid! Go through the clothes of their youth - it is much easier to customize a ready-made dress you find than to create a new one.
Peplum on the belt
An interesting decorative element appeared in the collections of famous designers about four years ago, and still remains in demand. It is enough to sew a loose miniskirt to the waist of the dress on top of the main tight one - and you are already on trend!

The girls liked the peplum so much that the creators of women's clothing lines were forced to add it to jackets, T-shirts and sweaters. You can update an already finished outfit by purchasing a peplum belt and tying it around your waist.
Preparing for work
Even when sewing simple things without patterns and instructions, you need to take and use certain measurements of the person for whom you will create. Otherwise, you may end up making a dress that doesn't fit well or isn't the right size.
The main parameters when sewing are the following:
- chest girth;
- waist circumference;
- hip girth;
- length of the product.
Often there is such a concept as half-girth, half-length - depending on how many parts the back, front, and skirt of your dress consists of.
It is also important to follow the following rule when creating a pattern: each time when drawing the details of a product on the fabric, leave small distances - up to 7 centimeters - for seam allowances and darts.
Darts are needed to secure the required amount of material and narrow it in certain places. And without allowances, you will end up with a dress 1-2 sizes smaller than expected.
An increase of 3-4 centimeters is needed along the edge of the product or at the joints of parts, in order not only to sew the dress, but also to beautifully process the crumbling edge of the material. At the neckline and sleeves, you can get by with small allowances of up to 2 centimeters.
DIY dress: master class
Recently, interesting tips have begun to appear on how to sew a dress for those who are not very familiar with patterns and their construction. You can use one of the three master classes offered below to sew yourself an interesting outfit.
The beauty of these lessons is that they won't take you more than an hour to complete! So, if you wish, you can sew several dresses at once in a day, so that you can pleasantly surprise your friends every time you meet.
A prerequisite is the presence of a sewing machine - even seams cannot be obtained by hand even by professionals.
Asymmetrical cut
Buy a piece of light fabric like chiffon or crepe chiffon the same length as you plan to sew the dress, but with a margin of 15 centimeters, and a width of at least 140 centimeters.
- Place a piece of cloth in front of you. Measure the expected length of the skirt with an increase of 5 centimeters and cut it.

- Attach the simplest top or T-shirt to the top of the fabric and trace it so that you have 2 parts - the front and the back. Don't forget about seam allowances.

- You can sew a dress by starting with a skirt. Take an already measured piece of fabric, fold it in half and start drawing: measure 10-12 centimeters from the edge opposite the fold, put down the estimated length of the front of the skirt and mark it with a dot. Pass the oblique through it to the bottom of the fold, ending it in a smooth semicircle.

- Open out the details of the skirt, back and front, sew them together with an overlock stitch and try them on.
- Process the details of the top in the sequence shown in the image.
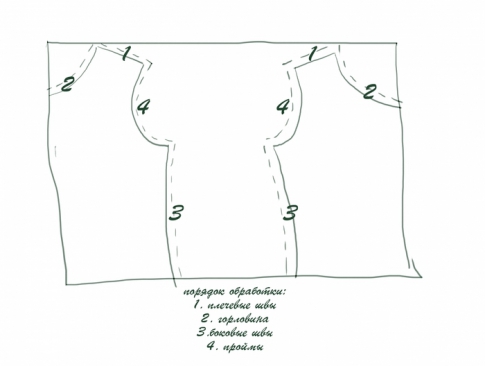
- Connect the front and back by sewing the shoulder and side seams with an overlocker. If your sewing machine does not have this function, you can sew the pieces with a simple straight stitch and zigzag.

- Finish the bottom edge of the skirt with a rolled or double hem stitch, like the neckline and armholes.

- Now all you have to do is sew the top and skirt of the dress. Do not forget that the upper edges of the skirt overlap each other by about 10-12 centimeters.
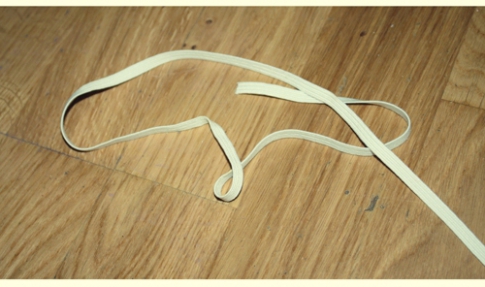
- Sew the elastic into the waistband and your dress is ready!
 Before going out into the world, check how transparent your product is. If necessary, wear a fitted base dress or lining skirt underneath. Without lining, the product can be used as a romantic beach dress.
Summer dress
Try to sew a dress of the same cut as the previous one, but with a skirt of the same length. To do this, take a thick fabric that holds its shape, with a variegated and colorful pattern.
- Lay the piece of fabric on the floor and fold it in half, wrong side out.
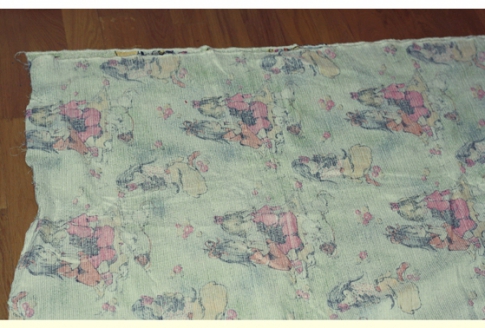
- Place a simple T-shirt with thick harnesses on top and outline it, increasing the length of the future skirt. You can shape the dress straight-cut, like a T-shirt, or you can increase the width of its skirt.

- Finish the side and shoulder seams in the same way as in the first dress. They are shown in red in the image.

- Determine where the waist is in your dress by taking the measurement from your shoulder to your waist and transferring the length to the garment.
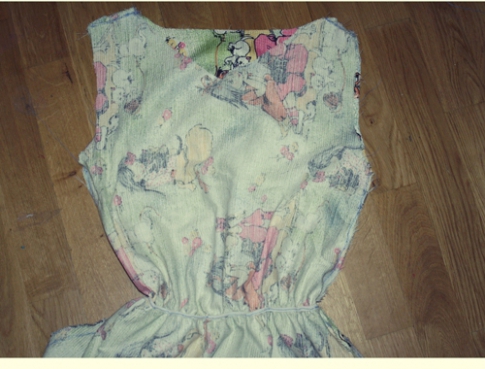
- Sew the elastic into the waist, stretching it before each operation of the sewing machine.
Now you can put on your dress and go conquer passersby in it!
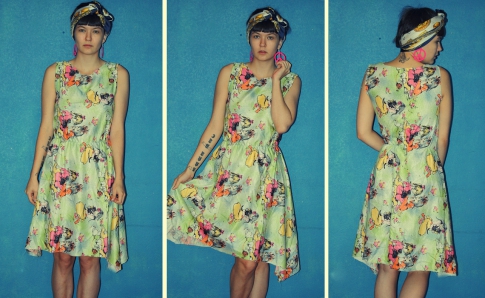
To decorate the look, you can sew a headband from the same fabric as the dress, wear bright accessories and tie it with a thick belt. Complete the ensemble with a handmade clutch.
Evening dress in half an hour
Recently, styles of dresses have begun to appear that can be sewn in literally half an hour using only one seam! You can learn more about such dresses by watching the video.
Take note of this easiest sewing method! Buy two pieces of fabric equal to the length of the intended dress multiplied by two. The width of each piece should be equal to the length of your shoulder multiplied by 2.5. Choose fabrics in colors that go well with each other.
 Throw each piece over your shoulder so that the edges of the fabrics are at the same level. Measure the approximate length of the neckline and armholes. Sew the remaining edges of the fabrics together using an overlocker. At the waist, tighten a wide belt with a beautiful buckle - you have a flowing, elegant dress in the Greek style.
Take it for yourself and tell your friends!
Read also on our website:
Almost every woman dreams of having a huge wardrobe. But even more, she dreams of being able to replenish her wardrobe as often as possible, that is, buy new things. It is the new thing that brings the most joy to a woman. We will tell you how to sew a stylish dress for every day with your own hands, and very quickly and easily!
However, life today is not cheap and not everyone can regularly purchase a new thing they like. Family, children, rising prices do not allow women to spend on clothes to the extent that they would like.
However, there is a way out of this situation. The ability to sew will allow a woman not only to save significantly, but also to often replenish her wardrobe with stylish, beautiful and original things.
Sewing is accessible to everyone; many people exaggerate the difficulties they will have to face when making their own clothes. It's actually not that scary. Of course, cutting and sewing courses will be very useful for any housewife, but you can get by with self-education.
The main motivation for wanting to learn how to sew is saving. All women know that such a part of the wardrobe as a dress is always expensive, even if it is not the most prestigious store. However, having learned how to sew clothes, you can create an evening outfit for 500 - 700 rubles.
If you are just learning to sew, then you don’t need to take on complex styles.


Better bet on expensive and brightly colored fabric. The dress model should be as simple as possible. Firstly, this is a guarantee that you will not ruin the whole thing, and secondly, the simplicity of the cut is always elegant. Also important are the qualities of the fabric such as wrinkle resistance, because otherwise you will look untidy in the new product. Thick knitted fabrics that wrinkle easily (for example, Jersey) can help avoid this.
Learning how to make a pattern for a future product correctly
- You can make a pattern yourself, but this requires knowledge or at least a lot of experience in designing clothes. A pattern is a huge number of measurements, formulas and drawings. Therefore, we do not recommend taking on this activity on your own.
- Pattern from a magazine. Today there are a huge number of magazines with ready-made clothing patterns. Usually in magazines, patterns are made on a huge sheet of paper, where several products are located. You can simply cut out a pattern from paper, or you can copy it in order to use these patterns again in the future. This is very convenient and guarantees the quality of the pattern.
- Order a pattern from a professional seamstress and use it in the future to make various clothes. In this case, all the features of your particular figure will be taken into account, and you can use this pattern when sewing any clothes.

How to sew a dress with your own hands quickly and easily with description
We take two meters of fabric 150 cm wide. We fold it in half so that we get a canvas measuring 100 * 150 cm. We take this canvas in our hands so that a meter of fabric falls down from your hands, and from palm to palm it is one and a half meters long.
Next you need to connect your palms so that you again fold the length of the canvas equal to one and a half meters. Those. the fabric should be folded in four layers. The length of the dress will be 1 meter, and the width will be 75 cm on the front and sleeve.
Next we begin to draw the dress itself on the fabric. This can be done with special chalk from a fabric store. You can also dry a narrow piece of old soap, preferably a color that contrasts with the fabric. It draws perfectly on fabric and leaves no marks on clothes.
From the top we measure 7 cm down and 7 cm to the side. We connect these points with a smooth line to create a neckline. The more you take down, the longer the neckline will be. If you extend the line to the side, the neckline will be closer to the shoulders.
Sleeve.To cut out the sleeve we need to leave enough space for the shelves. So we measure our hips with a meter and draw them on the fabric? length from the obtained hip circumference figure. For example, if your hip circumference is 110, then measure 27.5 + 2 cm for allowances.
The dress we offer has a one-piece sleeve.


But it can also be cut off, which will require cutting out an armhole and a separate sleeve. In addition, the product can be completely sleeveless.
To make a one-piece sleeve, you need to set aside 20 cm from the top edge for the armhole. Next, you need to measure the width of either your wrist or shoulder, depending on what sleeve length you need. Next you need to connect the armhole and the bottom of the sleeve. Those. smoothly connect the line from the neck to the shoulder and down. We also smoothly draw a line from the armpit to the bottom of the sleeve.
Waist line and hip line.To determine your waistline, you need to measure the distance from the bottom of your neck (where the zipper on a dress usually starts) to your waist. Mark this point on the fabric, measuring from the bottom of the neckline. We need to set aside another 20 cm from the resulting point, and we will get the hip line. And finally, we connect all three points: hip line, waist line, armhole.

The most crucial moment is cutting out the details of the dress. If we sew a dress with our own hands, then the main thing is not to forget to leave seam allowances of 1.5-2 cm along all cutting lines!
Neck.In order to beautifully design the neck, you need to make a facing. To do this, take a piece from the remaining fabric, equal in size to the neck. Place the dress neckline on a piece of fabric and draw a semicircle along the contour. We measure 1 cm upward from the semicircle - the seam allowance. We leave an allowance of 10 cm down from the semicircle. This will be a facing, which needs to be applied with the front side to the front side of the neck and make a line along the neckline. To make the neckline even and neat, you need to make small cuts in the allowances. Then turn the neck out and iron it.
If necessary, insert the lock from the back. But if the dress is knitted, then this is not required.
The final stage will be connecting all the parts. Sewing the dress with your own hands is completed.
Video on the topic of the article for beginners in sewing
Clothing for a woman plays a big role in creating her unique image. The fair half of humanity spends hours in shopping centers in order to choose the right outfit. However, there is a category of ladies who trust their wardrobe to professional dressmakers. This provides confidence that this particular model of dress or suit will only be in one copy.
Finding your own master is very difficult, so more and more women want to learn how to sew on their own. To do this, you need to know a number of basic concepts that will help you master making patterns - simple DIY dresses for beginners.
Beginning craftswomen are often interested in the question: There is nothing complicated about it, just a little effort is enough effort and imagination. To get started you need:
- choose exactly the model that suits you;
- create a drawing of your future outfit;
- take measurements;
- build a model pattern, this section will help you dress patterns for beginners, simple DIY patterns;
- sew a dress;
- create original additions to it.
 Of course, if you are concerned about the problem, how to sew a dress with your own hands for beginners, patterns, then it’s best to start by selecting a picture of the dress you like. Then, after taking measurements, transfer the sketch of the outfit onto paper, this is perfect for graph paper, since it is already marked with divisions, which will simplify the creation dress patterns for beginners. Simple DIY patterns do not require calculation of complex elements, so the most difficult thing will be to transfer the pattern to the fabric. To do this, please note:
- Seam allowances depend on the texture of the fabric ( the thinner the fabric, the larger the allowance);
- all lines are applied only on the wrong side of the fabric;
- To transfer the pattern lines, use a special tailor's pencil or ordinary soap.

For craftswomen and fashionistas, the question still remains relevant: how to build a base pattern. In fact, there is nothing complicated about it. - this is the creation of a basic drawing of a wardrobe element, based on which you can create different models of things. In this section we will look at some details of the process:
- the base consists of two parts - shelves;
- there are three cutouts on the shelves: an armhole and two undercuts;
- the grooves on the front shelf are deeper than on the back;
- The armhole on the back shelf is smaller than on the front.
To imagine, you need to take a rectangular piece of paper and take measurements.
- The length from the cervical vertebra to the level where the dress will end is the length of the product;
- The width of the pattern is half the chest circumference plus 5-7 centimeters.

Many people who want to learn how to sew are put off by the thought of the labor-intensive process of creating a pattern. Question, how to sew a dress with your own hands for beginners, patterns, which beginners ask themselves, has a very simple answer: very simple. To do this, you just need to familiarize yourself with the basic requirements, how to make a pattern. And they are as follows:
- train yourself to write down all your measurements in a notebook (this is necessary in order to learn how to compare and adjust clothing models);
- keep all sketches and sketches of clothing models (in the future, when there are a lot of them, you will be able to easily model clothes);
- All drawing lines must be smooth and clear.
In order to find out how to make patterns, it’s better to start with the simplest thing - cutting out a model of a straight skirt. The fact is that the simplicity of the model will convince you better than any words that creating patterns is within the power of everyone. So, to pattern a skirt you will need the following measurements:
- Half waist circumference (the number is divided by two);
- The half-girth is below (we measure the widest point);
- Skirt length (the choice is yours).
 Constructing a pattern for the basis of a dress
Daily, evening - there can be many options, but it will be the same. To imagine, you need to know how to make a drawing of the future product. To do this we perform preparatory stage:
- take measurements (there should be four of them - half-bust circumference and length of the product, length from shoulder to waist, length from shoulder to chest);
- On a rectangle of graph paper we mark the boundaries of our pattern and the waist line.
does not require special mathematical calculations, but some arithmetic knowledge will still be useful. For example, to calculate the depth of the undercut on the chest. Take a piece of fabric and make an inner fold. Place it on your chest; if the fabric fits tightly, this is the depth of the undercut. All that remains is to measure it. Two-thirds of its length is the length of the shoulder groove, which is necessary to make it symmetrical. The waist dart is calculated based on how narrow your product will be.

For all beginner dressmakers sheath dress pattern seems like a painstaking task. Creating a competent foundation is the key to ensuring that all the dresses you sew will fit perfectly. Of course, you need to start by taking measurements. They will help you determine your size. This is especially important if you decide to use a ready-made pattern from a fashion magazine. By the way, this is a very correct solution: basic dress pattern, taken from a professional source, will save your time and nerves. But at the same time, it is still worth putting all your measurements on the drawing, which was copied from the magazine. This way you can compare your measurements and the standard and be able to make the necessary adjustments. Usually, the error concerns the half-circumference of the waist and hips. As a rule, European models in these patterns are too narrow. The re-shot and corrected pattern can be used to sew several models, for example, deepening or reducing the neckline, adding pockets, sleeves, slits, or a yoke to the dress. However, if you decide to make the basic pattern yourself, then be sure to keep in mind that you cannot do without competent taking of measurements. First of all, the measuring tape should not be too tight or too loose when taking measurements. All measurements are taken only in a standing position. Errors are not allowed. Then, using neat dots and lines, the measurements are transferred to graph paper, with obligatory notes about what kind of line it is. The most difficult thing is to determine the length and depth of the recess. To do this, you can use a piece of fabric in the shape of a circle, which is applied to the chest. The center of this circle should coincide with the top of the chest. Pin the allowance that has formed in the circle with a pin - this will be the width of the undercut. And the depth is determined from the beginning of the roundness of the chest to its center. Thus, if you do everything right, you will succeed basic dress pattern.

A beautiful dress is not always an expensive purchase in a fashion store. A little patience and desire, and you can sew a new outfit yourself. To ensure the result meets your expectations, follow the instructions, how to make a pattern. To get started, prepare everything you need:
- centimeter;
- ruler, pencil;
- scissors;
- tracing paper;
- special chalk or soap;
- pins;
- textile.
There are two options for the method, how to make a dress pattern. The first is to make a drawing yourself, the second is to copy the style of a dress you like from a magazine. In the second case, no additional knowledge, how to make a pattern to you will not need. Modern fashion magazines always offer inserts with patterns designed to fit a wide range of sizes. So, in our guide you will learn, how to make a dress pattern yourself:
- We start by taking measurements (chest, waist, hips, back length to waist, shoulder length, finished dress length, sleeve length). Please note that the measuring tape should not be too tight or sagging, as this will cause data distortion and, accordingly, the product will not fit you nicely.
- We determine our size by the girth of the chest and hips, using the size table given in the magazine.
- We transfer the drawing lines from the pattern sheet to tracing paper.
- We pin the tracing paper onto the fabric and trace all the lines with chalk.
- Cut out the sketch on the fabric, leaving a couple of centimeters for seam allowances.
 Children's dress pattern
Every mother wants her daughter to look great at any age. A wonderful little girl should have the cutest and most charming dresses. Of course, you can go to the store and buy a ready-made item, but it’s much more pleasant to sew the dress yourself. In chapter patterns for children's dresses you will learn about some of the intricacies of the cutting process. In order to baby dress pattern turned out to be proportional, we will use the method of creating a sketch based on a sample. We take any T-shirt for your daughter, which suits her. Place the T-shirt on a sheet of paper (a roll of wallpaper will also work), trace the outline of the T-shirt - this will be the basis - baby dress pattern. Now we mark the length of the finished product on the drawing (after taking this measurement from the child). Next, cut out the sketch, fold it in half and cut it. One part is the front shelf, the other is the back shelf. They will differ in the depth of the neckline and armhole. These elements on the front shelf should be deeper than on the back. Moreover, if you are sewing a sleeveless dress, then the front and back armholes can be the same. If your model assumes the presence of a sleeve, then do not miss the moment of correctly taking measurements: the length of the sleeve is measured in the position of a bent arm, so the child will be able to freely raise and lower his arms, and there will be no need to adjust the dress. Be sure to keep in mind that the bottom of the product should be slightly rounded - this will add a special charm to the style. Children's dress patterns As a rule, they are created according to the described base model and differ only in finishing.

For a woman to like a dress, it must be made for her. This is the most correct approach when choosing new things. However, if a girl decides to sew on her own, she definitely need to know, Right. To do this, first of all, you need to take the correct measurements:
- half chest circumference (a centimeter tape is placed on the protruding points of the chest, the value is divided in half);
- waist circumference (measured at the narrowest part, divide the resulting measurement in half)
- semi-circumference of the hips (measurement of the widest part, also divided by two);
- back length (from the cervical vertebra to the waist line);
- back width (from armpit to armpit);
- shoulder length (from the neck to the junction of the shoulder and arm);
- length of the product (from the cervical vertebra to the level of the desired length of the dress).
A sheath dress is an original solution to the problem of an everyday outfit that quickly turns into an evening one. It is believed that every woman should have such a dress in her wardrobe for all occasions.

A straight dress is an excellent choice for those who always strive to look elegant. Moreover, a dress of this cut goes well with a raincoat or coat, or jacket. You can choose different accessories for it, and then from everyday it will turn into evening. You can sew such a comfortable outfit yourself, for this you will need straight dress pattern. A paper drawing is the basis for correct and beautiful tailoring. It is very important that all measurements are taken correctly; there should be no approximation here. You shouldn’t reduce the parameters either, since any errors will make the dress look tight and wrinkle the fabric. Thus, a clear straight dress pattern– this is a guarantee of excellent results. Let's look at the step-by-step instructions for creating a drawing:
- draw a rectangle-base, which consists of the length of the product and measurements of the half-circumference of the chest;
- mark the armhole and add 1.5 centimeters up, connect it to the middle of the front - this is our neckline;
- We deepen the neckline along the back by 4 centimeters;
- we calculate the waist undercuts (along the back - from the waist line up and down the same values, along the front - from the waist line to the chest up, and down to the same level as the back);
- if the style suggests it, we cut out the sleeve (although many professionals insist that the pattern of a straight dress does not involve sleeves, since this makes it impossible to wear it as a sundress over a turtleneck).

If you want the things in your wardrobe to be exclusive, then the best way to achieve this is to learn how to sew. Professional dressmakers say that the biggest mistake beginners make is that they grab onto complex patterns, and the art of tailoring does not tolerate fuss. It is very important to start with simple models, especially since the use patterns for beginners does not mean that the thing will look too simple. In chapter free dress patterns for beginners you will learn about some of the nuances of creating your own designer items. First of all, you should decide on the style of the dress. Fashion magazines are perfect for this; they reflect the fashion trends of the season, describe sewing technology, and provide recommendations and reviews from experienced fashion designers. Now let's start building patterns for beginners. Of course, it’s good to start by using ready-made sketches of drawings that are published in specialized magazines - they are great for creating a basis. But there is one drawback - all the data used in such publications is standardized to certain templates. It's rare that a figure fits neatly into them. Therefore, any basis should be adjusted to suit you. Dress patterns for beginners, as a rule, consist of several size options. And you have the opportunity to choose the one closest to you. If it needs to be corrected, then make sure that the line you drew runs parallel to the original one, then there will be no distortions or screeds in the product.

As a rule, they do not contain complex details and are mainly basic patterns. Their peculiarity lies in the fact that the finished product is supplemented with details cut separately. All types of clothing have such bases: dresses, trousers, skirts, etc. Beginners are advised to acquire the basics of all things - this will become a real treasure trove for subsequent clothing modeling. After all, by slightly changing the depth of the neckline and lengthening the product, you can create an elegant evening dress on the basis of a foulard dress. And one basic blouse can become a generator of ideas for creating a huge number of shirts, T-shirts and cardigans. Professional fashion designers have many patterns (or patterns) that they use to create their couture masterpieces. These patterns serve as a starting point for creating even the most intricate designs.

Any fashion designer knows how important it is to get it right pattern making to get a beautiful final result. Very often, inexperienced seamstresses try to create something without a drawing, by eye. However, this is a big misconception, because how accurately you transfer the measurements from the model drawing will determine how the product will look. Among professional tailors there is an opinion that the best construction of a pattern -basics This is only possible if you take your own measurements. That is, ready-made patterns in fashion magazines are suitable either for the lazy or for those with an ideal figure. But there is another opinion, how to make patterns: a standard drawing can be used as the basis for your own. A number of points should be taken into account:
- first, measurements are taken, and then the size is determined (many magazines contain size tables, but they correspond to the region or country where the magazine is published);
- all pattern lines are transferred first to paper (tracing paper), and then to fabric;
- All the lines of the paper pattern are drawn on the fabric;
- When cutting out parts from fabric, you should leave a couple of centimeters of seam allowance (note that the thinner the fabric, the larger the allowance);
- on “slippery” fabrics, it is better to avoid simultaneously transferring lines on both sides (of course, transferring the drawing first in one direction and then in the mirror direction takes twice as long, but this way you will definitely make sure that you have not lost an important centimeter anywhere).
 How to learn to make patterns
Any amateur dressmaker knows that it is very important to know how to make patterns. The fact is that only then can you consider that you have mastered the art of sewing clothes. To cope with the task, how to make patterns dress itself, draw a rectangle, one side of which is the length of the product, the other is the half-circumference of the chest. This is our basis how to make a sheath dress pattern. Now we apply the remaining measurements to it. Please note that you need to add about 1.5 centimeters to your data to ensure a beautiful fit of the product. The body is constantly in dynamics, so the dress should not hinder movement. In addition, keep in mind that a person’s figure tends to change, so being too meticulous in matching current measurements can lead to the dress becoming too small for you after a hearty lunch. In order to master the task, a little time, effort and desire are enough.
 How to create a dress pattern
Any woman knows how important a dress is in her wardrobe. To learn how to create charming dresses yourself, you need to know that all the lines must be straight and the measurements must be accurate, since approximation and inaccuracy will definitely affect the final result of the process. Once the base is created, you can add details, cutouts, and trim to the design. Depending on the choice of details, your dress can become casual or evening. The choice is yours. A base pattern is needed be sure to save, as this will save your time in the future when cutting out other models.

Professional dressmakers know how important a pattern is for sewing a product. This is probably the most time consuming process in sewing. However, there is an alternative opinion that some for some clothing models can be mastered the simplest way to cut without a pattern, For example:
- poncho made of light fabrics (gauze, tulle);
- flared sun skirt;
- bag dress, etc.
Choosing the simplest way to cut without patterns, please note that it is very important to prepare the fabric. Firstly, the material from which the product will be sewn must be decatified, that is, moistened. If the fabric is thick, then just spray water from a spray bottle. If the fabric is thin and light, then it is better to wrap it in a damp sheet. After moistening, the material must be ironed well. Next, we check whether there is a bevel in the weaving of the threads: we pull out the weft thread parallel to the edge and determine whether there is a bevel. If there is a shift, steam it with an iron. After this, all edge threads are cut off, as they can cause the product to become tight. When cutting without patterns, it is very important to properly process the cuts and seams. Moreover, in some models, processing of cuts is done before line work is carried out. For example, a poncho pattern consists of first hemming the entire square of the product, and only then securing the armholes with two seams.
 How to build the base of a women's dress pattern
A sheath dress is a versatile outfit in which you will always look fashionable and elegant. Features of this outfit are the absence of a collar, a round neckline and a fitted silhouette. easy to do, especially since this basic model is in all sewing magazines. However, a few useful tips will still be useful to you.
- Mark the pattern according to your measurements. You will need half chest circumference, length from shoulder to waist and from shoulder to chest, length of the finished product.
- rests on the waist, shoulder and chest undercuts.
- We transfer the paper pattern onto the fabric using special chalk or a piece of soap.
- We sweep away the details and grooves and try them on.
- Adjusting the depth of the armhole.
- Smooth out the undercuts in the direction from the side seams.
- After this, the product can be stitched.
A carefully sewn sheath dress will serve you for many years, because depending on the accessories, it can be worn both at a feast and out in the world. And the fact that this dress is sewn with your own hands will increase the self-esteem of the needlewoman. It's enough just to figure it out
 We sew ourselves, patterns for beginners
If you want your clothes to be not only fashionable, but also to fit you perfectly, then the best way to achieve this is to learn how to sew. Numerous clothing modeling courses, master classes or simple patterns for beginners, in which the entire process is clearly described. You just need to read carefully and transfer the theory into practice, or rather, reflect the calculations on paper. To do this, it is not at all necessary to have outstanding mathematical abilities; knowledge of the rules of division and addition will be enough. In the section you will understand that you need to divide the main measurements in half, that is, the girth of the chest, waist, hips. And add a couple of centimeters for seam allowances. , as a rule, do not contain complex details and are mainly basic patterns. Their peculiarity lies in the fact that the finished product is supplemented with details cut separately. There are such databases for all types of clothing: dresses, trousers, skirts, etc. Beginners are advised to acquire the basics of all things - this will become a real treasure trove for subsequent clothing modeling. After all, by slightly changing the depth of the neckline and lengthening the product, you can create an elegant evening dress on the basis of a foulard dress. And one basic blouse can become a generator of ideas for creating a huge number of shirts, T-shirts and cardigans.

On graph paper we apply the measurement of the length of the product and the half-circumference of the hips, and add 7 centimeters to the last measurement. They are needed so that the finished product is not tight and does not hinder movement. This is a very important rule in the problem, how to make patterns. We mark the half-grip measurement of the waist and connect three points: waist, hips, bottom. The front pattern is ready. Now we cut it in half, set aside one part, and put an undercut on the second: from the waist line to the hip line we make a clamp to a depth of 8 centimeters. Now we transfer all the lines to the fabric, make the back with a seam in the middle, leaving space for the cut (this is necessary so that nothing hinders your movements when walking). Are you convinced that how to make patterns skirts, nothing complicated. Now you need to transfer all the measurements onto paper, sweep the product, and try it on. Be prepared for the fact that after fitting you will need to sew the skirt a little along the side seams. Remember that any adjustments must be made symmetrically.

It's no secret that a dress made for you looks much better than a store-bought one. This is explained by the fact that dress pattern drawing created specifically for the requirements of a specific figure. That is, a well-tailored dress will never pull, press or hamper your movements. It remains to ensure that dress pattern drawing was done correctly. To do this, it is best to trust a professional, however, with a little effort, you can do it yourself. To do this you need to make a base pattern. This is a kind of pattern that fits your shape and size. To create it, you need to take measurements: half-circumference of the chest, waist, hips, back length from neck to waist, back width from left armpit to right, shoulder length from neck to the beginning of the arm and sleeve length. Please note that the last measurement is needed if your dress has a sleeve. Although many craftswomen prefer to start by sewing a sleeveless sheath dress, which looks great not only as an independent outfit, but also Pair with turtlenecks or long sleeve T-shirts. Now you need to determine the size according to your measurements. There are several size tables:
- European;
- American;
- Russian.
These are three basic systems, but each of them has its own special cases. For example, the British and German tables will have differences. Therefore, it would be better to get a comparison table of sizes, especially if you are sewing using ready-made patterns from fashion magazines.

There are a number of rules that will help you master the basics of tailoring. The pattern is the basis of the dress, step-by-step construction consists of correctly taking measurements and applying darts. Let's focus on the last point. The fact is that the presence of grooves ensures that the product fits according to the figure. If you want your outfit to fit perfectly, be sure to consider a number of rules:
- The waist dart in the back ends at the bust line.
- The front waistline ends a couple of centimeters below the bust line.
- The shoulder dart ends at the bust line.
To determine the chest line, you need to attach a measuring tape to the protruding part of the chest. Make sure that the tape measure is not too tight or too loose. When taking other measurements, it is recommended to tie any braid on the chest - it will serve as a true guide. Thus, pattern-basis of the dress, step-by-step construction relies on the correct definition of the chest line, that is, the distance from the shoulder to the chest.
A light summer dress will highlight your femininity and charm. And if you know how to sew and love to sew, then with our patterns you can easily create a comfortable summer outfit with your own hands. We wait all year for summer, when we can wear light, airy clothes. Of course, we want to update our wardrobe with a beautiful summer dress, perhaps more than one.

Many will go on vacation, and new summer dresses, both short and floor-length, hand-sewn, are simply necessary. Even if you yourself are not very good with a sewing machine, it’s worth trying to update your summer wardrobe with the help of patterns and instructions. We hope that you will like one of the proposed cut options.
Before we start cutting, let's look at the size options so that we know which size corresponds to which data.
This will make it easier for us to decide on the pattern, because the size of the product is not always mentioned. The table is clear enough for you to determine the size yourself.


In hot weather, a loose-fitting summer dress, sewn with your own hands, may come in handy. We sew a dress for the beach. Fabrics such as silk, satin, linen, cambric, viscose, and light acetate are suitable for such a dress. Even the cheapest silk will do: silk satin, silk chiffon. But by no means polyester; in synthetics the body does not “breathe” at all.
Keep in mind that viscose, especially wet, tends to stretch when worn. And silk, like linen, always shrinks after washing.
Before sewing the product yourself, try sewing a small piece of this fabric; you may have to change the needle or threads in the machine. It is best to buy needles from Schmetz and Organ. The size of this beach dress is 46-48. If you would like to make a pattern for a different size, please measure your chest circumference. Next, on the pattern, instead of 25 cm (chest line), we set aside ¼ of the girth of your chest + 1 cm seam allowance + 2.5-3 cm for light volume of the figure. We do the same with the volume of the hips: instead of 27 cm (hip circumference), we set aside ¼ of the volume of your hips + 1 cm seam allowance + 2.5-3 cm for light volume of the figure.


We choose the depth of the neckline ourselves. It’s better not to make a large cut right away; it’s never too late to trim off the excess. We make the length of the dress at our discretion. Don't forget to leave fabric for the drawstring, cord waistband and four small cords to tighten the shoulders. We ourselves mark with chalk the place of the belt-cord, it will be just below the waist. We baste the drawstring to the intended line. We adjust it from the front side, tucking the cuts on both sides. If the drawstring is on the front side, then on the drawstring itself two longitudinal or round holes are made for the exit of the belt-cord. We sew the holes by hand with our own hands. The belt-cord should move freely in the drawstring.

Next, we begin to sew the shoulders. We sew the shoulders together so that there is 2.5 cm of fabric left for the cord. We iron the shoulder seams and sew them, folding the fabric inward. We should have 4 drawstrings on two shoulders. We thread the cords through them, tighten them a little and tie them together. The shoulder turns out to be slightly gathered. We hem the bottom, the hand-sewn dress is ready. Choose a plain fabric or with a large floral pattern, this is very popular. We sew the selected classic model.

A dress with a peplum is a very feminine dress; it favorably emphasizes the features of the figure. Let's try to sew such a dress with our own hands using a simple and understandable pattern. A peplum is a wide frill that is sewn at the waistline. This dress will appeal to most ladies. So, ladies with light weight can visually increase the volume on their hips with the help of a peplum, and for overweight ladies a peplum will help hide the excess. In this case, the peplum should be sewn above the waistline. The only thing to remember is that such dresses look best on a tall or medium-sized lady. We are sewing a beautiful dress for the summer.


Our pattern is given for size 50 (see table above).


The pattern includes a back (2 parts) and a cut-off front (2 parts), the bottom is separate, it is a straight skirt consisting of two parts. The peplum is cut separately. On the pattern, segments T1H1 and TN have the same length, which is equal to the length of the peplum. TT1 is the waist line. If you are sewing from thin fabric, then it is better to duplicate the peplum with lining material, possibly from the main fabric. Then the peplum will keep its shape better. It will look original and interesting if the peplum has an asymmetrical length: short in front, long in back. Don't forget to baste and then sew in the zipper on the back of the piece. We process the neckline and armholes as in.


How beautiful and romantic dresses with a full skirt look. This model can have many options, with or without sleeves, with elastic, with a zipper, and so on. The dress softly fits the figure at the waist, and is maximally widened towards the bottom. It is quite possible to sew such a dress with your own hands. If you yourself are not very good at sewing, we would recommend sewing such a dress with elastic, then you will not have to particularly adjust it to your figure. If you lengthen the sun skirt, you will get a floor-length dress. The skirt can be made not so fluffy, for example, half-sun.


The pattern is suitable for sizes 48-50 (see table above). Fabric: silk, chiffon, satin, stretch cotton, and so on. If the length of the skirt is 55-60 cm, then with a fabric width of 140 cm you will need approximately 2.5 meters of fabric. In this model, the hidden zipper is located on the left side.

Sequence of cutting and sewing
- After you have decided on the length and style of the dress for the summer, it is better to first make a drawing on paper. If you are a beginner seamstress, take your time cutting the fabric, make a drawing, pin the paper and try it on. If everything fits, then pin the pattern to the fabric and cut it out, not forgetting the seam allowances (1-2cm). The size of the allowance depends on the fabric. If the fabric “crumbles”, you need to take a larger allowance. We lay out the cut details, choosing any fraction.
- The armhole and neckline are finished with a facing cut on the bias. We sew all the darts and iron them. We overcast the side seams of the bodice and grind them down. On the left side we leave a hole for sewing in a zipper. Press the side seams.
- Stitch and iron the shoulder seams.
- We process the sections of the armhole and throat with a facing cut on the bias.
- We sew the seam of the skirt, pulling the seam with our own hands. We do not sew the seam all the way down, leaving room for the zipper. The circle skirt must be pulled down from the waist, it should sag.
- Along the waist allowance, we manually assemble it using a small “needle forward” seam. We tighten the waist.
- We pin the bottom of the bodice and the top of the skirt with the right sides facing inward, aligning the side cut.
- We sew the bodice into the skirt. We sew the zipper into the side seam.
- Iron the seam connecting the bodice with the skirt towards the bodice.
- Align the bottom of the skirt and hem it with a closed hem. Iron the bottom. The dress is ready.


Using the same pattern, you can sew a long floor-length dress. For example, here is a long floor-length dress with an asymmetrical sun skirt.


The cut of this dress is different in that we add the following part to the main half-sun:


Long dress master class
You can sew a long floor-length summer dress with your own hands if you use our master class. An original long dress with a fitted silhouette will highlight the advantages of your figure. A floor-length dress can be worn both during the day and in the evening, on a holiday or in a cafe. The dotted line indicates the facing.


