Blue rose weaving mesh of beads step by step. How to make a beaded rose for beginners in needlework. Materials for beading
Elizabeth Rumyantseva
For diligence and art there is nothing impossible.
Content
Beading is a popular type of needlework, in which various ornaments, toys and other three-dimensional compositions are created from ordinary beads and wire. Roses made using this technology look impressive and can decorate any interior or become a good gift.
Big beaded rose
Beginning needlewomen can easily master the weaving of roses from beads in a master class with a photo. To create a flower, you need to prepare:
- pink and green beads;
- wire with a diameter of 0.3-0.5 mm;
- scissors;
- plasticine;
- floss threads or green teip tape;
- wooden skewer;
- PVA glue.
The process of creating a rose is laborious and can take more than one day. It consists of several stages:
- creating rose petals;
- weaving sepals (bud bases);
- creating leaves;
- stem making;
- assembly stage of the main parts.

Bud weaving pattern
To create a large rose, you need to make 11 petals: 8 large, 3 small. The weaving pattern is as follows:
- Measure a wire about 30 cm long.
- Form a loop so that the beads do not slip off when working.
- Thread 8 beads onto the short part of the base.
- On the larger part of the wire, start stringing beads 81-85 each, make them three turns around the short part.
- To secure, the ends of the wire must be pulled through the middle 3 beads.
- Weave 3 petals according to this pattern.
- Then measure 50 cm of wire and repeat all the steps, and do not 3 turns, but 5, increasing the number of beads on the long part of the base.
- So prepare 8 large petals.
- Give each petal a slightly curved shape.

How to weave petals on a plasticine basis
If the previous type of weaving seems complicated, you can make the petals according to a different pattern using plasticine:
- From plasticine, mold several blanks that resemble rose petals in shape.
- Lubricate the molds with Vaseline.
- String beads on a thread, lay on the form.
- Top the petals with clear varnish.
- After the varnish dries, carefully remove the petal.
- Remove the Vaseline with a cotton swab.
- Coat the inside of the workpiece with varnish too.
- So make all the parts of the bud.
Sepal diagram

To create the base of the rose, you need to make 5 sepals:
- Take 20 cm of wire, make a loop.
- String 5 beads on the short part.
- Thread 30-40 beads on the long part, make 2 turns around the axis.
- String 4 beads on the top end of the wire.
- Fix the end of the wire by pulling it through the middle and twisting it from below.
- Make all the sepals in the same way.
Beaded leaves
For the base, you need to weave 6 leaves:
- Take 30 cm of wire.
- Make a loop.
- String 7 beads on a short base.
- Thread 80–90 beads onto a long base. Make 3 turns around the axis, secure the ends.
- According to this scheme, weave all the leaves, combine them into branches of 3 pieces.

Rose assembly
When all the elements are ready, you can start assembling the rose:
- First, screw small, then large bud petals onto a wooden skewer.
- From the bottom of the bud, fix the sepals.
- Screw twigs with flower leaves to the stem. It is better to retreat to different lengths - so the branches will look more natural.
- Decorate the stem with green floss threads. Note that it is also necessary to wrap the bases of the leaves.

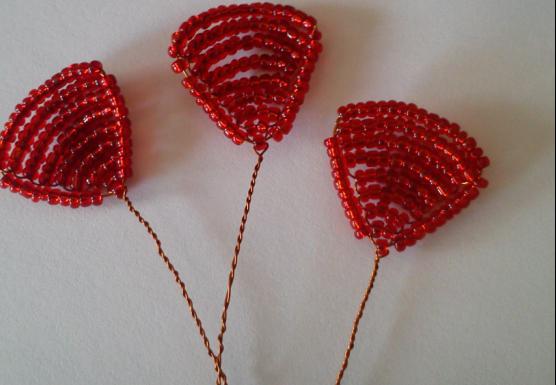
Small beaded roses
Small flowers can be used to decorate pins, brooches, rubber bands.
Prepare for work:
- wire 0.3 mm in diameter;
- nippers or scissors;
- beads of two colors;
- threads.

A small beaded rose for beginners is woven according to the following pattern:
- String 9 beads onto the wire.
- Make a loop, fix the ends of the wire by twisting them in 2-3 turns.
- On the same wire, make 2 of the same arcs side by side.
- String seven beads onto the tip of the base.
- Pass the wire through the middle bead of the first arc.
- Then add 2 more beads, thread the edge of the wire through the middle of the second arc.
- Put on 2 more beads and thread the tip of the base through the middle of the extreme arc.
- Add 7 more beads to the wire and fix its edge at the bottom of the petal.
- According to this scheme, weave 5-7 petals.
- Dial 14 beads separately.
- Twist them together. This will be the sepal.
- Collect a bud from the petals, fix the sepals below.
Roses in a pot
A lush spray rose will decorate the interior of any living room. To create a bush you will need:
- wire;
- yellow beads for a bud;
- green beads;
- skewer;
- scissors or tweezers;
- green floss threads;
- pot;
- Styrofoam;
- expanded clay drainage.

Scheme of a rose from beads in a pot:
- Thread 1 green bead on 30 cm of wire, lower it to the center.
- String 2 more beads, passing them through both ends of the wire and tightening.
- In the same way, weave 4 rows of 3, 4, 3 and 2 beads in each.
- To fix the ends of the working thread must be twisted into a knot.
- Make 6 of these sepals.
- Weave the petals in the same way. On a wire 60 cm long, make 8 rows of 1, 2, 4, 6, 8, 10, 12, 14 yellow beads.
- 9th row - edging. 9 beads must be strung on each end of the wire, stretched through 1 row.
- Tie the ends into a knot. Weave 5 petals, for each of which you need to re-measure and cut the wire.
- Also weave 4 large rose petals in 9 rows.
- Make 11 leaves, consisting of 11 rows of 1, 2, 3, 4, 5, 6, 6, 5, 4, 3, 2, 1 green beads.
- Bend the rose petals in an arc.
- To assemble on a skewer, first connect small, then large petals.
- From below, close the bud with sepals.
- Distribute large leaves evenly along the entire length of the stem.
- Wrap the stem with floss threads.
- Do the same for other roses.
- Cut out a circle from the foam, slightly smaller than the diameter of the pot.
- Insert the foam into the pot, stick roses into it.
- Top with drainage.
Video
Did you find an error in the text? Select it, press Ctrl + Enter and we'll fix it!Flowers are a traditional addition to almost every gift for the beautiful half of humanity. Delicate, fragile, unsurpassed, like every woman, they cheer up, delight the eye and attract attention. It's just a pity when a beautiful bouquet fades the next day, losing its charm.
artificial alternative
No matter how sophisticated florists are, even the most exquisite bouquet will delight its owner for a maximum of a week. That is why they began to look for an alternative to fresh flowers, creating them from various materials. Paper embroidery - the most common types of crafts as a gift. But flowers made of beads turned out to be as close as possible to the original. Due to the size of the material used, various weaving techniques, the products are so realistic that it is sometimes very difficult to distinguish them from a real flower.

Masters of beading have developed many techniques, they came up with various roses in these developments is quite common. Which is not surprising, because she is deservedly considered the queen of flowers.
Work materials
What you need to create a weaving pattern, beads (at least two colors, but more are possible), weaving wire, scissors or pliers. Such a simple set will help create a real beaded miracle, which will certainly become the best gift and will delight its owner for a very long time.

For the convenience of a set of beads, you can use a small, shallow container. It is convenient to pour grains of material into it, preventing it from scattering. In general, the working area of the needlewoman should be well lit, stable and comfortable for work.
Weaving basics
If you carefully study the master classes presented in special beading tutorials, it becomes clear that there are several methods for creating a rose. A bead pattern, even the most sophisticated one, in any case becomes understandable if you carefully work on its decoding.
So, there is a parallel scheme for weaving a pink bud, a master class for the manufacture of which will be presented below (it is also the simplest for beginners than everyone else). This technique is based on elementary knowledge in this area, so work on the product does not take much time and effort.

The second pattern of a beaded rose flower is based on the French technique. It is also called circular. This technique is a little more complicated, since not every novice needlewoman will understand the creation of flower parts the first time. But as a result of several attempts, you will still get a blank for a future rose, which, undoubtedly, will be somewhat more elegant than the previous one.

There are also techniques that are very similar to French weaving, but they all require more detailed study and consideration.
Making petals
In order to start work on creating a rose (the bead pattern is presented above), you should prepare the materials. So that everything is at hand, does not stop work and does not risk crumbling, it is better to immediately start working on a stable surface.
For a rose petal, it is necessary to cut a wire about 70-80 cm long (since our petals are small). String 1 bead on the center of the wire. Next, dial 2 beads and thread them through 2 ends of the wire, tightening to the first. That's what we get at the very beginning.

After this step, each row requires an increase in the number of beads (4, 6, 8, 10, etc.). So it is necessary to complete 9 rows, typing on the last 16 beads. After that, it is necessary to collect 9-11 beads on each end of the wire and stretch them through the very first one. Then twist the ends of the wire tightly. It looks like this:


In the end, we have a finished petal. For a small rose, you need about 4 petals according to the indicated pattern, 5 petals, in which there are 1 more row (that is, the last row ends with 18 beads). The larger you want to get the product, the more larger petals you need to weave.
Making leaves
The technique also creates rose leaves, the bead pattern of which is now being considered. To do this, you need to make 8 rows, the number of beads in which is 1, 3, 4, 5, 4, 3, 2 and 1, respectively, in each row. According to this pattern, sepals are woven, which are attached directly under the petals. The number of sepals varies from 3 or more, depending on the size of the bud.

The rose leaves themselves are slightly different from the sepals. The bead pattern of these parts is similar in the way of weaving, the leaf consists of 11 rows. The following is a scheme for increasing the number of beads in rows: 1, 2, 3, 4, 5, 7, 9, 8, 7, 5, 3.

Product assembly
So, all parts are ready, you can start assembling a rose from beads. The schemes, as can be seen from the step-by-step photos, are very simple and accessible for beginners.
For the center of the bud, you need to take the two smallest petals and use a round felt-tip pen to bend them almost in half. Then you need to insert them into each other.

After that, all the other petals must be tightly wound to the main stem to make a bud. The last petals, if the size allows, can be beautifully curved.

It is immediately necessary to attach the sepals to, evenly distributing them below. After that, leaves are attached a little lower along the stem. Further, the product can be wrapped with green threads (for example, floss) or floral paper. Everything, a beaded rose, the weaving patterns of which we have considered, is ready.

Conclusion
As you can see, the creation of flowers from beads is a simple and quite exciting task. In addition, handmade products are very valuable, because in addition to painstaking work, time, soul and inspiration are invested in them. With a little effort and insignificant expense, a lovely beaded rose can be born. Weaving patterns, as you have already seen, are completely simple and easy to read. Well, as a result, you can be sure that your gift will be the most unexpected, interesting and unique.
Materials and tools:


Materials that you will need to make a composition from do-it-yourself roses:
- cabin (Czech) size 10 burgundy - 150 grams
- beads (Czech) size 11 golden color – 70 grams
- burgundy wire 0.4 mm thick - 30 meters
- gold-colored wire 0.3 mm thick - 30 meters
- gold-colored wire 0.4 mm thick - 4 meters
- thin copper wire - 10 meters
- aluminum or steel wire 4 mm thick - 3 pieces of 30 cm (can be replaced with knitting needles)
- floss gold - 8 meters
- yellow sewing thread
- foil
- transparent acrylic adhesive
- dry sequins
- sisal for decoration of the composition.
Tools:
- scissors
- pliers
- tweezers
- 2 brushes (thin hard and soft)
Rose
Handmade beaded rose consists of five circles of petals. Weaved from a burgundy cabin on a burgundy wire 0.4 mm.
To weave petals, type 1-2 meters of cutting on the working wire and, without cutting the wire from the coil, wrap the end of the working wire around the axis, stepping back from the upper end of the axis 4/5/6/7/8 cm for petals 1/2/3/4/ 5 circles respectively.
Cut off the excess tip of the working wire with thin tweezers at the very axis.
First round of beaded rose petals
Wrap the end of the working wire around an axis 10 cm long, stepping back from the upper end of the axis 4 cm.

Dial 5 beads on the axis.

Weave 3 identical round petals of five pairs of arcs each.


Cut off the upper tip of the axis, leaving 2-3 mm and bend it inward (towards the back rows), bend the other end 90 degrees to the side. Bend the petals perpendicular to the axis.

Insert them into each other so that the ends of the axes are inside the bud.

Wind with threads in the tone of the future stem (yellow) to a piece of thick, 5 mm wire.

Second round of beaded rose petals
On an axis 10 cm long, type 5 beads and weave 3 sharp petals from 9 pairs of arcs. To do this, in the upper part of the petal, bring the working wire to the axis at an acute angle, and not perpendicularly, as in the previous round petal.

Please note that in the lower part of the petal and in 4 rows in the upper part, the working wire goes around the axis, lying on top of it, and 5 in the last five rows of the upper part of the petal from below, forming the so-called purl loops.

Bend the petals so that the purl loops of the lower part are inside the petal, bend the tip outward.

In the same direction that you have wrapped the first circle of petals, apply one at a time and wind the petals of the second circle with threads.

The bent tips of the petals of the second circle should be slightly higher than the level of the first circle of petals.

It turns out already very beautiful, but not yet very similar to a real rose.

Third round of beaded rose petals
On an axis 10 cm long, type 4 beads and weave 3 sharp petals from 10 pairs of arcs similarly to the petals of the second circle. The upper part of the petal is woven from five facial and 5 purl rows with all facial rows in the lower part of the petal.


Cup the petals with the purl rows inside and fold the top end of the petal outward.


Fourth circle of beaded rose petals
4 petals are woven on 2 axes from 13 circles of arcs: 8 facial and 5 purl. Take 2 pieces of wire 10 cm each. Run around the working wire around them with 2 turns with collected beads. String 1 bis on the right axis, and 2 on the left.

After the first circle of arcs, add 1 bead on each axis.


The bottom of the petal should always be round. You can weave the upper one both round and with sharp corners.
Cut off the excess axle wire at the top of the petals, fold the tips over to the purl rows and cup the petals so that the purl rows of the bottom of the petal are inside the "bowl".


In a spiral, applying the petals to the stem, keeping the direction given by the previous circles, wind them one by one with threads.

Our handmade product is already acquiring its features of a rose.

Fifth circle of beaded rose petals
4 petals are woven similarly to the fourth circle. Only now on 3 axes of 15 circles of arcs: 8 facial and 7 purl. Take 3 pieces of wire 10 cm each. Run around the working wire around them with 2 turns with dialed beads. String 1 bis on the right axis, 2 on the middle, and 3 on the left.

After the first circle of arcs, add 1 bead to the middle axis.


After 2-3 circles of arcs, one of the axes in the lower part of the petal can be cut off so that the working wire does not wrap around such a thick axis, consisting of 3 wires 0.4 mm. After 8 front rows, in the upper part of the petal, weave the next 7 rows purl. The bottom of the petal should always be round. You can weave the upper one both round and with sharp corners.
Cut off the excess axle wire at the top of the petals, bend the tips to the wrong rows and cup the petals so that the wrong rows of the lower part of the petal are inside the “bowl”, curving the upper part of the petal outward.

In a spiral, applying the petals to the stem, keeping the direction, wind them one by one with threads.
After the bud is formed, the desired shape is given to the petals, apply a drop of transparent glue at the points of contact between the petals. I am using acrylic. You can also use acrylic gloss varnish. After drying, it will be transparent and invisible on the flower. So that the bud does not fall apart under the weight of the petals, you can wrap it with wire, but not tight, but exactly as much as the bud of your flower should be open. I usually just hang the flower by the stem upside down with the bud down until the glue dries, without wrapping it with anything.
Rose buds from beads
I have 2 buds in the composition.
The bud consists of two circles of petals, 3 in each.
For the first circle, weave 3 petals in the same way as the rose petals of the first circle.
3 petals of the second circle are woven on 2 axes of 9 circles of arcs: on the right axis, type 2 bis., and on the left - 3. Weave a round petal from 7 front rows of arcs and 2 wrong ones.
Collect the resulting petals on the stem in a spiral, similarly to the first two circles of rose petals.
sepals
Weaved on a gold-colored wire from gold beads. On an axis 10 cm long, type 6 cm (for roses) and 5 cm (for buds) of beads. Weave as in the photo 5 sepals for a rose and 4 for buds.
When weaving the sepals, make sure that you have facial rows at the bottom of the leaf, and purl rows at the top.


On the other hand, weave 2 pairs of semi-arcs in the same way as described above.

Shape the sepals

Wrap the sepals one at a time with threads to the stem so that they fit snugly against the buds with the bottom wrong side. Cut off the excess ends of the wire and wrap them with thread so that they do not stick out.


I did not use a cutting (bead) of a different shade for edging the edge of the petal. This is for an amateur.
In principle, it would be possible to weave the last row of petals with beads, for example, gold, (the one from which we will make leaves).
I used dry gold sequins. With one brush, I applied transparent glue along the edge of the petal, and sprinkled glitter on it with the other brush. After the glue has dried, with a dry soft brush swept away the excess.
I really like this method (thanks to Sasha Kramarenko for a great idea).

Handmade beaded rose leaves
To make my composition, I wove 6 branches of 3 leaves.
Weave 6 large and 12 smaller pointed leaves.
Large: 7 beads on the axis, 11 pairs of arcs.
Small: 7 beads on the axis, 9 pairs of arcs.
Axes take a length of 20 cm.

From 1 large and 2 small leaves we collect a twig. This will require floss threads (1 skein was just enough for me to wind the entire composition) and thin wire. Surely each of you has a thin wire, obtained by chance, but never found use. I used it to thicken the twigs with leaves. For thickening, it is better to use several pieces of thin wire than one thick one. When attaching a branch to the stem, thin wires will not protrude under the winding with threads, and a thick wire will stand out with a bulge unusual for the stem. I wound a thin wire around a cardboard strip 10 cm wide and when a sufficient bundle thickness was gained, I cut the wire on one side. A beam was obtained from segments of the same length (20 cm each).

Attach a bundle of pieces of thin wire to the middle leaf and twist them together by 2-2.5 cm, trying not to form a spiral, and the twist was uniform.

Cut the floss about 40 cm. Each floss thread consists of 6 thin threads. Divide the segment into 2 (three threads each). And with these three threads, start winding the branch, starting with the middle large leaf. After 2-2.5 cm, attach a smaller leaf, leaving a stalk of 2-3 mm (in theory, it could also be wrapped with floss on these 2-3 mm, but I was frankly too lazy), winding it to a twig for 2- 3 turns, attach a second leaflet, leaving the same stalk and continue winding another 2-2.5 cm. Fasten the thread by passing it between the wires and collect the remaining 5 branches in the same way.

Rose assembly
Cut the floss about 1 m long, disassemble it in half. Start winding the stem from the bud itself. After 6 cm, without loosening the tension of the thread, attach a twig with leaves, gently straightening the ends of the wires along the stem, and continue tight winding with threads for another 5-7 cm. Fasten and cut the thread.

Assembling rose buds
Similarly, collect one bud with 2 branches of leaves, and the second with 3 branches.
Bud with 2 branches: the first branch at a distance of 4 cm from the bud, the next - after another 1.5 cm. then continue winding for another 8 cm.
Bud with three branches: the first branch at a distance of 5 cm from the bud, the next - after another 1.5 cm and the third after another 2 cm. Then continue winding another 8-10 cm.
Assembling a composition of beaded roses
The hardest one, in my opinion. I managed on my own, but I strongly recommend that you resort to outside help.
The rose itself weighs more than 100 gov, so it will strive to fall. In addition, you still need to hold two buds.
All this needs to be built into a harmonious composition and managed to be poured with gypsum mortar.
Prepare the vase in which you are going to plant the flowers. As per your plan, cut off the excess length of the stem, leaving some for the loop at the end of each. It is needed for stability (and indeed, suddenly you have to lengthen the stem a little, so it will be due to what).
Prepare a good piece of foil (I used food grade). Build a composition right on it and fix it at the base with the free edges of the foil.

Now feel free to put it in your bowl and fill it with a liquid solution of gypsum with water (prepared in advance). Everything must be done very quickly so that the solution does not seize ahead of time.

I want to note that the use of foil is very important here. In addition to the fact that it does not allow the stems to move relative to each other and keeps the composition static, it also does not allow your bowl to crack!!!
Since my bowl is spherical, without the use of foil, I risked it very much. And so, when setting, the gypsum expands and crushes not the edges of the bowl (to smithereens) but the foil that you have at the bottom.
So she always helps me out. Before the burgundy with a golden rose, I made an “ice” composition.

There I used a vase, also spherical, but with a narrow neck. I put the composition into it without problems, but I also had to fill it in, since the rose was heavy and turned over. So I stuffed the foil into it with a pencil, fixing the stems in the position I needed, and carefully poured a very (!) Liquid solution of gypsum with water into it. Nothing cracked.
Let's get back to our ... Roses. While the plaster sets, you can hold the flowers a little with your hands so that they definitely do not fall and move out.
You can arrange the soil at your discretion. I decided not to go out of color and dyed the green sisal that I had with gold paint from a balloon. She laid the ground.

Carefully straighten each leaf, you may have to slightly bend the stems of the flowers. If you are satisfied with the result, then we can assume that everything is READY!
Original of this master class You can find it on the author's website.
CategoriesHow to make a rose from beads with your own hands? This question worries many craftswomen, and today we will tell you about it. A step-by-step master class with a photo and a flower weaving pattern will help us with this. As a result, we get a bouquet of chic and very delicate roses.
Tools and materials Time: 2 hours Difficulty: 3/10
- beads for roses and for leaves;
- wire for working with beads;
- floral tape;
- stem wire.
Rose is one of the most popular beaded flowers. There are a great many schemes on the Internet, and each beaded rose is unique and original. We offer you not only a diagram of how to make a rose from beads, but also a detailed master class, thanks to which you can make a whole bush of roses from beads.

How to make a beaded rose
Step by step photo tutorial
So, let's start our master class. We will weave petals for a rose from beads using the parallel weaving technique.
Step 1: weave the petals
To do this, we string one bead on a piece of wire, send it to the center of the segment, then cross both tails of the wire in the next strung two beads.
- Further, the number of beads increases for each row by two beads. So we weave until the number of beads increases to 10.
- We form the next row from 11 beads, string 9 beads on each tail, and cross the tails in the very first bead. Thus we get the first petal for the flower.
In total, for one rose, you need to prepare 8 of them.


Step 2: Making the Rose Stamens
It is necessary to place stamens inside the rose, we make them separately from pink beads.


Step 3: form the sepals
Next, we form 6 sepals using the same parallel weaving technique. Number of beads: 1-2-3-3-3-2-1.

Step 4: Making the Petals
Now the turn of the petals has come, here the alternation of beads: 2-3-4-5-5-5-4-3-2-1. Only 5 leaves for one, which we then fix as shown in the photo.


Step 5: weave flowers
And the final touch is small flowers that complement the bouquet of roses. In order not to decorate the stem of these flowers with floral tape later, you can take a green wire for work.


Step 6: Collecting the Flower
And now we collect all our parts into a single whole, winding them to a piece of thick wire, which serves as a stem. Along the way, we decorate the finished stem with floral tape and add our little flowers.
In custody
Well, we have finished weaving our rose - we hope now you understand how to make a rose from beads. Such a beaded rose and one looks very good, not to mention a lush bouquet that will be very important to use when decorating the interior of a house. Share examples of your work in the comments!
We are pleased to inform you that a new master class has appeared on our website, in which you will learn about 2 more options for weaving this beautiful flower. The master class will be useful for both beginner needlewomen and experienced craftswomen. Your opinion is important to us, as we try for you!


Watch the master class and you will learn how to weave a wonderful beaded rose.
For work we need:
- Czech felling or ~ 40 grams (for roses) and 10 grams (for leaves) (colors depend on your imagination);
- Wire 0.3 mm;
- Gerbera wire 0.8 mm and 1.6 mm for the axis;
- Mouline threads for winding;
- Threads ordinary for assembly;
- Floral (teip) tape;
- Pliers and wire cutters;
- Clay Moment;
- Spinner for stringing beads
- Sisal
- pot
Rose consists of the following elements
4 rows of petals(round top, round bottom):
1 row - 2-3 petals - 1.5 cm beads on the axis - 5 pairs of arcs
2 row - 3 petals - 1.5 cm beads on the axis - 6 pairs of arcs
3 row - 4 petals - 1.5 cm beads on the axis - 7 pairs of arcs
4 row - 5 petals - 1.5 cm beads on the axis - 8 pairs of arcs
5 sepals(sharp top, sharp bottom) - 1.5 cm beads on the axis - 1 pair of arcs
3 leaves(sharp top, sharp or round bottom) - 1.1 cm beads on the axis - 4 pairs of arcs
3 leaves(sharp top, sharp or round bottom) - 1.5 cm beads on the axis - 4 pairs of arcs
Weave petals and leaves for a rose using French weaving technique. How to weave petals with this technique can be seen in the section " Beading for beginners ".
We make the basis for weaving from wire 0.3 mm or 0.4 mm. Short wire - axis, long - working.
Rose petals are woven - round top, round bottom.

We collect beads on the working and axial wire.

Beads on the working wire should be under the beads of the axial wire. We fix (make one turn) the working wire on the axial one perpendicular to each other.

We continue in this way to fix the working wire for the required number of rows.


We cut off the axial wire from above, leaving the tip ~ 2-3 mm, bend it.


We sew a petal.

For this rose, we need to weave the following amount petals:

Sepals - 5 pieces
French weaving technique - sharp top, sharp bottom (we fix the working wire on the axial, not perpendicular, but at an angle of 45 degrees). 
Leaves - 3 small and 3 large
Weaving similarly to sepals.

Rose assembly
We collect leaves
We attach three small sheets to the gerbera wire with a diameter of 0.8 mm (with floss threads or floral tape).

In the same way, we collect the second branch of leaves from three large leaves. The leaves were collected.
We make three loops of 7 beads each (you can make two such blanks so that the middle is more magnificent). We attach them to the rod and successively wind the 1st, 2nd, 3rd and 4th rows of rose petals. Next, we attach 5 sepals. 


We wrap the rod with floss threads down. At a distance of 5-7 cm from the flower we attach a branch with small leaves, at a distance of 2-3 cm from it we attach the second branch of leaves. We wrap with threads to the required length. We fix the end with a drop of glue. The rose can be planted in a pot or in a vase.
Congratulations! Our rose is ready!


I hope you enjoyed the master class. I wish you pleasant creativity!
Watch the video tutorial "Beaded Rose for Beginners" on.
With love for you and creativity, Elena Kazakova.


