Volumetric paper craft cactus. Paper cacti are colorful and evergreen. Flowers for paper cacti
Good afternoon. Today I want to invite you to make an ever-blooming cactus with your own hands from salt dough and improvised materials.
For this we need:
- Flour.
- Water.
- Salt.
- Dyes or gouache (brown, red, black, green).
- Potty.
- A glass of yogurt.
- Skalka.
- Board.
- Knife or stack.
- Brush.
- Toothpicks.
First you need to knead the dough. There are many recipes for salt dough, I took the simplest one. 2 cups flour, 1 cup salt (fine) and ¾ cup cold water. Based on this calculation, knead the dough. It should be thick, like dumplings. Take salt, fill it with water, add the dye of the desired color. Mix everything, add flour and knead the dough. You can add a little vegetable oil to the dough. I immediately kneaded the brown, red, green, black, white dough and put it in the refrigerator for 3 hours.
After the dough is ready, take the brown dough and roll it out to a thickness of 0.5 cm.

Take a pot and wrap it with dough. From above, we bend the edges inward. The bottom also needs to be covered with dough.


Now take the red dough and roll it out. Using a knife or stack, cut out 5 petals. This will be a flower. We take a brush, slightly moisten it with water, and grease one side of the petal, press it to the pot. We do the same with the rest of the leaves. We roll a ball of white dough and press it to the middle of the flower.

We roll out two bundles from green dough and make branches for our flower.

Again we take the green dough, roll it out and cut out 4 leaves. We press them to the branches.

The pot is ready. Now let's take a look at the cactus. We roll out the green dough and wrap it around a glass of yogurt. The principle of operation is the same as with a pot.

Now you need to make small ledges, from which we will then “grow” needles. Making them is very easy. Pinch the dough with your fingers from top to bottom. As a result, we should have a vertical relief. It is not necessary to make it straight, you can make it slightly in a spiral. We make protrusions through the same distance throughout the cactus.

We plant a cactus in a pot. My cactus fit perfectly in the pot. If your pot turned out to be much larger than a cactus, then just put the dough that is left in it and boldly plant your plant in a pot.

Roll out a flagellum from black dough and close the distance between the cactus and the pot with it. Thus simulating the earth.

Take toothpicks and use a knife or scissors to cut each of them into small pieces. Then paint the sticks green. These will be the needles for the cactus.

For now, leave the toothpicks aside and make a flower. Roll out the red dough. We cut out 12 petals from it and glue them in three rows with water and a brush to the top of the cactus. First glue 5 petals, 4 petals on top, and then 3 petals.
Someone on Women's Day gives mom a bouquet of flowers, and someone presents fresh flowers in a pot. And you can make a gift for March 8 with your own hands. It doesn't take much to do this. For example, you can do DIY paper gifts. There are a lot of such crafts.
There is such a wonderful technique - it is called "facing". Let's try to create a charming cactus from crepe paper in the technique of trimming. See, it's very simple! craft paper cactus can be performed by children from 7 - 8 years and adults.
A master class with detailed photos will show how to make DIY cactus.
You will need the following materials:
- crepe paper (corrugated paper or regular napkins),
- newspaper,
- small pot,
- any threads,
- skewer,
- PVA glue,
- scissors,
- flower (can be made from colored paper).
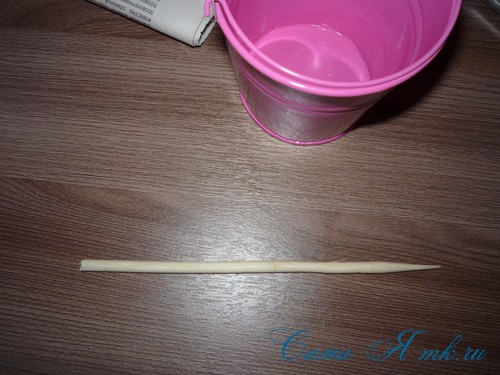
Cut the skewer with scissors and break it in half.
We leave the second part - it will play the role of trimming for us. If you do not have skewers, then an ordinary pencil can easily cope with this role.
We set the first half of the skewer, which has a sharp end, in the middle of the pot and stuff it tightly with newspaper.


We crush a dense lump from another newspaper, which we wrap with threads so that it keeps its shape.

Close the newspaper in a pot with crepe paper, fix it a little with glue.

On a skewer we prick the prepared base from the newspaper for our cactus.

Cut green crepe paper into 3/3 cm squares.
I didn’t count exactly how many trimmings are needed, but they will need a lot. My cactus took a little less than half a roll of crepe paper.

The main trimming tool is a long thin stick with a blunt end.
With the even blunt end of the second part of the skewer we make trimmings.
We place the blunt end of the stick in the middle of the square, then carefully twist the paper around the stick.

Without removing the paper from the stick, dip the bottom part into PVA glue and glue the part to the base.
We start gluing from the bottom, moving gradually up. We glue the parts as close to each other as possible so that there are no gaps.


Decorating! Our cactus is blooming!


You can make cactus eyes and a mouth out of cardboard and then it will “come to life”. If there is no ready-made decorative flower, it can also be cut out of colored or crepe paper.
Such an original, cute gift with your own hands will surely delight and surprise your mother or grandmother.
In this technique, you can create a wide variety of interesting crafts, for example, hedgehog, made in the technique of trimming. Since the craft is much smaller, in this case I used smaller trimmers (2/2 cm). The body is made of baby mass for modeling, painted with acrylic paints.


Create with pleasure!
I was glad to help!
Knowing the world is fun. Doing something with your own hands is interesting. Working with paper is easy. With its help, you can do almost anything, even what seems impossible, for example, paper cactus. How? Let's find out further.
For work you will need:
- small glass / lid;
- container from the Kinder toy;
- plasticine;
- green corrugated paper;
- acrylic paint / gouache;
- sponge / brush;
- cocktail tube;
- scissors.

Step 1. Making a cactus pot
As a base, any small glass or lid of syrup is suitable. The main thing is that the base for the cactus (plastic egg) does not fall into the container completely. You can decorate the pot in different ways: with a cloth, a tourniquet, etc., or simply paint it with bright acrylic paint, as in our master class.

Step 2. Making the base for the paper cactus
We completely glue the plastic container from the Kinder egg with plasticine 1-2 mm thick.


Next, we place the egg pasted over with plasticine in a pot, and press it a little so that a trace remains from the edges of the cup - these will be the boundaries for placing the soft spines of the cactus. 
Step 3. "Grow" a cactus
When the base for the cactus is ready, we proceed to prepare its non-thorny spines. To do this, we cut corrugated paper into strips 1 cm thick, and then into segments of 1-2 cm.

Now directly to the creation of "thorns": we apply a cocktail tube to the center of the pieces of corrugated paper. We twist the paper around the tube.

We press the twisted paper to the base with plasticine so that the "thorns" are fixed on it.

Thus, we fill the entire surface of the cactus. You can do this by holding the base in your hands or placing it in a pot.

After we brought you, you simply cannot have any doubts that you also need one at home. And not even one. Good news - you don't have to run to a flower shop: a real cactus can be replaced with cardboard. We have collected 15 cool ideas on how to make a cactus with your own hands.
We already told you, it's time to talk about separations. Try making these cute 3D paper and cardboard cacti with your kids. Such paper cacti will decorate any interior. Also it is excellent or grandmother's favorite.
15 DIY Paper and Cardboard Cactus Ideas

.jpg)
.jpg)
.jpg)
.jpg)
.JPG)
.jpg)

If you don’t know how to make cacti out of paper or cardboard with your own hands, you can download and print a template for cactus details from the link. You just have to cut them out, fold and glue them. Even a child can handle it!
.jpg)
.jpg)
.JPG)

How to make a paper cactus with your own hands (Video)
You can get even more pleasure from working on this paper craft if, in addition to cacti, you also try to make interesting pots for them. Flowerpots can be made from ordinary tin cans by simply painting them or pasting them with multi-colored tape. In addition to the fact that you will have new pots for paper cacti, you will also teach children, which means that they will also take care of nature.
Volume application from paper. DIY cactus
Necessary materials and tools
■ Colored paper (yellow, green and red)
■ Scissors
■ Glue, it is better to use a glue stick
Step-by-step process for making a cactus appliqué
1. Choose a yellow sheet of thick paper for the background. A4 format. You can use a sheet of yellow cardboard.
2. Cut out the templates.

3. Folding a sheet of green paper in half, apply templates to the fold and cut out 4-5 pieces of each detail.

4. From red paper we cut out the spines for the cactus - very thin strips (slightly pointed to one edge) 1.5-3 cm long.

5. We begin to glue the cactus from the lower tier. To do this, we take one of the largest parts of the cactus, glue half of its outer side with glue, glue 4-5 needles on it and glue the other part of the petal on top.


6. By analogy, we glue all parts of the same size, gluing needles between them.

7. Similarly, we glue all the other elements of the cactus. It turned out five shoots of a cactus with needles.
8. Glue the processes to the background, connecting them together.
9. We are making a flowering cactus, so we move on to making flowers. Cut out 4 red flowers using the stencil. Flowers can be of other shapes.


10. We fold each petal in half lengthwise - the petals have become "alive", they rise up.


10. Glue the finished flowers to the processes of the cactus.


Helpful advice. You can plant a cactus in a pot. To do this, you will first need to cut a pot out of colored paper, for example, in the form of a trapezoid.


