Decorating a children's birthday: various ideas for a fabulous holiday. Decorating a children's birthday - a table, a candy bar, children's dishes, a cake, a photo zone, a children's high chair, a room at a children's birthday with their own hands: ideas, photos. Decoration for kids
An important place in the preparation of the long-awaited birthday is given to the design of the children's holiday. Decorating the house and children's room with garlands, balloons, posters, flowers is within the power of any parent who cares about the mood of the child. There are a lot of ideas for decorating a hall for children's birthday parties, which means there are plenty to choose from.
colorful posters
You can entrust this work to a photo workshop or a design bureau, but a poster made by you will be nicer for your child. Take the time, and the whole family will feel their involvement in the preparation of the holiday. A wall newspaper is a great opportunity to show your child your tender feelings.
We decide on the theme of the poster. The easiest way is to stick in the center a photo of the birthday man, which he himself likes, and surround him with congratulations and wishes from all family members.
For a one-year-old birthday boy, it would be appropriate to mark all the stages of his development and achievements on a monthly basis in the format of "weight meter" and "stadiometer". Of course, now he will not be able to appreciate all your efforts, but the adult population will be happy to admire your work. Don't forget to include hand and foot prints here as well.
Pleykast
Any congratulations for the children's holiday rest on three "pillars" - music, poems, pictures. You can combine all the elements and record a video greeting with pictures, text and sound files. You can send a playcast card to the birthday person's email or burn it to a disc with a colorfully designed cover. How to make such a postcard? The program will do it itself - there are a huge number of services on the Internet for creating such a congratulation, however, not all of them are of high quality, so you should start monitoring.
Children's drawings
Children's drawings are a very popular way to decorate a children's birthday, and you can decorate not only walls. Imagine the feelings of a child if, upon waking up, he sees pictures hanging from the ceiling on thin threads or tinsel. These can be drawings of the birthday boy, his friends and guests of the holiday, as well as drawings of parents. 
If you do not keep your child's drawings, ask for them at the kindergarten. All "pictures" must be arranged in the same style, inserting them into bright frames. You can decorate one wall or scatter them in an artistic mess throughout the house.
Drawings of guests are more difficult to prepare in advance, but nothing will stop you from organizing an art competition at the holiday, where guests can congratulate the birthday man with their drawing. The benefits of the event are threefold - a happy child, interested guests and a fun room.
Drawings of parents are created on the basis of children's creativity: take a child's drawing and try to depict something similar. Do not hesitate, the child will appreciate it. For the plot, you can choose your family, as well as places and events memorable for the child.
Bright moments on a collage
In order for the birthday man, you can arm yourself in the old fashioned way with scissors, glue, magazines and felt-tip pens, place selected pictures, pictures on a sheet of whatman paper and stick everything.
Whatever method you choose for yourself, the collage should reflect the stages of a child's development - the first steps, the first tooth, the first verse and the first friend. Beautiful congratulations in verse or prose on a festive collage are required.
Festive garlands
Without such a decor option, the decoration of the holiday will be incomplete. In stores and online catalogs, you can see ready-made sets "For decorating a children's holiday", but if you dream up a little, you can make very interesting garlands of animals cut out of fabric or beautiful paper according to a pattern and attached to a rope. They can be supplemented with letters for the inscription "Happy Birthday", the name of the child. 
From colored paper, felt, silk, you can cut circles, stars, cars, butterflies, birds, hearts and string them on colored threads. As an option - the design of a garland in the style of some kind of cartoon. Suitable for self-production and voluminous garlands, for example, from floral elements for a girl's room.
Thematic sets
For themed birthdays, ready-made sets are very convenient, which can turn an ordinary sofa into a treasure map and special invitations for children. You can complete the set with a black pirate flag made by yourself, "golden doubloons" - chocolate medals for treasures and contests. There are also pirate diplomas and stickers in the set, which can please guests as gifts. There are many options for such sets - "Winnie the Pooh", "The Little Mermaid", "101 Dalmatians" will give ideas for a festive scenario. 
Balloons - festive mood
All children love balloons. You can order the delivery of balloons in the form of clowns, dogs, cartoon animals. True, they are not durable, and therefore it will not work seriously to play with them.
The entrance to the house can be decorated. The same garlands in the house can be arranged in the form of columns, chandeliers can be made from simple elements in the form of large flowers, or a real chandelier can be decorated with a bunch of balls. You can make such an element of decor without special skills. Inflate 4 - 5 pieces of 9-inch balloons of the same color and tie them in a knot. Connect in a ring and insert a 5-inch ball in a contrasting color into the center. You can decorate the flower with silk or paper ribbons and fix it with tape in any convenient place - from furniture to the ceiling cornice. You can also swing at more serious figures, for example, the frog princess from balloons, as in this video.
Name day decoration in nature
- A birthday in summer has a lot of advantages, and, above all, the choice of a venue for the holiday - a park, a summer cottage, a recreation center, a beach. A children's holiday in nature is an opportunity to make a bright, memorable birthday with a minimal budget. Making a picnic will not do without the balls, which have already been discussed. You can order several balloons filled with helium to decorate the table.
- Flowers in the summer are everywhere - garden, field, greenhouse. You can beautifully decorate the table even with dandelions and field daisies. In the photo - tulips and green leaves.
- A special element in the design of a children's birthday in nature can be an unusual figure - symbolizing the number of years for the birthday person. You can make it voluminous by cutting out parts from cardboard. We connect the joints with adhesive tape and decorate with a fringe of floral or other paper for decoration.
- in nature should include elements that eloquently reflect the nature of the holiday - balls, toys, flags, cars, little animals. To make them better with a child, you can use applications, handprints.
- A children's holiday in nature is a fun active game, prepare the necessary props for this - a pool and a sandbox, a trampoline and darts - all elements must be subordinate to the theme of the holiday, including the color scheme. Choose a few permanent colors and, in accordance with them, select balls and tablecloths, dishes and flowers, cars on napkins and flowers on invitations. You can sew the same bandanas, capes or panama hats for children - depending on the weather and the theme of the holiday.
Festive table: decor options
In addition to soft toys, kites and cartoon pillows that complete the picture of a children's holiday, special attention should be paid to the design of the children's birthday table. 
Remove expensive sets and snow-white tablecloths until better times - any bright colored fabric that can be covered with a transparent film is suitable for children. Under the film, as a decor, you can place pictures and photos of the birthday boy and you should not force the entire table close to snacks. . If you have time, you can sew special covers complete with baby wipes, you can tie bright bows to the table legs.
The most simple, bright, plastic dishes will do. - sandwiches with cucumber crocodiles, ladybugs and mushrooms from tomatoes, egg and cheese boats. There should be a lot of fruit on the table, you can decorate it beautifully, which children will definitely try out of curiosity. From drinks it is better to serve juices, fruit drinks, compotes, as well as desserts and pastries - jelly, fruit cakes, pastries.
The desire to please your child, plus our ideas can work wonders and arrange a fabulous holiday for the birthday boy, as in the photo of decorating a children's birthday with their own hands.
In order for a truly festive spirit to be felt on a birthday, delicious cake and gifts are not enough. The type of room where the celebration will take place also plays a very important role. Therefore, to make this day truly unforgettable, we offer you several ways to decorate the room for your birthday with your own hands.
This is a fairly quick, simple and original way to celebrate a birthday. Materials you will need:
- colored paper rolls
- Whatman sheets (preferably dense),
- stationery knife, scissors and ribbons.


Now let's look at the manufacturing steps.
- You must decide on a color scheme. Draw a design sketch which you want to do.
- Of course, then you can fix something, change it, but having a sketch will give you an idea of how it will look in the end - and significantly speed up your work.

- Lay out the drawing paper - this is the base on which you will work. Depending on the size of the embroidery you planned to make, you can take one sheet of whatman paper, or glue several (by the edges to increase the area). It will be much easier to work with thick paper, as it will remain strong when you cut it and weave the ribbons.
- Place the base of Whatman sheets so that you can work comfortably on both sides of the paper. You can put two chairs at a distance from each other so that you put the ends of the paper on the chairs, pressing them down with books or something heavy so that the paper does not fall.
- You can also hang whatman paper in the doorway. But do not lay it out on the floor or a table, as in this case you can only reach the front side conveniently.

- With a utility knife make two cuts in the paper, thread the tape into each of them so that a strip of tape remains on the front side, and both ends are on the wrong side: leave one end small and attach it to the paper (with glue or double-sided tape), the other is longer if you want to continue this weaving, or also fasten if this drawing is finished.
- Repeat the previous steps until do not fill the entire Whatman paper with paper embroidery patterns. In this case, the cuts do not have to be strictly opposite each other, and the lines are even. Take ribbons of different widths and make your own design.
- Hang your creation on the wall and enjoy the work done and the festive mood!

Making a big room for little money
If you need to quickly decorate a large spacious room, while using a minimum of money and effort, this method is just for you. You only need colored corrugated paper in rolls.


Then it all depends on the room that you will decorate. Ribbons of paper can be pulled from the eaves, pipes, chandeliers, cabinets or shelving, in general, everything that will be there. Moreover, you can stretch the paper with different strengths so that the sagging is somewhere large, somewhere smaller.


TIP: You can also twist the ribbons. Hang the colors randomly.
You will definitely succeed in creating a joyful and festive atmosphere! Don't forget - the link is full of ideas
Idea: balloon walls!
Both children and adults are all crazy about balloons. So, by choosing this method of decorating a room, you will definitely cheer up everyone present!

For this you will need the following materials:

Follow these steps and you will soon be admiring the colored ball powder on the walls:
- Divide the ball into 6 equal parts, tying knots on it.
- Using the pump, inflate the first part of the balloon until you get an inflated sausage, tie a knot at the end. Then cut off the inflated part of the balloon as close to the knot as possible. Then do the same with the next part of the ball, and so on until you get six small balls.
- Tape the knots so they don't stick out.
- Repeat the first three steps until you have hundreds of colorful balls.
- Attach the balls to the wall with small pieces of double-sided tape.

This decoration is wonderfully suitable for an original party - a photo shoot. And do not forget to stock up on enough sweets, as the view of the room will definitely have something tasty to eat.

Here are some more great balloon decorating ideas.


Wall decoration with large homemade "lollipops"
Beautiful colored lollipops are not inferior to balls in their ability to create an excellent mood. With their help, you can decorate a party or a birthday and provide an original photo area for those present.


To create a festive atmosphere with your own hands, you will need:
- wooden dowels measuring 12 "x 1/2" (30 cm x 1.25 cm),
- acrylic paint (there should be a wide range of colors: white, purple, dark blue, light blue, green, yellow, orange, red, pink, etc.),
- brush, stand for dowels (a glass or cup will do),
- palette, 4 sheets of A4 paper, scissors, pencil, foam discs measuring 10″x1″,
- glue gun, adhesive tape (regular or double-sided).
Assembly technique:
- Apply white acrylic paint on wooden dowels I. It's best to paint one half first and let dry (in a container with the painted side up) and then paint and dry the other side. While the dowels dry, start making the lollipop directly.
- Cut out 8 identical curls from paper stencils and arrange them on the foam disc as shown. Then lightly circle the stencils with a pencil.
- Choose a paint color and paint with a brush curls through one. Stroke the outlines first so as not to go beyond the edges. You can do several layers to make the color look more saturated.
- By this time your dowels should be dry. Use glue gun on the end of the dowel and quickly press it against the foam disc, hold a little to fix it.
- Do the same with the other disks, using different colors for coloring.
- Glue the finished lollipops to the wall. Can be glued with adhesive tape for the leg, or with double-sided tape for the lollipop itself.

That's all and done, enjoy the beautiful background!
Make a big number
A large figure will not only remain in memory, but will also become the central photo zone of the party. Detailed master classes


Birthday fan garland
On hot days, you want coolness so much, and on cold days - reminders of warm days. This garland, which consists of many fans, will wonderfully help to cope with both of these desires! Having made this one, you will be transported to a fairy tale! And surprise everyone!


Materials:
- colored paper for scrapbooking,
- scissors, tape,
- colored cardboard, glue stick,
- ruler, stationery knife.
Garland making steps:
- If you bought accordion-folded decorative paper right away, you can skip this step. If not, fold the paper into even accordions.
- Form half circles from accordions.
- Cut out stripes, circles, triangles or some other figurines made of colored cardboard - they will come in handy for decorating fans.

- Cut out half circles from cardboard(the size should be smaller than the fans). Attach them to some fans with a glue stick. They will perform two functions at once - decorative and strengthening, that is, they will not allow the fan to fold.
- Stick on fans curly molds made of cardboard by combining colors and creating your own pattern designs. As an example, you can take a picture.
- Connect the fans together to garland. To do this, stick them all on the tape. You can pre-fasten the joints of the fans with a stapler to strengthen the structure.
- Hang a garland and cheer up!


Making big paper Martenitsas
These decorations are made very simply and quickly with your own hands. You will need two A4 sheets - red and white, scissors and a glue stick. If you want to make a lot of decorations, then take more paper, as long as both colors are in the same amount.

Products have such a color scheme, since Martenitsa is like from Bulgaria and there is a rite to meet spring with similar products of exactly these colors, as this is a talisman for good health for the whole family. But if you do not delve into this folklore, you can take paper in colors that you like.
Let's now look at the manufacturing steps:


- Fold each sheet of paper in half (lengthwise).
- On each sheet, draw 10-12 straight lines as shown in the picture.
- Make cuts along the marked lines with scissors.
- Unfold the leaves and glue their ends, glue should be on both ends.
- Form circles, securing them with glue.
- In the middle of the circles, you can also attach strips of paper that differ in color from the circles themselves.
- Hang items around the room.

Garlands without glue
Even a child who knows how to handle scissors can make such an ornament, since the scheme is very simple. You will need: A4 paper (calculated as one sheet of paper for 4 elements of the garland), scissors, pencil.


How to assemble the garland:
- Cut a sheet of paper into 4 even pieces.
- Take one piece, fold it in half (across), and then in half again (also across).
- Draw with a pencil the shape you want to cut out.
- Cut out the shape and carefully unfold it.
- Connect the individual elements of the garland together (as shown in the picture), alternating colors.
- Hang up the garland.


We offer you several alternative sketches for this garland.

Little holiday in a box
On cold autumn and winter days, such a box of positive will be just a great gift and will definitely create a sunny mood! You will need: a box, small helium balloons, as well as paints (or ribbons, colored paper) to decorate the box.


How to DIY:
- Paint or paste a box of rainbow stripes, flowers or any other joyful patterns that come to your mind.
- Place small helium balloons in a box(the number depends on the size of the box. The ends of the ribbons tied to the balloons can be attached to the bottom of the box if you want the balloons to jump out the length of the ribbon when you open the box, or not to fasten if you want them to effectively fly away to the ceiling or into the sky.
- Close the box.
- Present a gift and keep an eye out for the surprise recipient's amazement!

IMPORTANT: It is important to remember that small helium balloons lose their ability to fly in about three hours. Keep this in mind when preparing a gift.


The birthday of a child is a joyful and expected day for the whole family. Kids are waiting for a fairy tale, and parents are trying to make this day unforgettable.
You can arrange a festive atmosphere by decorating the venue of the event. To make it easy and simple, this article will look at a huge number of examples of holiday decor for children's parties.
Making a garland for a child's birthday with your own hands is a pleasant and interesting activity. Parents will be happy watching the reaction of children to their labors. Below are instructions and tips on how to make DIY garlands for a child's birthday.
We create the atmosphere of a fairy tale
A garland is the easiest and most versatile way to decorate a room for a holiday. It can be made quickly and easily. If there is enough time, it is worth making more complex and spectacular decoration options.
You can make colorful ribbons with your child. The manufacturing process is simple, monotonous and does not require much attention. But parents will have the opportunity to spend time with the child, communicate and teach him the simple skills necessary in any needlework.
The best DIY garland ideas for a child's birthday
Garlands can be used in a variety of ways. It can be a regular thread with flags and circles, or jewelry with more complex shapes, as shown in the photo below.

The thread itself can be hung vertically. This technique is used by professional decorators when it is necessary to visually divide a room into several zones, for example, to separate a playing place from a festive table.

You need to show imagination by making garlands for a child's birthday with your own hands. Ideas for decorating a room are practically unlimited. True, parents will have to spend a little time creating such a decor. Decoration can also be used as part of an entertainment program for children.

Garlands allow you to create whole compositions: by combining several different types of decoration, you can make clouds with rain or a starry sky with the moon and other planets.
What materials are garlands made of?
The most common option for decorating a room for a child's birthday is a paper garland. It is very easy to make it with your own hands. This will require such versatile creative materials as paper, cardboard, glue, a stapler, etc. To create a garland, you can cut out various figures. They can be glued, painted, decorated with sparkles and beads, folded in the form of origami models, stapled and even stitched.
Garlands are made not only from colored paper, some craftswomen use napkins for this. You can make very beautiful balls out of them. To make a garland, it is better to use wrinkled napkins.
In fact, decoration elements can be made from any materials at hand. Perfect for this:
- food foil;
- medical cotton;
- scraps of multi-colored fabric;
- candy wrappers;
- corrugated paper "cups" for cupcakes or any other corrugation;
- Balloons.
The choice of materials depends on imagination and skill.
Original and non-standard garlands
You can even make a garland out of food. For this, rings and pads of ready-made breakfasts, chips, nuts, dried and candied fruits, marmalades and soufflés are suitable. Such a garland must be handled carefully so as not to spoil its appearance. It is necessary to store the decoration in the refrigerator, and no longer use it as a decoration, but, for example, for a competition.
Below is a photo of a do-it-yourself garland for a child's birthday, which is made from popcorn and ready-made breakfast rings.

Such a garland is not suitable for those who have animals in the house. In an effort to taste a delicacy, they can not only spoil the decoration itself, but also the decorated surface.
Yarn garland is another easy option for a child's birthday garland. Everyone knows how to make balls with your own hands from knitting threads. The photo below shows what a wonderful result you can get.

How to make DIY flags for a child's birthday garland quickly and easily
You can make an element - a checkbox using ordinary scissors and a pencil. You just need to draw the necessary shapes and carefully cut them out. Then the flags are either fastened with glue or a stapler, or broadcast on a thread.
Such a simple manufacturing method takes a lot of time, and the process itself is monotonous and boring. You can simplify your task by purchasing a curly hole punch. There are many such devices sold in craft stores, in various shapes and sizes.

Even the simplest and most well-known garland-ring can acquire a second life. Hole punch knives are so complex that they can cut real patterns, not just geometric shapes. The following photo is an example of what can be done with a figured hole punch.
A simple device will significantly reduce the time of work. You will no longer need to draw and diligently cut along the lines, just bring the sheet up and press the pen.
Helpful Hints:
- You can make a ring garland by buying a ready-made paper ribbon with a printed pattern. It will only be necessary to cut it into strips and glue it.
- For fabric flags, it is better to take felt, then you will not need to process the curly edges left by the hole punch.
How to securely fasten flags in a garland
You can collect a garland on a thread attached to the surface. If the elements need to be hung, then it is worth doing this before fixing the base in place. Flags can be connected to each other with glue or a stapler without thread.
You can save time by stitching the elements with a sewing machine. Only thick paper / cardboard or fabric flags are suitable for this. You can use the most ordinary threads or you can find metallic ones with a sheen on sale. Figures made of thick paper will need to be placed under the foot of the machine one by one, without gaps. An example of work is shown in the photo below.

Garlands sewn in this way will last longer. They are easier to store, faster to make, and look just as good as store-bought decorative items.
Making a garland of candy wrappers for a birthday
Such a product will turn out beautiful only from whole, untorn candy wrappers. If they are torn, you can make base flags out of cardboard and simply stick candy wrappers on them. For a garland of candy wrappers you will need:
- many different candy wrappers;
- strong thread - the basis;
- glue or stapler.
Wrappers must be selected as much as possible the same in size. If they are multi-colored and shiny, you can simply fold them in half, put a little glue in the center and hang them on the base. If the wrappers are large enough and have pretty scenes on them, you can carefully fold one edge over and stick the wrapper to the thread like a regular flag or staple it with a stapler.

This is a very simple and fast way that will save time and get great results. It will be interesting for children to look at the wrappers and share their impressions about which of the sweets is tastier.
Note: parents should take care of the presence of those delicacies on the festive table.
We make a flower garland from multi-colored napkins
Paper flowers can freshen up the atmosphere just as well as real ones. The photo below shows an example of decorating a table with flowers from napkins.
 You will need napkins or thin multi-colored wrapping paper, scissors, threads, glue, wire. It is necessary to cut the napkins into strips and fold them with an accordion. The paper accordion from the edge must be cut off using one of the methods suggested in the photo below and unfolded. Then the strip is twisted and tightly wrapped at one end with a thread. You can dip the base of the flower in glue and stick the bud on a thin wire for easy attachment to the base of the garland.

For large flowers, it is better to take not napkins, but special paper for florists. It comes in a variety of shades and has an interesting heterogeneous texture.
Create a garland of balloons
Paper balls coming down from the ceiling on threads of different lengths look very impressive, but balls in a tight bunch are a great way to decorate the space. You can verify this in the photo example below.

The easiest way to make such balls is to buy ready-made ones in the store and string them on a string. Making them is a very painstaking task. It is necessary to cut a large number of circles from colored double-sided paper. Then fold the circles in half and glue them one by one. The more circles, the more voluminous and "stuffed" the ball will be.

The presence of partitions depends on the method of gluing the halves of the circles with each other. Finished balls must be collected on a thread (base) and attached to the surface.
Such beautiful garlands can be made not only from paper, but also from threads and glue. It is necessary to inflate the balloons, generously coat them with glue and wind the threads. The blanks must be set aside until the glue dries. Then take a needle and pop the balloons. The result is fashionable and interesting jewelry, for example, as in the photo below.

The final appearance of the product will depend on the method of winding the threads and their thickness. Instead of thread, you can take thick twine or thread from twisted napkins or newsprint. Then the finished balls will look like in the following photo example.

You can also take at least 10 sheets of paper, fold them one by one, fold them into a small accordion and tie them in the middle. Then straighten the accordion separately for each sheet. The result is a voluminous and beautiful ball, as in the photo below.

How to make unusual flags - hearts, bows and lanterns
Interesting elements will turn out if you cut the tape into strips of different lengths and fasten them in a special way. In more detail, the process of creating hearts can be seen in the photo below.

The element is a voluminous bow, perfect for a girls birthday. It is not difficult to make it, but you will have to draw and cut out the details manually. For a bow, you need to cut and fasten 3 parts. The manufacturing method is shown in the photo below.

The element - a flashlight is very similar to a ball, but it is even more difficult to complete it. They do not need to be made large, the smaller they are, the more they attract the eye and delight others. To make lanterns, you will need cardboard and scissors. First you need to cut a large number of blanks, and then simply fasten them with glue or with the help of cut out hooks.

As you can see in the photo, the decorations are very beautiful. Such balls are called flashlights because during the manufacturing process an LED light bulb can be easily inserted into them.
Summarizing experience, or Complex designs from garlands
When decorating rooms, it is worth combining several types of garlands and various elements, this option will be the most advantageous. Clouds with rain from garlands have already been mentioned, the photo below shows an example of such a design.

You can also string long threads with small pieces of medical cotton wool and paper stars. By attaching them to the ceiling at short intervals and allowing them to fall to the very floor, you can get a fabulous veil and separate the resting place for parents and children with it. Small surprises and gifts for kids can be hung on garlands.

Even the alternation of very simple garlands creates space for the decorator. You can put letters on the flags, make up the name of the child or a whole congratulation with pictures.

The easiest option for creating a festive decor is a garland for a child's birthday, assembled with your own hands for 1 thread. It's easy to make and doesn't take much time.
Whatever parents come up with to decorate their child's holiday, both adults and children will be able to have a lot of fun, as well as keep happy memories of the time spent together in their memory. One very unusual garland can be created throughout life. It is necessary to hang a thread on the wall and attach photos of family celebrations and joyful events to it.
A DIY guide to decorating a child's room. Go crazy mama!
Birthday is magic, it's a small miracle, it's a special atmosphere that lives everywhere in the house. An atmosphere of joy and fun. What are we talking about? Oh yes! Get to the point. We decorate the room.
We will describe different techniques, techniques and styles, using which you can decorate a child's room for a birthday or other holiday with your own hands.
We have one goal - to create a mood, but the tasks are different. For example, someone decorates the room in which the holiday will take place, and someone creates a festive background for the children's room, in which the birthday boy will wake up in the morning and fall asleep in the evening and it will be different from everyday.
If the room we are decorating will be a place of celebration and gathering of guests, then we choose a decor that is safe, strong and does not clutter up the space.
Boys and girls: features

The next condition for decorating the room will be the gender of the birthday boy. Girls have one preference, boys have another. But in no case do we sacrifice beauty. Yes, the nature of the jewelry is different:
- for girls more choice of materials. These are fabrics and flowers and paper. Sequins, beads, threads - everything can be used. In this case, we use more softness, fluffiness, airiness.
- for boys, you can often get by with paper and cardboard. Better yet, reduce the amount of decor inversely proportional to age. Closer to adolescence, "tinsel" annoys them.
It's all about color
I would like to suggest that we all forget for a while about the existence of blue and pink tones. But you and I know such 3-4 year old fans of the mentioned colors that the use of any others will provide mom with a decorating failure. If this is not your case, rejoice in your happiness and choose any suitable palette.
As you know, there are no friends for the taste and color. However, there are trends and even some “discoveries” in the combination of colors that can inspire or fit perfectly into the interior, emphasize a festive outfit, reflect the theme of the holiday, etc.
Remember: color is always more important than the theme of the holiday! Those. even if a girl demands the “Anna and Elsa” holiday, this does not mean at all that a blue decorating explosion is waiting for your room. You can use a lot of white, pink, purple and turquoise. See what non-blue Frozen parties we could find:

Color is always better not to describe, but to show. That's why we've opened up Google Images and put together some great palettes that you can use to create your perfect room decor.


Decor elements
The most delicious, interesting and applied part of our review is the decor itself. What it is like, how to build it and from what, or where to get it.
paper pompoms

Decorating the room with paper pom-poms creates an airy atmosphere. They can be used both hanging and attached to the wall with paper tape. In hanging form, you can collect pompoms into garlands. Pompoms are made from crepe and crepe paper. It's not the cheapest consumable. Not so long ago we filmed a master class for creating such paper pompoms and then we could not find crepe paper, we took corrugated paper.
Tip: buy blanks that only need to be fluffed. It's cheaper and faster than running around town looking for paper.
Paper flowers

It would be more correct to call them giant paper flowers. They are from the world of wedding traditions, but it is infinitely beautiful. In this case, almost any paper in terms of weight and type is allowed. And of course, the paper will dictate the shape and design of the flower, but this does not diminish the beauty. It is difficult to calculate the benefits of self-production of such flowers. It all depends on the “scale of the disaster”, i.e. how many flowers you need and the cost of your personal time. You can not buy such flowers in the store. Only handmade and made to order.
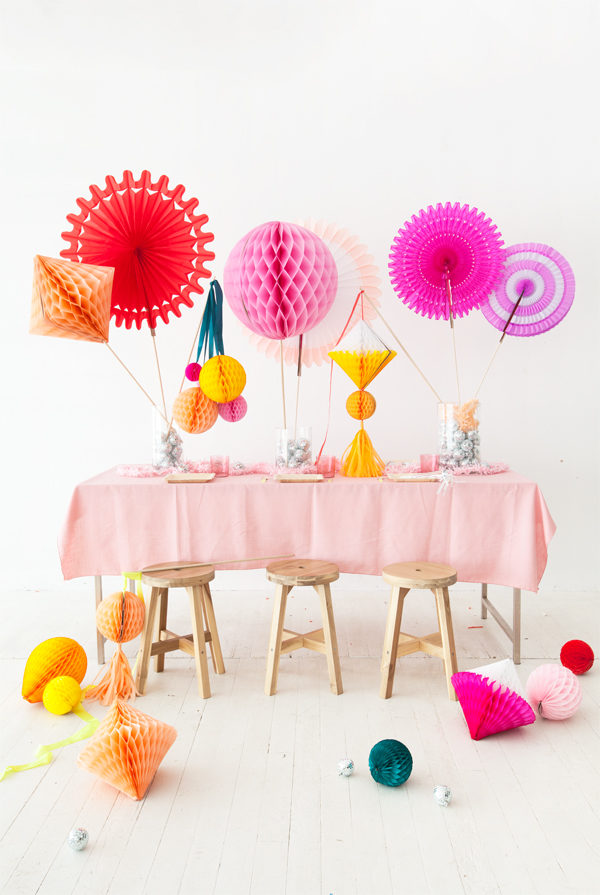
Paper fans (Fants)

Another kind of paper flowers to decorate the walls. But unlike the previous two, these are flat. And this can play a leading role when choosing a decor. For example, for small rooms.
honeycomb balls

There is no way to make such balls with your own hands. But they're just as effective and arguably the fastest to assemble.
Stretch garland. Banner

100% childlike room decoration. Classic flags stretched along the wall or stretched under the ceiling. Bright, colorful, with the inscription "Happy Birthday!". This option is familiar even here, in Russia. And he is unbeatable. Flags can be cut out of colored or scrap paper. And you can download, print on a color printer and cut. An unthinkable number of options with color, shape, size and length.
Tip: if you are going to print flags, choose the option with 5-10 flags per 1 A4 sheet. Believe me, 1 flag in A4 size looks terrible. Huge, awkward and developing from the slightest breath of wind.
Tassel garlands

Windy tassels made of delicate paper in silence. They are strung on a thread like a stretching garland, complement the compositions of balloons and are used separately to decorate chairs. They are simple, but in the right hands, with a good palette selection, they will do the trick.
Chain garland. Confetti

Dots, confetti, circles. Indispensable in creating a playful and sweet atmosphere. You can use small, large or different sizes. One minus: if you make them with your own hands, then you need a lot of them!
Number

The number symbolizing the age of the child is very popular at the holidays of preschoolers. It can be made entirely of cardboard, applique on canvas or in the form of a poster. Don't confuse the number with the piñata. This one is not beaten and stuffed with nothing. She, like a won trophy, is located on the table, in the photo zone or in another important place.
Poster

Posters are rapidly becoming fashionable, especially calligraphic ones. It is customary to write on them the metrics of a child at birth, the first words and phrases, wishes, parting words, slogans. Order one as a gift and it will decorate your home every day.
Ribbons

Satin, chiffon, silk, tulle and even gauze. Tapes are best used in large rooms with high ceilings or outdoors. But if there is an empty wall that requires a quick and easy decor, then they will come in handy here.
How to use gauze in decor? Very simple. Pour cold water into a deep container, tint it with ordinary gouache in the desired tone and lower the folded gauze there. Do not be afraid of uneven coloring, stains and shades - our everything!
Balloons
Plain, gel, small, large, curly, filled, plain or multi-colored. All is well with the balls. But already beaten.
Although, no. We take back our words. And here there are innovators who create trends. Look:
Complete the garlands with fabric drapery. The fabric softens the light, maintains the desired color. With kids, extra electrical appliances are useless, preschoolers will be indifferent to the efforts spent, but for teenagers, this is a must-have.
It is rare that a holiday is complete without such a popular decoration as a garland. Stretched across the entire hall, it immediately creates a festive mood. You can buy it in the store, but it's better to make it yourself. With your own hands, you can make original garlands from corrugated paper (and any other) - an inexpensive, multi-colored and easy-to-use material.

We offer several original ideas and master classes that will help you make your home festive and elegant.

You can make such a decoration very easily and quickly. We will need: corrugated paper, scissors and glue.

Step one. We cut off from two rolls of corrugated paper of different colors one piece each with a width of 2 to 4 cm. As a result, we will get two small rolls.

Step two. We glue the ends of the rolls, as shown in the diagram.

Step three. We throw one ribbon over the place of gluing and align it. Next, fold the second ribbon in the same way. We continue to shift the layers of paper ribbons crosswise.

Step four. We intertwine both ribbons to the end and get just such a stack of multi-colored layers. We glue the ends of the ribbons and unfold our creation. An elegant garland made by yourself is ready.

From ordinary colored paper:

Multicolored holiday garland

In order to make such a bright garland, we need three colors of corrugated paper, scissors and a sewing machine.


Operating procedure:
- Cut out three ribbons of different colors from paper. We overlap two ribbons, then cover them with a third ribbon on top.
- Next, with one seam, we sew on a typewriter all three tapes in the center, that is, in the place where they are connected. So that the tapes do not diverge, you can first bast them.
- The stitched tape, gently pulling the ends of the threads, we pick up. We got an original multi-colored garland that can decorate any holiday.
Fringed garland

For creativity, we only need a roll of corrugated paper, a sewing machine and scissors.
Operating procedure:
- Cut the whole roll into several small rolls. We roll them out and get long ribbons.
- We fold the ribbons in several layers, sew them in the middle and bend them in half. We cut the edges of the ribbons with curly scissors.
- Next, cut a small fringe, leaving the middle intact. We straighten the ribbon and get an airy and fluffy garland. Even a schoolboy can make it with his own hands and with the help of his mother.
Paper bow garland

A stylish festive garland can even be made from bows. We will need several rolls of corrugated paper in different colors, glue, scissors and a thin rope.
Operating procedure:
- We make bows using a diagram that clearly shows the whole process of work.
- We string bows on a rope and decorate the festive hall.
Garland "Hawaiian beads"
We will need: a thread to match the color of the garland, scissors and a large amount of corrugated paper.

Operating procedure:
- We cut long strips of paper 5 cm wide. We begin to lay even stitches “needle forward” in the center of the strip. After three or four stitches, we tighten the paper into an accordion.
- Next, turn the resulting bundle of paper clockwise, make a few more stitches further on the strip, tighten the new bundle and turn it in the same direction. As a result, we get a kind of paper spiral.
- We continue to make stitches and pull the paper into bundles until the strip runs out. Next, the tips of the "Hawaiian beads" are sewn together. In this way, you can make a garland with your own hands to decorate a Christmas tree, a Hawaiian party, a wedding car.
How to make a heart garland
Homemade heart pendants are best for decorating a Valentine's Day or wedding anniversary party, but they can also be used at other family celebrations. There are a lot of options for garlands of hearts, we offer the simplest and cutest.
You will need:
- colored paper (sheets from a school set for creativity are quite suitable);
- decorative twine;
- scissors;
- stapler;
- hole puncher.
Traditionally, hearts are made of pink paper, however, if desired, you can cut them out in different colors.
- Cut the paper into strips. For one heart, you will need two strips 17 x 2.5 cm long, two 14 x 2.5 cm, two 11 x 2.5 cm and one strip 9 x 2.5 cm.
- Alternately fold each strip in half, and without bending, put into each other according to the “matryoshka” principle according to the diagram in Fig. 2-4.
- Connect the ends of the strips with a stapler. Half of the heart is ready. Form the second half in the same way.
- Connect the halves with a stapler by inserting a “tail” (the shortest strip of paper) between them. Using a hole punch, make holes in the upper part of the "tails" (Fig. 5).
- The point is small - to string the hearts on a string and fix them in a knot. An elegant garland of colored paper is ready.

Stretchable heart garland
Simple and beautiful garlands, stretching like an accordion, will be the highlight of the decor for both a romantic and a children's party. All you need is thick paper of different colors, scissors and glue.
- First you need to cut out heart templates from cardboard - one is larger, the second is smaller. Each heart consists of 2 halves of the same color.
- Using the templates, cut out the desired number of blanks. Those halves of hearts that are larger, fold, as shown in fig. 3 which are smaller - fold in the center.
- Glue the 3D hearts as shown in Figure 4-6. Let the glue dry.
- Now we form our garland. Carefully connect the ends of the multi-colored hearts with glue. When it completely hardens, the accordion garland can be stretched and bent. It is easy to entertain the smallest guests of the holiday with such decorations.

Luxurious flower garland
Pendants under the ceiling in the form of exotic inflorescences look very impressive. It is not difficult to make such garlands out of paper with your own hands. We need:
- paper (multi-colored thin for flowers and denser green for leaves);
- stapler;
- hole puncher;
- decorative twine.
- We fold a sheet of colored paper "accordion". We fix the middle of the accordion with a stapler.
- We give the edges a triangular shape (for flowers with pointed petals) or any other.
- With the help of sharp scissors, we give the petals a concave shape.
- Cut out stencils for the leaves and for the core of the flowers. We glue the cores on both sides of each inflorescence, punch 2 holes in the leaves with a hole punch and string them on a string.
- Alternating inflorescences with leaves, we form our garland. Instead of leaves, you can cut out patterns of butterflies, stars, suns from paper - it all depends on your imagination.

We sew garlands on ... a sewing machine!
If you need to make as many garlands as possible for the holiday, and time is running out, just sew them on a sewing machine! You will get simple and spectacular decorations that are convenient to decorate windows and ceilings.


- Cut out more garland blanks using stencils. Figures can be anything: stars, little men, circles, shamrocks, etc. Only thick paper is suitable for cutting, the so-called velor paper is best.
- Pull out 20-30 cm of thread from the eye of the needle of the sewing machine (for the ends of the garland).
- In the settings of the sewing machine, set the sewing pitch to the widest (since the paper is thinner than the fabric, it is better not to abuse the number of holes.
- When you reach the edge of the first piece, do not cut the thread. Gently pull it, releasing 7-10 cm of thread. Then place another workpiece under the needle and stitch it. Thus, you can make a garland of any length. Remember to leave 20-30 cm of free thread after the last stitched piece.


Plain paper flags
Let's remember the lessons of kindergarten and make the simplest holiday garland. To do this, simply take a rectangular piece of colored paper and bend it in half. We cut out the double blank using the necessary templates.
We will consider them blanks that we will use to make paper flags with happy birthday greetings. You can make them from colored paper, sheets of glossy magazines, old books and just from white writing paper. The main thing is, after giving them the desired shape, make applications from letters or simply draw them on the flag.

Garland with applications
We have paper flags ready. Now you need to stick on them the inscription "Birthday" or "Happy Birthday!" from letters. The photo shows the entire alphabet. You can make the patterns you want by enlarging the image.
Cut out the desired letters using stencils from multi-colored paper, decorate them with rhinestones, flowers, bows and stick them on paper flags. Then throw them over a stretched string and form festive garlands. Do not forget to glue the inner sides of the workpiece so that the flags do not fall off the thread.


Flag letters
No birthday should be forgotten! Even if you couldn't collect enough coins left over from buying ice cream to buy a gift, don't despair. Your garland will be a pleasant surprise for your mother.
Cut out the desired letters from thick paper. Take the letters from the top photo as templates or use those copied from the Internet. For example, such as our "C", "D" and "H". Collect from them the phrase "Happy Birthday!"
Stretch a beautiful braid by tying it to studs on the wall, for example. Attach the letters to the braid in the desired order, collecting a garland. This can be done with a stapler, pins, glue, and even regular clothespins. Paper flags in the form of letters will look even more beautiful if you paint them with felt-tip pens and glue them with confetti.
Flags with a fan
Within the walls of the kindergarten, such complex flags were definitely not made. Although, there is nothing complicated in them, except for the fan itself. These are ordinary triangular-shaped paper flags, decorated with small round fans with letters pasted on them.
- Take a piece of colored paper with a width equal to the diameter of the future fan and fold the accordion. Fold it in half and glue the two halves of one side together. Get a semicircle. Fold two semicircles and glue. Glue the corrugated circle for the garland to the flag.
- Cut out a circle with a smaller diameter or a square and glue it to the fan.
- Glue the cut out letter on top. Punch two holes with a stapler. The checkbox is ready.
- Gather a garland and hang it on the wall.
Some more ideas
Garland of figurines:


Here is such a stylish garland of cute corrugated Christmas trees you can make for a New Year's party.

Another simple master class on making paper decorations.
Surprisingly simple and original find - brushes made of corrugated paper, suspended on a string. Looks very elegant and festive.


