Crochet knitting technique. Beautiful knitted beret made of thick yarn. How to knit takes from motives: MK
The scheme, even for a beginner, will be simple compared to knitting needles. This is due to the peculiarities of knitting. The headpiece can be adjusted in the process of work so that the product takes the correct shape. Consider several models of berets for the warm and cool seasons.
Spring red beret
This headdress can be started knitting from an elastic band or crown. The shape of the beret is created by decreasing and adding columns, as well as changing the thickness of the hook. Having typed a chain of three or four loops, you start knitting from the top of your head with a hook.
Scheme and description.
- You knit 8 single crochets.
- In each column, knit a bump (three columns with a crochet, having one loop of the base and top) and 4 loops between them.
- Alternate the "loop" column with 4 loops between them (there should be 16 columns).
- Knit 8 fans (in one loop of the base there are four “loop” columns) with 4 air loops (that is, there is a fan on the previous column, in the next element with air loops).
- In the next row above the fan, you knit 4 “loop” columns with a common top, and between them - 7 air loops with a connecting loop on the previous arch.
- Further, in all loops, except for the connecting ones, you knit solid "cap" columns.
Red headdress
We continue to crochet the red beret.
- Alternate * 2 columns with a crochet, 3 loops, 2 "cap" columns, 3 loops, slingshot (two "cap" columns with a common loop of the base) *.
- You knit seven "cap" columns and a slingshot.
- Alternate 18 double crochets and a slingshot.
- Knit two "loop" columns and three loops to the end of the row.
- Two rows go solid double crochets.
- Alternate * 2 "cap" columns, 4 loops, "fence" (two columns with one top and two different base loops), 4 loops *.
- You knit 7 columns with a crochet, "fence".
- Alternate 2 "cap" columns with a "fence".
- You knit 2 "cap" columns, 10 loops, "fence".
- You knit the penultimate row with “cap” columns (for one “fence with “cap” columns at the edges, there are 5 columns each).
- The last row consists of half-columns.
Most often, beginners do not get berets, but “pancakes”. This is due either to loose knitting, or to the wrong selection of threads and hooks.
Simple white crochet: pattern
- Chain of eight loops.
- 18 single crochet.
- Alternating double crochet and slingshot (two double crochets knitted in one loop of the base). Only 9 slingshots, the same number of columns.
- In place of the "crocheted" column, you knit a slingshot, and in the same element of the previous row - double crochets. Only 9 slingshots, 18 columns.
- Alternating a slingshot and 3 double crochets. Slingshot knitting shifts one loop in each row to get smooth lines, like a flower.
- You knit a slingshot with 4 "cap" columns to the end of the row.
- Slingshot alternation of 5 columns with a crochet.
- Knit the next row in the same way as the previous one.
- Alternate to the end of the row a slingshot and 6 "cap" columns.
As soon as you tie the desired diameter of the product, begin to reduce the number of columns. The elastic band can be knitted from simple double crochets or without it. When knitting, add beads to make it more elegantly crocheted (the pattern can be the same, and place the beads on the slingshots).

Knitting from gum
For some, it is easier to knit a product from an elastic band. To do this, dial the chain around the circumference of the head. Single crochet work eight rows. Connect the resulting strip into a circle with connecting posts. Add loops by half, that is, if the elastic consists of 120 loops, then you should get 180 single crochets.
Next, go to the "cap" columns. Alternate them with cones (14 "crochet" and a cone of two columns with a crochet with one loop of the base and a common top). Please note that 12 loops are added in each row. The increase goes between the bumps.
Having reached the desired diameter (approximately 21-23 cm), knit the next 4 rows without increments with a smooth shift of the bumps. Due to this, the hat (beret) is “bent”. Crochet the scheme of any headdress is knitted quickly due to decreases. In this case, you decrease 12 columns in each row, while the bumps move and form wedges. Pull off the remaining 8-12 loops, hide the thread on the wrong side.

White beret with visor
Pay attention to the children's model with a visor. The whole emphasis rests on a large flower, in which the second petals start from the base of the first (as voluminous flowers fit). Knitting starts from the middle. Six rows in a checkerboard pattern alternate the "cap" column with an air loop.
Then the resulting oval is tied with half-columns. Further, due to the "loop" columns, half-columns and air loops, 21 petals are formed. Pay attention to their location (see the photo for a white crochet with flower and visor patterns). Next comes the increase and work on the second row of petals: 6 large and 21 small. The latter are uneven, so read the diagram carefully.
For a beret, you need to impose leaves consisting of one large and three small petals (the same as those of the flower itself). The bottom of the headdress is tied with arches and "cap" columns. The visor is knitted last with "cap" posts and loops.

Beret with visor for beginners
Such hats with a visor can be knitted for both boys and girls. Only for the stronger sex, choose a simple pattern. To make the beret more stylish, take a melange, sectional yarn. Just remember that it is very capricious and unpredictable in the sense that the product can take on a wide variety of forms.
Knitting starts from the bottom. In the ring you knit sixteen double crochets. Then alternate the "loop" column with an air loop. Next, knit all the columns with a crochet (two in each air loop). You knit a few more rows with an increase due to the alternation of the "cap" column and two air loops.
So continue to knit fully crochet. The scheme for a girl or a boy can be any, the main thing is to adjust the shape of the headdress due to increases and decreases. Once the bottom is tied by adding loops, proceed to the formation of the height of the beret.
Try on the product. Measure the location of the visor, knit with convex and regular single crochets. Every five convex columns increase by one more column. This is necessary for the visor to stand. Its shape is obtained by cutting the loops along the edges (knit the last two columns together).

"Motive" crocheted: scheme and description
Graceful head berets are obtained from individual motifs. The bottom line is to first form the bottom of the beret from them, then the sidewalls, and knit the elastic in semi-columns with a strapping to match the pattern. At the same time, the sidewalls are knitted without increments so that the edges are bent.
Let's consider how to tie a flower. Schemes of a lush flower will be as follows. All rows end with a connecting loop, and begin with one lifting loop. Make a sliding loop (fold the thread into a circle so that you can then tighten it).

Connection of motives
We continue to consider crochet motive children's berets. The schemes for connecting elements are represented by arches of air loops and half-columns. Leave tails for each element for tying the last row and attaching motifs. Hide the ends of the threads in lush columns on the wrong side.
When the second element is created, when knitting the last row, immediately attach to the first flower with connecting posts for the three arches of the first flower. Further, the elements are also attached for the three arches of the first and second flowers, and the 4th arch remains free, that is, out of 24 arches connected, there should be 18, and 4 free.
In the next row, motifs are also attached, but they take a thicker hook to increase the size of the product. Connect the flowers according to As you can see, it turns out an unusual, stylish crocheted beret. The scheme of the headgear gum is represented by ordinary half-columns, which are attached to the middle of each arch of the previous row. The harness consists of lush columns and a connecting loop.
If you need to increase the size of the beret, then tie the flower several times with arches and half-columns. You can take a thicker thread and a larger hook number to also achieve the desired size.
Brief summary
When knitting a beret, pay attention to the yarn and hook number. Cotton Gold, "Crystal", "Brilliant" brands are suitable for a headdress. Choose wool with acrylic or bamboo for cooler weather, and cotton for summer. If you are working with unfamiliar yarn, then knit a sample first to see how the thread behaves in work.
Beginners should follow the instructions, and professionals can crochet berets from any pattern. The scheme for a girl, boy, adult differs only in size. The essence of knitting remains the same: knit the bottom with an increase in the size of the crown, adjust the height of the beret and narrow the loops to fit the forehead.
That's why master class with video, you can learn how to knit a hat with a pattern with voluminous bumps. The crochet cap turns out to be lush, creates volume on the head, since the bumps are attached to the canvas only with the base, a 3D knitted pattern is obtained.
The hat is double-knitted with a lining, since the outer part of the hat is made with an openwork pattern with bumps, despite its splendor, it is easily blown through, to warm the hat it is enough to tie a simple lining.
To knit a hat, you will need 200 g of melange yarn and hook No. 4.
 Beret crocheted with puff stitch pattern, it turns out spectacular, voluminous, and to make it even brighter, change the color of the thread each row. In the kit for the beret, you can knit beautiful mittens, also with a colored pattern.
You will need: 100 g each of green (No. 416), white (No. 02), lilac (No. 208), burgundy (No. 230), gray (No. 508) Adelia Fiona yarn (50% wool, 50% acrylic, 90 m / 50 g), hook No. 3.5; marking rings; tapestry needle.
 Classical knitted set of beret and bib will decorate every girl. For knitting a beret, a simple knitting pattern with embossed paths was chosen, a similar pattern was used to finish the bottom of the shirtfront.
The description of the knitting of the beret is presented for a head circumference of 55 cm.
You will need for knitting a beret and shirt-front: 300 g of dark pink yarn (50% wool, 50% acrylic, 240 m / 100 g), knitting needles No. 4.
 Hats and hats, berets and caps - all these hats can be knitted with your own hands. A little imagination and now you have a unique addition to a business coat or a luxurious fur coat. Try crochet this beret with a "knob" pattern. The execution of the model will give you pleasure. Model of Marina Arkhangelskaya.
You will need: 170g yarn(LanaGrossii) (70%- viscose, 20% - mohair, 10% polyamide, 190m/50g) butter color, hook № 3.
 Knitted voluminous berets their mods have not been released for several years. Knitted with a simple ribbed pattern, a beret from a beautiful color yarn will effectively complement your look. Embellishes the beret with buttons that need to be matched to the color of your yarn.
Head circumference: 56(58) cm
You will need: yarn (65% wool, 35% alpaca, 75 m / 50 g) - 150 g terracotta color, knitting needles No. 4, circular knitting needles No. 5, 4 buttons.
Knitting density: 17 stitches x 22 rows = 10 x 10 cm.
 Warm jacket with ties and knitted beret with a flower, look great in a set thanks to the common color scheme of the pattern of stripes of white, gray and black yarn. Knitted warm jacket and beret can be worn all autumn.
SIZE 38/40
YOU WILL NEED 100 g of white, gray and black yarn (16% wool, 22% polyester, 62% acrylic, 320 m / 100 g), knitting needles No. 3.5, hook No. 3, 1 decorative button.
Classic women's set for autumn beret and openwork scarf crocheted. Bright olive color yarn is perfect for creating a bright autumn look, use a small amount of contrasting dark yarn and pearl beads for finishing.
Beret size: head circumference 56 cm.
Scarf size: 30 x 180 cm.
You will need: 300 g of olive yarn (70% mohair, 30% acrylic, 520 m/100 g), 30 g of dark green yarn with lurex (92% acrylic, 8% metallic, 400 m/100 g), white large beads ( pearls), embroidery needle, hook number 3.
knitwear set, consisting of a beret, leggings and a jacket with a hood, you will come in handy for outdoor recreation. Knitwear is comfortable and will protect you well from the cold, you will feel comfortable in them and arrive in a good mood.
Knitted beret is a popular headdress that combines the simplicity and sophistication of fashion trends. Depending on the style of knitting and the yarn used, berets are: winter - warm and voluminous, openwork summer - with ruffles or pompoms, festive - decorated with a beautiful brooch or intricate accessory.
It is not difficult to knit, the main thing is to pick up yarn and a hook according to the recommendation, and you can get to work.
How to crochet a trendy beret
A women's beret, knitted according to the proposed scheme, will be a good addition to a knitted dress, trouser suit and high-heeled shoes. You will need: 100 gr. (780 m) cotton yarn with acrylic (50/50), hook No. 2.5. We work in two threads, the beginning of knitting is the crown. Size - 56.
- 1 row - dial 11 tbsp. b / n, loop.
- 2 row - 3 in. lifting, 2 tbsp. s / n in each loop of the previous row, SS.
- 3 row - 3 in. p., * 1 tbsp. s / n in the next loop of the 2nd row, 2 tbsp. s / n - the same *. Repeat the action from * to *, SS.
- 4 row - 3 in. lifting item, 1 tbsp. s / n in the next loop of the 3rd row, 2 tbsp. s / n in the loop of the previous row, SS.
- Knit according to the table, and when the diameter of the product reaches 26 cm (13 rows), make 3 rows with columns with 1 crochet.
- From the 14th row there is a decrease - * 9 st.s / n, 2 tbsp. s / n together *, repeat the pattern from * to * four rows.
- 19 row - embossed elastic band - * 1 tbsp. s / n, located in front of work, 1 tbsp. s / n - at work *.
As you can see, the beret knits quickly and easily, but it looks very stylish and elegant.

How to crochet a mohair beret
All knitters love to work with fleecy yarn, as the product is not only soft, but also beautiful, because the material completely hides small knitting errors. Size 56 will go: one skein of mohair (cashmere or angora), 80 gr. polyester with lurex. We will knit from the bottom with crochet No. 5.
- Connect 2 threads each (mohair and synthetics), pull out a chain from 6 in. p. Close it in a circle and make 6 tbsp. b/n.
- In the 2nd row, knit 2 tbsp. b / n in each upper st. b/n. So work, adding at regular intervals in all rows of six loops. Stop when the bottom of the cap is 26 cm.
- Work 2 cm and decrease as needed until the inner circle measures 15 cm.
- In the next row, insert the hook from the outside into the hole near the column and bring the loop to the front side behind it. Grab the main thread, pull it out, and knit the two loops that are on the hook.
- Perform five rows with single crochet, then tie the workpiece with a crustacean step with a woolen thread in two additions.
Such a fluffy beret is worn with a long cardigan, an elegant coat or a trench coat.

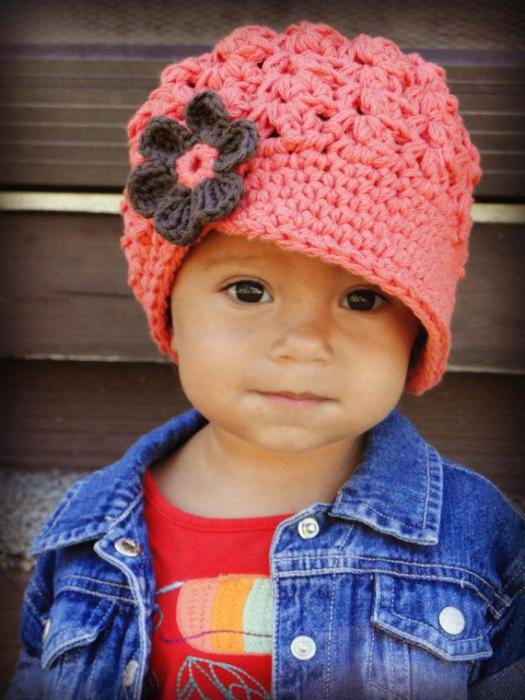
How to crochet a baby beret
To protect your baby's head from the sun's rays, tie a cotton thread beret. For lace creations you need - 50 gr. yarn and hook number 4.
- Close the chain of 6 c. n. Tie 3 lifting loops and 19 tbsp. s / n. Make a rise from 3 in. n., then again three air loops, 2 tbsp. s / n. Alternate - 3 plus 2. Next - SS. Knit according to the pattern until the 30th row.

- Dec – 3 rows dec every 5 sts, keeping yarn over in sts. The next row - decrease by removing the crochets in the columns. The last row is single crochet and decrease.
- Finishing work, knit 3 rows of single crochet border. Attach a knitted flower, butterfly or ladybug to the beret and an openwork miracle will come out for a little princess.


Crochet a beret and get a versatile piece that will always be in demand in your wardrobe and goes well with any outfit.
A beret is a universal accessory that can be worn not only by women, but also by children and men who have excellent taste in fashion. In this article, we will present several master classes, how to knit a beret for beginners.
A beret is a very beautiful accessory that did not immediately gain popularity. Berettas appeared first - flat hats, and were worn by representatives of the clergy.
At the end of the 16th century, berets began to be worn in Italy, but not by priests, but by persons related to the leadership of the country and military affairs. At the end of the same century, berets acquired a modern look. They were worn exclusively by men. Only at the end of the 18th century did they come into use as women's accessories.
At first they were made of fabric, mainly felt or velor. Nowadays, needlewomen have learned to crochet and knit them from different types of yarn. We will describe several techniques for making beautiful berets in this article.

You can crochet a beautiful and fashionable beret with a crochet hook very simply in just one evening. First you need to decide what the future beret should be - warm or light. If you want to make a winter headdress, then you need to use woolen or half-woolen threads, and if spring-autumn, then cotton or silk.
When choosing a hook, pay attention to the recommendations indicated on the packaging of the yarn. Usually manufacturers write what tools you need to work with a certain type of thread.
Having prepared the basic materials for knitting, you can start making an accessory. To do this, check out our master classes on how to crochet a beret.
How to tie a simple beret?

To knit such a beret, you need to know the basics of crochet, namely:
- How to make air loops
- How to make half columns
- How to make double crochets and without it
Here is the detailed diagram and description of the beret knitting process:
- We make 5-6 air loops and connect them into a ring
- The resulting ring must be tied with single crochets (their number should correspond to the size of the air loop ring)
- Next, we knit takes in a spiral as shown in the diagram below:

How to tie a voluminous beret?

- First, a chain of 6 air loops is knitted;
- The chain is enclosed in a ring with the help of a connecting column;
- Go to knitting circular rows with half-columns (each row should begin with an air loop and end with a half-column) according to the scheme:

How to crochet a warm beret?
For the manufacture of a winter beret for women, a circular pattern of 12 rows is used:
- We make 9 half-columns
- We alternate two half-columns with four air loops
- The scheme is the same
- We make 1 half-column in each loop of the upper row
- We repeat the scheme of the previous row
- The scheme is the same
- The scheme is the same
- We alternate 1 half-stub with two air loops
- We repeat the scheme of row number 5
- The scheme is the same
- We knit with a “crustacean step” as shown in the diagram below:

Crocheted berets for women: models for spring and autumn
Many girls wear berets not only to keep them warm, but also to complete their look. We present you the patterns for crocheting an openwork white beret, which will suit any spring and autumn outfit:


This version of the beret can be worn even in summer under a denim suit. According to the scheme, you can knit berets for children of the same cut:

Knitted takes with knitting needles: schemes
Any knitted beret, will consist of three main parts:
- Tops (it is with this part that you need to start knit winter beret with knitting needles)
- Headband
- The main part - here you can apply the knitting of some pattern
Try tie the beret with braids. They will visually increase the volume of the headdress a little, even if you use thin yarn, and not woolen or mohair:

In order for the beret to fit in size, you must immediately take measurements of the head of the one who will wear it (you need to measure the circumference of the head and the depth of the beret - from ear to crown).
As an example, we'll show you how knit mohair beret knitting needles:

- Knit 11 stitches.
- In the first row, all loops should be purl.
- In the second row, the first loop is the front. It must be alternated to the end of the row with an additional loop.
- In the third row, you need to knit two purl loops, two facial loops - and so on until the end of the row.
- In the fourth row, we begin to knit an exquisite pattern in the form of such an openwork, as shown in the diagram:

- After the pattern, you can continue knit beret with an elastic band - you can use either American gum or French:

Knitted takes with knitting needles: models
Look very fashionable knitted beret models for women spiral. We are talking about such beautiful hats:


No less interesting look berets with a pattern "Corn". It is also called "Hedgehog".

Berets with openwork paths also look original. Of course, you can’t wear it in the winter, but it’s suitable for autumn and spring. A detailed pattern for knitting a beret is presented below:

Whatever way you decide to tie your beret, in any case, it will look feminine, original and very fashionable. We hope that the master classes given in this article will help you learn the basics of crocheting and knitting berets so that you can create beautiful items not only for yourself, but for all members of your family.
Video: How to knit beret with knitting needles?
Instruction
Knitted berets are good at any time of the year. You can knit them for warm summer weather to cover your head from the scorching sun or for the cold season, then the headdress will perform a warming function. Therefore, before work, you first need to decide which one it takes, for which season you are going to knit. This will determine which threads should be prepared for knitting.
If you are making a beret for the summer season, take thin yarn made from natural fibers. For this purpose, it is good to use viscose threads, bamboo, cotton. Ordinary knitting threads are also perfect for this purpose (such, for example, are used for knitting napkins and other thin products.) A product made from mercerized cotton will look original. The advantage of these threads is that they are light and pleasant to the touch. Plus, they're breathable. And, in berets made from such threads it will not be hot even in the summer heat.
So, we decided on the threads. Now it remains to take a suitable size hook (for thin threads, hook No. 1.5-2 is suitable) and a measuring tape (centimeter).
Take the necessary measurements. First, measure the circumference of your head. To do this, place a centimeter in the middle of the forehead.
Build a beret pattern. Draw a circle that will serve as the bottom of the future beret. The diameter of this part should be half the circumference of the head. That is, with a head circumference of 54 cm, you need to make a bottom pattern with a diameter of 27 cm. If you like larger models, add an additional 2-3 cm to this value.
Now it remains to prepare a knitting pattern. Why you can use knitting patterns for round napkins.
Knitting an openwork beret, like any other beret, you need to start from the top. Cast on five air loops and close the chain into a ring. Then knit the product according to a previously prepared pattern, not forgetting to make the necessary increase in loops in each row. In order to know at what stage of work you are, periodically apply the product to the pattern on paper.
When the bottom is ready, knit in the reverse order: making decreases until the width along the bottom edge of the fabric becomes equal to the girth of the head. Tie a peg.
To complete the work, tie the edge of the product with a “step step”. It is performed in the same way as single crochets, but only in the opposite direction - from left to right.
Moisten the finished product with water (or wash) and let it dry in a straightened form on a flat surface. So that in the future your openwork beret does not lose its shape, does not deform, wash it only by hand, and dry it without squeezing it on a flat horizontal surface.
You can also tie the beret in another way, a little differently. First, knit a chain of 3 air loops and lock it into a ring with a connecting column. Then the hole will not form.
Continue knitting with a double crochet beret, constantly adding to make a circle in a spiral. To do this, knit two single crochets in each loop, starting from the first row. Then knit with a double crochet in every second, third and fourth, fifth and sixth loop of the next rows.
If you want to crochet fast, then make sure that there are no waves in the circle and there are no distortions and narrowings. Adjust the number of increases and decreases when knitting. If the circle narrows a little, then add loops, and if it goes in waves, on the contrary, reduce some of the loops in this place
Knit a circle with a diameter of about 25 cm, double crochet. Then knit evenly, without adding loops another four to five centimeters high.
Then start decreasing every fifth column in several rows until it turns out that the head circumference and the edge of the beret are equal in diameter.


