New Year's paper punching templates to print. New Year's vytynanki: decorate the house with a silhouette paper cutout
To decorate windows for the New Year, it is better to use not purchased decorations, but original ones - made by yourself


Sticker for window decoration “New Year's balls”
Decorating windows for the New Year with vytynankas is today a separate direction in handmade technology. Dedicated to this topic a large number of forums, master classes and videos.
How masterpieces are created for windows

With a little imagination, you can create a real masterpiece on the window.
How to make vytynanka for the New Year? Decorating windows is a creative process in which all family members can take part. As a rule, ordinary A4 paper is used to make stencils. But people with a creative approach choose other materials:
- Tracing paper.
- Foil.
- Metallized paper.


A stylish New Year's composition on the window will delight you, your guests, as well as random passers-by
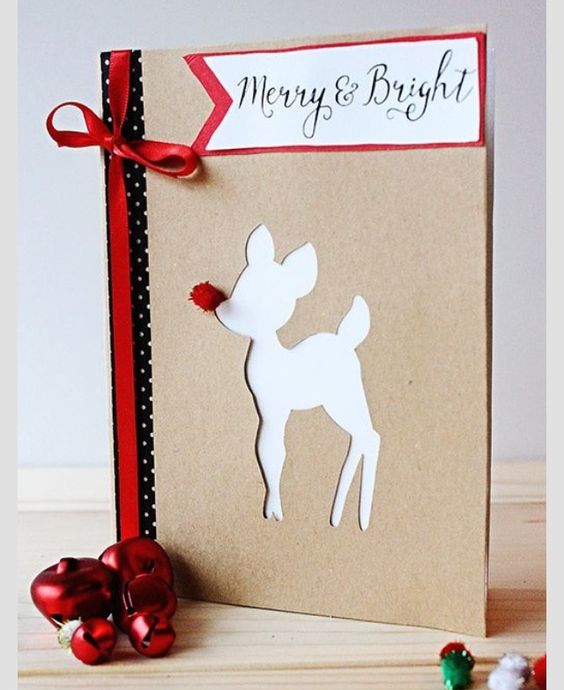
Snowmen and snowflakes on the windows are already quite boring, so it’s better to come up with a whole composition on a winter theme, where the main characters will be Father Frost and the Snow Maiden, a Christmas tree, handsome deer, bells, forest animals and gifts.
To create New Year's stencils for windows, you can use pictures on the Internet that need to be printed. The master will need a standard set of tools, which includes:
- sharp manicure scissors (it is better to stock up on two options - with smooth and rounded ends);
- stationery knife;
- a simple pencil;
- ruler and patterns;
- eraser;
- glass board for modeling plasticine or other hard surface that will protect the table from cuts and scratches.


You can buy ready-made vytynankas or make them yourself

Festive window decor will give you a New Year's mood
All large parts are cut using a stationery knife, and small elements are cut out with scissors.
Advice! You can draw pictures yourself, because not every Internet user has a printer. As a last resort, you can enlarge the image and, by attaching the sheet to the screen, simply copy the drawing.

Ways to use stencils

The easiest way to create a New Year's mood is to decorate the windows
Stencils for can be used in different ways.


To fix the stencil on the glass, some decorators use thin transparent tape. When creating a large composition, you need to follow some rules. For example, all three-dimensional details (Santa Claus, Christmas tree, houses, snow-covered meadows) are glued below. A flying reindeer team will find a place in the middle of the ensemble, closer to the left or right side.
Here you also need to take into account the direction of movement of the deer. The noses of noble animals should not rest against the frames of the window structure. The remaining elements of the picture (stars, snowflakes, garlands, angels, fir branches with balls) would be quite appropriate at the very top.

Gluing a stencil onto glass

Advice! It is better for a novice designer to take simple stencils. When a person gains experience, it will be much easier for him to cope with highly complex protrusions. By using materials of different textures and textures (postcards, jewelry), you can create a real work of art.
Winter landscape with toothpaste on the window

A winter landscape painted on a window with toothpaste looks very beautiful.
Decorating windows with protrusions for the New Year is a process that can captivate people of different ages. Creating snow patterns on windows using a toothbrush and toothpaste is a fairly simple procedure, but the effect is amazing!
To implement the idea you will need the following materials:
- ready-made vytynanka;
- toothpaste (white or blue);
- Toothbrush;
- pure water.

Decorating windows with protrusions for the New Year will be a fun activity for all family members

To begin with, it is recommended to choose simple stencils (snowflake, candle, angel, Christmas tree). All internal elements with sharp corners are cut with a stationery knife. The protrusion moistened in plain water or soap solution is applied to the glass, and excess water is blotted with a sponge or soft cloth.
Squeeze a small strip of toothpaste onto a saucer and add a little water. You can use a toothpick to stir the mixture until smooth. Dip the toothbrush in the resulting substance, bring it to the pasted stencil and quickly run your finger over the bristles - you get small splashes that need to fill the entire free space of the window.

When the white mass dries, the stencils are removed by prying them off with the tip of a knife. As a result of this activity, an amazingly beautiful snow-covered landscape appears on the wall.
Creative ideas for the holiday

What else can you think of to decorate windows for the New Year? Stencils are not the only solution; there are other, no less entertaining and attractive decorations.
This method is the simplest and is suitable for very busy people who are not creative. You can decorate windows using ready-made stencils, which are sold in a wide variety in hypermarkets and stores specializing in decorations on New Year's Eve.

These stickers are very easy to stick to glass and other smooth surfaces. The finished composition can be used to decorate the entire window, or you can decorate only a small part, for example, the corners. When the holiday is over and the emotions associated with it subside, the stencils are quickly removed, and not even a trace remains on the glass.
You can make similar stickers depicting New Year's characters and decorations yourself.
To work you need to prepare the following:
- Drawing.
- Transparent file.
- Polymer universal adhesive.


You can come up with your own window decoration ideas for the New Year or use the Internet
The sheet with the drawing must be placed in a file and glue should be applied along the contours of the image. It will take about 10 hours for the glue to dry completely. After this time, the finished polymer sketch can be removed from the file. There will be no difficulty here; you just need to pry the hardened substance by one edge and pull lightly. The result was a drawing with a convex relief. To fix it on the wall, you just need to wet the smooth side of the sticker with water.
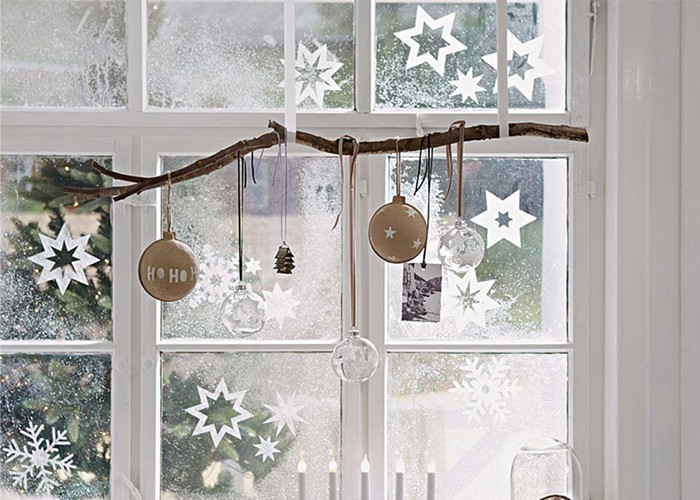
Garlands made of paper, cotton wool and light bulbs

If for some reason the idea of sticking protrusions on windows is not suitable, you can decorate the window openings with all kinds of garlands - both purchased and. The main thing is that the pendant is beautifully fixed and in harmony with the rest of the jewelry.
To make a cheap but cute garland you will need fishing line or nylon thread, white cotton wool. First you need to roll out a large number of cotton balls, and then string them onto the fishing line, leaving a small gap and a knot between each one.
You will have to make a lot of such ribbons, up to the window sill or a little shorter. They are fixed on one long fishing line, which is attached between the slopes or directly to the eaves. You can diversify the garland with colored threads of New Year's rain or light Christmas balls. People in the room will have the illusion of falling snow.

Snowflakes intended for sticking on windows are also used to create garlands. You just have to be patient and time, because you will need a lot of these snowflakes. It’s good if all family members get involved in the cutting process, the work will go faster, and time in a big, cheerful company will fly by. Snowflakes, like cotton balls, are attached to fishing line or thread.
Advice! It is better to hang such garlands at some distance from the glass. Then a shadow will fall on it, which will create a panoramic effect and a feeling of a mystical presence.


Gluing strips to paper cups

Garlands of multi-colored light bulbs are a classic. Fortunately, today you can buy not just ribbon copies, but also garlands in the form of a luminous grid that stretches across the width of the entire window. The decoration will be clearly visible from the street, but on New Year’s Day this phenomenon is quite natural.


Other options for decorating a window opening for the New Year

Illuminated paper panoramas are a relatively new way of decorating a window space on the eve of the New Year. Amazing panoramic compositions are born right on the windowsill. However, such decoration will require the creator to have a reserve of time and a standard set of tools:
- scissors;
- thick sheets of paper;
- PVA glue or any polymer composition.


Continuous ornaments with a New Year's theme (Christmas trees, houses, bunnies) are applied to sheets of paper. You can take ready-made printouts from the Internet. Several sheets are glued together so that the length of the strip is equal to the length of the window sill. For one window you need 2-3 stripes.
3-5 cm are retreated from the bottom edge of the paper and a fold is made, which is necessary to give the figures a vertical position. The strips are placed lengthwise on the windowsill, parallel to one another. A garland with small light bulbs is laid between them.

When evening comes outside the windows and the room becomes dark, the paper figures, illuminated by colored light bulbs, will turn into a real winter fairy tale. The effect of the play of chiaroscuro is amazing!

Paper fir trees illuminated with light bulbs will be an excellent window decoration

If you don’t have time to create complex stencils and compositions, but you still want to decorate the room in a New Year’s style, use a window sill and any available materials. For this, a small artificial Christmas tree, a branch of natural spruce or pine, a candle, or a figurine of Santa Claus will do. All you need is desire and a little imagination.
As the New Year approaches, the desire to decorate your home space becomes stronger. A Christmas tree with balls and tinsel, sparkling garlands, snowflakes and rain - these are not all options for New Year's decor. Decorate your windows with New Year's stencils, and this will allow not only you and your family members, but also passers-by on the street to enjoy the beauty.
Options for New Year's window decoration with stencils
How to make stencils yourself
Windows decorated with stencils will be relevant not only during the New Year holidays, but also in the run-up to them and until the end of winter. This decorative option is also convenient because it does not require any money or shopping trips. To place New Year's stencils on windows, you need to print out the pictures that are selected for you in this article. With a little effort, time and patience, your windows will look just like in the photo.

New Year's picture on the window
In order to make stencils for windows for the New Year, you need to have:
- white office paper;
- wooden or plastic board;
- stationery knife;
- scissors;
- transparent tape;
- toothpaste.
Before you get started, you need to print New Year's stencils for windows.
You can choose any designs as decoration. But images of dogs will be especially relevant in 2018.

2018 is the year of the yellow dog

Dog is the symbol of 2018

Stencil with a picture of a dog
Once you have printed all the stencils, you can start cutting them out. The outer contour of the image can be easily cut out with scissors, but for the inner holes, use a stationery knife. To avoid damaging the surface of the table, place a board under the stencil.
This is painstaking work that requires perseverance, attention and accuracy.
Once everything is finished, you can place the New Year's stencils on the windows, securing them with tape or soapy water.

Stencils on windows
You can put up stencils at your own discretion, arranging the images of New Year's attributes randomly, or creating real paintings.
Or you can use paper stencils for their intended purpose and, using a sponge and toothpaste, apply selected New Year’s designs to the windows, which are then easily washed off with plain water.
If you want to decorate not only a window, but also a windowsill, create a three-dimensional panoramic composition.

Panorama on the windowsill
To do this, cut out a forest or city landscape from paper, make a base and place it on the windowsill. Stretch a garland behind the stencil or place several small lanterns. At night, the illuminated composition will look especially magical.
Popular New Year's stencils for windows
The most current patterns:
- Ded Moroz and Snegurochka;

Santa Claus in a sleigh

Santa Claus

Santa Claus hides gifts under the Christmas tree
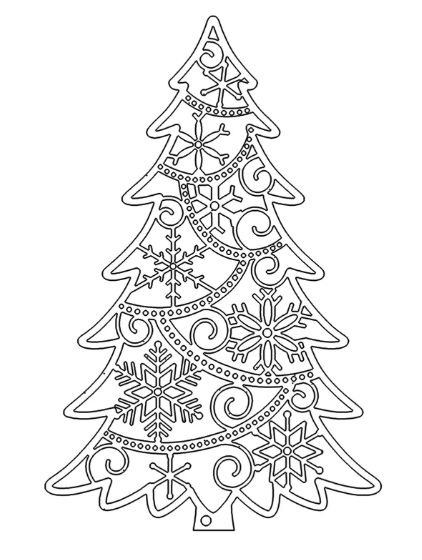
- Christmas tree;

Christmas tree with toys

Original Christmas tree
- New Year's toys;

Christmas ball

Christmas decorations

Christmas tree ball

Bells
- snowmen;

Snowman family
- thematic inscriptions;

Happy New Year
- Christmas stories;


Birth of Jesus Christ

Try making stencils for windows for the New Year, and you will feel how this exciting activity lifts your spirits and enhances the feeling of the holiday.
Hi all! It's winter and cold outside, and we are in full swing preparing for the New Year holidays. I would like to decorate the house as colorfully as possible so that I can feel the upcoming events not only by looking at the calendar, but also internally. After all, it is during this period that some invisible onset of an upcoming miracle is felt!
Soon the children will be given tasks to bring some decoration to the class or group. For this case, you can do a lot, or cut out a stencil for the windows. It is the latter that we will talk about today.
You know, lately you’ve been walking down the street and you’ve been surprised. There are so many elegant windows around! I used to always think that only people who could draw could do this. And now I understand that with a computer and the Internet, everyone can become a little artist. After all, you don’t have to have any talents to decorate your home. Now it is enough to print out the finished drawing, cut out any fairy-tale plot from it using scissors and a stationery knife. Then we simply glue it onto the glass using water, milk or soap solution and that’s ALL!
I have selected wonderful stencils that can be printed by copying from the article. You can do this by simply right-clicking on the image and then “save image as” or “copy as”. Save it in Microsoft Word. Next, enlarge if necessary and print. It's so simple!
New Year's stencils of snowflakes for windows for cutting out paper (diagrams, templates)
What is there no New Year without? Of course, without snowflakes. How not to decorate the windows with such beauty? Of course, you can get creative and cut it yourself. But there are no less beautiful stencils. You can make the same ones or try all of the ones suggested below. The main thing is that your windows or classrooms will immediately be transformed!
Did you know that the art of paper cutting (vytynanka) originated in the 9th century in China. That's when paper appeared.


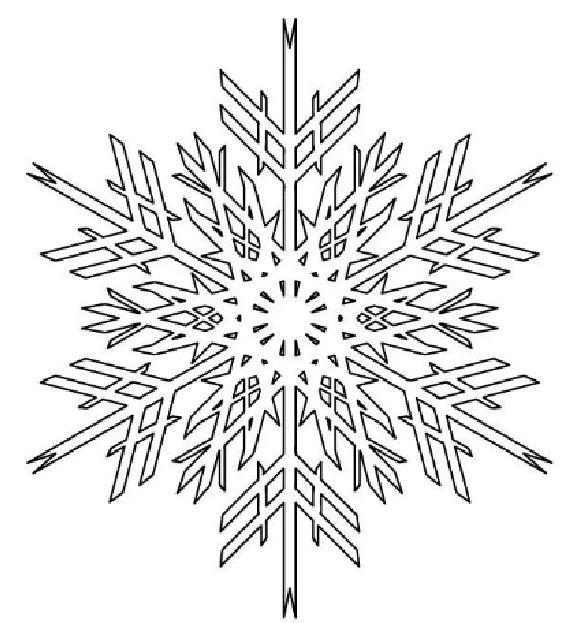
You can also print out these snowflakes. They have some character or object inside.
The level of complexity of the drawings is different. From easy to complex. Where to start is up to you!


You will get some interesting snowflakes. Now let's see what other samples there are.
Stencils of New Year's piglets for windows in A4 format to print
The coming year - a yellow earthen pig or wild boar. Therefore, how can we do without a New Year's symbol? No way, so you definitely need to decorate the windows with such little animals. They can be both small and large. Or maybe the window will be made entirely of them? The most important thing is that they are funny and very cute.


As you can see, the piglets are very cute. But even these can be in the form of cartoon characters that you certainly recognize. Now let's look at other stencils for windows.
Window decoration for the New Year 2019 in the form of New Year's houses
I can’t imagine a window that doesn’t have a house on it. They are so cozy that they immediately bring us closer to this family holiday. Looking at these, you immediately imagine how the whole family will gather at the festive table near the New Year tree. So be sure to choose and print the one you like best. Or maybe this is the home of Father Frost and the Snow Maiden? Or some fairy tale hero?


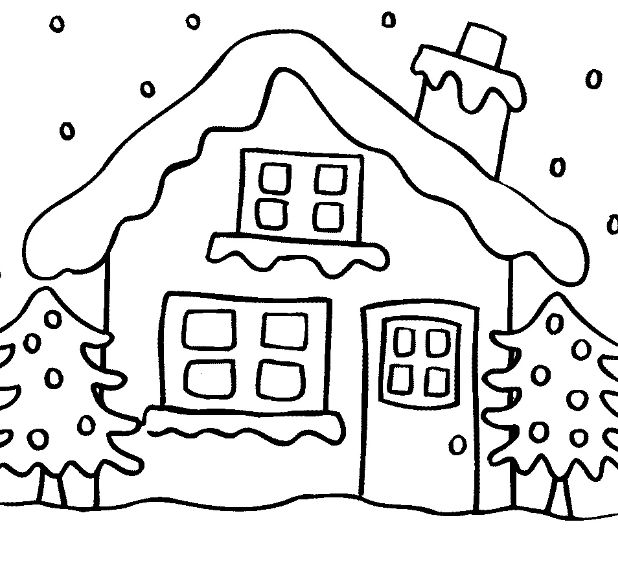


You see, even a bird's house can be cut out along with the birds. The most important thing is how warm and cozy these pictures exude.
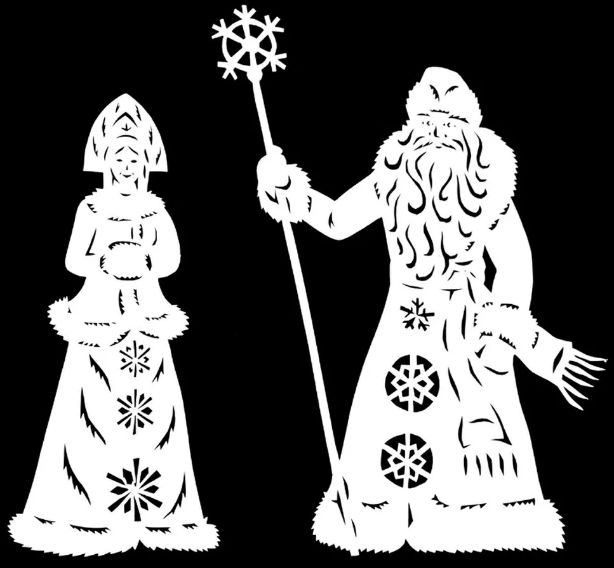
How to decorate windows for the New Year
From what you saw above it is quite possible to create some kind of plot. But how to do this without the main characters of the holiday. Of course, we also need Father Frost and his granddaughter Snegurochka. Or forest animals. Let's not forget about them either. In addition, children are always waiting for them in kindergarten, schools, and home is no exception.


And here is a snowman with bunnies. Their joy will soon certainly spread to us.


New Year's decorations for windows - templates, pictures for cutting
You definitely need to add some balls or bells to the windows. You can use a month or candles. After all, the more colorful the window, the more passers-by will glance at it. It's always nice to hear praise addressed to you. And the children’s joy will be simply enormous.


Let's not forget about the New Year's beauty.


Now you can safely print out everything and decorate the windows. Imagine how beautiful it will be. All that remains is to decorate the Christmas tree, live or artificial. Be sure to do this all together with your children. Of course, you don’t have to trust them with a knife, but they can easily stick them on the windows. And now I say goodbye to you, see you soon!
Stencils for windows for the New Year 2019 with a description of the process of preparing the decorations will help you inexpensively and stylishly decorate your home or work office on the eve of the main holiday. From the street, with the lights on, paper cutouts will stand out on the windows as interesting thematic silhouettes. Indoors, the decorations are associated with real snow patterns on a winter window. Therefore, white decorations using simple patterns will create a feeling of celebration inside the office, guest room, children's room or even the kitchen. Even small children can repeat the easiest cuts in the shape of a pig. To quickly cut out snowflakes, just fold the printed template in half or in four (if the pattern is symmetrical).
We present to your attention complex patterns of A4 format and smaller sizes, images of the mistress of the coming year (Yellow Earthen Pig), classic snowflakes and Christmas trees, neat Happy New Year inscriptions in a beautiful font. Your pig stencil (symbol of the year) does not have to be white. You can print out the yellow pig template so that the paper decoration will definitely attract good luck and prosperity to your home in 2019. To create blue, silver, gold snowflakes, you can insert a sheet of A4 paper of the desired color into the printer and cut out colored decor along the contour. Other stencils for windows for the New Year 2019 can also be made in color by allowing the child to decorate a Christmas tree or a pattern with Santa Claus before gluing it on the window. Any Happy New Year inscription in a beautiful font or design can be decorated with glue-based sparkles or rhinestones.
On all the templates presented below (except for the Yellow Pig and the yellow Happy New Year inscription in a beautiful font), the numbers and letters are turned in the opposite direction. This is done so that after cutting there are no visible outlines left on the white parts. The front side of the finished stencil will be the back side of the sheet of paper.
The best stencils for the New Year 2019 for cutting and drawing on the window (A4 format)
When looking for stencils for the New Year 2019 to cut out on a window, pay attention to ready-made solutions in A4 format. Large illustrations are ready-made New Year's compositions that will definitely attract the attention of children or guests in the house. Original decorations in standard A4 format can be immediately printed on the printer without adjusting the dimensions. Among the proposed options there are stencils for the New Year 2019 for cutting onto a window (A4 format) of varying complexity. The more thin slits you need to make inside the composition template, the more difficult it will be to make a paper stencil.


Materials for the master class:
- template printed on paper for cutting
- stationery knife
- soap (optional)
- rhinestones and glue (optional)
- stationery glue with glitter
- scissors
- water container
- tassel
Step-by-step instruction:
- First cut out a solid piece along the contour with scissors. Place it on a wooden board or surface that you don't mind scratching or cutting.
- Use a utility knife to make small slits and cut out the template pieces. It is convenient to cut out some curves with nail scissors.
- Prepare the soapy water by leaving the soap in a small container of water for a few minutes.
- Glue rhinestones or decorate with sparkles on the back of the stencil. Let dry.
- Dipping the brush in soapy water, wet the side where traces of the template outlines remain.
- Glue the blank onto the glass. Try to do this carefully so that the wet paper does not form wrinkles.
The simplest stencils for the New Year (Year of the Yellow Pig 2019) for cutting out on a window
Simple stencils for the New Year of the Pig 2019 (for cutting out onto a window) contain only a few slits inside the part or look like a solid silhouette. Even a small child can cut out a simple paper stencil that doesn't require cutting with a utility knife. A ready-made stencil of a pig (symbol of 2019) can become the main character of an entire composition of decorations on your window. Around the symbol of the year (Yellow Pig) you can place white patterns cut out according to the templates of other master classes in this article. The same pig can be produced on a printer in A4 format and in the form of small piglets. A whole set of stencils for cutting out New Year 2019 in the form of pigs for a window can be printed using different templates.


Materials for the master class:
- a template printed on paper for cutting out (for yellow pigs you need thick paper and a color printer)
- stationery knife
- scissors
- water container
- tassel
Step-by-step instruction:
- Using scissors, first cut out the entire pig along the contour and place it on a surface for working with a knife.
- Make small cuts with a utility knife.
- Use soapy water to glue the parts to the window. If you choose to cut out a yellow pig stencil (the symbol of the year), it is better to fix the decorations on the window with small pieces of double-sided tape. Printer ink forms streaks on paper when wet. Therefore, you should not glue such a pig stencil onto soapy water.
Complex stencils with many details for the New Year 2019 - the year of the Earth Pig
Amazing stencils for the New Year 2019 (Year of the Pig) with flower buds, monograms, hieroglyphs and general decorations can be used not only for decorating windows. For example, the image of a pig with a Chinese symbol can be printed on yellow paper in its original and mirrored form, pasted on thick cardboard, and glued a loop of ribbon on top. This pig can be attached to a Christmas tree, to the rear view mirror in a car, or to furniture fittings at home. If the pig is still cut out for the window, add the symbol of the year with the inscription Happy New Year in a beautiful font, snowflakes or pattern. This master class contains the best stencils in honor of the Year of the Pig for the New Year 2019.


Materials for the master class:
- stencil of a pig (symbol of the year) printed on paper
- stationery knife
- regular thin blade
- water container
- tassel
- double-sided tape (for working with colored stencils)
- scissors
Step-by-step instruction:
- Cut out the pig along the outline.
- Using a utility knife and blade, cut out the small details of the template. Examples of stencils with a bold black outline require special attention. You need to cut out an even rectangle with a pig printed in the center. Everything that is highlighted with bold black strokes must be deleted. As a result, you will get an amazing stencil - a white canvas with the transparent outlines of a pig.
- Glue the finished products to the window. Glue the paper decoration with tape or soapy water, depending on the color of the parts and the density of the material. A stencil of a pig (symbol of the year) made of white paper, with the year 2019 indicated on its body, must be glued to the window with the correct side.
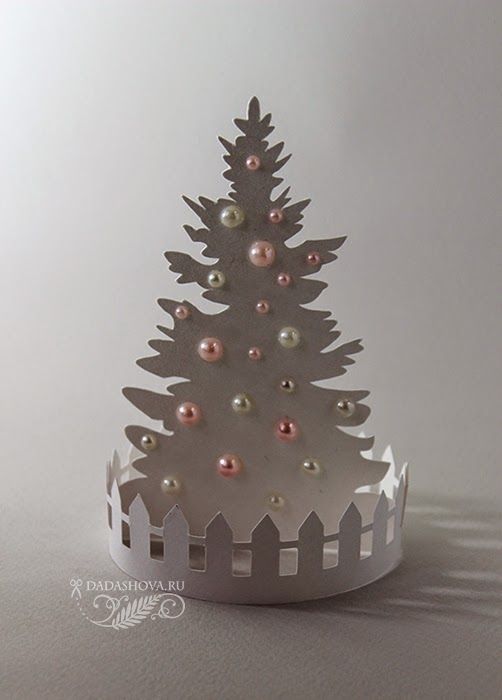
Convenient paper New Year template - Christmas tree (you can print it right away)
The most needed paper template for the New Year is a Christmas tree (you can print it in A4 format or several pieces per sheet). In addition to window decorations, such blanks will be an excellent template for children's decorations and appliqués. If you decide to give your child a paper Christmas tree to decorate, you should not glue the colored stencil onto the glass with water or liquid glue. In this case, use double-sided tape. A paper Christmas tree is an interesting template for the New Year. The stencil can be printed directly on green paper, supplemented with colored paper circles in the form of an applique and glued in the center of the New Year's composition on the window.


Materials for the master class:
- Christmas tree stencil printed on paper
- scissors
- stationery knife
- water container
- tassel
- double-sided tape (for working with colored stencils)
Step-by-step instruction:
- Cut out the Christmas tree along the contour, and then start cutting out small parts.
- wet the paper with soapy water on the side where the numbers are in reverse order.
- Glue the decoration to the window and smooth it until the paper dries to the glass.
Beautiful New Year template made of paper on glass for home decoration
To decorate a window for the New Year, you don’t have to buy an expensive garland or ready-made stickers. Use a New Year's template made from paper on glass for the fastest and cheapest room decoration. The finished Happy New Year inscription in a beautiful font, the image of Santa Claus, a Christmas tree, Christmas bells or the symbol of the year, the Yellow Pig, can be painted or glued into pure form. Using ready-made templates for the New Year, you can cut out any option from paper and even stick it on the side window of your car. Create a festive mood for yourself and your loved ones with simple stencils on the windows.


Materials for the master class:
- stencil printed on paper
- scissors
- stationery knife
- water container
- tassel
- double-sided tape (for working with colored or decorated decorations)
Step-by-step instruction:
- Cut out the decoration along the outer contour. Place the sheet on a protected surface and begin cutting small indentations with a utility knife.
- The inscription Happy New Year in a beautiful white font should be covered with soapy water on the side on which you cut out the contours of the template. It is better to glue the yellow inscription to the window with double-sided tape.
Stencils for the New Year on the window - amazing patterns with a plot
It is recommended to print large stencils for the New Year on the window (patterns) on white A4 paper. Original compositions with titmice on a tree, Santa Claus on a sleigh or a Christmas house can be placed in the center of your window. Decorate the main stencil for the New Year on the window with additional patterns or paper snowflakes using templates from similar master classes.
New Year's vytynanki have become an indispensable attribute of this holiday along with garlands and. They are most often cut out and glued to windows, creating a fabulous atmosphere. But we will not limit ourselves to just this idea: let’s see which vytynanka templates can be used for, which are suitable for decorating a festive table, and which for creating. In fact, the scope for using protrusions is limitless!
In addition to the most fabulous ideas for decorating your home with vytynankas for the New Year 2018, “Cross” will tell you in detail:
What types of vytynankas are there?
Most often, protrusions are cut out on, so we will rely on this topic. So, what can be classified as silhouette and what can be classified as symmetrical protrusions.
Silhouette:
- numbers for numbering the coming year
- symbol of the coming year ()
- winter compositions
- and Snegurochka
- animal figurines
- fairy tale heroes
 Even such simple protrusions on the windows will look very elegant:

From simple pictures cut out using stencils, you can create complex compositions and full-fledged plots:


People with extensive experience cut out plots of incredible complexity:


What materials and tools will be useful in the work?
We are pleased to publish on the pages of the online magazine “Cross” a list of everything that may be needed and help in the cutting process, as well as for gluing.
- Printer or copier
- white A4 paper, colored printer paper, not too thick Whatman paper, kraft cardboard
- stationery knife small size (the sharper the knife blade, the easier it is to cut, and the smoother the protrusion) or a knife for artistic work (paper cutter), for example, from Mr.Painter or Erich Krause.
- cutting base(a breadboard mat, a cutting board, a piece of plywood, or, as a last resort, a thick stack of newspapers or magazines that you don’t mind ruining)
- scissors(regular and manicure ones are useful, as well as those with a very sharp nose)
- pencil
- tweezers
- box or package for paper waste
- box (preferably with a lid) for storing finished vytynankas
- glue or double-sided tape, laundry or other soap
- sponge or tassel

Kraft cardboard vytynanki

Art knife

Cutting mat
YOU WILL NEED IT
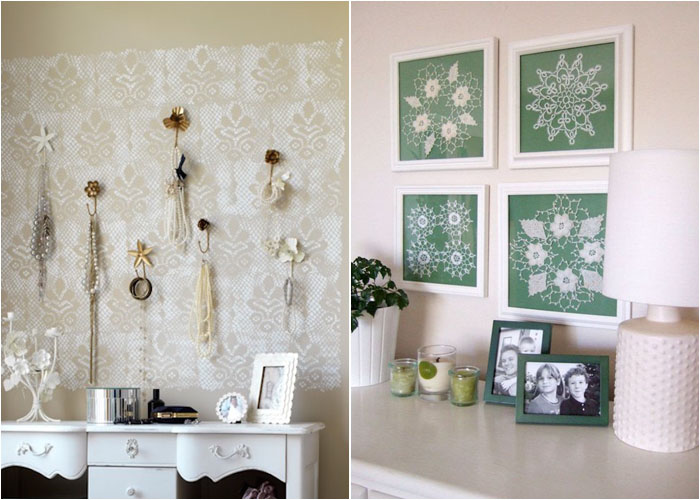
The vytynanka painting will fit perfectly in a box from:
Even the simplest ones will become more elegant if they are decorated with cut-out scenes on a current topic:
Vytynankas cut from very thick paper or even cardboard:
- decorate a mobile phone
- chandelier or lamp
- suitable as
In order to make such New Year's balls, cut out a New Year's protrusion from paper or cardboard, and then stick it on cardboard of a different color.
Can serve as table decorations:
And the illuminated city will literally bring any window sill to life! To make such a city on the window, place snowdrifts below, some that houses can easily fit into. , place on top. Provide a central place for the Snow Maiden if you decide to cut them out too.