Do-it-yourself three-dimensional snowflake not made of paper. Video: Christmas Tree Toys and Decorations Made of Paper. Do-it-yourself volumetric snowflakes
The most current and widespread types of winter decor include snowflakes made by hand from paper. Our master classes with step-by-step instructions, work diagrams, photos and videos tell you how to make them at home, in kindergarten or at school with your children. From the lessons below, you will learn how to beautifully cut out paper snowflakes for the New Year, how to create three-dimensional products in 3D style, and how to fold amazingly graceful and airy crafts using the ancient Chinese origami technique. Snowflakes made with your own hands will turn out to be very unusual, will give everyone an optimistic, festive mood and will make everyone believe in the most beautiful and kind New Year's fairy tale.
DIY snowflakes made of paper - schemes for the New Year 2019
From small sheets of paper with the most ordinary scissors you can cut out very unusual, graceful and airy snowflakes with your own hands. Any drawing is suitable for this, but if you don’t have your own ideas, you should use ready-made diagrams. This section contains the most popular options for New Year's patterns. By transferring them to a suitable material, you will be able to make unusually light, beautiful and delicate snowflakes that will serve as a magnificent decoration for windows, doors, a room in an apartment or house, a school classroom, an office or a production facility.


Do-it-yourself voluminous snowflakes made of paper - a simple scheme of work and step-by-step photos

This master class describes in detail the creation of a three-dimensional paper snowflake, reminiscent in shape of a beautiful blooming flower. The work scheme is not too complicated, but the process requires attention, accuracy and patience. But the finished product turns out to be extremely impressive and creates a bright, joyful and festive mood in any room.
Necessary materials for a volumetric snowflake
- white A4 paper
- metal ruler
- sharpened pencil
- glue sticker for paper
- stationery scissors
Step-by-step instructions for a simple DIY scheme for making a three-dimensional snowflake

Do-it-yourself large and beautiful New Year's snowflakes 2019 step by step - master class
Making large and very beautiful paper snowflakes with your own hands is not at all difficult, especially if you use the so-called “accordion” technique. In this way, you can create products of any size, up to very large A2 size works.

Necessary materials for large paper snowflakes
- A3 sheet
- thread
- needle
- scissors
- stapler
Step-by-step instructions for a step-by-step master class on making beautiful and large snowflakes with your own hands
- Cut a square from a white A3 sheet and fold it like an accordion. The average depth of the fold is 5 centimeters (if desired, it can be either reduced or increased).
- Sew the resulting corrugated base with thread in the center. To ensure that the workpiece holds well, make several dense, wide stitches and carefully secure the edge.
- Draw a suitable pattern on the outside of the accordion. It can be absolutely anything, the main thing is that the pattern is symmetrical relative to the middle.
- Carefully open the snowflake and staple the edges until the overall shape looks like a circle.
Beautiful snowflakes-ballerinas for a garland - DIY templates

Many people know how to cut out New Year's snowflakes from paper, but not everyone would think of making them in the shape of ballerinas, and then stringing them onto the rain and decorating a window in the home dining room at home or a stage in a school assembly hall with this unusual garland. To create an elegant mini-masterpiece, you will need white or colored (optional) paper and a ready-made dancer template. And then a few deft movements with scissors and voila! The garland is ready and pleases the eye with its spectacular and attractive appearance.
Necessary materials for a beautiful ballerina snowflake
- high density white cardboard
- white thin cardboard
- paper (white or colored as desired)
- simple pencil
- eraser
- scissors
- compass
- New Year's rain about 2 meters long
- scotch
- buttons
Step-by-step instructions for a master class on making your own snowflakes using a template
- On a sheet of thick white cardboard, make a sketch of a dancer with her hands clasped above her head in a semicircle and carefully cut out the figure with scissors. This is a template for future ballerinas.
- Attach the template to a thin cardboard sheet and cut out the required number of figures. There can be 20 of them if you want to make a very lush garland or 10-15 for more rare stringing.
- To make a ballet outfit - a beautiful openwork tutu-skirt - draw a circle on a white sheet using a compass. Its size depends on your desire. If you take a small diameter, the skirt will turn out to be short, and if it is large, the ballerina will be wearing a real ballroom outfit.
- Carefully cut out a circle and fold in half three times. On the outside of the resulting sector, draw any suitable pattern, and then cut it along the contour with scissors.
- Unfold the skirt and carefully smooth it out. Cut a small hole in the center of the circle and insert a cardboard figurine of a ballerina, made using a template with your own hands, into it.
- Using tape, secure the outfit around the dancer's waist so that it does not fall off.
- When all the snowflake ballerinas are dressed, take a thread of rain and thread it through the dancers’ arms closed above their heads. To prevent the figures from dangling, carefully attach them to the rain with a small piece of tape.
- Using push pins, attach the garland to the place you plan to decorate.
DIY paper Christmas snowflake for 7 year olds - master class

Children love holidays very much, and New Year in particular. But if preschool children mainly concentrate on gifts and sweets, then children from 7 years old already want to take an active part in preparing special events, along with their parents and teachers. Of course, children of this age will not yet be able to cope with too serious tasks, but they will be able to make simple winter decorative elements. You can easily entrust first-graders with making beautiful and airy New Year’s snowflakes out of paper. This process is very simple and children can easily master it on their own. Well, if any small difficulties arise, mothers, fathers, grandmothers, grandfathers or class teachers will definitely come to the rescue and help the little creators of beauty complete their first masterpiece.
Necessary materials for a children's snowflake for the New Year
- colored paper
- scissors
- cardboard
- office glue
- simple pencil
- ruler
- paints
- glitter
- strong thread (ribbon, twine, rope, etc.)
Step-by-step instructions for a children's master class on making a beautiful snowflake with your own hands
- From a colored sheet, cut three strips of the same length, 7 centimeters wide.
- Fold each one neatly with a step depth of 1 centimeter and decorate with a beautiful openwork cutout.
- Then straighten the strips slightly and glue them into a single ring using office glue. Carefully press the joints with your fingers so that the structure does not fall apart later.
- Turn the resulting ring with the carved side out, and connect the inner part into a socket and glue it very well. As a result, the base for the snowflake should take the shape of a circle with a small empty center.
- From a white sheet, cut out a thin, lacy snowflake approximately half the diameter of the colored base.
- For the face, cut out a small circle from cardboard. Using light beige paint, make a kind of frame on it along the entire edge, and inside, draw eyes, eyebrows, nose, mouth, rosy cheeks and leave the picture for a while so that the paints dry.
- Cut out a hairstyle for a snowflake from a blue sheet and glue it to the cardboard face on top.
- On the carved blue base, first glue an openwork white snowflake, and then a ruddy face. Wait until the craft “sets” and becomes solid, then decorate with sparkles (rain, stones, half-beads to your liking).
- Thread a strong thread into the central upper ray of the snowflake and make a loop. Hang the New Year's product on a door, window or wall indoors.
DIY Christmas voluminous paper snowflake - master class

This interesting and educational master class tells in detail how to make a stunningly beautiful, graceful and elegant New Year's decoration with your own hands - a luxurious three-dimensional snowflake. The finished work is very impressive and looks extremely attractive and airy. These delightful products can be used to decorate school classrooms, children's rooms and any other premises where themed holiday events and winter celebrations are planned.
Necessary materials for a voluminous New Year's snowflake
- A4 sheets – 6 pcs.
- ruler
- simple pencil
- stapler
- scissors
Step-by-step instructions for a master class on making your own New Year's snowflake

DIY New Year's snowflake 2019 - how to cut it out of paper, diagrams
The easiest and fastest way to make a New Year's snowflake with your own hands is to cut it out of paper, following the instructions of a ready-made diagram. The four-pointed product is considered the simplest, however, its production can be approached in an extraordinary, bright and imaginative way. To work, you will need medium-density colored sheets intended for printing. First, you will need to cut a square from a rectangle, fold it diagonally three times, and then apply the design you like to the workpiece and carefully cut it along the contour line with scissors. The whole effect of the work is that smooth, rounded shapes are harmoniously combined with thin, pointed rays, symbolizing tongues of flame.

For a five-pointed snowflake, the sheet will have to be folded not diagonally, but horizontally in half, then again in half along the long side and finally unbent. Then the lower left corner of the rectangle is connected to the middle of the upper edge of the workpiece, where there is already one fold. The lower oblique part bends upward and clearly aligns with the diagonal fold on the left side. Then the workpiece is turned over and the two-layer triangle is bent to the nearest edge. All that remains is to cut off the protruding excess with scissors, draw the desired pattern and cut it out figuratively along the pencil outline. If you want the snowflake to be more openwork and ornate, it is recommended to insert the scissors as deeply as possible without crossing the common middle base.

The six-pointed snowflake is one of the most popular homemade New Year's decorations and there is a wide variety of original and unusual patterns for it. The main blank for it is made according to the principle of origami snowflakes, then a design is applied on top and carefully cut out with scissors.

A seven-pointed snowflake is created according to the principle of a five-pointed one, only at the end the blank is folded one more time.

For an eight-pointed New Year's decoration, the folding pattern of a six-pointed snowflake is suitable, but before applying the design, the blank is folded in half again.

DIY paper origami New Year snowflake - step-by-step master class and video

Origami is the ancient Chinese art of creating beautiful, elegant and unusual crafts from paper. The technique is becoming increasingly popular every year and both adults and children master it with great pleasure. There are no particular difficulties in the process of creating paper mini-masterpieces, but those who have only recently begun to study the principles and rules of origami should use step-by-step instructions with photos or have a video on hand that describes in detail all the necessary steps.
This master class tells you how to make a six-pointed paper snowflake with your own hands for the New Year. The lesson describes how to prepare the base for a snowflake and how to cut it out of paper correctly. The material is presented in a very accessible way and even for children it will not be difficult to make spectacular origami, following the tips and tricks presented in the lesson below.
Necessary materials for New Year's origami snowflake
- white office paper A4 size
- simple pencil
- scissors
- ruler
Step-by-step instructions for a master class on making your own snowflakes using the origami technique

The frantic pace of modern life does not always allow you to feel the festive mood before the New Year. Therefore, we try to decorate the room to create the appropriate atmosphere.
To decorate a room, you don’t have to buy decorations in a store. But it will be more pleasant to decorate the room with your own hands. It’s enough to get the whole family together on a day off and start preparing for the New Year.
The simplest element of holiday decor is a snowflake. In Soviet times, children folded a sheet of paper several times and cut out geometric shapes. When unfolded, the result was a snowflake with openwork patterns.
With the development of modern technologies, it has become possible to learn about various methods for manufacturing design elements.
In today's article we will look at several options for making a popular New Year's attribute.
Making a beautiful Christmas tree is quite simple. To cut out a snowflake we will need scissors and a sheet of paper. Follow the step-by-step instructions with photos and you will definitely succeed.
Prepare a square sheet of paper (15 cm). First of all, we fold it diagonally, as shown in the photo below.

Then we connect both ends of the triangle and smooth the fold with our hand.
We continue to bend the sheet and cut off the excess, as shown in the image below.

Now we need a round object, such as a pencil with glue. We use it to draw two circles on the workpiece.

The next step is to cut out the paper along the drawn circle, and we should get this figure:

As a result of these actions, we created a snowflake around the edges. Now let's take care of the center. To do this, cut out a semicircle on one side of the workpiece.

In the end, we got this craft.

For variety, you can experiment, just cut out different shapes.
Step-by-step instructions for making three-dimensional snowflakes
You can decorate the room with 3D decorations. There are many ways to make such decor. We will look at one of the simple options for creating a large snowflake.

First we need to make a perfect square out of a rectangular piece of paper. To do this, fold it as shown in the photo below, and then cut off the excess part.

Fold the triangle in half. We make sure that all the lines are straight and the ends match.

From the edge where the ends meet, we make notches with a pencil in 2 cm increments. And we draw lines, leaving about one centimeter from the edge.

Now we make cuts along the drawn lines with scissors.

We carefully unfold the workpiece so as not to damage it.
In the next step we will need glue. Starting from the center, we begin gluing each pair of strips.

Then we turn the workpiece over and glue the next pair of strips on the other side. Thus, we prepare six parts of the future snowflake.

All that remains is to fasten the blanks with a stapler, first in the center and then along the edges.

You can use glitter to decorate the decoration. Painted edges also look beautiful. Go for it!
How to make beautiful New Year's snowflakes
Do you want to make a beautiful decoration for your apartment? Nothing could be simpler. Just have some paper and scissors ready. In just one minute you can cut out a snowflake with your own hands for the New Year holidays.
Here's the final result:

We take a regular A4 sheet. From the corner we bend one side to the other to form a triangular shape. We don't need the lower part, so we cut it off with scissors.
The next step is to fold the workpiece in half.

Now we bend one side slightly obliquely, and bend the opposite side on top, and turn the workpiece over. The actions are shown in the image.
The appearance of the finished snowflake will depend further on the design. Here you can show your imagination, but first use a ready-made option, and then experiment.

All that remains is to cut out the decorated element according to the drawn template.

All that remains is to deploy our workpiece and evaluate our results. If you do everything according to the instructions, then you will definitely succeed.
DIY snowflakes using quilling technique
Making snowflakes using this technology will require perseverance and a lot of patience. Because the work is quite painstaking. But the result is worth it, the decoration turns out very beautiful. Young children may find this method difficult to use, but parents and students may enjoy it.
To understand the essence of this method, watch the corresponding video:
Try to make one craft, if you have enough nerves, then continue the creative process.
Stencils of New Year's snowflakes
It is not necessary to use special technology or fold paper and then cut it out. You can decorate your house with snowflakes, which can be easily made from ready-made templates. All that remains is to download the patterns and cut out the decorative element using them using a stationery knife or scissors.
I offer several interesting options that you can print or download to your computer:


We cut out these stencils, paint them if necessary, and stick them on windows or other surfaces that we want to decorate.
You can print all these patterns using the icon below:

As a result of the click, a new window will open in which you should click on the “Printer” shortcut and configure printing.
Snowflakes for the New Year in the form of a ballerina (templates and diagrams)
As you already understand, snowflakes can be given a variety of shapes, structures and volumes. But if you want to diversify your decorative elements, then use ballerina templates.
I have selected several options. If you wish, download them or print them; after the stencils there will be a PDF file label with all the images.


Click on the PDF file shortcut and download the templates.
If you know how to draw, then try making a stencil yourself. You will succeed.
Step-by-step master class on creating snowflakes for beginners
If you have never made a paper snowflake with your own hands, then I offer you step-by-step and detailed instructions. This method is one of the simplest.
We will need A4 paper, you can use colored material. To make an equilateral square, you need to connect the top side to the side. And then cut off the bottom part.
Fold the resulting triangular piece in half, then smooth the corners.

To ensure that all edges and corners are smooth, we will mark points for further production. We unfold the triangle so that the square is folded only diagonally.
Now connect the top corner to the center of the base and smooth the bend with your hand to mark the point.
To create the next point, bend the base to the first bend.

Then we connect the upper corner of the triangle to the previous bend.
Now we need a ruler. Bend the triangle along a line that runs from the end of the upper segment to the center of the base. We do the same on the other side.
We fold the workpiece along the side lines. Carefully iron the bend lines.

Cut off the excess paper along the fold line.

As a result, we get a hexagonal blank, from which we will then make a snowflake.

We fold the workpiece along the lines again and fold it in half.
We will need to draw some kind of pattern. To get started, use the ready-made option in the photo below, and after that you can experiment with the drawings.

Cut according to the template.
Carefully unfold it and we should get something like this snowflake with 6 rays.

The main thing is to remember all the steps, and then the whole process will take you no more than one minute.
An easy way to cut out paper snowflakes for kids
Involve children to decorate the premises for New Year's. This process will be exciting for them. Look at the video how a girl makes a simple but beautiful snowflake in just a couple of minutes.
It is possible that the first couple of attempts will be unsuccessful, but then you will not notice how you have been making New Year's snowflakes for a long time.
Use your creative imagination and come up with original crafts with your children.
Hello everyone! Today I want to continue the theme of crafts and show you how you can easily and quickly create wonderful toys in the form of paper snowflakes at home. The other day my sons and I made such a beauty that now this wonderful creation makes us happy. Watch and do with us.
I remember how I sat and cut out snowflakes as a child; it brought me so much joy and pleasure. And then she ran and glued it to the window. Time has passed, but nothing has changed until now, I still love this activity, only now I do them with my kids.
As always, I’ll start with the simplest manufacturing options, and along the way there will be more and more complex options.
In order to create a snowflake, you only need one tool - scissors and a sheet of paper and a great mood.

Then you need to correctly fold the paper into a triangle, and then draw a suitable pattern and cut it out. You will also need a simple pencil))).
The main thing is to take a square-shaped sheet, fold it in half (1), then in half again (2), repeat steps (3, 4), almost done! Draw with a pencil what you will cut out, for example like this in this photo:

So, from this triangular blank I propose to make these magically beautiful and light versions of winter snowflakes, which you can use everywhere, even bring them to kindergarten, school and decorate rooms in your apartment, in the entrance and windows with them.
If you like everything openwork, then this look is just for you:

If you prefer classic options, then choose these wonderful snowflakes:

The following layouts and diagrams will be a little more complicated:

In general, I really liked this selection of all kinds of decorations on snowflakes, which I saw on the Internet:

Look how picturesque and patterned they are, it’s just super beautiful, and most importantly, it’s accessible to everyone, even a preschool child, a schoolchild, and even us adults.
For the little ones, you can offer this craft in the form of curls made from stripes.

Cutting snowflakes from napkins or paper
Have you ever seen those, such that the cutest snowflakes appear from napkins that absolutely everyone would like? I found these and am sharing them with you, the method is simple and easy, and also budget-friendly, you will need glue, napkins, scissors, a pencil or pen and cardboard.
Interesting! Napkins can be replaced with any other type of paper, such as corrugated paper.
The stages of work themselves are not complicated, but these pictures outline the entire sequence, so watch and repeat.
 The final result of the work will be incredibly beautiful and will be remembered by everyone, and if you decorate it with colored sequins or something like that, it will be absolutely cool.


Or this way, depending on how someone decides to decorate the original sample.

Well, now I’ll show you a rather primitive, old method; before, such cute snowflakes were used to do everything in labor lessons or in art kindergartens. You will need paper and a good mood, and of course, scissors and glue. You will need to cut long strips of paper from a regular A4 sheet, the width of the strip should be 1.5 cm and the length approximately 30 cm.

You can make these multi-colored stripes and you should get 12 plain stripes.
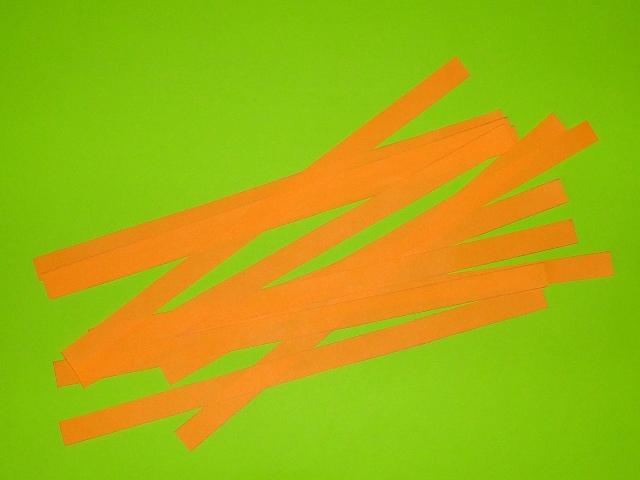

This is how you glue these strips together step by step.

It turned out incredibly original, you can hang it on a Christmas tree, on a window or on a chandelier))).

Another similar option made from paper strips.

I saw a friend’s snowflake made from ordinary newspaper, then you can cover it with shiny varnish or glue sackcloth.

Or you can roll cones out of paper and glue them in a circle, alternating colors.

Do-it-yourself volumetric snowflake with step-by-step descriptions
To begin with, I want to offer you this way of working, maybe you will like it better than the following:
This type of work is a little more complicated, but it is the most interesting in my opinion, because it looks Such a snowflake appears as if in 3D form. Of course, it’s time-consuming, but it’s worth it, my child and I made such a masterpiece in 1 hour. We are happy to share our step-by-step master class with you.

Stages of work:
1. You will need 6 squares of paper (blue and 6 of another white color), we took ordinary squares that we already had, they are sold as notes for notes. If you don't have these, then make your own.
Fold each square in half from one end to the other.

It will turn out something like this, and the last figure lies on the table, this is the result of the work.

2. Then fold the two ends of the paper to the fold line on both sides.

Turn the finished templates over to the wrong side.


Now turn the craft over to the other side again and push out the parts that stick out.

4. This is how it should work out, absolutely not difficult.

The next step will be to prepare 6 white squares, from which we will make the following blanks.

5. So let's start, this work is even easier than the previous one, let's make origami out of paper again.

This is how it should turn out, there should be 6 blue blanks, and also 6 white ones.

6. Well, after you have cut the white squares, fold each leaf in half by taking one end and placing it on the other.

Do it after the envelope.

7. Now turn all the envelopes over to the other side.

My youngest son also helped, and the eldest joined a little later.

8. Fold the sides.

Turn it over and fold out the sides, then fold them towards the center. Cut out a small circle from paper and attach all the modules.

9. Now start gluing.

Take your time, do everything carefully. Use a napkin.

10. Almost everything is ready, all that remains is to decorate and cheer up yourself and those around you.

So I called my eldest son for help, and this is what we did to him.

11. We glued a photo in the middle, it turned out to be such a funny and mischievous modular paper snowflake. Tomorrow we will hang this beauty on a booth in the kindergarten. It looks simply amazing and much brighter live). So be sure that absolutely everyone will like this miracle!

In fact, there are quite a lot of three-dimensional options; they can be made using the origami technique, or in the most ordinary way.
I found these on the Internet, I hope you find them useful, take paper, scissors and glue:

Here is another similar option.

If you have a lot of time, then you can make more complex voluminous snowflakes; I know that the halls of kindergartens, schools, universities, universities and even shops are usually decorated like this.
Interesting! You don’t have to glue the parts together, but use a stapler to do it faster.


Video on how to cut out a New Year's paper snowflake for children
First I wanted to show you a primitive video, and then I thought that you can easily do the most ordinary thing yourself. So I thought, I thought and... I propose to cut out an unusual snowflake in the form of an angel:
Simple snowflake patterns for beginners in origami technique
As far as I know, origami is also divided into subtypes, for example, modular paper origami. Which one do you love the most? I have some interesting ideas.
Or the simplest and easiest to do, even school-age children can figure it out:

Modular origami is already more difficult; here you initially need to learn how to fold the modules correctly, and then everything will go like clockwork.

You will need to make quite a lot of modules to put together such a composition, but you will develop fine motor skills)))

Each such module is easily inserted one after another, so you can come up with any options on the go.

All I can do is wish you good luck and creative success.

Schemes and templates for cutting snowflakes from paper for the New Year
As for the various ready-made patterns, I offer you these types of snowflakes. The main thing is to remember that first you need to fold the sheet correctly, as I showed you at the very beginning
Now outline what you want to see and cut out along the contours.

If you want to make the snowflake more voluminous, use ready-made templates, like this one:

Then for this purpose you will need to cut out 3-4 templates, and then stitch or glue them in the center, and press them down with a stapler. Who needs such ready-made blanks and diagrams, write a comment below, I will send it to you by email absolutely free, I have quite a lot of them in my piggy bank, I will be happy to share a whole bunch.


By the way, you can create your own pattern, look how it looks, try it, it’s a creative activity:

I once thought it was last year, and I imagined such beauty:

For those who like openwork and very complex options, although there is nothing complicated, I can suggest watching this video, by the way, in it, paper is folded differently, take a look, there is something to learn:
Master class on snowflakes in quilling style for beginners
This type of toy is quite difficult if you have never made it using such a well-known quilling technique before. But this is at first glance, because the main thing is to understand the essence.
Even a beginner or a child can get the simplest diagram and snowflake:

And also this video will help you with this, everything is accessible and described and shown step by step. All you have to do is repeat all the actions after the presenter and you will get a masterpiece.
Snowflakes using the quilling technique, this one is stunningly beautiful and charming. Try it.
Well, I gave you a whole bunch of ideas for realizing the festive mood, decorate your house, apartment. It will look simply great, especially with your own hands, such crafts will always bring warmth and comfort to every heart))).

See you! Have a great day everyone, sunny mood! Come visit more often, join my contact group, write reviews and comments. Bye everyone!
Sincerely, Ekaterina Mantsurova
With the onset of winter and the approach of the New Year, which envelops us in its magic, buildings and streets are filled with snowflakes, both real and artificial. Applied arts that allow you to create amazingly beautiful snowflakes are a great way to spend time on the eve of the New Year holidays.
Snowflake decorations are most often made from paper. Paper is a plastic material that has the ability to take on different shapes. Snowflakes are made by cutting out paper blanks, embossing and folding. These techniques can be combined or used separately.
Not so long ago, paper snowflakes had almost no differences. A few years ago, these decorations were cut mainly from white napkins. The configuration turned out to be identical, only the design was different.
Do you need homemade decorations?
Today, techniques for making snowflakes have become more diverse. Various creative techniques make it possible to make New Year's snowflakes that are similar in appearance, but have individual differences.
Of greatest interest are snowflakes made from paper blanks with a three-dimensional configuration. Making such beauty is not much more difficult than flat snowflakes.
There are many options for decorating rooms for the winter holidays. For this purpose, you can use purchased decorative items and make homemade decorations. Lately, many have opted for New Year's handmade items.
It takes time to create New Year's accessories, but the result is worth it. Thanks to homemade New Year's decorations and, first of all, snowflakes, you can decorate your home for the holidays quickly and originally.
The main task is to master the techniques for making three-dimensional snowflakes, and this article will introduce you to master classes and popular snowflake templates that you can draw or print and cut out.
After spending a little time, you will get acquainted with the most popular schemes for creating homemade snowflakes of various shapes.
 Do-it-yourself voluminous paper snowflake, photo
 Option No. 1 – decoration with twists
This option for creating a homemade 3-D paper snowflake, the peculiarity of which is its three-dimensional configuration, is worth trying for those who want to decorate the room with large decorative elements. The design of such snowflakes can include several colors at once. Of particular interest are the transitions of tones in a circle.
Make six square pieces of paper with the same dimensions.
Important! The radius of the decoration will coincide with the diagonal of the square-shaped paper part; Taking this point into account, first decide what format of snowflakes you want.
In addition to paper, you will need scissors, a simple pencil and glue. You will need a ruler for marking, and a stapler to fasten the parts.
Let's look at the scheme for making a three-dimensional New Year's snowflake in more detail:


If you do not fully understand the scheme for making a snowflake yourself, watch the video: the master class will help you create a paper decoration:
Option No. 2 – template decorations
Involve children in arts and crafts. Jointly creating New Year's accessories using templates is a great opportunity to chat with children and help them learn new creative techniques that will certainly be interesting to them. Together with your children, make homemade paper decor in the form of three-dimensional snowflakes.
To make a 3D decoration, you just need to fold the pieces in a circle and then glue one on top of the other; In this way, you will create a three-dimensional snowflake from flat elements.

Those who are not going to make a three-dimensional decoration by gluing together several identical pieces should use the “accordion” technique - it is quite simple.
Fold the paper sheet like an accordion and fold it in half, then make markings.
The paper turned out to be too thick, and you can’t immediately cut out a solid product? It’s easy to solve the problem - draw markings on one side and the other of the accordion: this technique will save you from the need to fold a sheet of paper in half. In addition, using this technique, you can create details of halves and quarters of future snowflakes. The blanks are laid out and then glued together.
The photo shows an easy-to-create jewelry option, but you can make more unusual designs. Attach loops to the snowflakes or combine them, thereby making a garland, and decorate the room for the New Year holidays.

To better understand the accordion technique, watch the video demonstrating how you can make a voluminous paper snowflake step by step:
Option number 3 – snowflake star made of paper strips
Let's look at another simple and yet interesting technique for creating paper snowflakes with a three-dimensional shape with a step-by-step technique, perfect for beginners. This technique in most cases involves the use of paper, which is used in the quilling technique. Such paper can be purchased at stores offering handicraft supplies.
If you can’t find special paper, plain paper sheets will do. In addition to paper, prepare brushes, glue and clothespins.
Step-by-step instructions for making a star snowflake:


Option number 4 – flower snowflake
Snowflake decorations, reminiscent of flowers in appearance, will add tenderness to the festive decoration of the room and help create a fairy-tale atmosphere.
Let's start making a flower snowflake. To make such a decoration, you will need a landscape sheet, a pencil, an eraser, scissors and stationery glue.
Use these instructions to make a voluminous flower snowflake for the New Year:


You can look at the technique of making a flower snowflake in more detail in this video:
Option No. 5 – decoration using quilling technique
New Year's quilling decorations are very popular: they look much more attractive than standard decorative elements. Quilling snowflakes decorate windows, Christmas trees, walls, and you can also use them to decorate a holiday table. Often such jewelry is made in several colors and decorated with sparkles to make them more vibrant.
First, cut the strips: their number depends on the configuration of the future decoration. The length of one strip is 15-25 cm and the width is approximately 2 cm.
The most important part of the job is to curl the strips correctly. To prevent the strips from losing the required shape, coat them with glue. It is recommended to secure the round parts with a clothespin until they dry.
After finishing preparing the parts, assemble them into a snowflake. Glue the elements to each other. In the middle of the decoration, place a circle consisting of several layers - one folded strip. To make your work more convenient, use a thread spool.

The final step is decorating and fixing the resulting snowflake. You can start decorating only after the parts have dried and adhered well.
Video with a master class on making homemade quilling snowflakes:
Option number 6 – beautiful snowflake with rhinestones
This scheme for creating a New Year's paper snowflake is one of the simplest, even children can master it.You will need paper in at least two different colors, scissors, rhinestones for decoration and stationery glue.
Let's start creating a snowflake.
Make square-shaped paper blanks of identical sizes - and form them into a cone, one corner should stick out from the back side. Fix the parts with glue at the base, thanks to this they will securely hold the structure.
Fix all the details in a circle and repeat these manipulations, then you will get a decoration consisting of several layers.
Decorate the snowflake with beads and rhinestones to make it brighter.

Option No. 7 - modular snowflake
We bring to your attention another scheme for making paper New Year's snowflakes, the peculiarity of which is their three-dimensional form: decorations are created from several parts in the origami style.
Make rectangular paper blanks - they should have identical dimensions.
The technique for creating blanks will become more clear if you look at the photo:

Place the triangles one on top of the other, securing with glue. It is advisable to first decide on the color and configuration of future snowflakes. First try connecting the parts without glue.
By fixing the triangular blanks, you will get an origami-style snowflake decoration from the modules.

In this article, we looked at the most popular techniques for making New Year's snowflakes from the most common material - paper, the peculiarity of which is their three-dimensional configuration. Paper makes it possible to bring many original ideas to life; thanks to even very simple stencils you will get fabulous holiday snowflakes.
Another video instruction for creating a homemade paper snowflake using an original technique:
The New Year makes you believe in miracles. Create wonderful New Year's decorations with your own hands. Beautiful paper snowflakes will allow you to decorate your home in a New Year's way. Decorative elements that keep the warmth of your hands will make the atmosphere not only festive, but also cozy.
Be inspired by the beauty of New Year's accessories, create mini-masterpieces and delight others with designer decorations.
A New Year's snowflake can be made from paper, pasta, and even from the base of a toilet paper roll.
There are many ways to make a paper snowflake. You will learn how to make a regular and voluminous snowflake. Connect the kids and let's get started. You will definitely succeed.
How to make a snowflake with your own hands
1. Prepare a square sheet of paper and fold it in half, diagonally.


Here are some pattern options.


How to make a snowflake (video)
Step 1: make the blanks
Step 2: draw a pattern and cut out a snowflake
How to make a voluminous snowflake
You will need:Paper of any color (preferably not too thin);
- scissors;
- stapler (you can use glue or tape);
- a simple pencil;
- ruler.

* If you want to make a small snowflake, then the side of each square can be 10 cm, and if large, then the whole 25 cm. For large snowflakes, it is better to use thick paper. For beginners, it is advisable to make the first snowflake small.
2. Using a ruler and pencil, mark 3 parallel lines. The distance between each line should be the same. When making a large snowflake, you can make more stripes.
* In the image, the lines are drawn with a red felt-tip pen to make it easier to see.

4.
Turn the paper back into a square and start rolling the first row of strips into a tube (see picture).

* Strips can be fastened with a stapler or glue.
5. Turn the paper over to the other side and fasten the next two strips, also fastening them with a stapler, glue or tape.
6. Turn the snowflake over again and connect the last strips.
7.
The same process must be repeated with the remaining five paper squares.

9.
Staple both halves together, as well as all the places where the snowflakes touch. This way the snowflake will not lose its shape.

* You can hang your beautiful craft on a window, wall, or Christmas tree.
How to make a big snowflake from paper strips

You will need:
Thick paper of any color;
- scissors;
- glue.
1. Cut 12 strips of paper 1cm wide and 20cm long.
* You can slightly increase the size of the strips - width 1.5cm, length 30cm.

3.
Add 2 more strips vertically and horizontally, intertwine them and attach them together.


* You can glue the halves in the middle so that the snowflake looks like a flower.
Making beautiful snowflakes from pasta
You will need:Pasta of various shapes;
- glue;
- acrylic paints;
- brush;
- decorations to taste (glitter, stickers, artificial snow (you can use sugar or salt instead), etc.);

* To make it easier, place the pasta on a large flat plate.
* To avoid staining the table with glue and paint, cover it with paper.
1.
Before you start making a snowflake, you need to come up with a shape, i.e. what it will look like. At this stage, it is also worth considering what form will be durable and will not come apart.

2.1 Drain the inner circle of the snowflake first. After this, you need to leave the glue to dry and this small part of the snowflake to get stronger.
2.2
Start gluing the next circle.

* Using the same scheme, you can “build” several circles, but remember that the material is fragile, which means you shouldn’t get excited and make huge snowflakes.
2.3 After gluing, leave your snowflakes for a day.
3.
Time to paint the snowflake. For this you can use acrylic paint. Spray paint may be the best option, but it is best to apply it outdoors rather than indoors.

* You should not use gouache - not only will it take longer to dry, but it may also crack if applied in a thick layer.
*If you're using acrylic paint, you'll also want to choose a brush that can get into all the crevices of the pasta.
* It is advisable to have several brushes of different sizes for convenience. If necessary, you can apply a second coat of paint.
4.
Decorating a snowflake. You can use glitter or artificial snow, for example.

* Snowflakes do not dry quickly, so it is better not to rush to hang them on the Christmas tree immediately after making them. You can hang such snowflakes both on the Christmas tree and on the wall.
How to make a snowflake from a toilet paper reel

One such reel is enough for just one snowflake.
Press the bobbin down and cut it into 8 equal pieces (each about 1 cm high).

Simply glue the resulting rings together.
Now you can decorate your snowflake as you wish.
How to make a very beautiful snowflake from buttons or rhinestones


