How to sew a “Soccer ball” bag with your own hands. DIY sports bag Pattern for a sports uniform bag
It’s easy to sew one, you just need a little patience, a creative mood and
Next we work from photographs.
STEP 1. Fold the newspaper exactly in half, matching the corners. 
STEP 2. Fold it again, bending the combined corners so that there is a distance from the central fold. 
STEP 3. We draw control horizontal lines on the folded newspaper so that the distance from the top part is less than from the bottom. The distance between the lines (blue in the photo) is the height of the bag. The distance from the bottom line is half the bottom of the bag. We cut off the extra corner on the right; it is advisable that the angle of inclination is not very large. 
If you are planning a bag with two colors, then expect to cut the resulting pattern so that the height of the bag (the distance between the blue lines) is divided into 3 parts. 

STEP 4. Next, we cut out parts A and B from the main fabric (it is better if this fabric is darker). We sew and decorate the outer seams. We sew the zipper. 
STEP 5. Using the same pattern, we make the lining of the bag, sew on useful pockets, reinforce the bottom with fleece, and sew it on the wrong side of the lining so that it is not visible in the bag. 

STEP 6. Cut out the handles to the bag and sew them on. Fold the main bag and lining wrong sides together. 


STEP 7. We are working on sewing down the parts. We finish the internal seams with bias tape. 

That's probably all!
Let's begin with bag « soccer ball"is, in fact, a lady's bag, that is, books and folders will not fit in it, but due to its spherical shape it is very roomy. We take as a basis a real soccer ball, the length of the edge of each part, which is approximately 4 cm. We will push from this figure.
So, let's find out how to sew a bag with your own hands. Her process, as the name suggests, is similar to making a soccer ball with your own hands:
A standard soccer ball consists of 32 parts: 12 black pentagons and 20 white hexagons. However, we will cut 2 black and 2 white pieces to install the zipper, but more on that later.
Fabric calculation. The standard width of leatherette is 150cm. If you plan to make handles in black (which is very organic), then you will need 20 cm of black leatherette, and 30 cm of white leatherette. In addition, you will need a sealant (preferably with an adhesive base; this is not necessary, but the sealant should firmly hold its shape to create an ideal sphere later) 50 cm and a black zipper 15-20 cm. It is better to make the lining from thick fabric - 40 cm will be enough.
The rules for drawing a pentagon and hexagon are shown in the pictures:
How to draw correct pentagon:
How to draw correct, even hexagon:
For ease of cutting, use templates cut from thick cardboard. To reduce fabric consumption, arrange the hexagon pieces as shown in the figure,
Just arrange the pentagons in a chain. The increase in seams should not exceed 5-7mm. After you have cut out the leatherette, do the same work with the adhesive base. Connect all the parts with the corresponding parts of the adhesive base and gently (through the fabric!!!) heat with an iron. We cut out the same number of parts from the lining fabric.
We take 2 parts of pentagons and 2 parts of hexagons and sew them together as indicated in the picture and cut along the dotted line as indicated in the picture. We sew in a zipper along the cut line; for simplicity, we first add a strip of leather along the edge and then sew in a zipper.
Next, it is more convenient to continue working on the bag from its bottom, that is, the side opposite the zipper. We take a pentagon and trim it around the edges with hexagons. We continue to work until the moment when we need to connect the bag with the element containing the zipper. We turn the ball inside out and baste the part with the zipper, then carefully attach it to the bag with wide stitches, turn it inside out and see how smoothly it sits. If you sew carefully, maintaining equal seam allowances, you will get the perfect ball.
Option 1: Cut out 2 rectangles of 10cm x 50cm from black leather. Fold them right sides inward and stitch along the long edge. Turn it inside out. We cut out 4 rectangles 4x2 cm and attach the handles to the ball, covering them with rectangles.
Option 2: For the second option, the consumption of black leatherette will be greater, due to the fact that we will need 2 strips of 80X8cm. They are also stitched along the long edge, turned inside out and joined crosswise through the bottom 9 as shown in the figure, strengthened on the sides with eyelets.
Lining: Repeat the same work with the lining fabric. That is, we cut out 32 parts and assemble the ball.
So you found out how to sew a bag “Soccer ball” with your own hands. This bag may not be suitable for going to the theater, but for walks, girls' get-togethers and trips into nature, it is ideal - it looks stylish and does not get wet.
How to sew a sports bag. Master ClassDear needlewomen) I would like to invite you to sew your own sports bag. This bag is roomy and lightweight, which is very convenient for visiting the gym or going on vacation. Are we watching a master class?

So, let's watch a master class on sewing a sports bag - an indispensable bag not only for visiting the gym when playing sports, such a bag will be useful for carrying things, as well as for going on vacation or traveling. And read about the benefits of playing sports at home on the website hotsale.ua/news.php?n=5000. Not every one of us has the time or finances to visit the gym; you can play sports at home, at any convenient time, by purchasing a fitness machine or horizontal bar. By the way, the last option is a horizontal bar, it’s quite possible to purchase, they are inexpensive.
To sew a sports bag, you will need a thick fabric, preferably a dark color, so that the bag does not get dirty so quickly (if you have a suitable fabric on hand, but very light, then make sure the bottom is dark), and with waterproof properties, such as tarpaulin. The bag can also be made from leatherette... depending on what material you have on hand.
Required materials and tools:
- cotton fabric;
- artificial leather;
- nylon;
- lining fabric;
- bag handles;
- plastic rings;
- hooks;
- zippers 56 cm and 23 cm long;
- threads;
- scissors;
- transparent ruler;
- tailor's needles;
- iron and ironing board;
- sewing machine.

So, to sew a travel bag, print out the templates below. Cut out the pieces along the solid lines. From the main fabric we cut out: two rectangles 59x30 cm, one rectangle 25.5x38 cm, two strips for a zipper 3x5 cm. Using a template, cut out two side circular pieces, two side panels for pockets. From the bottom top fabric you need to cut one 36x59 cm rectangle. From the lining fabric, cut one 59x91 cm rectangle, two side circular pieces and two side panels for pockets. From the stabilizing fabric, cut out: two rectangles 59x30 cm, two side circular pieces and two side panels for pockets. Cut two lengths of 92 cm from the straps, one length of 153 cm, two lengths of 18 cm. Attach stabilizing fabric to all parts, following the manufacturer's instructions.


First we sew the pockets. Take two outer pockets and two lining pieces for them. Fold the lining and outer pieces together. Staple along the long edge. Sew along the top edge. Then open and press the seams. Sew on the front side with a double seam. Repeat to create a second pocket. Fold the pieces with circular panels and secure with needles. Sew using a sewing machine.


Find one of the outer parts and mark a hole on it. Sew using a sewing machine and cut out a hole. Insert the zipper inside and secure with needles along the sides. Using a sewing machine, sew along the zipper teeth. Place the zipper piece right sides together and secure with needles. Using a sewing machine, sew along the right side along both sides with a double seam.


Find two 92 cm straps and mark the center with several needles. Fold them in half in these places and stitch them using a sewing machine. Attach one strap to the zipper piece and machine stitch along each side as close to the edge as possible. Secure each side of the handles with a crisscross stitch. Repeat for the second panel and second handle. Sew a 36x59 cm faux leather piece to one of the panels.


Take a large zipper and sew two tabs to its sides. Attach the zipper face down to the front panel. Sew along the teeth and then double stitch on the top of the first seam. Repeat for the second panel and the other side of the zipper. Find two 18cm straps and attach them to the two rings as shown in the photo. Sew these two rings to the pocket pieces. Fold the bag pieces and stitch on the wrong side.


Follow the previous steps to sew the lining. Insert it inside the bag and fold the top edges. Secure with needles. Sew on the front side with a double seam. Sew plastic hooks to the straps on the bag. The travel bag is ready!


If you are tired of going to the fitness center with a large bag or a comfortable backpack is a little boring, it’s time to sew a fashionable and beautiful bag for your sportswear. In this master class we will learn how to sew a bag in 5 steps, which will become an additional pleasant incentive on the path to a healthy lifestyle.
Finished product size: 42×20×28 (length, width and height are indicated in cm).
To sew a sports bag we will need:
- Thick fabric in two color options (for the base of the bag);
- Fabric for lining;
- Small embroidery - a word, logo or symbol (for decoration, you can also use lace or ribbon);
- Threads.

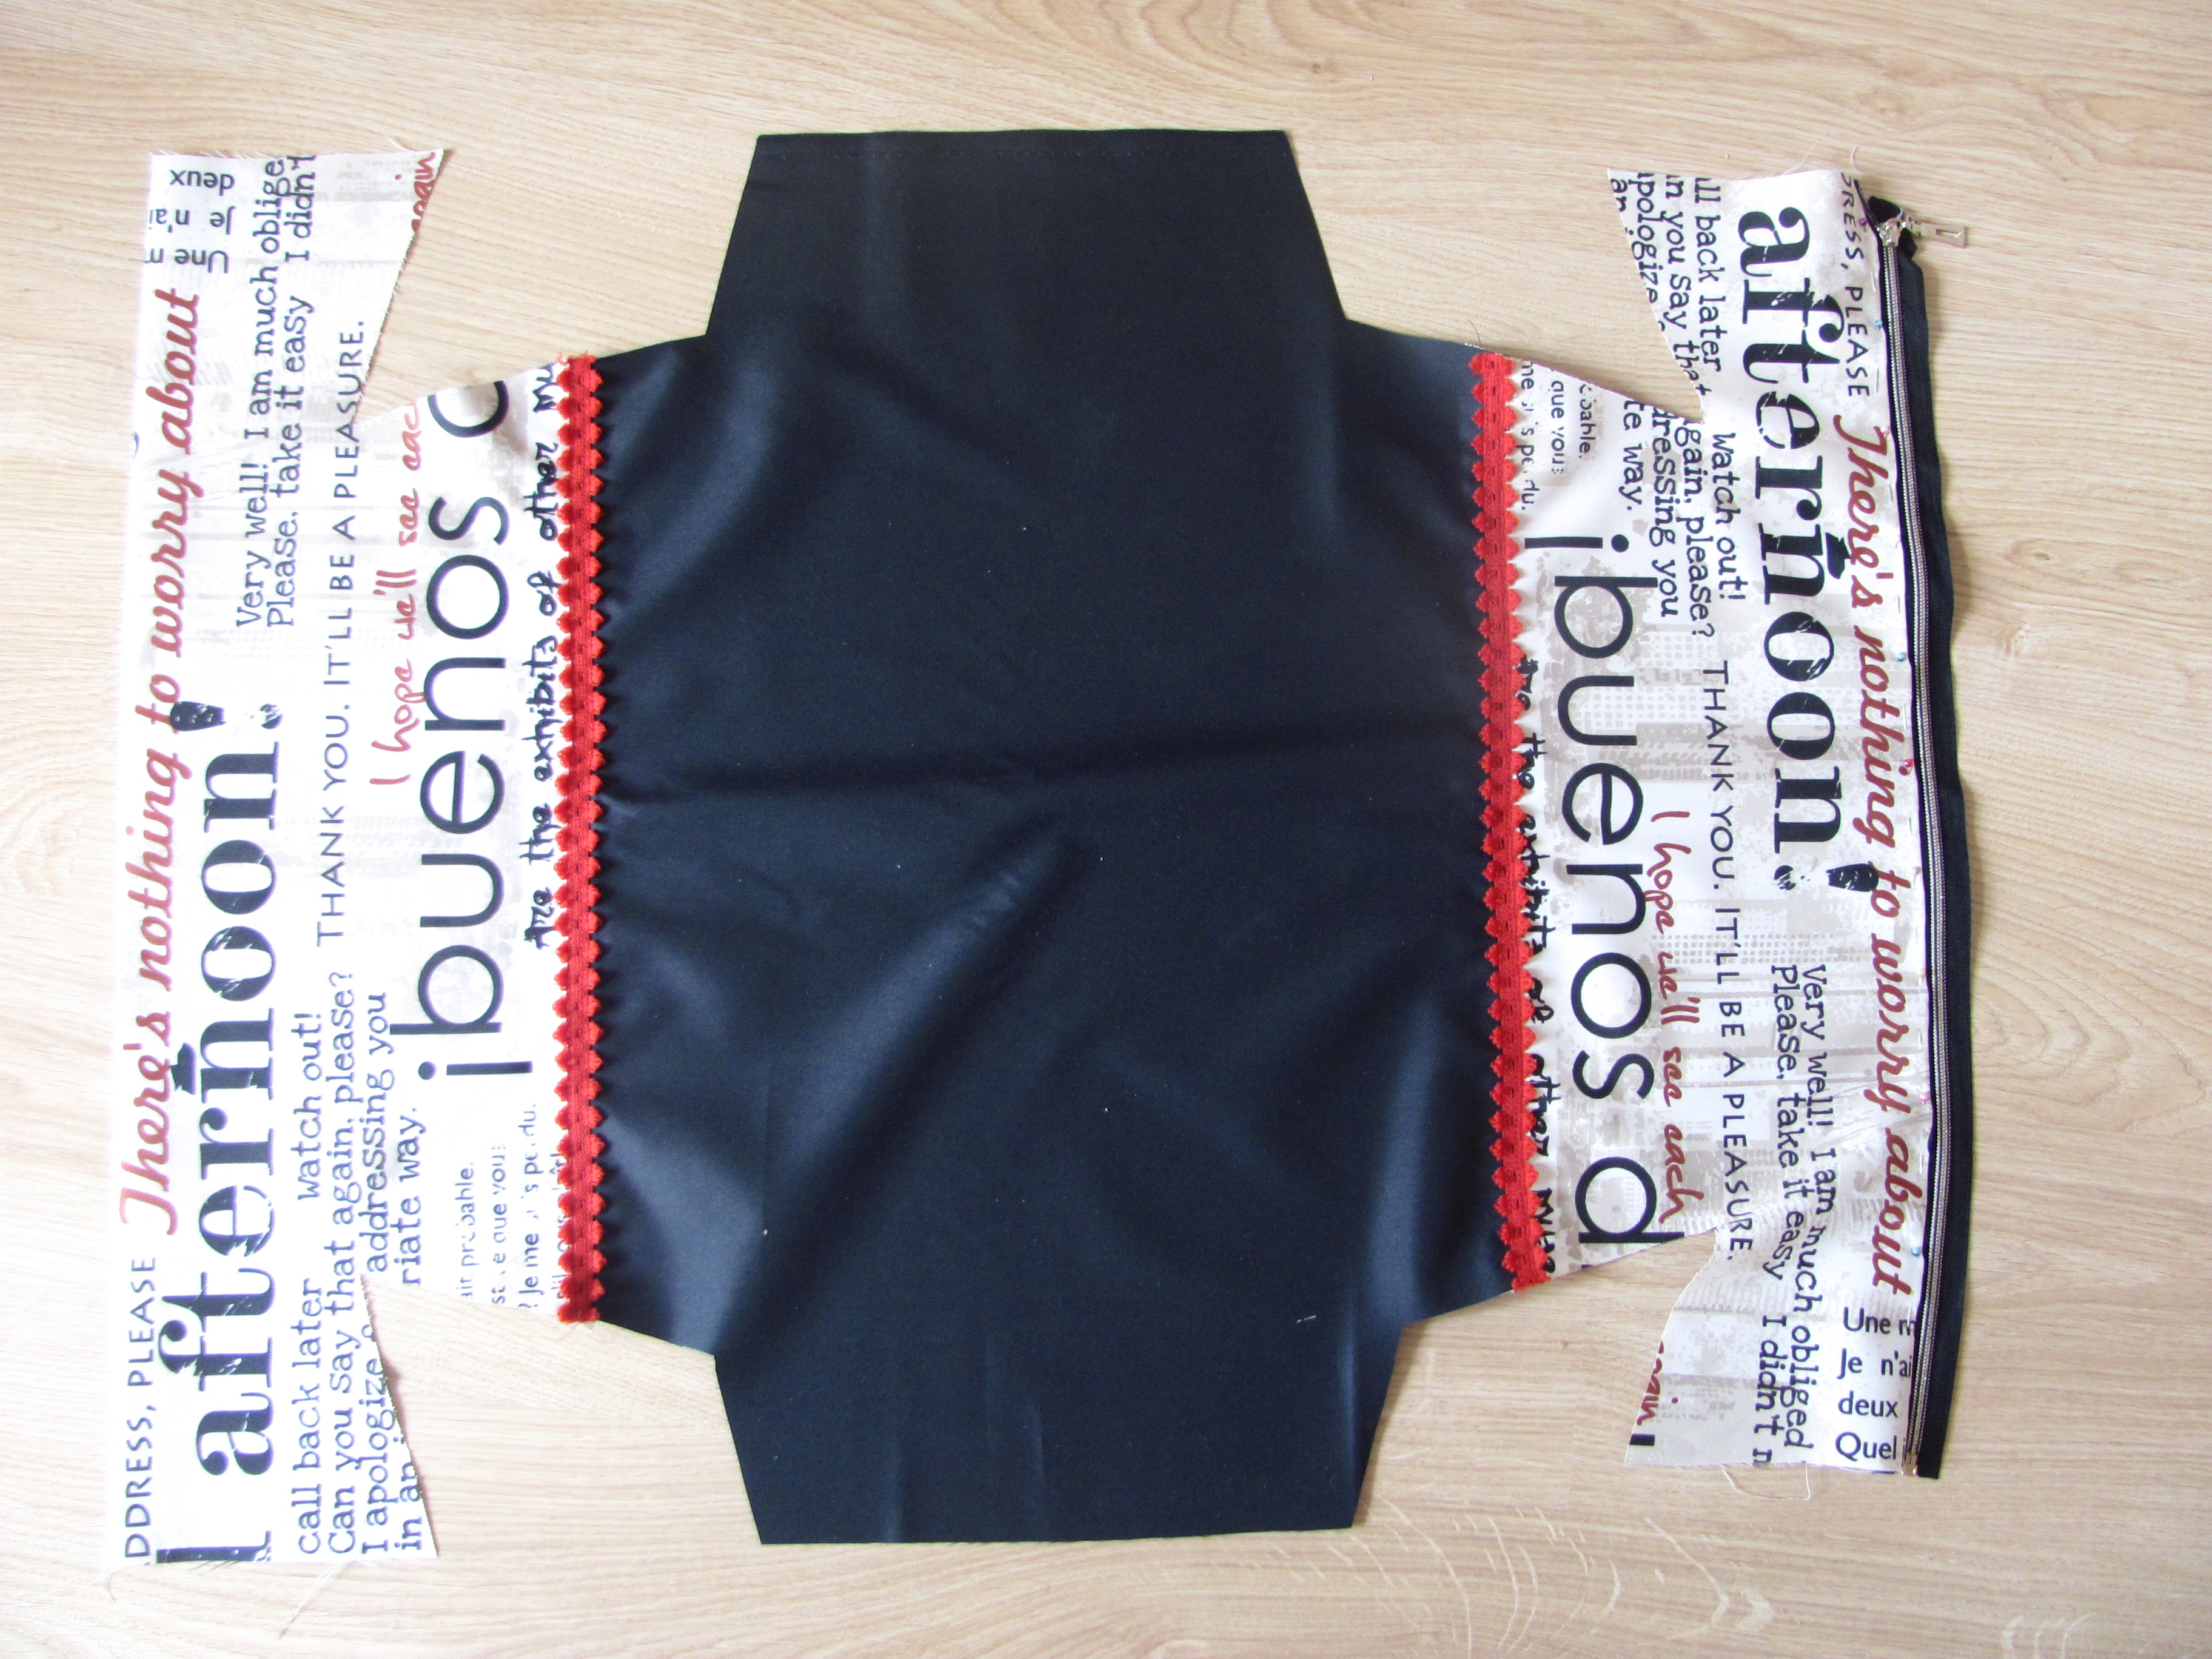
Step 1: Cut the base. First, if the fabric is not dense enough, it is necessary to iron the dublerin to the wrong side.
We cut out the upper part, it consists of two rectangles measuring 42×20, and four squares 10×10 (hereinafter, you need to add allowances of 1.5-2 cm). We get one rectangle and two squares for the right and left parts.

We cut out the lower part as shown in the photo and diagram.


Step 2: Sew the base parts.
Top part. On each rectangle, use tailor's pins to secure two squares, as shown in the photo.

We sew the fastened parts together. Having cut or overlaid the edges, we sew them to the square parts.

We attach the zipper to the resulting parts.

Bottom part. Using tailor's pins we pin the edges of the lower part together as shown in the photo; in the diagram they are painted blue. We process the edges in the same way.
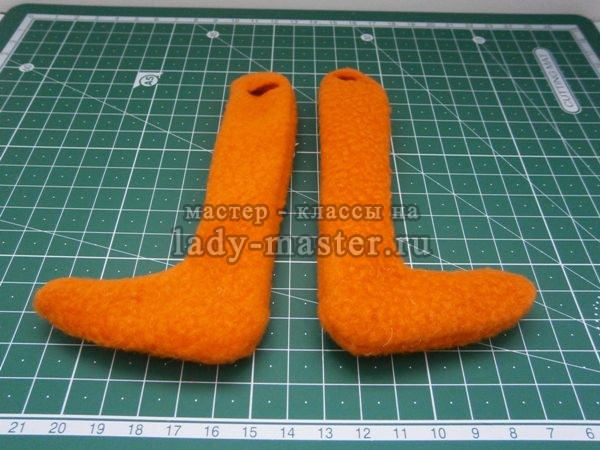
Let's get our hands ready. Cut out two strips measuring 75x7. Fold in half and stitch to the edge.

Using a pin, turn the handles right side out and stitch the resulting parts close to the edge.


Step 3: Sew the top and bottom. We first attach the handles to the bottom part.

Then we chop off the top and bottom together, grind them down, trim the edges and sew them to the bottom part.

We strengthen the handles. We cut out 4 rectangles measuring 5x12, attach them to the handles on the wrong side of the bag, and sew them on.

If desired, while there is no lining, we decorate the frame of the bag. We embroider an inscription or symbol on the canvas (in this case, on burlap), determine the place for decoration, attach it to the bag and sew it with any decorative seam.


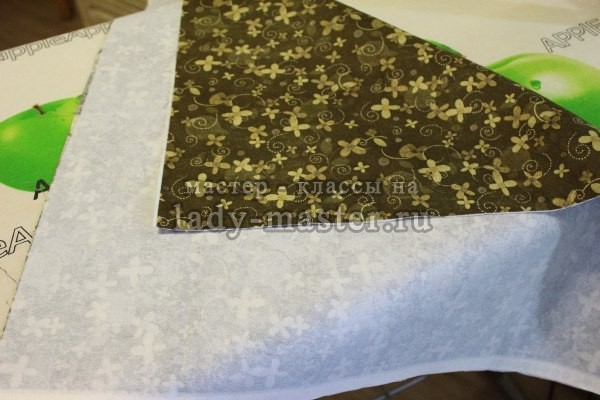
Step 4: Making the lining. We cut out and mark the lining according to the diagram. It is sewn similarly to the frame with the difference that the pattern for the lining is one-piece, i.e. There is no need to sew the top and bottom.
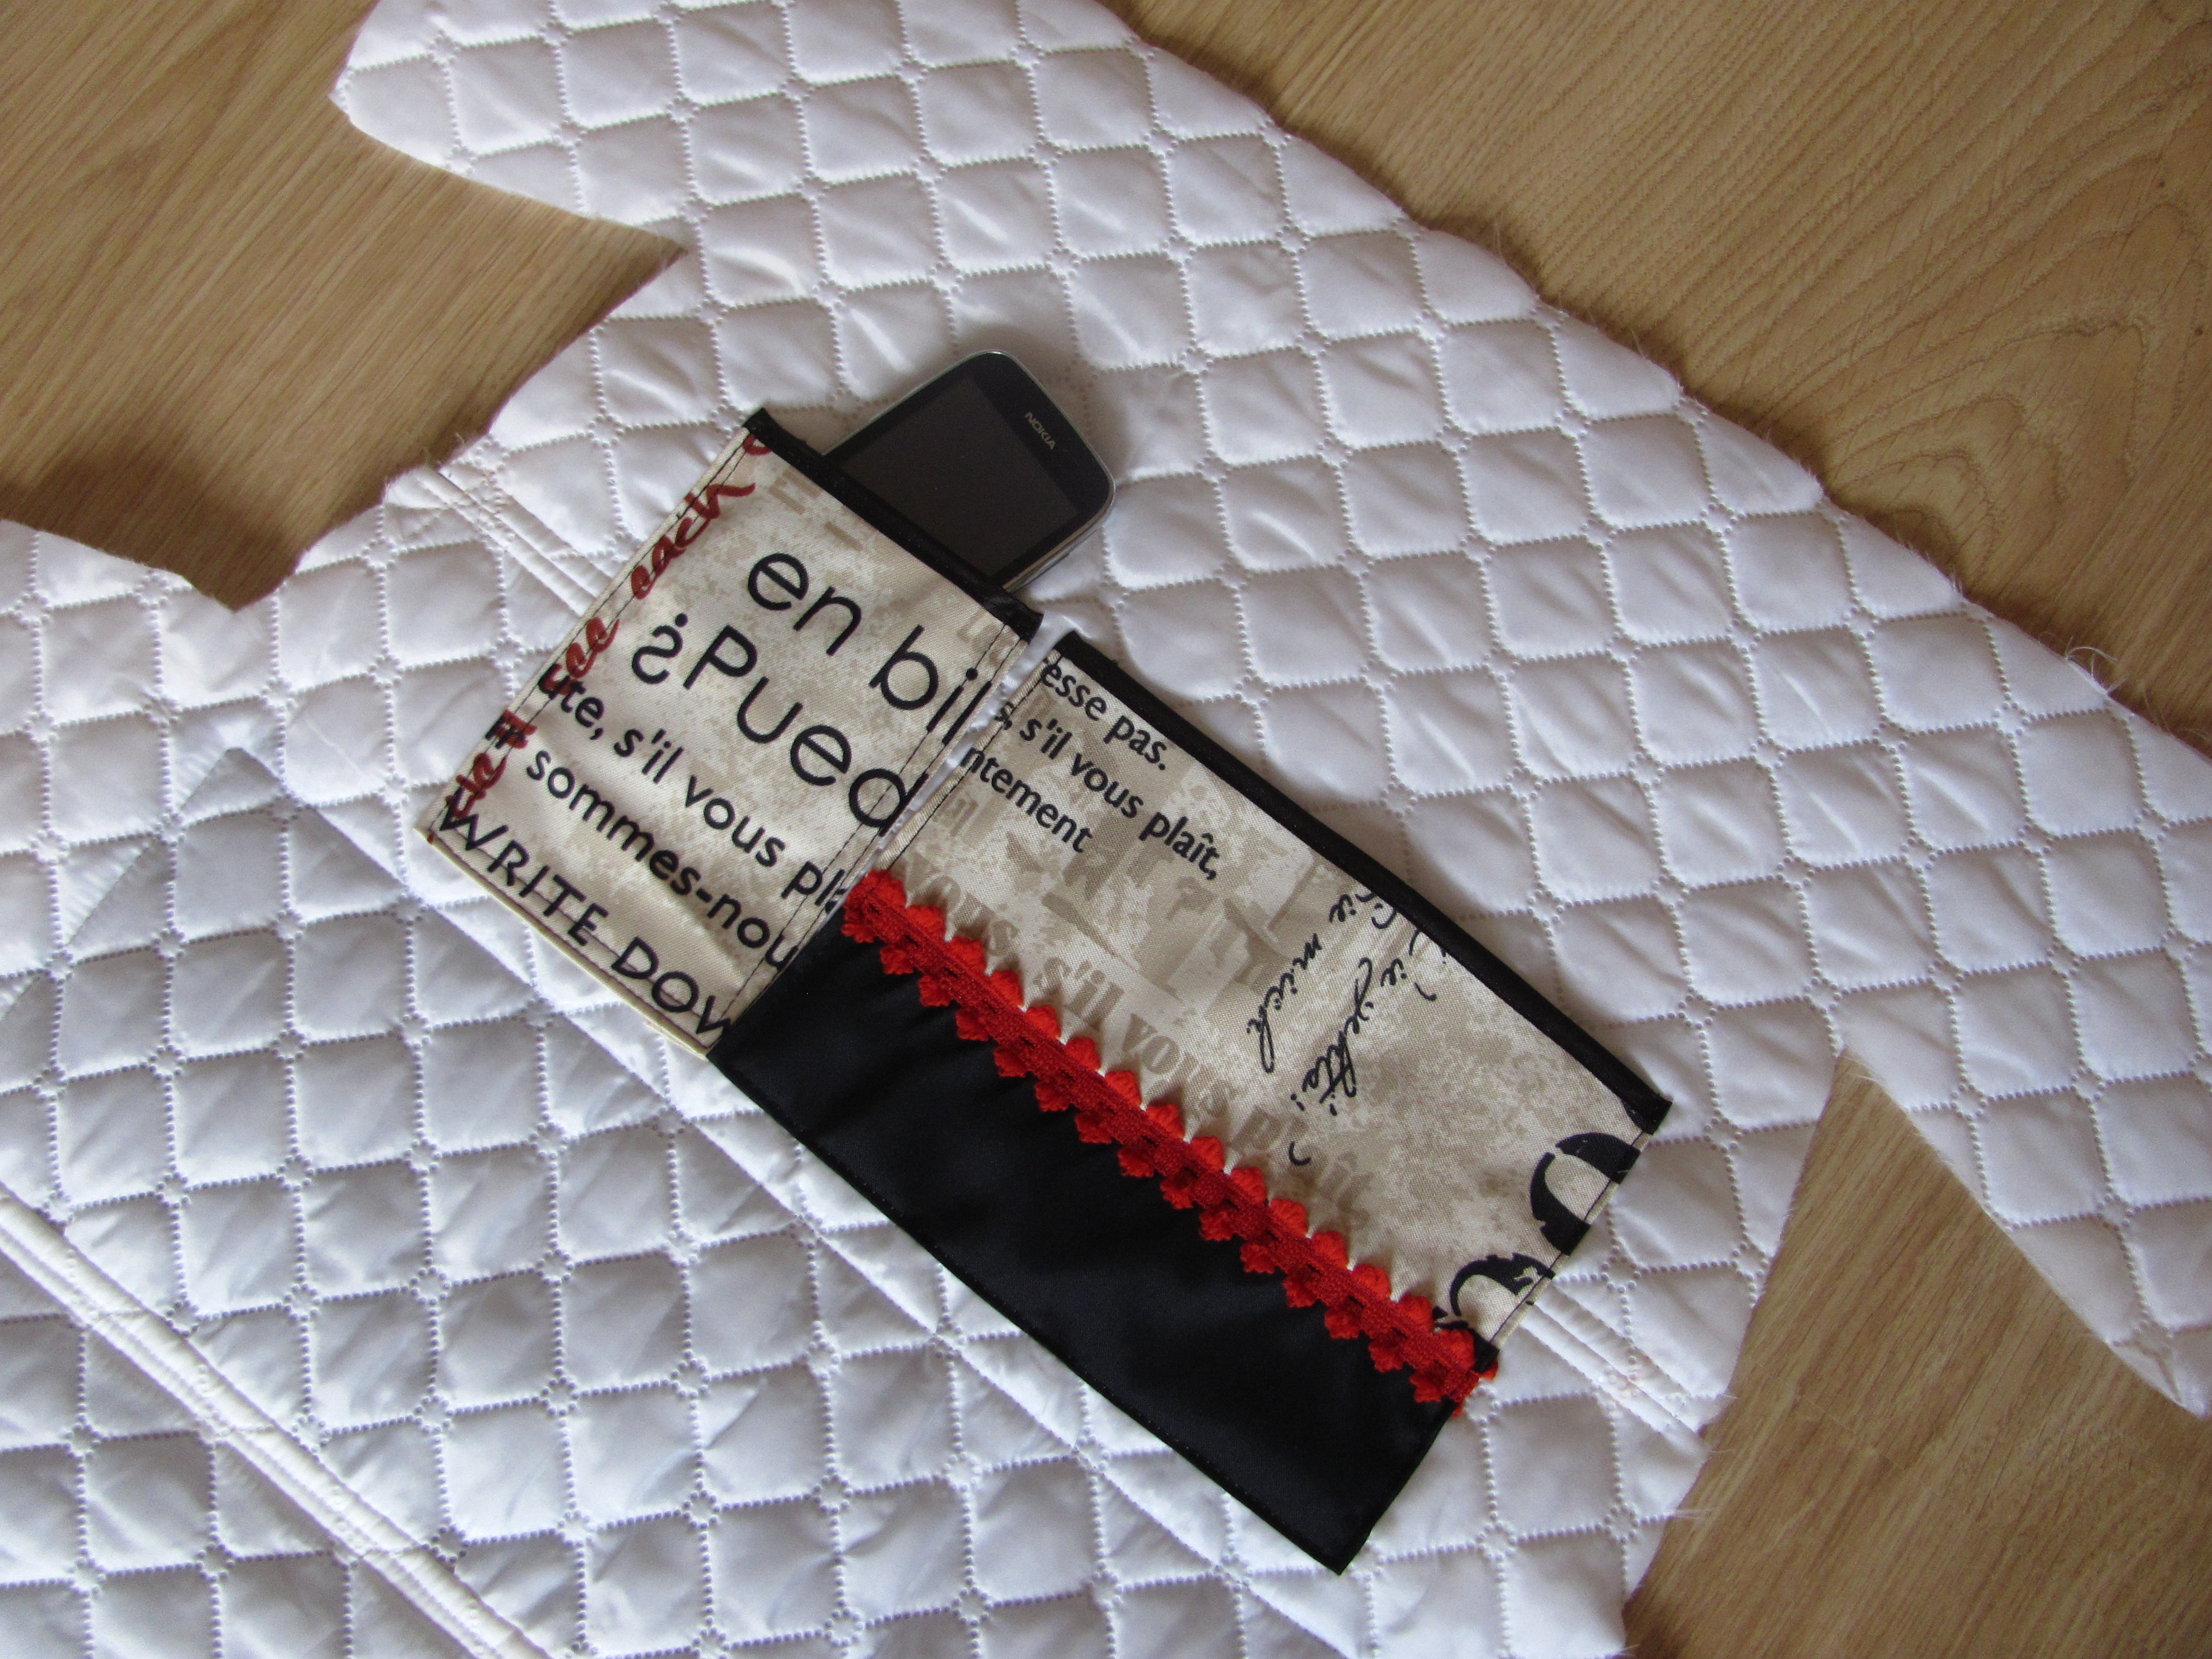
 Now let's make compartments in the bag. To do this, cut out rectangles 18x18 - 2 pieces, 33x36 and 20x36 - one piece each. We fold each one in half, sew it together and get partitions with dimensions 9x18 - 2 pieces, 33x18 and 20x18 - one partition each, 18 is the height of the partition, and 9, 33 and 20 are the lengths.

Their placement inside the lining is shown in the figure, each partition is highlighted in color.
 First, the small and medium partitions are sewn together, then the large partition, after which the structure is attached to the lining.

For a better shape, you can make a rectangular base for the bottom of the bag. To do this, take different scraps of fabric, lay them out in several layers and sew them together in any order.

Step 5: Connect the outer part of the bag with the lining. Place the rectangular base on the bottom of the bag, then place the lining, pin it to the zipper and sew it on.

The bag is ready! As you can see from the photo of the finished product, it turned out to be not only stylish, but also roomy, with special pockets for water or juice and two compartments for things.


These days, a healthy lifestyle is rapidly gaining popularity. More and more young people are giving up bad habits and starting to visit swimming pools, fitness clubs, gyms and sports sections. However, each sport requires appropriate equipment, but the problem is that things for sports, unfortunately, are much more expensive than alcohol and cigarettes, not to mention subscriptions to this or that establishment. You can save money by making a choice when purchasing attributes and clothing for sports and fitness in favor of little-known brands that cost less, but you can also resort to another way to save money, for example, sewing a sports bag with your own hands. This type of saving will not affect the quality and results of classes, but will allow you to spend the freed-up budget on purchasing healthy food - another important component of an active lifestyle.
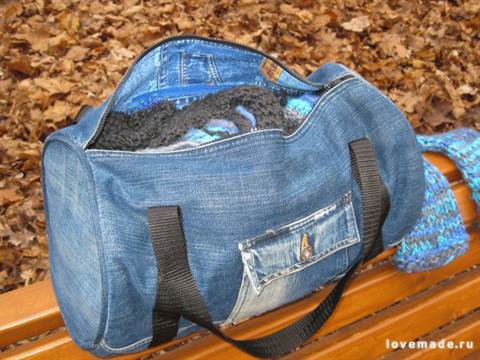
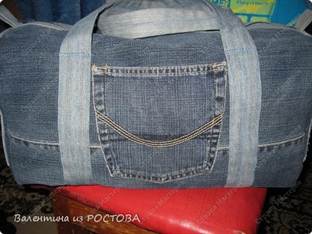
Bag for men
A sports bag made from old jeans will look very original. Of course, such a bag can be worn by a fragile girl, but it will add brutality to a man and complete the image of a modern urban handsome man.
And sewing this bag is very simple. You will need:
- 2 pairs of old jeans (it’s good if they differ in color or shade);
- lightning;
- material for the straps (slings, decorative thick rope; you can sew straps from the same jeans);
- lightning;
- scissors, threads, needles;
- sewing machine.

It is necessary to cut out the elements of the future bag. From one pair of jeans we cut out the sides, handles, zipper strips, and from the second - the bag itself. Sew the parts of the bag. We add back pockets as decoration. It is not necessary to sew on pockets, but without them the image of a denim bag will seem incomplete. We take the elements of the handles, fold them in half lengthwise and stitch them. Next, turn it inside out, and you get a finished handle.
The handles are sewn to the bag. A more reliable option would be to sew them in a circle, since the weight for such bags is quite heavy and can easily tear off poorly sewn straps. We sew in a zipper and sew on the side surfaces with pockets. An excellent brutal men's sports bag is ready.
If desired by the future owner, such a bag can be further decorated. The inserts of their brown leather (no difference, artificial or natural) will look very stylish.

Metal rivets will look even more original and courageous, a little reminiscent of the street punk style. They can also be easily found in sewing stores. If you don’t want to spend money, then you can use buttons from old jeans instead.

For convenience, you can also add a long strap so that you can carry the bag on your shoulder, but this is not for everyone.
Option for women
Since the article presents a master class on creating bags for men, it is fair to teach how to sew original sports bags for women as well.

Who else, if not a female athlete, needs a bright accessory that will emphasize her femininity and individuality.
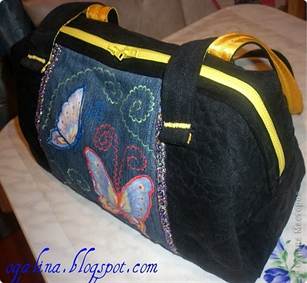
Perhaps in such a situation you even need to change the approach to making a sports bag. For example, do not sew it, but knit it. After all, no one forbade knitting sports bags!

The process of creating such a bag is very simple if you have even basic knitting skills. To create a bag like in the photo, you will need:
- thick yarn (for example, knitted tape, wool or wool blend roving, lace yarn, and so on);
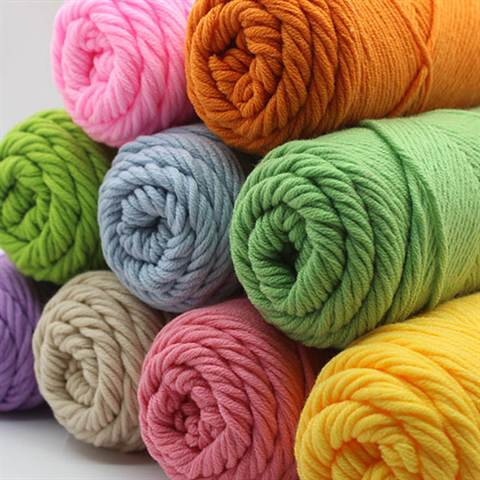
- knitting needles;
- hook;
- zipper (it is better to choose a zipper of a complementary or, conversely, contrasting color to the color of the straps or the main fabric);
- strap tape.

Let's move on to the creation process:
- We knit a large rectangular fabric from yarn of the main color (its size depends on the desired product of the finished bag). Beginners can knit from a simple stockinette stitch; experienced needlewomen can knit an openwork pattern on the canvas. In both cases, the finished product will look gorgeous.
- Using yarn of the main color we knit circles for the side. Their size depends on the large canvas.
- We sew the main fabric and the sides along the wrong side with a crochet hook.
- Sew a zipper to the free edges of the main fabric.
- Sew on the straps.
The original women's sports bag is ready!
To make the product even more original, it can be decorated. For example, crochet a beautiful flower and add it to the front side of the product.

In addition, you can add pockets (functional or false), decorative ribbons, hardware, laces, tassels, etc. - all this will only add flair to your product.


Based on this master class, you can create other variations of knitted sports bags.


