Santa Claus - crochet, knitting pattern with photo. Crochet pattern for Santa Claus Crochet Santa Claus amigurumi
Good afternoon friends!
Today, I have a new New Year's character - Santa Claus, we will crochet him. And in the last master class I showed...
Almost every person has a New Year tree in their home; it can be either artificial or real. In any case, it is customary to place Father Frost and the Snow Maiden under the Christmas tree. It can be crocheted from yarn to make a bright and soft toy. You can knit Santa Claus as a gift for friends or family. For knitting, “grass” yarn is used, which is excellent for knitting fur coats and beards.
Santa Claus - materials for knitting:
- Red yarn (wool mixture) – 50g.
- Cream yarn (wool blend) – 15 g.
- White yarn (wool mixture) – 1 g.
- White yarn “Travka” – 10g.
- Foam rubber.
- Black beads – 2 pcs.
- Scissors.
- Glue gun.
We knit the body of Santa Claus
We start knitting the toy from the body; you will need red yarn and “grass”. Connect a chain of 3 loops into a ring.
1st row: knit with an increase in each loop.

4-5 row: tie these rows in a circle without adding loops.
Row 6: Increase through 1 stitch.
Rows 7-10: knit these rows in a circle without adding loops.
11th row: increase through 2 loops.

Rows 12-15: knit these rows in a circle without adding loops.
Row 16: Increase through 3 stitches.
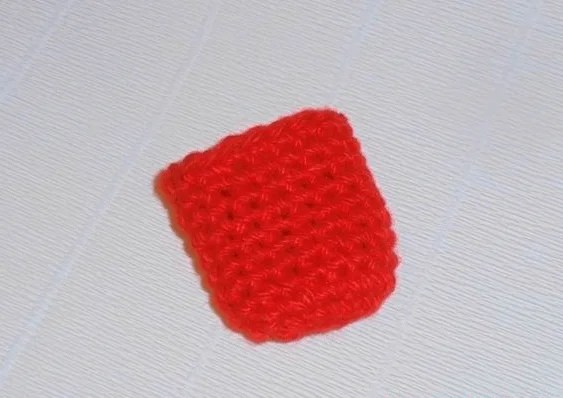
Rows 17-19: knit these rows in a circle without adding loops. Fill the torso with foam rubber.

Now you need to knit from the inside. Tie 2 rows in a circle, then cut through 2 loops in 2 rows. On the next row, cut through 1 stitch, and then in two rows, cut in each stitch. Cut the thread. The body is ready!

Use white “Grass” yarn to tie the body in one row, as in the photo below. You will get Santa Claus's robe.

We knit the head of Santa Claus
The head is knitted from cream yarn. Connect a chain of 3 loops into a ring.
1-2 row: knit with an increase in each loop.
3rd row: increase through 1 loop.
4th row: tie this row in a circle without adding loops.
Rows 6-9: knit these rows in a circle without adding loops.

Row 10: Cut through 3 stitches.
Row 11: knit without adding. Fill with foam.
Row 12: Cut through 2 stitches.
Row 13: knit without adding
Row 14: Shorten in each stitch. Cut the thread.

Hat for Santa Claus
The hat is first knitted from red yarn. Connect a chain of 3 loops into a ring.
Row 1-2: Increase in each stitch.
3rd row: increase through 1 loop.

5th row: increase through 1 loop.
Row 6: tie without adding loops.
Row 7-8: tie “grass” yarn with white yarn. Cut the thread.

We knit the hands of Santa Claus
Hands are knitted from red yarn. Connect a chain of 3 loops into a ring.
Row 1: Increase in each stitch.
Row 2: tie without adding loops.
3rd row: knit a chain of 5 loops. Fold in half and knit in the round. This will be a finger.

4th row: tie without adding loops.
Row 5: knit “grass” yarn with white yarn.
Knit 6 rows of red yarn in the round. Fill with foam. In the last two rows, cut off stitches. Knit the other hand in the same way.

Glue a cap filled with foam rubber to your head.

Knit the beard in 2-3 rows of white “grass” yarn.

Glue the head and arms to the body.

Gift bag
The bag is knitted from red yarn, and the strap from white yarn.
Cast on a chain of 5 loops and tie along the oval. Make an increase in each stitch. Then knit 9 rows. Fill with foam.

Knit the strap from white yarn using a chain of 70 loops. Tie the bag and make a bow.

Glue on the eyes - black beads and make a red nose from yarn. Sew the bag to your hand.

Santa Claus is ready for the New Year!

Santa Claus - crochet, knitting pattern
By the way! If you have already started preparing for the New Year, look in the form of Santa Claus and Snow Maiden

How to decorate champagne for the New Year
Also, you can do it yourself

My friends, Happy New Year and have a nice time!
Friends, if you found my master class useful, share it with your friends!
It's hard to find a person who doesn't decorate a Christmas tree. But so that she doesn’t stand alone while you are busy with your business, take care of the Christmas tree’s most faithful friend - Grandfather Frost. You can buy his figurine in a store, but your neighbor and friend will buy one, and if you knit Santa Claus with your own hands, he will definitely be in a single copy. Also, a crocheted Santa Claus will be a wonderful gift.
- Red yarn 50 g (wool mixture)
- Cream yarn 15 g (wool blend)
- White yarn (a little),
- Yarn “grass” white 10g
- Foam rubber
- 2 beads
- Scissors
- Hot glue
Crochet Santa Claus: Description
Let's start crocheting Santa Claus from the body.
Let's connect 3 air loops into a ring.
1st row: double the loops by knitting 2 in each loop of the previous row
2-3 rows: increase in every 2 stitches
4-5 rows knit in circles
In the 6th row make increases through 1 loop
7-10 rows knit in circles
In row 11 increase through 2 stitches

12-15 rows knit in circles.
In row 16 increase through 3 stitches
Rows 17-19 knitted in the round. We fill the torso.

We continue to crochet Santa Claus from the inside. Knit 2 rows in the round, and then decrease every 2 stitches in two rows. Next, make decreases through the loop, and in the next two rows, make decreases in each loop.

Now you can trim the thread.
We take white grass and tie it around the body in one row.

How to crochet Santa Claus: Head
Using cream yarn, pick up 3 air loops and connect them into a ring.
In 1st and 2nd rows
In the 3rd row make additions through the loop.
4 row knits without increases
In the 5th row we make increases through the loop
6-9 rows: We don’t make additions.

In row 10 Decrease through 3 stitches.
11 row we knit without increments and stuff.
In row 12 decrease through 2 stitches
13 row knit without increments
In row 14 We make decreases in each loop. The thread can be cut.

Crochet Santa Claus hat
We begin to knit with red thread. We make a chain of 3 ch into a ring.
In 1st and 2nd rows make additions in each loop
In the 3rd row make additions through the loop
In the 4th row We don’t make raises.

In the 5th row add through 1 loop
6th row knit without additions
We bind two rows with “grass” yarn. The thread can be cut.

Santa's hand
Use red yarn to make 3 ch into a ring.
In the front row add in each loop.
Second row knit without additions.
In the 3rd row you need to knit a chain of 5 ch, fold it in half and knit it in a circle.
This is how we get a finger

4 row knit without increments
5 row knit with grass.
Knit 6 rows with red yarn in a circle. Fill and shorten stitches in the last 2 rows.

Sew the hat to the head.

From white grass you need to crochet a beard for Santa Claus in 2-3 rows.

The head and arms must be sewn to the body

What can you imagine Santa Claus without? A gift bag is a must-have attribute of a crocheted Santa Claus.
We knit a chain of 5 ch with red thread, tie it in a circle. We make increases in each loop.
Knit a cord of white yarn using 70 ch.

Sew on the eyes and you can make a nose from red yarn.
We sew the bag in one hand of Santa Claus.

With such a crocheted Santa Claus, the holidays will be more fun. None of your friends will also refuse such a cute gift. But you can also try knitting Santa Claus with knitting needles.
In contact with
Every person decorates a Christmas tree at home for the New Year, real or artificial, depending on their own preferences. But the generally accepted tradition is the arrangement of the Snow Maiden and Father Frost under the New Year's beauty. These figures can be bought in a store or made yourself from threads at home.
In order to get a soft and bright toy, you need to know how to crochet. The diagram and description of Santa Claus crochet will be simple and understandable even for a beginner. A cute knitted Santa Claus and Snow Maiden can be a creative gift for family or friends. When knitting a product, you should use yarn called Grass. Thanks to it, you can create an unusual fur coat and beard for a winter character.
Preparation of materials and process of creating a figure
Before you start work, you need to prepare:
- Red wool blend yarn - 50 grams.
- Cream-colored wool blend yarn - 15 grams.
- White yarn - 1 gram.
- Yarn “Grass” for beard - 10 grams.
- Pieces of foam rubber.
- Black beads for eyes.
- Glue gun.
- Scissors.
Knitting body figures
The first stage of work is knitting the Grandfather’s torso. For this purpose, red yarn and Grass yarn will be used. We crochet a chain of three loops and connect it so that we get a small ring.

 The body of the figurine is almost ready. Now it needs to be filled with pieces of foam rubber. After filling the body, you need to knit from the inside. The next 2 rows are simply knitted in the round, after which the stitches are shortened. Two rows must be decreased every 2 stitches. In the next row, the reduction occurs through each loop, then in each loop. The thread is cut and the body is completely finished.
You can tie a white thread around the bottom and top of the body in a circle so that you get an impromptu edge on Grandfather’s fur coat.
Knitting a head from yarn
 Knitting the figurine's head is made from cream-colored yarn. To get started, 3 loops are connected into a ring. Next 2 rows an increase is knitted in each stitch. On the third row, the increase is performed through 1 loop. The fourth row is performed in a circle without any increase. The fifth row is performed exactly the same as the third.
From sixth to ninth- knitting is done in a circle. There is no need to add anything at these stages. On the tenth line the reduction is performed every 3 stitches. We knit the eleventh line without any additives. The next row is similar to the tenth row in its design. The difference is the number of cuts. They occur every 2 holes. After which knitting is performed without adding or subtracting - 1 row. The last line is shortened in each loop and the remaining thread is cut.
Making a cap for Grandfather
 At the initial stage, the hat is made of red threads. The work begins with a ring of three loops. In the first two lines, you need to make an addition in each line. The next row allows adding through one sling. Then knitting occurs without any additives. In the fifth line, the addition occurs through each line. The next row is simply knitted in the round. The last two rows are made with yarn The grass is white for beauty, and the thread is cut.
Making the hands of Santa Claus
The hands are knitted from red threads. Getting started is also done from those loops that are connected to each other:
- First line. Increase in every hole.
- Second line. There is no increase.
- Third line. A chain of five holes is knitted. Then it is folded in half and knitted in the round. It turns out to be a finger.
- Fourth line. It does not involve additions.
- Fifth line. Knitted with Grass yarn.
 Then we knit in a circle with red threads. After this, the hand is filled with foam rubber. In the next few lines the reduction is performed. The second arm of the figure is knitted similarly to the first.
Then you can attach the head to the body using a glue gun. Grandfather’s face must be decorated with the beard familiar to all children. For this, the needlewoman will need white yarn. For a beard, it is enough to knit two rows on the figure’s face. The arms are glued to the body of the figure.
Making a bag and strap
 The bag itself is made of red yarn, and the strap is made of white.
For this, a chain of five holes are tied in an oval. Then an addition is made to each loop. Then nine lines are knitted without increasing. The product is filled with foam rubber.
For the strap, you need to cast on loops in the amount of 70 pieces from white threads. The resulting bag can be tied with a bow and attached to the hand of Santa Claus. Decorate the face using black beads and a red nose from a piece of yarn.
So, your cute DIY craft is ready. It will become an indispensable and creative decoration for the New Year's green spruce. The process doesn't take long and does not require professional knitting skills, and even a beginner can make a product using this master class. Santa Claus amigurumi crochet patterns can be found on the Internet on home craft sites.


Do you still think that Snegurochka is the granddaughter of Father Frost? No, everyone has long known that the faithful companion of the main giver of all New Year's gifts is his wife. She is a wonderful housewife, a reliable friend, the best adviser and an irreplaceable assistant to the Russian “Santa Claus”. And if it weren’t for Grandma Snegurka, Grandfather would not have had time to visit all the kids and give out such welcome surprises and presents. Therefore, it is impossible to do without a grandmother under the Christmas tree, otherwise Moroz Morozovich will remain hungry, not combed and not collected. So, quickly stop knitting bunnies and start making this charming couple - just in time for the New Year 2011! Happy holidays everyone! Happy knitting!
Materials
:
acrylic threads Crystal (flesh, red, blue, white, brown), 1.5 mm hook, filler, needle with a large eye, glue eyes (or beads).
Legend:
VP - air loop
sc - single crochet
ss - connecting post
increase - 2 stitches in the base loop
decrease - knit 2 stitches together
PSSN - half double crochet
pico – ch 3 fasten into ch 1
DP – long loop (extended loop)
[…] - number of loops in a row
*…* … times – repeat as many times as indicated for **
All details are knitted in the round.
Torso and head
Fill while knitting.
Red (blue) thread.
2nd row – *1 increase* 6 times
Row 5 – *3 sc, 1 increase* 6 times
Row 6 – *4 sc, 1 increase* 6 times
Row 7 – *5 sc, 1 increase* 6 times
Row 8 – *6 sc, 1 increase* 6 times
Row 9 – *7 sc, 1 increase* 6 times
Row 10 – *8 sc, 1 increase* 6 times
Row 11 – knit 60 sc behind the back wall
Rows 12-21 – 60 sc
Row 22 – *8 sc, 1 decrease* 6 times
Row 23 – 54 sc
Row 24 – *7 sc, 1 decrease* 6 times
Row 25 – 48 sc
Row 26 – *6 sc, 1 decrease* 6 times – fasten and cut the red thread
Attach flesh-colored thread
27 row – 42 sc
Row 28 - knit behind the back wall *6 sc, 1 increase* 6 times
Row 29 – *7 sc, 1 increase* 6 times
Rows 30-35 – 54 sc
Row 36 – *7 sc, 1 decrease* 6 times
Row 37 – 48 sc
Row 38 – *6 sc, 1 decrease* 6 times
Row 39 – *5 sc, 1 decrease* 6 times
Row 40 – *4 sc, 1 decrease* 6 times
41 row – *3 sc, 1 decrease* 6 times
Row 42 – *2 sc, 1 decrease* 6 times
Row 43 – *1 sc, 1 decrease* 6 times
Row 44 – 6 decreases – tighten the hole, fasten and cut the thread and hide it in the piece.
Nose(knits the same for Dedik and Snegurochka)

Body thread.
1st row – 2 ch, in the second ch from the hook, knit 6 sc
2nd row – *1 increase* 6 times
Row 3 – *1 sc, 1 increase* 6 times
Rows 4-6 – 18 sc – fasten and cut the thread, leaving a long end of the thread for sewing. Sew the nose 1 row above the collar.
Glue on the eyes, embroider the eyebrows.
Lower edge(knits the same for Dedik and Snegurochka)
White thread.
1 row - for a half-loop 11 rows of the body 60 sc - knitting direction as for the body
2-3 rows – 60 sc
Row 4 – knit sc, grabbing the fabric of the bottom row (attaching the edge to the fabric) 60 sc (you can simply knit and sew) – fasten, cut the thread and hide in the piece.
Collar(knits the same for Dedik and Snegurochka)
White thread.
1 row - for a half-loop 28 rows of the body 42 sc - the direction of knitting is opposite to the direction of knitting the body
2nd row – 42 sc
3rd row – *6 sbn, 1 increase* 6 times
4-5 rows – 48 sc
Row 6 – knit sc, grabbing the fabric of the bottom row (attaching the collar to the fabric) 48 sc (you can simply knit and sew) – fasten, cut the thread and hide in the piece.
Leg– 2 pcs (knitted equally for Dedik and Snegurochka)
 Brown thread.
1 row – 8 ch, in the second loop from the hook 1 increase, 5 sc, 4 sc in the last loop, knit on the other side of the chain 5 sc, 1 increase
2nd row – 2nd increase, 4 sbn, 6th increase, 4 sbn, 2nd increase
3rd row - *1 sbn, 1 increase* 2 times, 4 sbn, *1 sbn, 1 increase* 6 times, 4 sbn, *1 sbn, 1 increase* 2 times - 1 sbn - offset
4th row – knit 38 sc behind the back wall
Row 5 – 38 sc
Row 6 – decrease 2, 8 sc, decrease 7, 8 sc, decrease 2 – fasten and cut the thread, leaving a long end of the thread for sewing. Fill the leg with stuffing and sew it on.
Hand– 2 pieces (knitted equally for Dedik and Snegurochka)
White thread.
1st row – 2 ch, in the second ch from the hook, knit 6 sc
2nd row – *1 increase* 6 times
Row 3 – *1 sc, 1 increase* 6 times
4th row – 18 sc
Row 5 – *7sc, 1 decrease* 2 times – fasten and cut off the white thread
Attach the red (blue) thread
6th row – *7sc, 1 increase* 2 times
Rows 7-11 – 18 sc – can’t be beat!
Row 12 – fold the arm over the top and connect the two sides 9 sc – fasten and cut the thread, leaving the long end of the thread for sewing.
A cap
Red thread.
1st row – 2 ch, in the second ch from the hook, knit 6 sc
2nd row – *1 increase* 6 times
Row 3 – *1 sc, 1 increase* 6 times
Row 4 – *2 sc, 1 increase* 6 times
Row 5 – 24 sc
Row 6 – *3 sc, 1 increase* 6 times
Row 7 – 30 sc
Row 8 – *4 sc, 1 increase* 6 times
Row 9 – 36 sc
Row 10 – *5 sc, 1 increase* 6 times
11th row – 42 sc
Row 12 – *6 sc, 1 increase* 6 times
Row 13 – *7 sc, 1 increase* 6 times
Row 14 – 54 sc – fasten and cut the red thread
Attach white thread
Row 15 – 54 sc, 1 sl st, turn work
Row 16 – knit in the opposite direction behind the back wall 54 sc
Row 17 – 54 sc
Row 18 – knit sc, grabbing the fabric of the bottom row (attaching the edge to the fabric) 54 sc (you can simply knit and sew) – fasten and cut the thread, leaving the long end of the thread for sewing. Fill the hat a little and sew it to the head.
Beard
White thread.
1 row – 36 ch, in the second loop from the hook 1 sc, 34 sc, 1 ch, turn work
2nd row – 35 DP, 1 ch, turn work
3rd row – skip 1 loop of the bottom row 32 sc, 1 decrease, 1 ch, turn work
Row 4 – 33 DP – fasten and cut the thread, leaving a long end of the thread for sewing. Sew on the beard, bending it “like a smile”, so that the edges of the beard are near the edge of the hat (see photo).
Grandpa's Hair
White thread.
33 ch, into the second loop from the hook 1 dp, 31 dp – fasten and cut the thread, leaving a long end of the thread for sewing. Sew the hair on the back of the head close to the edge of the hat.
Crown

Blue thread.
We knit in rows.
1 row – 26 ch, in the second loop from the hook 1 sc, * 1 increase, 1 sc * 12 times, 1 ch, turn work
2nd row – skip 1 loop of the bottom row 34 sc, 1 decrease, 1 ch, turn work
3rd row – skip 1 loop of the bottom row 5 sc, 23 hdc, 4 sc, 1 decrease, 1 ch, turn work
4th row – skip 1 loop of the bottom row 5 sc, 21 hdc, 4 sc, 1 decrease, 1 ch, turn work
Row 5 – skip 1 loop of the bottom row 2 sc, *1 sc, picot* 25 times, 1 sc, 1 decrease – fasten and cut the thread.
Either tie 35 ch on each side to the ends of the crown, or attach a ribbon.
Assembly
Grandpa - following the instructions described above, sew, embroider eyebrows with white thread, rouge the nose.
Snow Maiden – embroider hair with white thread; from the back of the head near the hair of the 2nd row, attach a white thread (like a fringe) - braid it into a braid; tie a ribbon; embroider eyebrows; put on a crown (you can sew on a crown with a few stitches), embroider eyebrows, rouge cheeks; You can sew on bead earrings.
You can ask any questions regarding the diagram


