Knitting socks with 2 knitting needles. Socks on two knitting needles without seam. Easy way (Knitting)
The method of knitting socks on four knitting needles refers to classic version. With this method, the product is obtained without any seams. But there are still inconveniences. Firstly, you always need to make sure that the loops do not fall out of the knitting needles, and secondly, it is quite difficult to use patterns.
In this regard, knitting on two needles allows you to conveniently create a pattern, since the fabric is not circular. The downside, however, is that the product will have to be sewn, but knitted seams allow you to do this very carefully. And you can choose any of the options.
Knitting technique
It is better to knit the elastic of the socks using smaller number knitting needles, then it will be tighter and will not stretch much.
Knitting an ankle sock with two knitting needles
We knit a 2x2 elastic band with a width equal to the circumference of the ankle, knit in rows facial loops to the beginning of the heel,

we knit one half of the fabric with a height equal to the height of the heel. The second half can be removed using a spare knitting needle or thread.


Rounding the heel of the toe
We divide the loops of the knitted half into three, the outer parts should be the same. In the example shown, each part is equal to five loops. We knit 5 loops of the right part, then 4 loops of the middle part, and we knit the fifth together with the first loop of the left part (a), in the reverse row we remove the first loop (b), we knit three loops of the middle part purlwise, and we knit the next one together with the next loop (c ), repeat knitting until we pick up all the loops of the outer parts.

Knitting a sock foot on two knitting needles
We collect all the loops to obtain a circular fabric: to the loops on the knitting needles we cast on 5 loops that were taken when rounding the left side, then we connect the loops from an additional knitting needle, and then we cast on 5 loops that were lost on the right side, we knit the foot required length before starting the sock.

To start, we divide all the loops into several parts (in the example given it is 4), and at the end of each part we make a decrease, knitting two loops together.

Sewing a sock
Fold the sewn parts of the sock front side out,

insert a needle and thread under the loop to the right of the edge,

then we also insert a needle under the loop on the left side of the fabric being sewn, again move to the right side, etc., tighten the thread. All edge loops must be on the wrong side of the product.
The sock knitted on two knitting needles is ready.

- When knitting the second sock, do not forget to take into account the symmetry of the fabric you are knitting.
- When using a pattern, choose a technique so that there are no broaches on the wrong side, or they are very short, since otherwise when putting on the sock, your foot will cling to these broaches. The best option would be to use .

We cast on 50 loops on the knitting needles. Next we knit:
1st r. 1 edge; (K2, P2) x 5 times; 8 persons. (braid); (P2, k2) x 5 times; 1 edge.
2nd r. and we knit all the even loops according to the pattern.
3rd r. We begin to knit the braid OXOX in the middle according to the pattern (my comment:there was no diagram in the MK, I added it - see at the end of the MK). We knit the remaining loops according to the pattern of the 1st row.
In this way we knit 40 rows straight.
Then we cast on 20 air loops for the heel from the front side of the knitting.
We tie them like this: knit 1; (K2, P2) x 10 times; 8 persons. n. braids; (P2, k2) x 5 times; 1 person
Turn the knitting over and cast on 20 stitches for the heel on the 2nd side. We tie them like this: 1 purl, (2 purl, 2 knits) x 10 times; 8 p. n. braids; (K2, P2) x 10 times; 1 purl.
We turn it over to the front side and begin decreasing on both sides of the braid for lifting. We knit 35 stitches with a 2x2 elastic band, and knit 36 stitches and 37 stitches together.
Like this. 
Then knit 1; 2 purl; 8 p. braids; 2 purl; 1 person Next, remove 1 stitch like a knit stitch, unknitted on right knitting needle.

We knit the next one.
And we put it on the unknitted one from the right knitting needle. Next we knit according to the pattern.
We decrease loops only in the front rows, in the front loops near the braid.
The knitting should decrease evenly on both sides.
The result is a triangle like this. Hence the name socks. There should be 14 stitches left on the needles.
Next we knit in the front rowK2, p2 x 3 times, k2.
From the edge loops of the side of the sock we cast on 39 faces. P.
Turn the knitting over and knit the cast-on 39 stitches purl + 14 stitches of toe elastic
Next, from the edge loops we collect 39 sts, purl on the other side of the sock.
We turn the knitting over to the front side and knit the cast-on 39 sts + 13 sts of elastic (we leave 1 knit stitch on the left knitting needle).
Then enter for back walls right knitting needle in 2 loops on the left knitting needle (1 knit stitch + 1 cast on from 39 edge stitches)
Pull out the loop.
And we knit together behind the back walls.
We turn the knitting. We remove the first loop.
Next, we knit the remaining 12 stitches according to the pattern, and we knit the 14th stitch together with the cast-on loop.
We turn the knitting over. We remove the first loop.
We knit the next 12 stitches again, and knit the 14th stitch together behind the back walls with a cast-on loop.
In this way we tie all the loops collected from the sidewalls. There should always be 14 stitches left in the middle.
We knit until there are again 14 stitches of elastic left on the knitting needles.
This is what the sock should look like from the side.
Now we cast on the loops for the heel. From the wrong side, from the edge loops, we put on 20 sts.
Turn over, knit the cast-on stitches, knit 14 stitches and, on the other side, knit 20 stitches.
Turn over, knit 20 stitches purlwise, 13 stitches with a 2x2 elastic band, and purl the 14th and 15th stitches together.
We turn the knitting over. We remove the first loop. We knit 12 sts of elastic, and knit 14 sts and 15 sts together behind the back walls.
In this way we tie all the heel loops. There should be 14 elastic loops left on the knitting needles.
Then from the edge loops we knit 21 stitches of the cuff.
We turn the knitting over. We purl the cast-on loops, 14 stitches, 2x2 elastic, 21 purl. p. from edge loops.
We turn the knitting over. We knit the collected 21 stitches with knit stitches, 13 stitches with elastic bands, and knit 14 stitches and 15 stitches together behind the back walls.
We turn the knitting over and again remove the 1st stitch, knit 12 stitches with an elastic band according to the pattern, and knit 14 and 15 together purlwise.
In this way we tie all the loops of the sidewall. There should again be 14 stitches of elastic left on the knitting needles. We close these loops according to the drawing.
The sock is ready.
SCIT DIAGRAM OXOX 
Embodiment: 

Knitting has long been an integral leisure activity for every housewife, and if she knew how to knit socks, this became a separate plus for both herself and her household. “But socks are knitted on five needles, which constantly get in the way and fall out, and this is so inconvenient and painstaking!” - you say. That is why the technique of knitting on two needles has spread today. We’ll talk about it now, and also show you two ways to knit comfortable socks quickly, and without seams.
Preparation
Any experienced knitter will tell you that quality finished product directly depends on the correct selection of tools and materials involved in the work, that is, in our case, knitting needles and threads. Including their thickness, length and what they are made of.
Spokes
The first thing you need to choose is the knitting needles. Knitting should be fun, and convenience plays a role in this case. important role. Be guided by the main criteria when choosing to buy the model that is right for you.
Different types of knitting needles for knitting socks
Wooden knitting needles are light and quite strong, but can leave puffs on the products. Plastic knitting needles are light, smooth and comfortable, but they are very fragile and often break. Aluminum products are strong and smooth, but they can leave dark traces on light yarn. Steel is perhaps the most reliable material, although many may find such knitting needles heavy.
The size of the knitting needles should be selected depending on the pattern of the future product and the thickness of the yarn. It will be more convenient if you buy a complete set of knitting needles of all sizes so that you can use the right ones if necessary. In the store, experienced salespeople will tell you about correct selection knitting needle diameter for a specific yarn and knitting density.
Do not forget that an incorrectly selected knitting needle size will lead to sloppy appearance products. In the future, this will affect the quality of the socks, their durability and comfort.
Pay attention to the edges of the knitting needles. The working ends should not be blunt, but too sharp ones are not recommended either.. With such knitting needles you can damage the sock during knitting and split the thread, which will make it look sloppy. Even worse, sharp knitting needles can injure your hands (even experienced knitters are not immune to this).
The non-working (back) ends of the knitting needles can be the same pointed or closed, with rings, caps or wire. The first option is double-sided, suitable only for knitting small items. The second type of knitting needle is designed for working with large complex things.
For beginner knitters, it is better to purchase knitting needles made of aluminum or steel of medium size, No. 3 (this is the thickness in millimeters, it is indicated on the non-working edge of the knitting needle or cap) and 15–20 cm long. The non-working edge must be closed. This will make it convenient for you to knit socks on two knitting needles for both adults and children; the loops will not slip off during work. Tools that are too long will make the job heavier and their non-working ends will catch on everything they can reach.
Yarn
The modern textile industry provides us with such a huge selection of yarn and threads for knitting that our eyes run wild, and it can be very difficult to choose the right option. It can be wool, synthetics, cotton and a host of others mixed types threads

Carefully select yarn for future socks
Wool-based threads are considered the most suitable for knitting socks. In the finished product, they hold their shape well, do not stretch, and the designs and patterns look distinct and voluminous.
When you choose yarn for yourself, carefully read the instructions on the label. Everything is listed there necessary information: these threads are intended for hand or machine knitting, how to properly care for related product. Do not throw away the label until you finish knitting: the information on the color and thread number indicated on it will be useful if there is not enough yarn and you have to buy more.
We recommend that beginning needlewomen choose wool or wool blend yarn for knitting socks. Even the size of the finished product can depend on the thickness of the thread! For regular socks, choose standard threads of medium thickness, and for warm socks that will be worn in cold weather, it is better to take thick yarn. Knitting needles No. 3 are great for knitting socks from wool and half-wool yarn of any thickness.
Determining the size
You shouldn’t mindlessly pick up your knitting needles and start knitting. Knitting, like any other activity, has its own characteristics and preparatory stages, which should be considered before starting work. First, you need to determine the size of the product. In order for socks to fit perfectly on your feet, you must take into account the height of the instep, the size of the foot, and the lower girth of the calf. It’s not often that we have the opportunity during the knitting process to attach a product to a model for fitting. Therefore, knitters often use a single formula based on shoe size:
where X is the shoe size, and Y is the foot size in centimeters.

Before you start knitting, take a foot measurement to calculate the size of the product.
- Carefully count the loops in the product. This is especially true for knitting complex patterns, but in a simple canvas it is also important.
- Remember that when knitting a sock you need to form 4 parts: the sole, heel, shaft and top of the product.
- When decorating a product, you can use threads different colors and shades, but only one type, quality and thickness.
- The density of the sock knitting should be uniform throughout the entire work.
- Do not forget that some types of yarn lose quality when heated and wet processing(for example, they shrink when washing). This is especially true for wool and wool mixtures. To avoid such troubles, add small increments while knitting. It is enough to knit 1-2 more loops on each side of the work than indicated in the report. But if you are planning a neat, gentle wash for your socks, then stick to the exact number of loops.
We start from the toe
First we will look at a simple version of knitting from the toe towards the top of the product without a seam.

These socks without a seam can be knitted on two knitting needles
Take the main yarn and an additional thread (length at least 35 cm, it is better to use a sliding thread). Secure by tying in a knot.

Tie the main and additional threads in a knot
Now calculate the number of loops. The calculation will be based on the leg circumference. Measure it with a centimeter and divide it: by 3 - if you have thick yarn, by 4 - if the threads are of medium thickness. That is, in 1 centimeter of tightly knitted fabric with the initial loops not very closely shifted, there should be 3 or 4 loops, respectively. This applies to knitting with needles No. 3. If you use thicker knitting needles, the number of stitches per centimeter will be no more than three.
Do not try to tighten the initial stitches too tightly: it will be awkward for you to remove the knitting needle and knit the next row. Additional thread will hold the shape of the loops perfectly.
Let's say there are 48 initial loops. You need to cast on half the calculated loops, that is, 24.

Begin casting on stitches using extra thread
In this case, the loops are formed by the main thread, and the additional thread secures them at the bottom of the knitting.

Secure the loops with additional thread
Thus, cast on 24 loops on two folded knitting needles.

Cast on 24 loops
Taking out one knitting needle, knit the first row with knit stitches, and the second row with purl stitches, without knitting the last loop.

Take out one knitting needle and knit the front row
Turn the work over and continue knitting. The last stitches in each row are not knitted.

Continue without knitting the last stitches in the rows
Thus, you need to knit one less loop in each row until a third of the initial number of loops remains, that is, in our case, 8 pieces.

The number of loops will be reduced to a third
At this stage, the number of working loops begins to increase: knit the previously removed loops in each row in turn.

Now knit the remaining stitches
To avoid too big holes because of elongated loops, use this method: lift a side loop onto the left knitting needle, knit it together with the next one on the left knitting needle. In the front row, these loops are knitted with knit stitches, in the purl row - with purl stitches.

Carefully knit the loops so as not to leave large distances between them
Knit the toe of the sock in this manner until all the stitches return to work.

Knitting toe
Now take to work the loops that were initially secured with additional thread (hereinafter referred to as DN). Pick up the first stitch from the DN onto the knitting needle. Transfer one stitch from the left needle to the right.

Transferring loops
Raise the loop from the DN again.

Continuing the transfer
And transfer the loop to the right needle from the left.

Transfer stitches from one needle to another
Continue in this manner until you have picked up and transferred all the stitches to the right needle. After this, carefully remove the additional thread.

After transferring stitches, remove additional thread
The further knitting process looks like this: knit 1 (a loop that was picked up with an additional thread), then 1 loop is removed, the thread is brought out in front of the loop (loop from the left knitting needle), knit 1 again, 1 removed, and so on in order. The last stitch is knitted. Slip the first stitch of the next row, knit 1, purl 1, repeat to the end of the row.

Further knitting process
Accordingly, in one row you will knit half of the loops, in the other - the second half. The result will be a product in the form of a “pipe”. When its length becomes equal to the length of the foot, start knitting the heel.

Knitting the foot
Remove the loops one at a time onto an additional knitting needle. On the remaining stitches, knit the heel in the same way as you knitted the toe of the sock. So first you will decrease the number of working stitches by 1 on each row until a third of the starting number remains.

Knitting the heel of the sock
And then you will add a loop in each row until the previous amount returns.

Complete the heel knitting
Transfer all the stitches to one knitting needle, knitting 1 knit stitch in turn from the front knitting needle and slipping 1 stitch with the thread before knitting from the back knitting needle.

Transfer all stitches to one needle

Knit the sock to the top
Tie an elastic band according to the following pattern: 1 slipped loop, * k1. p., 1 p. remove, leave the thread before work, 1 p. p., 1 p. remove, leave the thread before work*. Repeat the report from * to *. Having knitted an elastic band of the desired height, close the loops.

Tie the elastic band and close the loops
That's all. The result of some simple work is this wonderful sock.

Finished sock
After repeating the whole process, tie him a pair.
Let's start with an elastic band
These cute two-color socks are no more difficult to knit than the previous ones, with the only difference being that the direction of work goes from top to bottom, from the elastic to the toe. Take yarn of two colors of the same thickness and knitting needles No. 3. In this example, the foot length of the sock is 11–12 centimeters.

For these socks, take threads of two colors
Knitting starts from the back of the cuff. Place two knitting needles together, cast on 22 stitches and knit 15 rows one to one with an elastic band (depending on the density, it will be about 4 cm).

Knit 4 cm with an elastic band 1 X 1
After this, knit another 4 cm stockinette stitch. If desired, you can change the color of the product. The back of the sock is already ready.

Knit another 4 cm in stockinette stitch.
Now start knitting the heel. To form it, make decreases on the front row: knit the second, third and 2 penultimate stitches together. Continue in this manner until there are 12 stitches left on the needles. After this, you need to expand the work so that the size of the canvas increases. Knit one additional knit stitch from the edge stitch. No additions are made to the purl rows. Add stitches until the count is again 22. The heel is formed.

Shape the heel of the sock
Knit a foot 8 cm long in stockinette stitch.. Alternate yarn colors: 2 rows for each color. The sole of the sock and its back are ready.

When knitting the foot of a sock, alternate colors
Knit the toe in the same way as the heel: reduce the number of stitches to 12, then increase to 24.
Knit 8 centimeters of the top of the sock, while connecting the first and last loops with the edge loops in each front row. This way you will connect the sole to the upper and almost finish knitting the sock.

Connect the sole and the top of the sock
Knit the cuff at the front using stockinette stitch, while connecting it to the back. It remains to tie 4 centimeters of elastic - and the work is completed.

Finish knitting the sock
Knit the second sock in the same way.

Enjoy warm cozy socks!
How to knit for children
For knitting children's socks, it is better to take multi-colored yarn. Bright colorful products not only please the eye, but also become an interesting, funny thing for the baby. The main thing is that the thread is natural, soft, and retains heat well. In addition, children's socks should be decorated decorative elements as knitted flowers, animals, butterflies, bugs and everything that your imagination tells you.

Children's socks should be bright, soft and fancy
The method of knitting children's seamless socks on two knitting needles can be anything: from a toe or from an elastic band - it doesn’t matter. But it is very important to correctly calculate the number of loops depending on the size of the leg. To do this, use the formula we gave above and take into account the thickness of the thread used.
To avoid mistakes, first try knitting a small piece of fabric using garter stitch or stockinette stitch. 10 rows of 10 stitches will be enough to understand what knitting density is needed for your child’s leg.
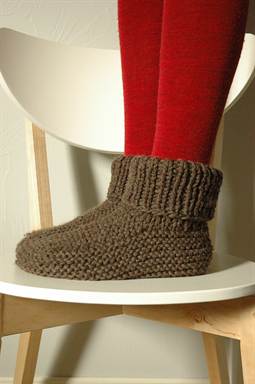
Variation: socks-slippers without seam
Each of us wants our feet to be warm and comfortable. Is it raining, slush or snowing outside? Imagine that warm and soft slippers knitted by your own hands are waiting for you at home!

Cozy and light knitted slippers Your feet are sure to love it!
For such slippers, you can use a simple pattern.
- Cast on 43 stitches on the needles. 20 of them are one side, 3 are in front and 20 are the other side. Next, knit two rows: knit the first row, purl the second.
- We knit the third row like this: knit 20 loops, yarn over, knit one, yarn over, purl one (this is the middle of the product or the central loop, everything goes symmetrically from it), yarn over, knit one, yarn over, knit 20. We knit the fourth row and all even rows purlwise, except for the central one: we knit it with the front one.
- Fifth row: knit 20, yo, knit 3, yo, purl one, yo, knit 3, yo, knit 20.
- Seventh row: knit 20, yo, knit 5, yo, purl one, yo, knit 5, yo, knit 20.
- So we knit up to 23 rows. We knit it like this: knit 20, yarn over, knit 21, yarn over, purl one, yarn over, knit 21, yarn over, knit 20.
- Now you need to knit the sole of the slipper. To do this, when knitting the 23rd row, insert a strong thread into it, since the sole should be more rigid and durable. Remember how the heel of the toe is knitted, and use the same method to make the front part of the slipper.
- The sole is made of 13 loops: 6 on the right, one in the center, 6 on the left. From six on the right and on the left, grab one loop each and do this along the entire length of the sole.
- Knit the 25th row: knit 36, 37th and 38th loops together, knit 11, 50th and 51st loops together, slip this loop back onto the left knitting needle. Turn the knitting over.
- 26th row: one loop is already on the knitting needle, purl 11, purl the 13th and 14th, and transfer the resulting loop back to the left knitting needle. Turn over and knit rows until you run out of tack stitches. As you knit, it is better to reduce the number of stitches from 13 to 7–9, because the heel is narrower than the sole itself. Then we knit these 7–9 loops, picking up the loops. This will close the heel.
This pattern is usually used for knitting slippers in sizes 38–39.
Video: knitting seamless socks on two knitting needles

Warm wool socks are an indispensable part of any person's wardrobe. Moreover, this great way practice and improve your knitting skills for beginner needlewomen. You will learn from our article how to knit socks using the two-knitting technique, and a knitting pattern with a description of the work will help you with this.
Master class on socks on two knitting needles with knitting patterns
Many of us are accustomed to seeing our grandmother busy knitting socks. However, she does this on 5 knitting needles, which for beginners seems like a skill beyond reality. There is also knitting of socks, which is done on two knitting needles.
For a pair of socks size 40-42 you will need the following:
- Warm wool yarn, about 200 g
- Knitting needles No. 5 or No. 5.5
Instructions on how to knit socks will be described step by step simply, even if you have not knitted on two knitting needles before.
Stage 1. Elastic band. We cast on 39 loops. We begin to knit with an elastic band, that is, alternating the front and back loops. The last one (before the edge) should be knitted face-on. So we perform about 28 rows. Then the number of loops is mentally divided by 3, 13 in each part. We begin to knit the middle: 34 rows of knit stitches in the center.
Stage 2. Sock. 2 loops connected together and knitted as one will be called combined from now on. We continue to work with the central 13 loops.
In the first row:“combined” knit, 9 loops “face”, “combined” knit.
Second row: 13 knit stitches.
Third row:“combined” facial, 7 “face”, “combined” facial.
Fourth row: 9 knit stitches
Fifth row: combined facial, 5 facial, again “combined”.
Stage 3. Foot. 19 is dialed in the first row additional loops on the left, along the “tongue”, they are knitted “face”. Next, another 13 knit stitches on the left side along the shin. In the second row, we add 7 loops to the upper side of the “tongue”, 19 from the right side and 13 loops along the shin. We knit everything face to face. Having completed these two rows, count the loops, you should get 71. We knit them with facial stitches for 10 rows.
Stage 4. Sole.
First row:“combined” knit, 28 knit, “combined”, 3 “face”, “combined”, 3 knit, again “combined”, 27 “face”, “combined.”
Second row: the remaining 66 stitches are knitted.
Third row:“combined”, 26 “face”, “combined”, 2 knit, again “combined”, 2 “face”, “combined”, 26 knit, again “combined”.
Fourth row: 61 knit stitches.
Fifth row:“combined”, 24 knit, “combined, 1 “knit”, “combined”, knit loop, “combined”, 25 knit and again “combined”.
Sixth row: 56 "face"
Seventh row: “combined”, 22 knits, 3 “combined” in a row, 24 knits, “combined”.
Eighth row: 51 knit stitches.
Repeat decreasing the loops, starting from row 1, until their number is reduced to 26. We finish the work, close the loops. The foot, heel and shin are sewn together with a crochet hook or just a needle.
The result is these socks on 2 knitting needles:

The scheme of this work is extremely simple: it mainly involves only facial loops (and even “combined” ones are knitted “face”).
Video on the topic of the article
“Simplified” knitted socks:
Socks on two knitting needles:
Two socks simple knitting needles which are made without a seam:
"Invisible seam":
Toe socks:
Similar articles:
Every fashionista is interested in learning how to knit correctly and quickly openwork braid knitting needles, because such an element beautifully decorates any product. These patterns are used...
Many knitters like to use a special Bulgarian beginning in their work - a type of loop that allows them to make the edge of the product more beautiful and sophisticated....
Handicraft is a beautiful process of creation knitted accessory. An openwork knitted shawl combines fashion, style, beauty, comfort and warmth. This is a...
The master class will help you understand the features and techniques of knitting socks on 2 knitting needles with a seam. Each step is shown in detail in photos and videos; even beginners can easily master this knitting method.
Video master class knitted sock on 2 knitting needles
Several patterns for knitting socks with patterns
Knitting on 2 needles has its own characteristics, it has its pros and cons. The socks are knitted quite quickly and using two knitting needles is common. The disadvantage is that the parts of the sock are sewn together, but if everything is done carefully, the seam will not be noticeable.
Materials
To knit a sock, you need 2 knitting needles size No. 3.5 and approximately 70 grams of Alize Lanagold classic yarn, composition 51% acrylic, 49% wool.
The sock is designed for foot size 38.


Beginning of work. Elasticated cuff.
Cast on 50 loops: 48 + 2 edge stitches.
Casting on loops


We take out a knitting needle and knit a 1x1 elastic band: one knit and one purl, approximately 10 cm. We knit the first loop, purl the last loop.
You can choose any elastic band, the main thing is to understand the principle of knitting a sock.
In the second row we knit according to the pattern - the front loop along the front loop, the purl loop along the back loop.

We finished knitting an elastic band of about 10 cm.

Then we knit with stockinette stitch: according front side- all stitches are knit, purl stitches are purl. We knit 3 cm from the elastic.

Knitting heels
On the front side we knit 26 loops with facial loops. This will be the underside of the sock.
Turn the fabric and knit with purl stitches in the opposite direction.

We knit the heel: We knit only the first 26 loops with a height of 5 cm using stockinette stitch. The second half remains unchanged. On the front side - with knit stitches, on the wrong side - with purl stitches.

We knit the heel as follows:
On the wrong side we knit 8 loops including the edge purl. loops, then 2 loops together (decrease),

and knit the center of the heel from 6 purl loops, 2 loops together (decrease).
There should be 8 loops left unknitted on the knitting needle. We leave them without knitting, turn the knitting and knit the front side.
We lower the first loop without knitting, 6 loops with facial loops, two loops together.
Turn the knitting to the wrong side. We knit only the middle part: in the middle there are 6 loops and plus the outer loops, which we knit by grabbing one loop on the left and right. We knit until there are not one loop left on the side ones, that is, 8 loops remain (including edge loops) - this is the center of the heel.


We knit the middle with 8 (6+2 edge) knit stitches, then cast on 9 stitches on the wall. and knit with facial loops top part sock


We knit along the wrong side to the heel, cast on 9 loops along the second wall of the heel.


Now the knitting needle has 48 + 2 edges again. We knit in stockinette stitch 14 cm.

To complete the sock, knit the toe
On the front side we knit in next sequence: 2 stitches together, knit 21, 2 stitches together. This is the middle of the mating.
We put a marker so as not to confuse the loops when we make decreases in the middle of the sock.


Again 2 loops in place, knit 21 stitches, 2 together. We decrease 4 loops in each row on both the front and back sides. At the beginning of knitting, from the center of knitting, we decrease the loop on the right and left, and at the end of the row.


Decrease on each row until 8 stitches remain.


Then hook the thread through the loops and tighten the loop.

We combine the edges of the product together and sew it with the same threads that were used to knit it.


The sock is ready. We knit the second sock in the same way, constantly comparing so that the products are identical.

Our sock is knitted with the simplest stockinette stitch, to make it more interesting you can use various patterns


