How to make things for a doll? Homemade things for dolls. How to make a Barbie, Tilda, Motanka doll with your own hands? How to make a doll from clay, tights, paper and thread with your own hands
This is where Barbie can store her shoes and jewelry. To make a chest of drawers you will need:
- 3 matchboxes;
- cardboard and thin paper;
- PVA glue;
- acrylic paint.

What do we have to do:
- Glue the matchboxes so that they stand on top of each other and the boxes slide out easily.
- Cover the non-moving part of the chest with paper and paint it.
- Paint the drawers.
- Cut handles from cardboard and glue them to the boxes.
Advice. The chest of drawers will look more colorful if you make the drawers in different colors.
Shoebox wardrobe
This is where Barbie doll can store her outfits. What you will need to create a cabinet:
- shoe box;
- wooden stick;
- 2 large beads;
- thick foil;
- glue;
- heat gun;
- scissors.
What do we have to do:
- Take the lid from the box, cut off the folds along the width and cut it exactly in half along the length - this is a blank for the cabinet doors.
- Cover the doors with film. Glue a piece of foil onto one of them to make it look like a mirror.
- Cover the entire box with film.
- Glue the doors to the cabinet using the remaining bends.
- Using a heat gun, glue the beads to the doors to create handles.
- Make 2 holes in the box and insert a stick into them to make it convenient to hang things.
Advice. It’s easy to make “hangers” for Barbie outfits from wire.
Chair made from a plastic bottle
You can make 2 or more chairs so that the doll can invite guests to tea. What you will need for production:
- plastic bottle;
- cotton wool or foam rubber;
- scissors;
- thread and needle;
- colored fabric.

What do we have to do:
- Cut out the shape of a chair from a bottle.
- Measure the workpiece and sew a cover for the chair.
- Fill the bottle with cotton wool or foam rubber at the seating area.
Advice. The larger the volume of the bottle used, the larger the chair will be. For Barbie herself and her friend Ken, it is better to take 1.5 liters, but for Barbie children, 0.5 liter bottles are suitable.
Plastic table
To make Barbie's tea party convenient, you can't do without a table. What it will need:
- flat plastic;
- glue;
- 4 sticks with a diameter of 5 mm;
- scissors.
What do we have to do:
- Cut out 2 identical tabletops from plastic and glue them together.
- Glue the legs to the tabletop.
- From beautiful and thin fabric make a tablecloth.
Corrugated bed
Of course, Barbie cannot do without a large and comfortable bed. Moreover, it does not require much material:
- corrugated cardboard;
- paper;
- self-adhesive film with wood imitation;
- scissors;
- stationery knife;
- a simple pencil;
- PVA glue and “Moment”;
- metal wire;
- fabric, thread, needle;
- cotton wool

What do we have to do:
- Using a pencil, draw templates on paper: a bed, a headboard and an attachment to the side where the legs will be.
- Attach templates to corrugated cardboard, and cut out the blanks with a stationery knife. You need to cut several identical pieces to make the bed stronger.
- Glue several beds, headboards, etc. together, put them under a press and wait until they dry well.
- Use wire to connect all parts of the bed.
- Cover the bed with film.
- Sew a mattress and pillows from fabric and stuff them with cotton wool.
All these instructions are very simple. They do not require any special skills or expensive materials. But mom will be able to have fun with her daughter. When the furniture is ready, you can start sewing outfits for Barbie together.
How to make a sofa for a Barbie doll: video
Julia Pyatnitsa
DIY clothes for Barbie: creating fashion at home
There are no dolls that can compare in popularity with Barbie dolls. As a child, every girl always has one or more slender, long-haired friends who are so fun to play with! What’s even more interesting is that you can make furniture, a house, and even clothes for a Barbie doll with your own hands.
History of dolls
The Barbie doll appeared thanks to the efforts of a simple American woman, Ruth Hendler, in 1959. The doll was produced in 2 versions - with light brown and dark hair.
The main idea behind its creation was: “Girls aged 10 no longer want to play with little dolls. They like beautiful dolls game situations with which they will help prepare for adult life.”
This also includes Barbie's clothes, by changing which girls will learn to dress fashionably in real life! It was originally intended that the dolls would be sold in swimsuits, and each item of clothing would have to be purchased separately. But they quickly found craftswomen who made amazing clothes for Barbie dolls with their own hands.
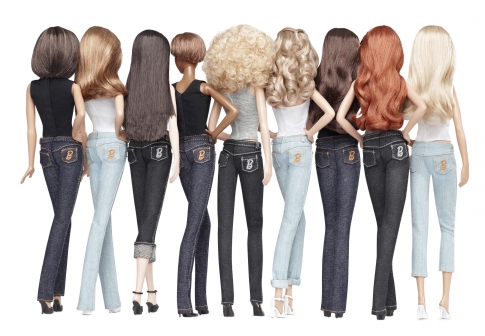
Clothes for Barbie dolls
So, the first clothing for the original Barbie was a two-piece swimsuit pin-up style. But over time, her wardrobe expanded to cosmic proportions! The doll has all the types of clothes that little fashionista girls also have. And all of them can be created with your own hands.
- Dresses - these are the outfits that Barbie can most often buy in a store.
- Outerwear - jackets, jackets and even coats.
- Casual clothing - blouses and T-shirts, skirts and jeans, T-shirts and shorts.
It’s impossible to count how many shoes Barbie has in her arsenal! And if your daughter insists on updating her ward's outfits, don't be alarmed - you don't need to buy expensive accessories for a toy in a store. 
You can sew clothes for Barbie with your own hands even in home environment. You don't even need it for this sewing machine- it is enough to have a set of bright threads, needles and scraps of fabric.
Pants pattern
Despite the fact that feminine Barbies often wear skirts and dresses, try sewing fashionable trousers with your own hands. Your daughter will definitely be delighted, because not every girl has such a piece of doll clothing.
After you master this simple method of sewing, you can move on to more complex trouser styles, which can be borrowed not only from Barbie catalogs, but also from clothes for Monster High dolls and other popular models.
In addition to working tools, you will need the following materials:
- pattern paper;
- scissors;
- trouser fabric;
- pencil with a grater at the end.
A pencil is needed to clearly draw the pattern. In addition, it makes it easier to turn out narrow legs of doll trousers.
- Using a pattern, prepare 4 identical parts: 2 regular and 2 in a mirror image.

- Finish the edges of the pieces with an overlock stitch for strength.
- Sew the inner and outer edges of the blanks, leaving 1-2 centimeters on the back or side. Use this space to sew on a sticky fastener or button.
- Turn the pants inside out. Roll up the pant legs to form cuffs. They can be secured with threads and decorated as desired.
The trousers will be high-waisted. You can experiment by shortening and lengthening the legs, widening the pattern, creating capris and even shorts with your own hands! If you have a piece of thin light fabric lying around at home, use it - you will get wonderful summer trousers.
Sweater pattern
To complement the trouser ensemble, give Barbie a doll sweater as well. It’s very easy to sew it with your own hands, even if you don’t have a single extra piece of fabric at home, because the material for sewing is an old sock! Choose lightweight openwork or knitted socks to create an imitation sweater knit. 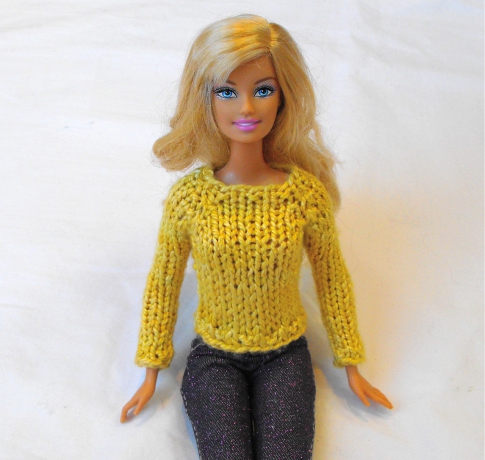
- Take a high top sock. Cut off bottom part, leaving the top.
- Unscrew small area for the collar and attach the doll.
- Mark the locations for the sleeves and body with chalk or pencil.
- Cut off excess material and turn inside out. Sew the seams.
- Turn the product right side out. Cut off the excess length of the sleeve and hem, trim and fold the sleeves to form cuffs.
The sweater comes with a beautiful boat-shaped collar. A suit made from a black sweater and white fabric trousers will look good. The sweater can be decorated with beads, cross stitch and satin stitch. To complete the ensemble of a sweater and trousers, you can sew a warm coat for Barbie.
Do-it-yourself sewn clothes for Barbie dolls are interesting not only because you can save money on the purchase expensive toys. You get a unique doll wardrobe with original items of clothing that only your daughter’s ward will wear.
To complete the sweater and pants ensemble, you can sew a warm coat for Barbie. Instructions for operation are presented in the video.
Take it for yourself and tell your friends!
Read also on our website:
show more
There are several ways to make clothes for Barbie. For example, you can sew it or use options where a sewing machine is not needed. In this article you will find various instructions and homemade outfit ideas. Skirts, dresses, shoes and other accessories have everything to dress up your dolls.
Ballet costume for Barbie doll master class
Simple and quick way make a ballroom leotard using a balloon.

In addition to a swimsuit, you also need shoes. To make shoes for Barbie, you will need a hot glue gun. We will use Barbie's legs as a model. They need to be wrapped in plastic wrap, then applied with hot glue. When the glue hardens, remove the finished shoes. Using scissors, we remove all unnecessary things.

Using nail polish, we decorate shoes in any color. By following the instructions below you can make simple skirt for your Barbie.

Top and skirt for Barbie made from socks without sewing

Another clothing option for a doll using a sock. Can be used to decorate top and skirt lace ribbons, beads or rhinestones.
Miniature shoes for a doll photo tutorial

We trace the doll's legs on thin cardboard. We make shoe soles, so the measurement exact size very important.

The boots have a slightly pointed part, so draw the shape a little more legs dolls

Now we cut out the sole and bend it in two places as shown in the figure. For the heels you will need two pieces of cardboard glued together.

We cut out the heels and polish them with sandpaper until the layers of cardboard are visible.

Measure the front of the doll's leg (length and width). Draw your measurements on paper. Additional space needs to be added to the resulting drawing. This extra fabric will be folded and glued to the sole.

In this extra space you need to cut out small triangles. This will give the shoe a smooth outline.

Add a little glue to the front and back of the foot. Carefully glue it together.

We measure the back of the foot. We draw the picture in the same way as we drew the front part. Cut out small triangles.

Glue the back part as shown in the picture.

The sole needs to be painted. After the paint has dried, it needs to be glued to the bottom of the foot.

In order to give the shoes a finished look, you need to glue golden braid to the shoes. Other suitable material may be used.

For a more interesting design, you can add small straps around the ankle.

You can decorate the shoes with lace and small rhinestones.

Do you want to learn how to make a chair, a bed for dolls, sew a peignoir, underwear, a coat for Barbie, Evening Dress? Check out the master classes.
How to make a bed for dolls?
This does not require special materials and equipment; a regular one will do. cardboard box, it needs to be cut in a certain way and the parts connected.

We start creating a crib for a doll with a pattern. You will need to trace it onto cardboard. You can rely on the dimensions given or use your own according to the size of the doll.

In the diagram shown, the dimensions are given in inches. It is easy to convert them into Russian size, if you know that there are 2.54 cm in one inch.
The bottom diagram is the base of a bed for dolls. This is a rectangle 50 cm long, 33 cm wide (numbers rounded off). Stepping back 2.5 cm from the large sides, make slits. They will be needed to firmly connect the parts. As you can see, on the left, the length of the two slots is 3 inches, that is, 7.6 cm. On the right, they are 14 cm.
You will attach the legs and headboards to these slots. The back, designated foot, will be located near the doll's legs. This is where you will attach the legs. sleeping place, designated by the same word. Headboard - headboard. The legs that you will attach here are marked with the same word. Here's how many and what parts you should end up cutting out on cardboard:
- base - 1 pc.;
- headboard - 1;
- side near the legs - 1;
- front legs - 2 pcs.;
- hind legs - 2 pcs.
When connecting parts, pay attention to the colored circles on the pattern. Green ones indicate the connection of the legs, towards which the doll will lie with its feet. Yellow ones show the combination of parts in the headboard.
This is how to make a doll bed. It can be not only this texture.
Other furniture for Barbie
In this case, the night bed for dolls will look like this:

At first glance it is difficult to believe that the base of the bed is made not of wood or plastic, but of paper.
Here's what you'll need for this craft:
- light cardboard;
- White paper;
- textile;
- glue;
- padding polyester;
- scissors;
- cord;
- ear sticks;
- foam sheet;
- toothpicks;
- needle and thread.

Now cut out a rectangle from another cardboard that matches the size of the mattress. Place a sheet of padding polyester on it, and on top - a slightly larger piece of fabric so that you can then fold the edges of the flap. Sew all three layers together, imitating the stitches of a spring mattress.
Attach this top part base to the bottom, glue the fabric on the sides to make the doll mattress complete.

Let's start decorating it. To do this, cut a strip of fabric, coat it on the inside with glue, attach a cord here, and wrap the fabric into a roll.

Glue this element to the side of the mattress, and below attach another one, created in the same way.

You will get such a beautiful mattress.

We make the headboard and foot of the bed from cardboard. Based on the diagram below, redraw the details.

Then cut them out.

To make the parts of the night bed strong, create three identical parts and glue them together. In the same way, assemble the legs of the bed, using 4 identical elements. Glue them and the transverse elements of the headboard into place. This is what you should get.

The frame and base of such furniture for Barbie or other dolls are made from the same cardboard. 3 identical parts are cut out of it and glued together. When the foot part is still wet, bend it on one side and the other as shown in the photo. Allow to dry in such a position that the part takes this shape.

Now it won't be difficult to assemble the bed. Glue vertical and horizontal elements to the foot part.

Let's turn ear sticks into bed legs. Remove the cotton wool from them, cut to the desired length.

To make this piece of toy furniture very beautiful, we will make the legs curly. To do this, cut strips of paper and make sharp corners on one side.

Curl each strip onto a stick, from wide to sharp edge.

You can continue to decorate the legs of the bed with narrower stripes.

Cut off the sharp edge of the toothpicks on one side and insert the other into the hollow holes of the sticks.

Glue the legs in place.

If you wish, you can use a stencil to cut it out of cardboard decorative elements and use them to decorate a crib for dolls.

Just as you decorated the legs, decorate the small elements for the bed. Glue them as shown in the photo.

Cover your creation with paint and varnish. After the solution dries, you will have a wonderful doll bed.

Now you will be able to make other furniture for Barbie and other dolls.
How to make a chair with your own hands?
It will look like the real thing. For this piece of furniture you will need:
- cardboard;
- wooden skewer;
- transparent glue;
- acrylic paints;
- PVA glue;
- sandpaper.

To make the back curved and strong, use this trick. Mix PVA and water in equal proportions, dip into this mixture this part. Then attach it to the round bottle, wrap it in a bandage, and put the structure on the battery to dry.

While this is happening, let's glue the front legs.

Now cut out a thin strip from cardboard; its length should be such that it reaches from one front leg to the other, if you pass it along the contours of the semicircular seat. To give the strip a curved shape, soak it in the same mixture of glue and water and squeeze it out. Glue this part in a semicircle, and a strip of the same width between the front legs in a straight line.

Here's how to make the chair next. Glue the back legs in place.

The back has already dried on the battery, so you can glue it in place.

From the same cardboard, cut 2 strips from the back to the seat. Glue them as shown in the photo.

Now you need to give the chair additional strength. To do this, generously coat it with PVA and let the glue dry.

After this, you can paint the chair any color. Here dark was used, and to give the item an antique effect, the paint was slightly worn sandpaper, and the top is covered with matte varnish.

How are clothes for dolls sewn?
The daughters will be pleased not only with new furniture for Barbie, but also with things. Make them together with your children to instill in them a love for this type of needlework from an early age. Start with simple things, for example, by creating such a peignoir. Enlarge the pattern on the monitor screen so that the item is the size of the doll.

As you can see, the pattern consists of only two elements. Fold the fabric in half lengthwise, attach the larger piece, and cut it out. Place the pattern on the wrong side of the fabric, mark with chalk the location of the two slits into which Barbie's hands will stick. For the collar, open up the pieces by folding the fabric in half.
Here's how to create such clothes for dolls with your own hands. Sew the peignoir at the back, connecting the two back panels. Cut a hole for the arms and trim it with braid or bias tape. Hem the right and left front. These smell spots can also be decorated with ribbon.
Connect both parts of the collar to each other on the wrong side, while leaving free space around the neck. Turn the collar right side out. Sew the neckline first on the bottom side and then on the top.
If you want to decorate the collar with braid, then first place this decorative tape between its two parts, align the edges of all three parts so that they are on the same level, and stitch on the wrong side. When you turn the collar onto your face, you will see that it is decorated with braid.
All that remains is to trim the bottom of the peignoir, sew on a tie, and then new outfit ready for Barbie. Underwear it will also not be difficult to create. The pattern consists of only one piece.

To sew a combidress, redraw the pattern on paper. As you can see, it is one-piece.

Place the paper backing on the back of the fabric, cut it out, adding 1 cm on all sides for seam allowances. Transfer the symbols to the wrong side.
If you have dark fabric, it is convenient to redraw the details of the pattern on it using chalk; on a light one, a simple pencil is usually used.
Draw stripes here on the front and back, marking the waist line with them. Now fold the fabric piece in half, connecting the right sides. In this case, the numbers: 1, 2, 5, 6 must be connected in pairs. Topstitch the sides. Where the segments are drawn on the diagram, insert an elastic band. To do this, measure it along the doll’s waist line, sew it from the inside with a zigzag seam, stretching it.
Treat the bottom and top of the jumpsuit with braid, make two straps from it, and sew them in place.
Evening dress for Barbie consists of only two parts. Please note that the front is one-piece, but the back needs to be created from two elements, since there will be a cut at the back and below the knees.

Redraw the details onto the pattern, and then onto the fabric folded in half. Cut with seam allowances. Hem the right and left side back, as well as a slit at the bottom. Sew these details on the hips. Now place the back and shelf with the right sides facing each other, sew these parts on the sides. Process the neckline from the front.
Cut a long and narrow strip from the fabric. Sew the sides together, tie it with a bow, and sew it onto the back of the dress.
That's how wonderful it will turn out to be.

To keep your daughter's ward from freezing on cold days, see how to sew a coat.

Take it for him thick fabric. Pin the redrawn parts as follows. The back will be complete, so place its pattern on the fabric folded in half. Redraw, unfold the canvas, mark the places of the upper folds, lay them, fasten them with a thread and a needle.
The shelf parts are the right and left half of the front. Fold the strips along the dotted lines so that you can sew them onto one button and make holes for them in the other. Cut out 4 sleeve pieces. The base of the beret consists of a circle, dotted lines indicates the location of the bend.
Let's start sewing a coat. Sew inside out side seams shelves and back, connect the sleeve parts in pairs, sew. Close and shoulder seams. Place the right and left sleeves into the corresponding armholes and stitch on the wrong side. You can sew on shoulder pads to make the coat fit well. Hem the bottom. Fold the collar in half as shown in the diagram and stitch it to the neckline.
All that remains is to cut out and overcast the loops, sew buttons on the other side and praise yourself for being able to sew a coat with your own hands.

To sew a beret, sew bias tape along its entire rounded edge, thread an elastic band measured according to the volume of the doll’s head into the resulting drawstring.
You can sew these kits for Barbie with your own hands or with a younger assistant.
If you like wicker furniture, check out how to make one for Barbie:
Here's how to make a sofa box for dolls:
You will learn how to quickly sew a dress from a sock for Monster High, Barbie from this story.
Barbie and all her prototypes invariably remain the most beloved and sought-after dolls among girls. Diversity role playing games requires large quantity accessories. And children are increasingly beginning to beg for new outfits for their dolls. You can please your children and update your doll's wardrobe yourself using scraps, socks, unnecessary ribbons and hairpins.
How to sew a skirt for Barbie
A skirt is the easiest wardrobe item to sew. It can be made from any piece of fabric, a sock or a cuff. For sewing you will need a sewing machine, thread, and scissors.
Sewing process:
- Take two pieces of fabric measuring 19x5 cm (you can use one piece of 19x10 cm). Also cut 10 cm of elastic and select threads to match the fabric.
- Sew the two parts of the skirt together, as in the picture.


- After this, process the resulting workpiece with an overlock/zigzag stitch or stitch it by hand.


- Now step back 15 mm from the edge of the skirt and stitch the elastic in two directions.


- When sewing on the elastic, stretch it a little. This is what should come out:

- Now cover the elastic with fabric and stitch it closed.


- Fold the skirt in half. WITH wrong side sew along the entire length, retreating 8 mm.


- Finish all the edges of the product and the skirt is ready.


How to sew a summer top with a skirt for Barbie
You can make a new suit for a doll in 15 minutes from an ordinary one. baby sock. You don't need a machine.
Sewing process:
- Carefully straighten the toe (you can even iron it to make it easier to cut).
- The bottom part will be used for the top, and the top of the sock will be used for the skirt.
- Using a marker or colored chalk, draw the dress pattern onto the sock, as shown in the photo.
- Use sharp scissors to cut out the pieces.
- Now you can overcast the product so that it does not fray.
- Or just twist the ends of the knitwear a little and leave it untreated.
- At the end you can decorate the outfit with beads, satin roses or a bow.


How to make a ballet costume for Barbie
If your doll is into ballet, she just needs a special outfit. To sew it you will need inflatable ball, elastic and tulle.
Sewing process:
- Take an inflatable ball, cut off the bottom and top, slightly rounding the edges.
- Put the resulting blank on the doll. This will be our swimsuit.


- Now wrap the doll's legs with food oilcloth. Apply hot glue to your feet, when it has cooled, carefully remove it from your feet - these will be ballet shoes.
- Use scissors to cut off the curved edges of the shoes. Shoes can be painted with nail polish.

- Cut the tulle into strips 1.5x10 cm and tie it around the elastic band. This will be a skirt.
- The ballet outfit is ready.

How to make a swimsuit for Barbie
Beach season is just around the corner, so it's time to sew a swimsuit for your doll. Satin, durable knitwear or stretch are suitable for this.
Manufacturing process:
- Print out the swimsuit pattern or transfer it to paper. There are open and closed swimsuit types to choose from.


- Cut out the parts, remembering to leave 5-6 mm for seam allowance.
- Using a thin needle and small stitches, sew the panties along the fold line, finishing all seams.
- Now connect the bodice front, side pieces and straps.
- If you sew one-piece swimsuit, sew all four parts and finish the neckline.


Most patterns for doll clothes are very simple and children will be happy to help you. Therefore, a simple sewing process can become exciting activity for the whole family.


