Pattern of a backpack with one strap. Bright backpack from old jeans
A backpack is a great way to carry things. It combines a lot of advantages, which include: spaciousness, reliability, as well as high functionality.
The very concept of "backpack" came to us from the army. Military, in order to be able to quickly transfer things that could be arranged the best way, it was necessary to develop new bag. The backpack became her embodiment. The combination of many compartments that contribute to the competent distribution of things in the space of the backpack allows it to carry the proud title of "the most convenient bag".
Backpack benefits.
The main advantages include the possibility of high-quality weight transfer to the back. Such a solution makes it relatively easy to carry fairly heavy loads without damaging the muscles and without causing discomfort. The backpack is fastened with wide straps that correctly distribute the necessary load. In order for the use of this item to be as convenient as possible, the straps are subject to correction, depending on the required length, they can be adjusted.
Today I want to tell you about how to sew a beautiful backpack from fabric that was lying around at home. The reason for the huge accumulated number of tissues is that I carefully collected them for a friend, however, she did not need them. In order for the fabric not to lie idle, it was decided to use it for its intended purpose.
Backpack patterns.
The required parts are
- rectangular cut out of fabric, format 73cm by 37
- oval bottom, format 23x17
- two straps, the length and width of which can be modified. I decided to make the length 100 cm and the width 11 cm.
- closure


In order to complete all the patterns, you should determine the old jeans, which you will not be sorry to put under the knife, a few centimeters of fabric (a combination of various patches is possible), buttons, lining, threads, as well as future fastenings - I have them as rings.
Interesting moment!!! Scraps of fabric can be attached to interlining - I just overlapped them one on top of the other and I got a very good picture.


Nessesary to use this technology in order for us to succeed required amount details, namely three details.

One of the future details will be needed in order to serve as a "closer". Another part will be divided into two parts in order to use it to decorate the straps of the future backpack. A similar technique is necessary to create maximum symmetry. Of course, as part of the creation of straps, you can use various color solutions, however, I decided that my backpack should look classic - that is, I tried to avoid all sorts of asymmetries.
In the meantime, it is necessary to take the old jeans set aside in advance, and ruthlessly draw on them the future boundaries of our backpack. You need to do 2 parts. If you do not have relevant experience, try to avoid cutting "by eye". In order for all the details to be right size, it is necessary to use a ruler, or a centimeter, as well as chalk, which will help to make the correct markup, based on which we will later cut out the base of the backpack. To begin with, you can cut out one part, and then circle it, thereby creating the silhouette of the second.


In order to make my backpack unusual, I decided to experiment. I had jeans pockets on the side parts - this did not suit me very much, from an aesthetic point of view. In order to make my backpack more attractive, I took an ordinary tie and, using a machine, sewed it along the contour. Here milestone there will be a choice of the right drawing, since not matching the motives can drastically worsen the visual component of our work of art.
The next step is stitching. In order to qualitatively sew the bottom, it is necessary to turn the product inside out. The bottom must be sewn, stitching at a distance of about 2 cm - this is necessary to be able, at the end of the work, to trim the seam so that its excessive protrusions do not interfere with the operation of the backpack. Also pay attention to the thread tension. It is not allowed to create holds, since their presence may call into question the correct use of the backpack - the ties will significantly distort the geometry, thereby exposing the backpack to deformation and further destruction.

The next step will be sewing on the straps. It is necessary to sew them under the "opener" in such a way that their origins are not visible - that is, they need to be sewn with a turn inside. In order to make the seam less noticeable, you should tuck the straps and say a line only along the tucked part with inside. WITH bottom you need to perform the same manipulation. When sewing on the straps, it is necessary to constantly check the symmetry - as we remember, we made the straps from one piece of fabric, on which the fabric was previously attached. The uniformity of sewing will preserve the integrity of the pattern and everything appearance backpack as a whole.
Important!! In order to be able to adjust the length of the straps, you need to take care of purchasing special fasteners in advance. If you don’t have them, ordinary knots can act as a length corrector. Of course, their use will not add a nice looking backpack, however this technique will help to give some freedom of style.

Thus, we got such a backpack.

The final stage is sewing on the top lining, as well as installing the lining. Top part it is sewn as standard - through bending along the inner seam. As for the lining, it is necessary to take measurements according to the parameters that were used to create patterns for the backpack itself. An important point there will be a need to establish additional borders, in the amount of 2 cm. These borders will be necessary in order to soften the borders of sewing on the lining.
As for the fastening - it is sewn last. As a fastener can act completely different elements. You can use Velcro, hooks, however, in my experience, the best fastening is rings. As you can see, I used an ordinary button, which served as the basis for my attachment
That's how I got a beautiful bag of roomy size. If you have the opportunity and desire, you can, using these patterns, create backpacks that are larger than this one.
You do not need large material costs to sew a backpack from jeans with your own hands. How to make a beautiful and necessary denim backpack for schoolchildren, students, or kids? Of course, trade now offers different backpacks and knapsacks, but, firstly, I want to save money, and secondly, the quality of most of today's goods is low. A backpack made from old jeans will always come in handy, and will not be superfluous!
We want to offer you 2 workshops on sewing a backpack from old jeans, all with patterns and not difficult to sew. To begin with, let's look in the closet and choose jeans that you haven't worn for a long time, and throw them away - your hand didn't rise. It's very good that it didn't rise! Today we sew a backpack from old jeans.

Choose a style, buy accessories, and you can sew. If you don't have sewing machine It doesn't matter, but more work needs to be done. Just mark each seam on the wrong side with a ruler and a pencil or crayon - and hand stitches will be straight. We all try to follow fashion: now, in addition to a backpack, a knapsack backpack, a backpack-bag, with a drawstring or eyelets on top, are also popular, we will also sew such models.
Stylish backpack - master class

Our first master class was not chosen by chance: although the details of the backpack are not made of denim, the sewing process itself is very clear and simple. The backpack turns out to be 27/30 cm in size, that is, medium in size. How to sew a backpack from old jeans with your own hands? To begin with, we take our old trousers, cut them along the instep (inner) seams. Like this:

We iron, make patterns first on paper, and then transfer them to the places where they fit (we choose right places under the pattern), we are not in a hurry. We pin the paper with pins on the wrong side and circle the patterns. Help yourself with a ruler. Then we cut out all the details.

For work you will need:
- Old jeans.
- Lightning 55 cm.
- Ruler, pencil, scissors.
- Tailor's pins.
- 2 half rings, 2 frames for fixing the straps (can be replaced with carabiners).
- Threads in the color of jeans.
- Lining fabric (optional)

On paper, we draw a rectangle with a pencil and a ruler: the bottom side is 27 cm, the side is 30 cm. Cut it out. Bend the rectangle in the middle. Cut off the upper sharp corners.

We received the main part of the backpack. We should have 2 such details. Next, do the rest paper patterns, we pin patterns to jeans, and cut them out. Do not forget to add 0.7-0.8 cm seam allowances to all details! So, the pattern of a backpack from jeans looks like this:

Look at the pattern from bottom to top:
- Shoulder straps: 85/6.5 cm — 2 pcs.
- Lower loops: 13 / 6.5 cm - 2 pcs.
- The main details of the walls are rounded: 30/27 cm. - 2 pieces.
- Outer pocket: - 27/15 cm. - 1 pc.
- The bottom of the backpack: 27/10 cm. - 1 pc.
- Top loop: 27/7 cm - 1 pc.
- Side part (there will be a zipper on it): 77/10 cm. - 1 pc.
- Sintepon or interlining - to shape the straps and backpack (preferably).
If you will make a lining, from lining fabric:
- Basic children. walls: 31/28 cm. - 2 pieces.
- Bottom: 28/11 cm - 1 pc.
- Side: 78/11 cm.

We take the pocket detail, bend it by 0.5-0.7 cm and attach it. This is the entrance to the pocket.

We impose the detail of the pocket on the front in this way. We find the middle of the pocket and sew the bartack exactly in the middle. We pin the sides of the pocket with pins so that there is no skew of the fabric during work.

Then we take shoulder straps, a loop, lower loops, and process them: stitching on the wrong side, and then turning them on the face. You can flash again for beauty on the finished straps.

We take the part 77/10 cm. Fold it in half, mark the middle with a pencil on the wrong side. If you have a 55 cm zipper, then you need to retreat 11.5 cm from both ends and mark with a ruler and a pencil the place of the cut under the zipper. We draw a cut line and draw small triangles at both ends of the line.

We cut along the intended line, ending with triangular cuts. We bend the fabric inward by 0.7 cm and iron it. We take a zipper, put the side part on top, face up, and pin everything together with pins.

Sew at a distance of 0.3-0.5 from the hem of the fabric. The zipper was designed, then you need to sew the bottom 27/10 cm. We apply the front to the front and sew by 0.7-0.8 cm. Next, we will sew the straps, belt loops, and then the main details to the side.

On the back main part, we pin with pins, first the upper loop, and then the loops threaded into 2 half rings.

We find the middle at the back, attach the ends of the straps to it, and pin it off. Sew at the top and bottom, stepping back from the edge of 0.5 cm.


Attach the main part with the pocket on top, pin it with pins and sew. If you sew without lining, then the seams need to be overcast. The backpack is ready with your own hands.


On the video: step by step master class of this stylish backpack step by step:
The next backpack is a bag-shaped backpack for girls. In this work, your imagination will come in handy: there are so many finishes that your eyes just run wide. Everything can come in handy here: any pockets, fur, lace, and denim braids.


You can use several pairs of jeans, but they must be the same thickness. The top of such a bag is best done using eyelets (metal rings), but you can also make a simple drawstring. The backpack-knapsack on top will be tightened with a cord. cords, rep tape, eyelets, half rings can be found in any needlework store. We will do our master class, adhering to the instructions for sewing such a sack:

The jeans backpack pattern will look like this (do not forget to add 1 cm - seam allowances).

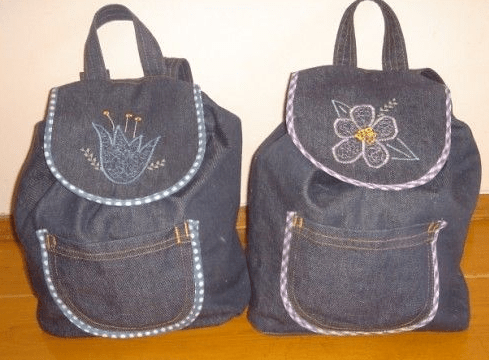
Pattern for a small bag. The large lilac detail is the lining, the small lilac one is the bottom, the colored rectangle is the wall of the sack, which can be decorated and sewn from pockets and stripes. The bottom is better to make double. If you want to make a larger backpack, you can use this pattern:

Provided that x = 10 cm: 3 x = 30 cm, ½ x = 5 cm, 2 x = 20 cm, trim strip - top bar for eyelets or drawstring = 60 cm.

So, instead of colored side pieces, we have 2 pieces of jeans, cut and decorated to your liking. Instead of a lilac bottom detail - too denim. These 3 parts are sewn on the wrong side and ironed. For beauty, you can lay another finishing line by 0.2-0.3 cm (where forefinger on the picture).


We unfold the work and turn it over, bending the lining in half. The corners are at the bottom. Then we need to flash the sides, as shown in the photo, leaving an unsewn space on the right. Do not forget to insert belt loops with half rings in the right places as you work. It should be on 2 sides near the bottom.


Turn the work inside out, sew up the remaining unsewn place. Insert the lining inside the product. If you make a drawstring, then it's easier to flash like this:

On the video: this master class on sewing a backpack step by step.
In the previous master class, we learned how to sew a cool sack bag. See how else you can decorate the walls of the product:


Backpack - irreplaceable thing both for students and schoolchildren, and for all adherents of an active lifestyle. Our model is made of leatherette in black and silver-gray. The main compartment and a large patch pocket on the front fasten with a zip. Adjustable handles allow you to adjust the backpack so that the load on your back is distributed as comfortably as possible. We will offer you a pattern that you can change as you wish, and tell you in detail how to sew a backpack with your own hands.
Backpack: choose materials
How to sew a backpack with your own hands? For a backpack, you need to use durable fabrics, but you should also pay attention to their weight (especially for children's backpack). You can use artificial or genuine leather, backpacks made of dense raincoat fabrics or neoprene will be lighter. An additional plus of these materials is that they allow open cut edges, and their wrong side may well be open, without lining.For summer urban backpacks, you can use tight jeans or linen, but models made from such fabrics should be completely duplicated with a lining. In our model, we used lining for only two parts. On the back of the backpack, the lining covers the added seal, closes the transverse seams on the sides and bottom, and also closes the front detail.

In order for the backpack to keep its shape well, we added a seal. You can use any suitable material, such as thin laminate underlay, which you can buy at hardware stores. We added the same padding to the wide part of the handles so that they put less pressure on the shoulders.
To calculate the required amount of fabric, draw a pattern and cut out all the necessary details. Lay out the pattern and measure how much space it takes, taking into account whether you will sew from one or two types of fabric. You will also need two zippers, 50 and 60 cm long, and two frames for the handles. You can use both high-quality plastic fittings and more durable metal.
For handles, buy an additional 1 m of belt tape (slings) of the same width as the fixing frames.
We will offer you a drawing of a backpack pattern measuring 25x35x12 cm. Textbooks and notebooks will fit in such a backpack standard size(maximum A4). Focusing on our drawing, you can change the pattern and sew a backpack with your own hands in a larger or smaller size.
So, let's find out how to sew a backpack with your own hands!
Building a pattern

To build the main part of the front and back, draw a rectangle where AB and CD are 29 cm, and AC and BD are 36 cm. and split it in half. Set aside 12 cm from the center to the right and left and draw the side lines through the resulting points until they intersect with the AB line and to the rounded bottom corners. Cut out the detail.
Draw the detail of the front pocket by copying sideline from the front detail. Also copy the top rounded corner. The length of the part is 30 m, the width at the top is 20 cm, at the bottom - 25 cm. Raise the bottom line in the center by 1 cm and round it.
The bottom of the front pocket is a rectangle 25x6 cm, one of the long sides of which is curved in the shape of the bottom of the front pocket.
Front pocket zipper bar - 75x4 cm, can be made in two parts. Another detail for the front pocket zipper is a 18x3 cm rectangle.
The detail of the bottom and sides is a rectangle 50x13 cm. If necessary, it can be sewn from several parts.
Two parts of the strap for the zipper on the main compartment, 62 cm long and 6 cm wide. Round one of them, as shown in the diagram, stepping back 3 cm in the center.
Also, the fastener of the main compartment includes two small rectangles 13x4 cm, which are sewn onto the edges of the zipper.
A small handle at the top of the backpack is a rectangle 20x5 cm. Handles-straps are a rectangle 35x6 cm, round off one edge.
The inner pocket is a rectangle 19x20 cm. If you change the size of the backpack, namely the front pocket, pay attention to the inner pocket as well. They are interconnected: the seam with which the inner pocket is sewn is hidden by the front pocket.
The corner that will hold the sling of the handles is a 10x10 cm rectangle.
External pocket zipper bar - 75x4 cm, can be made in two parts.
Another detail for the zipper of the outer pocket is a rectangle 18x3 cm.
To process the allowances, you will need a ribbon 2 cm wide and 110 cm long. This can be a cut main material from one or several parts or a slanting inlay: both from the lining material and ready-made in a matching color.
cutting
The constructed pattern takes into account all seam allowances. Check if your material is stretching in any direction. If there is stretch, cut the details of the front, back and handles perpendicular to the stretch line.
From main fabric
- Before - 2 parts
- Front pocket - 1 piece
- Pocket bottom - 1 piece
- Bottom and sides - 1 piece
- Plank for the main zipper is flat - 1 piece
- Curved main zipper bar - 1 piece
- Cross bar for the main zipper (13x4 cm) - 2 parts
- Front pocket zipper tab - 1 piece
- Cross bar for front pocket zipper (18x3 cm) - 2 parts
- Webbing handle - 4 parts
- Center handle - 2 parts
- Angle for sling - 2 parts
- Inner pocket - 1 piece
From lining fabric
- Before - 2 parts
- Bottom and sides - 1 piece plus 6 cm to the length (total 56 cm)
From the seal
- Before - 1 detail, reduce along the entire contour by 5 mm.
- Bottom with sides - 1 piece 48x11 cm
- Webbing handle - 2 pieces 4 cm wide
- Center handle - 1 piece 2.5 cm wide

Prepare for work:
- Fabric details and lining
- Lightning
- Belt sling
- Fasteners
- Threads, scissors
Progress
Sew the details of the small handle, folding them with their right sides inward. Turn right side out and insert the seal inside.


Fold in pairs the details of the two shoulder straps and stitch. Cut the allowances along the rounded edge.

Unscrew the strap handles, insert the seal and stitch. Cut 2 parts of 10 cm from the sling. Insert a latch into each segment, as shown in the photo, tuck the edges and stitch onto the handle-straps around the perimeter and “square”.


Stitch the strips on the front side. Sew additional details along the edges (13x4 cm), sew the main bottom to the second end, getting a ring, and stitch.

Sew 18x3 cm strips on both sides of the front pocket zipper. Turn the strips over, covering the edges of the zipper, and sew again.


Attach the zipper to the placket. Sew off. Stitch the bottom of the pocket.

Attach a seal to the bottom and sides. Baste the lining to the bottom, bending the transverse edges.


Baste the lining to the front of the backpack. Stitch the pocket with two stitches.

sew on front pocket, placing it in the center of the front part and aligning bottom edges the main part and the bottom of the pocket. The seam from the inside pocket should be inside the front pocket.

Fold the corners for the sling diagonally, and then again in half and put one end of the sling inside (the entire width of the corner). Sew several times, securing the sling. Bend the second edge of the sling twice, closing the cut, and sew.

Baste the handles to the top edge of the backrest, and the corners with slings to the sides of the backrest.

Baste the ring of sides and bottom to the back, folding them right sides inward. Sew.

Sew on the front piece with pockets as well. Fold the seam strips in half and wrap them around the inside seam allowances. Sew, place overlapping parts at the joining points.


Children's backpacks are an indispensable thing for a student. A backpack in the form of a cat can be sewn with your own hands from old jeans or another thick fabric. Backpacks are different: tourist, youth, city, school, children, etc. With a children's backpack, you can go for a walk, in sports section, go to nature. Kids love animal backpacks. In our case, in the form of a cat.
Cat with a fish

For work you will need:
- main fabric
- lining fabric
- lightning
- piece of lace
- buttons
- colored threads for the muzzle of a cat
Take a sheet of A4 paper. Approximate dimensions of our backpack will be: width 20 cm, length 29 cm. larger size. It all depends on the age of the child. We make a pattern of the backpack itself, paws and fish. Paws measuring 7 by 4 cm, fish measuring 14 by 7 cm.

We lay out the pattern on the fabric. Number of details:
- back - 1 piece from the main fabric and 1 piece from the lining fabric
- before - 1 piece from the main fabric and 1 piece from the lining (cut along the zipper line)
- paws - 4 parts
- upper straps - 2 parts 7 / 43 cm
- lower straps - 2 parts 7 / 25 cm
- pocket - 1 piece 17 / 13 cm
- fish - 1 detail

Sew the paws, make notches on them, turn them inside out, put a synthetic winterizer inside, stitch or embroider the fingers of the Cat.


Stitch the straps, turn them inside out, make decorative stitches on the sides. Make fasteners along the edges of the straps.

Hem one edge of each strap so that the fabric does not spill out.

Making a pocket. We bend the edges of the fish, sew it on the pocket with a zigzag stitch.

Finish the edges of the pocket with a zigzag or overlock stitch.

Process the top of the pocket. Sew lace or braid to the top. Draw on the pocket the front paws of the Cat, with which he holds the fish. Embroider paws with decorative stitching by hand.

Baste the pocket to the bottom of the front of the backpack. Draw paws with chalk. We embroider the paws with a decorative stitch, not forgetting about the fingers of the Cat.

Make a muzzle: embroider a mustache and eyes of a cat. Sweep the zipper with the top and bottom of the front.

Attach a zipper. Baste the straps and legs to the front and sew.

Connect front and back halves backpack. Fasten with pins.

We stitch and make notches in the places of rounding.

We sew the lining, as in the photo. Leave 1 cm for the pocket inside the backpack.

Turn the Cat inside out, insert the lining into it, bend the lining and pin it to the zipper from the inside.

Sew lining to zipper blind seam, manually.

Make 3 loops on the upper straps, sew 2 buttons on the lower straps. The backpack is ready.


We will need:
- old jeans
- oblique inlay - 2 meters
- cord - elastic - 1 meter
- rubber tips - 6 pieces
- limiter - 2 pieces
- Velcro tape - 7 cm
- eyelet - 4 pieces
- cat applique
- interlining for the bottom
We cut details
- two rectangles 27/24 cm
- bottom - oval 11 / 20 cm
- pocket - 13 / 12 cm
- valve - 20 / 10 cm
- straps - 2 pieces 54 / 4 cm
- handle - 20 / 3 cm
Do not forget 0.5 - 1 cm seam allowances.
Today, a backpack is a stylish and fashion accessory. In stores, all backpacks are the same, and sometimes you really want something new and unusual. If you don’t know how to sew a backpack with your own hands, then patterns and step-by-step instructions from our website will help you!
If in your life you are the first to come across such needlework as sewing, then you will do a great job when sewing an accessory. There is nothing complicated in this case, the most important thing is to follow the step-by-step instructions with photos and videos, which we will provide below.
Instructions for sewing a fashionable backpack
Let's decide on the main tools and materials:
- Various pieces of leather;
Main fabric 145 cm*160 cm;
The cord is 115 cm long, and the thickness is approximately no more than 1 cm;
Ribbon made of kiper fabric measuring 150 cm * 4 cm;
Belt adjusters;
Large carabiner for fastening - one piece;
Blocks with an inner diameter of 0.7 cm - 8 pieces;
Buckles with a peg in length should not exceed more than 3 cm;
Half rings with a diameter of 4 cm - 2 pieces.
First of all, we start by studying the pattern. You can find it on the Internet, or draw it yourself.
Backpack patterns: photo
(photos enlarge by clicking)


The pattern should have a pocket, the main part of the product and, of course, a valve.

DIY backpack
We decide on the sizes ourselves, how you want to see your backpack, and we make it that way. Similarly, you can sew a briefcase, as well as a backpack, using patterns and step by step instructions, and with their own hands.
Also, do not forget that there should still be a little indentation for processing seams. For this case, it is enough to leave about one centimeter.
To build pockets, you need to leave 2 cm each, and for the main part up to six centimeters.
Now finished pattern apply to the fabric, and begin to trace with crayon for the fabric. Then we cut out all the necessary details.
https://youtu.be/8mYVAxLFiZs
You should get the following parts from the main fabric:
- Valves for pockets - 2 pieces;
The backpack itself (base).
We make the following parts from leather, which will mainly be used only for edging the product itself:
- The strip for the backpack valve is one and a half centimeters wide, 60 long.
2. For the pocket flap, you will also need a strip, one and a half centimeters wide, and 40 cm long.
3. Loops 6x8x3 cm - 2 pcs (the size is indicated in the finished state).
4. Loops for half rings 8x10x4 cm (the size is indicated in the finished state).
5. Patas in duplicate.
Additional space for processing seams from leather goods not required. We cut out the details, in the size that has already been written.

If there is no skin, then this case you can use almost any material, but preferably very dense.
After all the details have been prepared, we proceed to sewing itself. First of all, you need to make a base. To do this, take the cut out main part and fold it in half. We sew with a machine line. Then we move on to slicing. For this, we fold the upper additional places several times and sew.

Now you need to build a pocket according to the pattern, using step-by-step instructions with your own hands, in order to answer the question of how to sew a children's backpack:
- The specially left place must be unscrewed by outside, and tuck gently.
Arm yourself with a needle and thread and sew by hand.
On the side and lower cuts walk with a hot iron.
We put the finished product in our pocket.
We lay the bent lines on the ironed edges, and only then iron the folds on the sides and bottom.
We make seams in the corners of the product.
We iron.
Now we turn to the manufacture of special eyelets for a backpack (made by hand according to patterns and step-by-step instructions), thanks to which the straps on the backpack will be held. From the wrong side, we fold inward small loops from the beginning, having previously tucked an additional place along the cut.

We sew along the edges of the product, cut off the excess fabric.
In one of these loops, it is necessary to make a small hole into which the buckle will be inserted. And the remaining space should have been about 2 centimeters. Then we thread one end into the buckle. We wrap the second side so that the length remains about four centimeters.
We sew the finished loop to the pocket so that the buckle looks up.
Do the same with the second loop. When ready, sew on front side bags - backpacks.
The prepared pocket must be sewn with a machine line to the main product.
The next step when doing a backpack according to step-by-step instructions is the formation of valves.
Sew the prepared cut parts together and edging with a specially prepared fabric. When this part is ready, it is necessary to sew it to the main product and iron it. We do the same with the pocket itself, now it becomes more or less clear how to sew a backpack with your own hands, using patterns and step-by-step instructions.


DIY backpack
Pats must be sewn onto the above-mentioned blanks sewn. The part itself should slightly overlap the valve by about two centimeters.
We do the same on the pocket. In this case, it is necessary to use a seam in the form of a square with a cross inside.
The final stage of the backpack with your own hands is to make straps. To do this, we fold the braid in the form English letter V. We do it carefully, not forgetting to thread the braid into a special regulator. Then, at one end of the straps, it is necessary to fasten the carabiner clasp, and the second through the prepared half-rings.

Then it is necessary to tighten the top of the backpack, for this it is necessary to make blocks at an equal distance, so that from top edge the place was about four centimeters. Thus, we do along the entire perimeter of the floor finished product. We pass a cord through them, making a large knot at each end.
That's all, we looked at how to sew a backpack for children with our own hands, according to the most simple patterns and using step by step instructions. However, such fashion backpack Suitable for young stylish girls!
Video tutorials on sewing a backpack with your own hands:


