How to make a square out of paper. How to make a square out of paper in the easiest way
You will need
- - paper;
- - cardboard;
- - ruler;
- - pencil;
- - scissors;
- - glue;
- - felt-tip pens;
- - colored paper;
- - paints.
Instructions
On a landscape sheet of paper, using a ruler and pencil, draw the development of the cube. It should have six faces, each of which is a square. In the development, arrange them in such a way that you have to glue as few edges as possible. Place the four side faces side by side, end to end, and the top face and base - on the sides of the development.
Strengthen the cube from the inside with a cardboard frame, making exactly the same development, but without a top and without a base. Draw the frame a few millimeters smaller than the main cube.
Draw special valves to the reamers; they will then be smeared with glue. Most often, when gluing, the valve is glued directly to the edge of the cube, but if the paper is very thin, then glue the valves together, and the edges will remain intact.
Carefully glue the frame, then glue the cube around it. Cover it with colored paper on top, you can make appliqués, paint it with paints, felt-tip pens or pencils - whatever you and your assistants have enough imagination for. If you are making a cube for board game, put the number of points on its sides. But do not forget that on opposite sides they should add up to the number 7.
If you still want to make not a cube, but a volumetric square (although there is no such figure in geometry, since a square is a planar, planimetric figure), use the origami method.
Take a square sheet with a side of 15 cm.
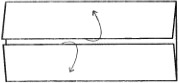
Fold the sheet in half to form a crease, then fold it back.
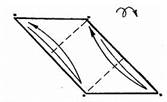
Now bend the edges of the same sheet towards the center of the bend. Turn the sheet over and fold each of the opposite corners toward the center to form a trapezoid.
Fold the corners of the trapezoid from the opposite side towards the center to form a square. This is how you get a “volumetric square”.
Many details for applique, origami, paper plastic are made on the basis of a square. Before you start doing the actual work, you need to make the actual square. In each case, the methods for making it will be different.
You will need
- - paper;
- - ruler;
- - compass;
- - pencil;
- - scissors.
Instructions
To prepare the origami sheet, you don't need any tools. Take a regular rectangular sheet of writing paper paper A4 format or any other. Place it vertically in front of you. Bend it, starting from one of the corners and aligning one of the short sides with the long one. You have a double triangle with an “extra” stripe. For greater accuracy, straighten the sheet, and then fold it again, starting from the other corner and aligning the same short side with the second long one.
Bend the strip to either side. It can be cut or carefully torn off. If you don’t have scissors at hand, bend the strip on one side and the other one at a time and smooth the fold line each time. It will separate itself. The strip can also be cut with scissors. Flatten the square.
For applique, a square background made of thick paper is often required. paper. There is no point in preparing it the previous way, since the fold line will remain. Take a sheet of velvet paper or thin cardboard and turn it front side down. Move the legs of the compass to the required distance. Set aside this segment from the same corner. Draw perpendiculars to the resulting points until they intersect. To make the figure more even, place the sheet on a flat surface, place a ruler or staff next to it and align the cut paper with the side of the ruler. Place the square on the sheet so that one of the legs fits tightly with the rail. Carefully move the square to the desired point and draw a perpendicular line.
Children learn the art of origami from school, and in most cases they become familiar with paper, glue and scissors when they are still young. kindergarten, where together with the teachers they make the first primitive crafts. By cutting out figures from paper, first flat, then three-dimensional, the child is preparing to study geometry, and it is very important to instill in him a love for Aristotelian science right away, so that interest does not disappear later, and everything works out. A volumetric square made of paper is a figure with which one usually begins to get acquainted with stereometry. Having learned simple techniques for making this polygon, you will be able to build amazing structures based on an ordinary cube.
Basics of geometry
Anyone without advanced mathematical knowledge can make origami out of paper. A square - at first glance, a very simple figure, and constructing it will not be difficult. However, you need to start the process prepared, having an idea of paper assembly and not getting too upset at the first failures. Before you start getting interested in how to make a square out of paper, you need to familiarize yourself with the basics of geometry. Do not forget that a cube is a rectangle in which all sides are equal and the angles are right. This condition is mandatory, but errors of a couple of millimeters are acceptable.
Assembly materials
The production of a square occurs in several stages. You will need paper sheet, glue or tape, ruler, pencil and scissors. If you are afraid to draw a diagram yourself, you can print the finished diagram on a printer. To make the cube bright, each side can be covered with colored paper, shiny tape, or painted with multi-colored paints or crayons. So that the sides of the square do not get dirty over time and retain their original appearance, it is recommended to cover it with a transparent film.
Paper square: manufacturing diagram

Children and adults will love making geometric figures - the process is so exciting that very soon you will have a whole collection of various cubes. Before you start, you need to stock up the right amount paper, which is enough for all sides, so that later you don’t have to add missing elements to the existing frame. The development is performed on whatman paper or cardboard. The material should be moderately dense so that the figure does not wrinkle during assembly, but a sheet of paper that is too thick will also not work. Special condition- the presence of additional edges on the sides of some sides, with the help of which the cube will be glued together. A volumetric square consists of eight identical sides. In order not to make a mistake with the choice of whatman paper, perform all the calculations before drawing the drawing on a sheet of paper.
Cube assembly
Once the development is ready, it must be cut with scissors. The connection can be made with any glue or To ensure that the edges of the square are even, each fold line must be bent several times before gluing. Now the pencil drawing can be erased so that the cube has an aesthetic appearance. Depending on the purpose for which the craft is being made, it can be decorated different ways: cover with shiny glossy film or colored paper, paint or stick bright stickers.

Offer a fun process, and soon you will have a collection of cubes in your home different colors and sizes. Once you know how to make a square out of paper, it will be easy for you to create miniature crafts that can be turned into, for example, dice. If it grows in the house Small child, you can cover several figures with colored tape to get a unique set of doll furniture.
A little imagination...

If you decide to make an unusual origami out of paper, the square can be turned into For this, it should be made from the material white. Optimal length each face - 1.5-2 cm. Before you start making a miniature cube, you need to practice and start learning the art of origami from a figure bigger size. As soon as the technique is fully studied, you will be able to create masterpieces based on simple Knowing how to make a square out of paper, you can easily move on to the next stage of learning - modeling original three-dimensional crafts.
Paper people
In Russia and the West, a tendency has long been noticed to produce children's kits for creating people and animals, which are based on a three-dimensional square of paper. The diagram is no different from the development of a simple cube, only for some parts the proportions are changed. So, putting the squares together different sizes, can be designed interesting crafts. Once your child understands this simple technique, you will be able to create masterpieces with your own hands and not spend money on expensive handicraft kits. It is better if the drawing is applied to the paper immediately, and not after assembling the entire figure.

To preserve the aesthetics of the product, the edges must be glued together with hard glue, not tape. is clearly visible on paper, and the craft will not look in the best possible way. Having figured out how to make a square out of paper, you can easily make unique crafts and collect a whole collection, because origami is a fascinating art that is accessible to people of all ages.
Voskobovich's method has been widely known to people associated with pedagogy since the collapse of the Soviet Union. One of his popular toys is Voskobovich’s “Square”, or, as it is also called, the game square. We will tell you what kind of toy this is, how to play the Voskobovich square and how you can make it with your own hands in this article.

Voskobovich square - what kind of toy is it?
This game will be interesting not only for children different ages, but also adults playing with them. It is made in the shape of a square, which consists of 16 isosceles triangles. Between the triangles that make up the square there is a space 0.5 - 1 cm wide. The standard dimensions of triangles are 4.5 * 4.5 * 6 cm. A well-bending material is chosen as the base of the toy, most often fabric. The standard size of the square base is from 14 to 15 cm.
The planes of each triangle are painted in contrasting colors. For example, on one side, all the triangles that make up the square are red, but if we expand the square, we will see that they are green.

The number of colors presented in a square depends on the age of the child who will play with it. You can find two-color and four-color squares. The two-color one is intended for children aged 2 to 5 years; a child aged 3 to 8 years and older can handle the folding patterns of a four-color square. Red and red are often used for a four-color square. Blue colour triangles on one side, yellow and green color on the other side.
Along with the game, the kit includes instructions that offer a fairy-tale plot for the games and addition diagrams of different levels of complexity.

Benefits for a child from playing with Square
The play square will greatly help in the development of your child.
While playing with it, the child will:
- learn to name and distinguish different shapes geometric shapes;
- navigate the sizes – large, medium, small;
- form first ideas about spatial relationships and spatial modeling;
- be able to use the proposed diagrams or come up with your own for constructing planar and three-dimensional figures;
- remember colors;
- develop mindfulness, thought processes, logic, memory;
- develop imagination, creative data, creativity;
- fine motor skills.

How to play
It must be remembered that an adult is a full partner in playing with a child. You can easily take this toy on your trip; it will keep your child occupied for a long time and takes up minimal space in your luggage.
For games with magic square Voskobovich, you can use the book “Square Fun”, which is included in the package and offers a fairy tale story with 18 color addition diagrams. The fairy tale “The Mystery of the Raven Meter” with its main characters mom Trapezium, dad Rectangle, baby Square, grandfather Quadrangle and other characters will captivate your child into the world of adventure. He will happily agree to help overcome the difficulties that stand in the way of the heroes.
You can turn on your imagination and dream up with your child. Come up with your own fairy tale and your own schemes. You can create your own book in which your fairy tales will be written down and pictures drawn up together with your child, from which he can recreate the figures again. This game will be even more interesting for him.
Play the game "Guess what happened." To do this, fold some shape and ask your child to guess what happened. If the child already knows how to fold figures independently, then switch roles. Now he will put together a figure for you, and you guess.
Try to put together letters, numbers or symbols familiar to your baby. Let him try to do it on his own. This way, you will not only spend quality time together, but also reinforce the material previously studied with your baby.

You can create an unusual finger theater, playing only in separate parts square. Let the child lift up the upper left corner with his finger, left bottom corner, upper right, lower, and now, lifting with your finger, the center of the square from below, you will get a pyramid. This game will be fun to play with musical accompaniment.
The square can be cut in certain places. For example, by cutting a square with a cross, you will discover new possibilities for folding unusual three-dimensional shapes.
Fantasize with your baby and you will be able to discover new games with this wonderful square.

Master class on making a Voskobovich square with your own hands
There are several options for how to make a square yourself. More details about each.
Option 1

How to do:
- Choose contrasting colors for the triangles. If you are making a two-color square, then red and green sheets of cardboard will be enough. If you decide to make a four-color square, you will need red, green, blue and yellow sheets.
- Draw on cardboard required amount triangles. For two-color you need 16 pieces of each color, for four-color - 8 pieces. You can use standard triangle sizes (6*4.5*4.5 cm), or you can make your own.
- Cut out the triangles.
- Based on the size of the triangles, decide on the size of the base. For standard sizes the base will be 15*15 cm. If you use a different size of triangles, then take into account the distance between them of 0.5-1 cm.
- Glue the triangles in pairs contrasting colors: blue-yellow, red-green. There should be 16 triangles in total.
- Next, if you use tape, glue the triangles together on both sides, according to the number of colors chosen for the square.
- If you use film, first measure the dimensions of the base of the square. On the base, arrange the squares in the required sequence. Fold the film along the top border and carefully glue the squares on the other side. You will have a solid base for your square. If you use tape, there will be many connection points.


The guide is ready. You can start folding.


Option 2
You will need:
- plain, easily folded fabric for the base;
- colored self-adhesive paper;
- scissors;
- ruler:
- pencil.

How to do:
- Prepare the base of the required size. Please note that the edges of the fabric should not fray. Treat them if necessary.
- Cut isosceles triangles from self-adhesive paper.
- Place the triangles on the base to avoid mistakes when gluing.
- Now gradually separate the protective paper layer from each triangle and glue it to the base.
Dimensions of triangles and bases, color combination described in detail in option 1.

Option 3

How to do:
- Prepare the base. If necessary, trim the edges of the fabric.
- Cut out the required number of triangles from colored fabric.
- You need to cut out 32 triangles, slightly smaller in size, from cardboard.
- Assembling a square. We glue cardboard triangles onto the base using a glue gun, and glue fabric triangles on top of them.
- To add strength, sew the edges of the triangles using a sewing machine.
All the necessary sizes and color selection can be seen in the first version of the Voskobovich square.


In addition to games with such a square, Voskobovich offers another game “Transparent Square”.
Transparent square
With the help of this game the child will develop:
- thought processes;
- logics;
- design skills;
- fine motor skills.
In addition, the baby will learn to name and distinguish geometric shapes and learn about their peculiarities.

The set includes 30 transparent square-shaped plates. One of them is entirely blue, the other plates are colored blue only by individual particles of the square.
The set offers detailed guide game actions. It contains a fairy tale about the unusual non-melting ice floes of Lake Ice. According to the plot of the tale, the raven Mater competed with the guardian of Lake Ice for three days. All these days he performed various tasks. In the manual they are divided into 3 groups.

- Day one offers tasks that require the analysis of geometric shapes and part-whole relationships.
- Day 2 is devoted to collecting squares and other various shapes from particles.
- The third day involves playing vertical dominoes.
All these days the child assists him in completing tasks, receiving a reward in the form of non-melting pieces of ice. From these he will be able to put together the figures offered in the album or create his own.
On the final third day, you can help the raven with your whole family by playing “vertical dominoes” with your child. The rules of the game are very simple. The players, in turn, draw out plates with parts and together begin to build a square from them. When the plate that you pulled out is not suitable for building a square, then you need to put it aside and start building another square from it.
The player who has completed the construction of the square takes it for himself, and he is awarded the number of points corresponding to the particles of the square. The winner is the player who has the most points at the end of the game.

The fairytale story “The melting ice floes of Ice Lake, or the tale of a transparent square” will tell the little one about what happened to the Master and the ice floes in the continuation of the story. This fairy tale is a continuation of a series of fairy tales about little Geo, Uncle Slava and the crow. If you are not familiar with them, you can read them summary, which is at the beginning of the book. After Geo takes the magic pieces of ice from the Master, he begins to search for a way out of the Violet Forest. Invisible Vse, who accompanies him on the road - a prankster and a mischief - is trying in every way to prevent him from doing this. However, your baby's participation and magical ice cubes will not allow him to do this. Your child will help Geo by collecting various figures from non-melting pieces of ice while reading the fairy tale.
The compactness of this game makes it very convenient. When you go on the road, you will know how to keep your child occupied for a long time.
The game is suitable for children from 3 to 9 years old. Included is various schemes addition of figures.

A hexahedron or cube is a polyhedron whose sides are all squares. Do you like riddles and puzzles? This article will teach you how to make a cube out of paper or cardboard. Let's consider these unusual products, like the Yoshimoto cube and the transforming cube.
From the scan
Developments are called schemes that allow you to make three-dimensional figure made of paper or cardboard. First, let's learn how to build a sweep. To make it you need paper, pencil, ruler and scissors.
All sides of the cube are squares. So, first you need to draw a square on a piece of paper. At the same time, do not forget about the rules of geometry - a square has all sides equal, and the angles are 90°. Next, let’s remember how many faces the cube has – six. That is, there should also be six of them in the gluing diagram. Draw four squares around the central square. Where should I put another one? Just draw it on the side of one of the squares. The edges are in place, there are not enough allowances for gluing. They need to be drawn on three side squares. They are 0.5-1 cm.
Do not forget to cut their corners at an angle of 45°, so they will not interfere when gluing the figure.
The scan is ready! This is what you should get:

Now you need to arm yourself with scissors and glue and assemble the figure. Cut out the development using scissors. Next, you need to bend all the edges of the cube, as well as the allowances. Lubricate the edges with glue and connect the cube together. Volumetric paper cube is ready!

Origami cube
The origami technique is very ancient. Its appearance is associated with the production of paper in Ancient China. The Japanese adopted its secret, and it was there that the art of origami originated. Previously, figures made of paper had a sacred meaning. They decorated temples, wedding and funeral ceremonies. The Japanese believed that hanging balls folded using the origami technique above the patient's head would help ward off illness and evil spirits. Later this art began to be not only religious, but also entertaining.
Most of the patterns for origami originate from ancient times, but modern masters have also made a significant contribution to the development of this unusual looking creativity. We invite you to try folding a cube using the origami technique. To do this, you need to take a square sheet of paper and make a fold in the center, and then bend the edges towards the middle. This initial figure is called a door.

Fold the edges toward the center and tuck the top and bottom corners into the pockets:


Turn the workpiece over and bend along the lines indicated in the diagram:
The result is a module. To collect a cube of such modules you need six. Each part has pockets; it is into them that neighboring modules are inserted. Connect the parts according to the diagram:


The origami cube is ready. For beauty, you can make each side from paper of different colors.

Unusual puzzle
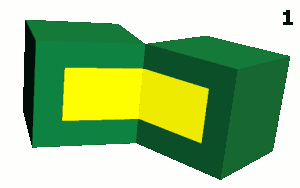
Do you want to please your beloved children with an unusual puzzle or make an unforgettable photo album? Then a short master class on creating a transforming cube will be useful to you. On each side of such a cube you can place a picture or photograph, and inside there are as many as six more pictures.
To make such a cube you will need:
- 12 pictures or photographs;
- Glue;
- 8 cubes with 4 cm sides;
- Scotch.
You can take the most ordinary children’s cubes or glue them yourself using this pattern:

First, look at the places where the cubes are attached:

It is important to understand! The whole secret of transformations of such a puzzle is in the correct gluing of pairs of cubes.
To make it more clear, let's look at this process step by step. First, glue two pairs of cubes together as shown by the yellow stripes in the diagram:
Place these four cubes side by side and glue them together in the places indicated in blue:

Place the cubes as shown in the diagram. In this case, the yellow glue will be on the side opposite the red one. Glue along the red lines:

The photo must be placed on the four cubes. The size of the photographs is 8 by 8 cm.
It is important to glue the photo carefully, especially if you do it with glue. Otherwise, you can inadvertently glue together those edges that are responsible for the correct transformation of the puzzle. So it's better to use hot glue or double-sided tape.
An unusual photo album from a transforming cube is ready! You can see in the photo how you can lay it out and view pictures.
At first it seems that these beautiful flowers glued together from several parts. But such a flower can be made from square sheet single-sided colored paper in just half an hour. In the center of the flower you can see the back (white) side of the paper. Most difficult moment assembly is the final phase. But thanks step by step photos this can also be easily dealt with. The main thing is to carefully look at the photographs.
Sequence of work.
Fold the square in half diagonally (the white side will be inside) and unfold it.

Fold the sheet along the second diagonal.

Unfold the sheet again and fold it in half horizontally.

Unfold the piece of paper, turn it 90° and fold it in half again.

You will get a square with these folds.

Turn it over with the white side up. Bend the bottom of the square in half, aligning its edge with the horizontal fold.

Unfold it and rotate it clockwise 90°.

Fold again bottom part square in half to the midline.

Repeat the steps shown in photos 8-9 twice. You will get a square, in the center of which there is another square, but smaller. It is indicated by dotted lines.

Lift the two closest sides of the square by the edge and connect them together, making a large fold.

Fold the edges, without releasing the folds, into the center of the workpiece.

Iron this fold to the left.

Then fold the fold in the opposite direction and press the fold again.

Open the fold.

When unfolded, press it onto the workpiece. You will get a small square.

Do the same with the remaining three corners (photo 11-16). You will get a blank with four small squares.

Now you need to fold each of these squares in a special way to make petals. Fold the top leaf of the square from the center to the top, folding it in half.

Unfold it and bend it so that its corner coincides with the center of the square.

Unfold again. Now bend the sheet so that the fold is between the folds already formed (shown by the dotted line).

As you can see, both folds matched.

Bend the right side of the square to the left. Fold it in half along the dotted line, starting from the center.


Return to the starting position, that is, to the right. You have made one side of the petal.

To make the other side of the petal, left side Flip the square to the right (the white part of the sheet will be inside).

Fold this moving part in half too.

Return to original position. You will get one petal. Make three more petals from the remaining squares.

You will get a figure like this.

Now you need to bend the edge of the square towards the middle dotted lines.

Fold the top petals in half so they are out of the way, and bend the edge of the square on the left to a diagonal line. But iron the fold only until it intersects with the other fold (shown by the arrow).

Unfold the workpiece and fold it the same way right side.

You will get a fold like this.

Fold the other sides in the same way. This is the still shapeless appearance your craft will have.

Turn it over to the other side.

Grab the corner (where the pointer is) and pinch it between your fingers so that the nearest petals - they are clearly visible from below - are connected to each other (shown by the arrow).

Make a fold in the place where you kept the craft. It will secure the flower in the desired position.


