How to make a princess crown. Top simplest and most beautiful crowns or How to make a crown with your own hands
It is very important to use accessories in children's games. They give the game a realistic touch, and are appreciated even more if they are made by hand. A paper crown can be used not only for entertainment, but also for theatrical performances held in kindergartens and schools. Hurry to please your child, and we will tell you how to make a paper crown at home.
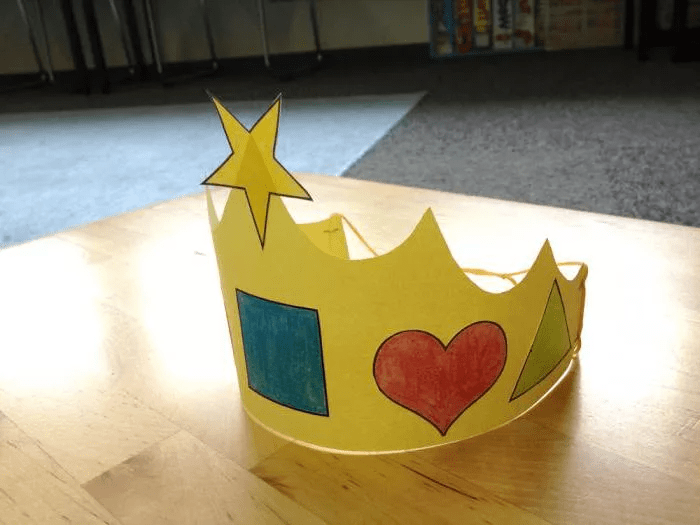
Paper crown
To get started, prepare:

Now you can get down to business. We perform the following actions:

Paper crown: option 2
Let's make the crown in a different way. For work take:
- cardboard with low density;
- elastic band;
- hot glue gun;
- elements for decoration (can be replaced with felt-tip pens, paints or pencils).
Let's do the following:

Color the crown with whatever you want: paints, felt-tip pens, pencils.

Volumetric crown with golden shimmer
This crown will be a little more difficult to make than the previous ones.
Prepare for work:
- paper;
- glue;
- scissors.
We do the work:

Smooth the finished crown with your hand and you can put it on!

Crown for a girl

Prepare the following materials:
- high-density colored paper (30 cm wide and 30 cm long);
- cardboard;
- scissors;
- compass;
- glue.
We make a crown for a girl as follows:

Snow Queen/Princess Crown (with snowflake)
To do beautiful crown, prepare a sheet of paper, scissors, glue.
We perform the following actions:
- Draw the outlines of the crown (you can use templates).
- We cut strips of colored paper, 25 cm long and 7 cm wide.
- For the base of the craft, we make circles in the amount of 20 pieces, diamonds in the amount of 2 pieces. We connect the circles with glue to get the 1st row.
- Glue diamonds in the gaps between the circles. This will be the 2nd row. We repeat the procedure, alternating circles and diamonds.
- To make a snowflake, glue together multi-colored rhombuses and circles and fix them in the center of the crown.
Advice! To make the crown look more magnificent, make each subsequent row a little larger than the previous one.
A crown made using the quilling technique looks very beautiful.

Monarch headdress for boy
Any boy will be happy with the chic crown of a real king.
You will need:
- a sheet of high density paper;
- scissors;
- glue;
- rhinestones and beads for decoration.
How to do?
- Make a strip for the base of the crown and glue its ends together.
- Take paper of a different color and cut out 2 more strips, which should be wider than the previous one. Glue them to the base with the letter X. Measure it on your head and see if anything is in the way.
- Cut out 6 stripes to decorate the crown. Trim one end of the strips to create a semi-circular oblong border line. Glue the opposite side of the strip to the base of the craft from the inside. It turned out something like the sun with rays.
- Study the photo of the crown and give the stripes the appropriate shape. Attach the decoration to the top. Decorate the craft with the prepared decorative elements.

Cutting templates


Video instructions
The training videos selected for you will help you understand the subject and working methods in detail and choose the appropriate option.
Origami crown:
Royal Crown:
Foamiran crown:
Crown of the forest fairy:
Page content
A crown is a wonderful decoration for holidays, photography, and theatrical performances, showing all the originality of the owner. From antiquity vicious circle meant power, immortality and eternity, and the chosen stones carried secret meaning. Gold royal jewelry is associated with bright sunshine. Their different types can be made for an affordable budget from scrap materials: cardboard, beads, paper, shells, ribbons, feathers, etc.
Today we'll look at how to make a crown with your own hands for kings and queens and their little princesses.
A paper crown is a budget and lightweight option. There are many ways to bring it to life.
First. To make it, you will need non-adhesive colored square stickers, sold at any stationery store, as well as glue for fixation.
Instructions:
1 step. Fold the square of paper in half diagonally, fixing the upper corners with glue. Let's do required amount blanks, depending on the size of the head.
Step 2. We insert one piece into the other approximately until the middle and fix it with glue until we reach the end.
For the second method you will need a stencil, scissors and materials for decoration. It's simple: cut out the stencil, glue the ends if necessary and decorate the top. If you cannot connect with glue, you can use a stapler to fix the thread at the edges.


The third method allows you to create a real masterpiece. To make it, we will use the technique of twisting strips of paper - quilling.
Tools:
- scissors;
- quilling paper - strips;
- pencil;
- ruler;
- glue.
Instructions:
- We measure the circumference of the head and cut out a strip of cardboard. For now, let's put it aside and take the strips for quilling. If you don’t have ready-made ones, you can simply make them at home: draw colored sheets into strips of equal width and cut them. If desired color It didn’t turn out, but I want it, so we take a white one, and with the help of paints, markers or a color printer we give it different shades.
- We make the main element: tightly wind the strip onto an awl or needle. Then you can give the resulting spiral any shape by pressing at the same time different corners: triangle, square, eye, arrow, etc. Fix the end of the tape with glue.
- We make a lot of such elements. Volumetric parts are pulled out and coated well with glue from the inside. It will take some time to dry.
- Let's form a pattern by connecting and fixing the pieces together. It can be like a chaotic drawing, there is also an ornament thought out in advance: a flower, lines, stars.
- Once the top is ready, cut out a strip of cardboard for the base and glue the resulting base to it.
- On free places place the remaining blanks.
- Give the product time to dry.
The royal symbol using the quilling technique will look like jewelry work. It is important to fix all the parts inside and among themselves so that the structure does not collapse. If connected correctly, the decoration will last for a long time.


To create a decoration using the following technique, we will use cardboard - its quantity determines the volume of the product, foil, scissors and glue.
You need to be prepared that the craft may not work out the first time. To solve the problem, we take additional sheets as a reserve.
Instructions:
- We create the base: measure the circumference of the head, add a couple of centimeters for error and cut out a strip of cardboard.
- Let's come up with the top. You use your imagination: you can cut out a unique outline yourself or use ready-made templates.
- We glue the cardboard and apply foil, fix it with glue. After drying, remove excess areas with scissors.
- Once the top has dried, you can glue it to the base.
- For additional decoration, firmly glued pebbles, beads, buttons, bead patterns, sparkles, and drawings with felt-tip pens or threads are suitable. For the atmosphere of the New Year's holiday, pieces of garland, rain, and layers of cotton wool are suitable.


Is not the only way, the photographs below show other embodiments of the crown and examples for inspiration.


To create an autumn crown with your own hands we will need:
- Maple leaves;
- glue;
- colored cardboard.
Instructions:
- As usual, we start by measuring the circumference of the head.
- Draw a template on cardboard with teeth or any other pattern you like. If your imagination doesn’t give you any ideas, we print a ready-made stencil from the Internet. When the length is not enough, we make two blanks and fix them with tape.
- The paper frame is ready. Now is the most creative stage: we glue the leaves, arranging them in any order and creating a unique pattern.
Here's what might happen.

In the previous paragraph there was a crown on autumn Ball with your own hands from tree leaves. However, when it is not possible to find beautiful leaves, they can also be made from white paper.
1. We measure the circumference of the head.
2. Draw leaves on white paper or find a ready-made template that we print.
3. Cut them out and color them bright colors: red, orange, yellow, green, having first mixed everything in the palette.

4. Carefully bend the leaves and attach them to the rim using a stapler.
This is how beautiful it turns out.


For crowns there is a large number of stencils that allow you to achieve wonderful product in a short period of time. Ready-made templates can be scaled, creating the desired size immediately. In some cases, they are used as blanks. By combining ideas from different options, you can come up with your own stencil.


Below are examples of works for inspiration, where you can get new ideas and techniques for creating royal jewelry.


Approaching New Year 2019 Yellow Earth Pig makes many of us already today think about upcoming children's matinees. And it doesn’t matter whether it’s a kindergarten or Primary School. All of us, without exception, want our children to look as bright and best as possible, regardless of their location. For this purpose, each caring mommy carefully selects and thinks through a fairy-tale image for her baby. Of course, princesses are especially popular. With the intense efforts of needlewomen, chic, fluffy and airy dresses are created, gentle makeup, gorgeous hairstyles with shiny curls. Everything is so full of beauty and grace, splendor and nobility. But the most important thing that you should not forget about at the Christmas tree is the crown. It will be simply necessary for your girl. After all, as a rule, everyone’s favorite princesses cannot do a single minute without their main attribute, which, in fact, gives them important status and universal respect in a particular society. Of course, many parents run to stores in search of this decoration, and some, who have excellent handicraft skills, try to create real masterpieces of art at home, which, with their uniqueness and unsurpassed quality, can easily outshine market goods of this type. If you have never had to make these products, then on the eve of the New Year holidays you should definitely try. After all, your little daughters so want this early age everyone admired and admired their beauty and perfection, and this decoration, made by you with your own hand for New Year's party, will give them self-confidence and some grace. If you don’t know how the original crown for a girl is made on New Year 2019 with your own hands at home, then you should read our article, which presents to your attention 57 photo ideas and simple master classes available for your understanding and creativity.
New Year's paper crown
In order to do paper crown for the New Year 2019 for your girl, you will need inexpensive materials and a little patience. If you try, with your own hands you can create quite interesting and spectacular beauty products that will highlight the individuality of your child.
- thick paper or cardboard;
- scissors;
- glue;
- a simple pencil;
- tape measure;
- roll of foil;
- decorations - sparkles, rhinestones, beads, shiny stones, beads, snowflakes and much more that you will like.
Work process:
- First you need to measure the circumference of the child's head using a regular measuring tape.
- Now we draw a rectangle on paper or cardboard, the length corresponding to the circumference of the child’s head, plus 2-3 cm for reserve. The width depends on the desired height of the future crown, approximately 10 cm.
- After this you need to draw the teeth. This will be made more convenient if you step back from top edge approximately 4-5 cm, draw another line. This will be the maximum height of the teeth, which can be depicted as the same or different.
- Cut out the resulting drawing. Using this sample, we create a similar foil decoration with our own hands, which must subsequently be glued to the paper base using glue. It remains to fasten the two sides. If desired, we transform the resulting product with rhinestones, beads, snowflakes, tinsel or sparkles.
This is how you can easily and simply create a crown for your girl at home for the New Year 2019. Such a seemingly elementary detail will play important role V magical image your princess.
Browse our photo ideas to greatly enrich your imagination and help you get creative.


If you want to please your daughter more elegant option, then use the kanzashi technique. Have you ever encountered it, then watch our training video, which will clearly tell you about all its secrets.
Master class on making a crown in kanzashi style
Crown made of wire and beads

To make a crown for a girl for the New Year 2019 with your own hands, original and without special effort, it is worth considering the option of making such jewelry from wire and beads. The result will certainly amaze you, because such a product really looks like what a princess wears in cartoons. For your little daughter it will become real pleasant surprise that will make her really proud of you. To create such charm, you don’t have to go to the store, since many mothers have their own stocks of beads, beads and various similar elements in special boxes. Select the “jewels” that best suit your baby’s image and use them to create interesting and dazzling masterpieces of beauty.
For production you will need:
- finished headband;
- wire;
- scissors;
- a set of beads that you have.
Manufacturing process:
- Before we start work, we should prepare our base - remove all unnecessary decorations, leaving only a clean surface of the rim.
- Now we proceed to the actual production of the original branches that will make up our New Year's crown. If you remember, the middle row of these weaves should look much longer and brighter than the sides. To do this, take a small piece of thin wire and string a large bead onto it, after which you should connect the two ends of the wire and weave them together so that decorative element held firmly and did not sag. We do the same with the following beads, only they need to be placed on two branches of wire, which we previously twisted into one. In this work, alternating small beads with large ones will make it more impressive. The play of colors will also add its own additions and accents. Like this in a simple way We managed to create a central row of branches, which should consist, as a rule, of 5 - 7 beads. We will screw them in the middle of our rim using the ends of the wire.
- Using similar actions, we create side branches that will be shorter than the middle ones.
- Next, let's start making a crown for your girl for the New Year 2019 with your own hands. To do this, we securely screw our blanks to the headband, placing them in such an order that large voids do not form between them, as this will spoil the aesthetic appearance of the head decoration.
This is how you can simply do this creative work at home. For those who are not particularly familiar with the technique of doing this, we recommend watching our video tutorial, which will explain to you all the secrets and subtleties in a step-by-step and accessible form.
Master class on making a crown from beads and wire
If you have read this video and all your questions have been resolved by themselves, then we recommend that you familiarize yourself with our photo ideas collected in wonderful selection. It will serve as an excellent example for you to create on your own.


As you have already noticed, the perfection of the crown is achieved not only with beads, but also with beads, decorative shiny stones, flowers and other additions. The end result depends entirely on personal imagination, and the richer it is, the more gorgeous the handmade product will look at your daughter’s New Year’s party.
Crown "Snow Queen"

If your girl does not want to be a princess at the Christmas tree party for the New Year 2019, but expresses her desire to become a queen, then fulfill the child’s request and create for her a costume of a fairy-tale Snow Queen with a beautiful and majestic crown, made with your own hands. There will be no limit to amazement, you will see! Good mood and a joyful, warm smile will decorate your child’s party. Without delay, get to work to meet the deadline.
For production you will need:
- silver snowflakes - 5 pcs.;
- wire;
- needle;
- “Travka” yarn with lurex or something like that;
- silver thread.
Work process:
- Before you start decorating the New Year 2019 crown, you should use a certain piece of wire to create a frame for the future product. Measure the volume of your girl's head and weave a kind of round mesh that will serve as a fastener for decorative New Year's elements.
- After the base of the head decoration has acquired the proper appearance, you should wrap it with Grass yarn, without missing a single component of your product.
- The final part will be the transformation of our handmade creation. For this purpose we will need silver snowflakes. We must secure them to the crown by sewing them with silver thread. If you want, you can get shimmering beads, rhinestones, sparkles and embellish your magnificent work with them. In general, the richer and more luxurious you create a children's crown, the more realistic and interesting your baby will look in the image of a cold and proud Snow Queen on New Year's holiday V kindergarten or elementary school.
We invite you to look through our photo ideas on this topic, which, in fact, will help you choose the most optimal one for independent work option.


Master class on creating New Year's crown from an old tiara, tulle and mesh with sequins
Royal lace crown

You are confused and can’t figure out what you can use to make a crown for a girl for the New Year 2019 with your own hands quickly and quite simply, then turn your attention to the royal lace version. It won’t be difficult for you to create such charm with your own hands at home. If you don't believe me, see for yourself.
For production you will need:
- beautiful openwork lace, length 40 - 45 cm;
- PVA glue;
- wax paper;
- spray in a can of silver, gold or some other color;
- hot glue;
- sponge to remove excess glue.
Work process:
- Spread out wax paper and place an even piece of lace on it. If the openwork is slightly wrinkled, it is advisable to iron it properly.
- Now we need PVA glue in order to thoroughly coat our braid in two or even three layers. We wait completely dry our workpiece.
- Let's start with the decorative part of the work. In this case, we will need acrylic paints or, better yet, a golden or silver spray. We process our product with it, capturing each pattern. After this, you need to give the lace time to dry.
- After the allotted hour has passed, we should connect the ends of the openwork, thereby recreating the festive crown for your girl for the New Year 2019 with our own hands.
If you are in your creative work are extremely careful, then create true perfection, which will outshine everyone at your daughter’s New Year’s party. We suggest you look through our photo ideas that will provide you with new opportunities in this area.


We offer another simple option on how to make the main royal attribute for festive look your child. Our interesting video tutorial will provide you with step by step instructions this technique.
Master class on creating a crown from cardboard, organza and glitter
DIY crown made from a plastic bottle

Making a crown for the New Year 2019 from a plastic bottle is a fairly cheap option among all of the above. After all, in almost every home there is a similar auxiliary material from which you can create incredibly beautiful decorations for your little girl’s head with your own hands.
For production you will need:
- two-liter plastic bottle;
- scissors;
- adhesive tape;
- Blank sheet;
- marker of any color;
- glitter glue;
- decorative elements at your discretion.
Work process:
- Using sharp scissors, carefully cut out about 1/3 of the plastic bottle to form a cylinder.
- On plain paper draw a template for the future crown.
- Using tape, attach the resulting stencil to inside plastic cylinder. We outline the drawing with a marker; there is no need to draw out the details.
- Now, using sharp scissors, cut along the contour of the design so that no traces of the marker remain on the plastic. Please note that the shape must be cut with a rim.
- We again attach the template to the workpiece and, using shiny glue, trace our resulting product along the contour and draw all the details.
- All that's left is to let the glue dry. To do this, you should remove our creation for two hours to a place that will not be accessible to your children.
That, in principle, is the whole complexity of this work. Don’t be lazy, and you will create a wonderful decoration for your girl for the New Year 2019 with your own hands in a matter of hours, for which she will certainly be grateful.
Don't forget to check out our photo ideas, which you will find useful and quite interesting.


If this option seems too primitive to you, then we recommend watching our video tutorial. Thanks to this, all the secrets of creating a New Year's crown from wire and beads will be revealed to you.
Master class on making head jewelry at home
Chenille wire crown

The process of making a crown from chenille wire. The flexibility and colorfulness of this material allows you to create unusually beautiful jewelry in the form of bracelets, rings, hairpins and cool figures. When you first encounter chenille wire, you will be amazed by its pliability and pleasant to the touch quality. Holding it in your hands, your imagination will naturally begin to draw great ideas for creativity. This perfect option in order to please your girl for the New Year 2019 with something excellent and unique. So, let's get started with our craftsmanship at home.
For production you will need:
- silver chenille wire - 10 fluffy sticks;
- finished headband;
- pliers with sharp teeth;
- brocade or wide satin ribbon;
- glue gun;
- scissors;
- various elements of jewelry: rhinestones, beads, snowflakes, white fur, confetti, sequins and more.
Work process:
- On initial stage we need to free our headband from all kinds of decor. We thoroughly wipe the surface and proceed to further actions.
- We take silver chenille wire and create something like diamonds from it. They can be either diamond-shaped, or round, or simply - simply form a variety of curls and zigzags, but so that your fictional designs fit into the framework of the “royal” crown design.
- Attach the decorative silver pieces to your base so that they hold tightly and firmly without dangling or falling off. Don’t worry, such improvised material as chenille wire is quite “obedient” and reliable in use. Having planted all the elements, you should connect them together with peculiar plexuses or something like that. Your imagination must work hard to achieve the desired excellent result.
- After the work has been done, you should carefully examine your product for flaws and various disadvantages. If you are faced with the fact that there are annoying tails of chenille wire left, spoiling the whole appearance of your decoration, take a pair of sharp-toothed pliers and remove any imperfections.
- Once you've completed your pattern, you'll usually be left with empty place on both sides of the rim, since this crown implies the location of the “pattern” only in the center, capturing slightly the lateral parts of the base. This, of course, looks more like a tiara, but the aesthetic appearance is in no way inferior to other types of decorations for a New Year's party. For beauty and grace, we will need to finalize the remains of the unshaped headband, disguising them with a silver satin ribbon or a piece of brocade of the appropriate color. We make some kind of curling movements around the hoop and use hot glue to secure our material.
- As for the transformation finished product, then here you can rely only on your taste and personal preferences. However, it is worth noting that rhinestones and small silver stones will perfectly complement and even emphasize your efforts.
So the decoration for the New Year 2019 is ready, made with your own hands quite quickly and easily. Your girl will certainly appreciate this creation and thank you with a warm smile and excellent festive mood. Fantasize and make your dreams come true, thereby making your loved ones and friends happier and kinder. And in order to create fertile ground for your thoughts and considerations, we invite you to look through our selection of photo ideas, which will provide many most interesting works for consideration.
Ask a little girl what she wants to be.
And she will probably answer that she is a princess.
And a princess definitely needs a crown.
You can make the crown yourself at home with your baby.
This will please her and help develop her creative imagination.
DIY crown made of cardboard
Even a child can make a crown out of cardboard without outside help from adults. To do this, you need to take A4 cardboard. An elastic meter measures the circumference of the head. If necessary, several sheets of cardboard are glued together into a long rectangular shape.

Using a pencil on this cardboard, the shape of a crown is drawn, which can even be the most unusual shape: with sharp teeth, with turrets, with patterns. After the workpiece is ready, it is cut out with scissors. The craft is bent into a circle. Both edges are secured together with a stapler. In order for the crown to stay firmly on the child's head, you can pierce holes in two places and stretch an elastic band through them. It will be pulled under the chin.

The resulting cardboard crown is decorated with your own hands. They will also get involved simple beads, sequins, ribbons and rhinestones. All this is attached with glue. After the adhesive base has dried, the product can be safely placed on the child’s head. Recommended to sew for a little princess royal dress. This will undoubtedly bring great joy to the child.
DIY crown made of wire and beads
It will take several hours to create such an elegant crown. But it is not so easy to break or dent. With one return movement, the shape of the crown will return to its original state.

To make a crown with your own hands you will need: beautiful bead cutting golden hue(40 grams), simple golden-colored beads (5 grams), golden-colored glass beads (5 grams), wire with a diameter of 0.3 ml special for bead weaving, wire with a diameter of 1 ml, pliers and wire cutters.
The work begins with setting beads on wire. The wire that is thickest is taken. The picture shows a crown with a rim slightly larger than the neck of a three-liter bottle. glass jar. If desired, the diameter of the rim can be increased.
When required quantity beads are placed on a wire, its ends are twisted.
The next step is to weave the petals of the crown with your own hands. Used French technique weaving. Along it, a bead-cut of 15 pieces is strung onto a wire piece 70 cm long. A loop is formed on one side of the future petal (as shown in the photo).

After this, the beads are strung again and an even larger loop is made. The beads are woven in an arc until the moment comes to twist the wire at the base of the resulting leaf.
At the very top of the petal the loop unfurls. Beads and glass beads are strung on it. The end of the wire does not need to be cut. It is enough to make a few turns and carefully hide it in glass beads.
According to the described scheme, you need to make five leaves.
After they are made, they are attached to the rim at an equidistant distance. The leaves are attached to each other using beads.
That's how it turned out small masterpiece– DIY crown made of beads and wire.
DIY lace crown
Such a textile crown on a princess will look very elegant from the outside. The image will become completely softer and sweeter.

To make a lace crown you need lace, rhinestones for decoration, foil and glue.
The required length of lace is measured. It's being cut. In order for the crown to keep its shape perfectly and not bend, the lace is placed on foil and soaked with PVA glue on it. Leave until completely dry (about six hours).

After drying, the lace is decorated with ribbons, rhinestones, and beads. They sit on the glue. It is better to use instantly drying colorless glue.
Both ends of the lace are glued together. It should be a bright and charming crown for a girl. This craft can be of different thickness and width. The crown made from more looks magical wide lace the finest weaving.
DIY felt crown
Making a crown with your own hands from felt is not difficult. It's a pleasure to work with this material. Felt holds its shape perfectly due to its density. This is an environmentally friendly material. The felt doesn't fray at the edges, so you don't have to process them.

You just need to cut out the desired pattern from paper and apply it to the fabric. It is necessary to measure the circumference of the child’s head in advance. Cut two pieces to pass the elastic inside the product.

To give beautiful shape along the edges it is advisable to lay a line on sewing machine. Then you need to insert an elastic band of the required width. The elastic can be threaded inside using a ruler. If the head circumference is measured correctly, then in the end the elastic band will not stick out from the crown on the child’s head. Otherwise it won't be pretty. If desired, the elastic band can be replaced with satin ribbon, which will be tied behind the head with a bow every time you put it on.
The resulting crown is decorated with artificial roses with your own hands. In the photo they are made of felt. It is important to choose a ferment for roses in pleasant pink and cream shades. To create a flower, oval and round shapes, which then form into a bud. They can be sewn together with thread and attached to a felt crown.
So we made a crown with our own hands from unusual material. Really hand made.
What is the most important thing in preparation for the holiday?
Mood! How to create it?
Simple, quick and easy to make a crown for your little girl to make her feel like a princess or queen.
If you have a lot of time to prepare, then we make a kokoshnik on a frame, or using cardboard, we cut out a template, according to which we will make a crown for the Snow Maiden or a snowflake.
Unfortunately or fortunately, our kids are designed in such a way that they need a crown instantly, literally in a few hours, or even better in a few minutes.
Notice the crowns above. Each of them is done quite quickly, which cannot be said about these crowns in the next photo.
 The first one is made using the kanzashi technique. A fairly well-known technique that has gained popularity is when a product is made step by step from ribbons. This first photo, you see, is beautiful and exclusive, but very fragile and not suitable for children.
The second photo is a creation made from beads; it can be either on a wire frame or without it. Look how sequins and large stones fit in here.
The rest of the beads complement and add charm. You will find all these details in any bead store, there will also be wire, stones and everything else that is required for such a creation.
Photo 3 - this is a kokoshnik embroidered with threads with beaded elements and made on a frame. Such beauty requires a lot of patience, attention and perseverance from needlewomen.
These crowns are very beautiful, but they are not suitable for little girls, since the time required and the amount of labor exceed the few minutes that little girls are willing to endure.
Therefore, let's consider quick ways creating crowns, while they are very impressive and beautiful, not at all inferior to kokoshniks, having the main advantage - they are light!
- from foil;
- from a plastic bottle;
- from a peat pot;
- from cardboard roll;
- frame decorated with tinsel;
- from lace;
- from paper.

We chose exactly 7, since hundreds of thousands of variants are made using these templates; they will differ only in details in execution or decoration.
Having begun to master the creation of a crown, we invite you to remember that it also requires. Lots of ideas and tips from slippers, tights to finishing touches on accessories and crowns.
How to make a suit from what you have at home or decorate a dress to create an exclusive outfit.And the crown will look perfect on the hairstyles specially selected in this article. They are suitable for snowflakes and queens, Christmas trees, Cinderellas and princesses. Many photos and videos available will show how to repeat them on your girl’s head, which will make it easy to recreate them.
It's time to practice and make one of the suggested ones or your own version based on photo ideas.Have you already chosen a hairstyle for your princess?
Foil crown
 To create such a crown, you need a roll of baking foil, tear it off and make voluminous rolls, creating a ring, then attach the top to it.
The foil bends well and maintains its shape. In addition to the crown, you can make other signs of royalty.
It’s very easy to add new parts or entire units, the only disadvantage of this material is that if it’s compressed too much, it’s very difficult to straighten it out, but we recommend using everything you have at home and decorating it in 2 layers, giving it a “silver” look.
Crown made from a plastic bottle
We immediately found 3 options, they differ in the method of adding color and decoration, but the basis is the same - these are familiar and familiar plastic bottles that are found in every home.
Golden
 The gold crown is a plastic bottle painted with varnish, its main advantage is that it is not closed in a ring, it covers ¾ of the head, which allows anyone to wear it, a decoration according to their own opinion and taste.
Pay attention to the photo, painted plastic is well decorated with stones and other decorations.
You can buy them in the store or look for them from the needlewoman’s mother in her “hamster” supplies. Often purchased just in case. Choose sew-on stones or ones with a flat inner side.
What is the crown decorated with?
The stones are glued using a hot gun or superglue. Sequins are glued around them; one bag will be enough to decorate the entire surface. Beads are also suitable, but we recommend choosing small ones, they weigh less.
Diadem


To create a tiara, you need a 2 liter bottle and a template, according to which we will draw a design with sparkles. Then we carefully cut it out and it is ready, if there is still time, then we paint it and glue rhinestones and stones, so it looks more valuable.
Lilac
 The base is a plastic bottle wrapped in glitter paper, and the front is decorated with rhinestones in the shape of shells or sequins.
- Prepare 5 liter bottle and draw the outline of the upper part on it, first measure the baby’s head. The volume of the head should be equal to the length of the resulting shape and bottle.
- To make it look beautiful and without alterations, draw the outline for the first time not with a permanent marker, but with a proofreader or pencil, and only after correcting mistakes with a marker. We want to reassure you, even if it didn’t work out the first time, it’s okay, because the front part will be decorated and the flaws will be hidden.
- We cut out the edges and make sure that they are 1-2 mm larger than the contour, because By running a lighter along the edge, we will make the edges less sharp and dangerous for the child.
- We cover the inside with shiny paper, this can be wrapping paper or gift bags. We do this using tape, a hot gun, or whatever superglue we have on hand. Remember about double-sided tape, it will stick perfectly to the plastic and hold the paper.
- We glue the sequins using a hot gun or superglue, applying from bottom to top so that the bottom layer overlaps the top.
- We decorate the lower part with matching tinsel. For better fixation, use a stapler; it will speed up the fastening process and the staples will not be visible, because she's brilliant. Double-sided tape will also work.
- To make sure the structure is strong, turn it upside down before trying it on, let it dry for several hours so that the glue sets everywhere, if you used it.
This crown is suitable for a queen or a mermaid, or maybe a butterfly or a queen. It all depends on the chosen color of the suit and the mood of your beauty.
Crown made from peat pot and cardboard roll
And these materials are definitely available in every home.
You will need: a cardboard roll of foil or a baking sleeve or film, possibly toilet paper, paint, washcloth, stones and sequins for decoration, a mustache clip, hot gun or superglue, paint brush and pen.  Its production is very similar, with a crown made from a cardboard roll, so we will not give the second description.
- We draw peaks on the crown so that we can see the necessary cutouts.
- We paint with white paint, it’s better to take acrylic, we need to paint our future crown inside and out;
- We cover it with golden paint so that our crown looks like a real one, we use a sponge for this.
- We decorate with rhinestones, beads, sequins, then glue a hairpin for fastening.
When making from a cardboard roll, you need to make a bottom. Leftover rolls are perfect. 
- Place the crown on cardboard or any thick paper. Draw a circle according to the shape, but you should get 2 circles. One is equal to the diameter of the crown, and the second is 2-3 cm larger.
- We cut out in a larger circle and make cuts, right up to the second circle, we bend these sections, we glue them inside so that the bottom holds tightly.
- It is extremely important to glue inside, because... the outside will look less aesthetically pleasing, so make sure that you don’t get confused and that all the tails of the bottom are inside.
- The remaining points are similar.
Frame decorated with tinsel
 Tinsel or rain is wrapped very tightly on the finished frame, preferably with glue or 2-sided tape; if possible, add beads to the peaks of the peaks.
It is important to check and remove any sharp or scratched parts using tape or other means. If there are sharp ends, drop them on them using a hot gun or dip them in PVA glue and let them dry.
Talk to your child what shape of crown she wants, show her different variants, but choose not the most complex ones.
Tinsel with a steel vein has appeared in stores; if you find it in a store, you will speed up the manufacturing process several times. There is no need to wrap anything, you just need to connect the individual parts.
We make a beaded crown on the frame, but such a crown cannot be called simple and quick, so it was left out of the top, but crowns sometimes turn out simply breathtaking. To make it you will need: pliers, round nose pliers, wire, beads and beads, a lot of time and patience.
Lace crown
 We starch any lace we like or grease it with PVA glue (or rubber glue), let it dry, and paint it acrylic paint and give it the desired size (put it on a jar or bottle).
What to do if you don't have lace?
Take a closer look, perhaps there are some lace curtains or an unnecessary blouse with openwork elements. This will do too. You just need to cut out the desired openwork element required length and then everything follows the algorithm, so don’t worry, even if this piece is stained or stained.
The advantages of this crown are its simplicity and accessibility, the disadvantage is the time it takes to dry.
The video will teach you how to make a lace crown:
Paper crown
Paper is a material that is found in every home, so it is the easiest way to make a crown in a matter of minutes. Naturally, it will be far from festive and will be simple, but if you spend a little more time decorating it, you will see that it will surprise and delight many guests of the holiday party.
Which crown options are the simplest:
- according to a paper template;
- origami;
- diadem;
- kokoshnik;
- from a paper plate.

Nowadays many templates have appeared on the Internet; print them out and place them on a hard base - you will get a crown like Alternative option- stick it on cardboard.
Pay attention to the 5th and 6th crowns, just cardboard or paper decorated with sequins, and in the second case lace and some beads are glued on.
Before you start cutting out the crown, measure the child's head to determine whether it will be elastic or will fit tightly.
How to make a work of art from a simple crown?
- Choose a suitable simple template than the easier it is better. Apply it to whatman paper, print it out and transfer it in a pencil, or immediately draw peaks on whatman paper.
- Cut according to the template to the required length. If the whatman paper is not very dense, then glue the inside into another layer or with colored silver paper.
- Purchase from a craft store: silver-colored snowflakes, braid with rectangular or pointed, silver-colored rectangular parts, glitter glue or glitter (gel glitter), simply replace it with PVA glue and glitter.
- On the cut out template we apply a pattern in shape reminiscent of drawing frost on the windows only in a very simplified version, leave room for snowflakes - they are the main accent of the crown, glue them using a hot gun or super glue. Lay a braid along the edge so that each bend has a border of them. If you don’t want to draw, then choose a piece of fabric with such a pattern in white or transparent.
- Try on the finished crown and sew on an elastic band if you have planned one, but pre-treat the edges with tape or glue a wide elastic band if you did not glue the 2nd layer of whatman paper.
It is important to choose everything in silver color, then white + silver will look elegant and in the style of snow.
This crown is suitable for both snowflakes and Snow Queen, as well as princesses or other fairy-tale characters.
For a crown using a template you need: a crown template, cardboard from the box, silicate and super glues, beads, beads, sequins, a hoop, rhinestone stickers, a container for glue, brushes for glue and a tool for laying out beads.
How this can be done at home is shown step by step in the video:
Crown for the Snow Queen
A kokoshnik is made from paper in the same way, as is a tiara, for decoration, tinsel or rain is often used, but the braid looks more advantageous, as do snowflakes instead of sequins.
Kokoshnik
Using origami technique
 You will need: a sheet of paper and strictly follow the folding instructions, decorate it with rhinestones, sparkles, snowflakes, beads and seed beads to match your princess’s costume.
But that's not all to make a high crown using the origami technique. It is enough to bend the required sides correctly.
Please note that there are 2 instructions in the photo, so choose the version of crowns that you like best.
Our top is all closed, but one more type of crown is left out. The reason for this is that they are easy if you master the crochet technique.
Note for needlewomen
Simple crowns or kokoshniks, with and without beads
If you know the beading technique, you can make crowns like these for your pet. We recommend making crowns on a wire frame, then the problem of maintaining the shape will not worry you.
Crochet crown

To crochet a crown, we use non-cotton threads; remember, threads with lurex will make sequins and small rhinestones invisible.

Delicate crowns for snowflakes


We suggest right now to knit a crown in 30-40 minutes, even for a beginner!
You will definitely know the answer to the question of where to get it with video lessons for beginners.
Here is a crown on a headband, a hair clip, ideas for creating a crown for any head size. Just take 30 minutes and grab a hook and thread, and then the magic of transformation will follow.Tie any of the crowns the right size and volume, all special calculations are given.
A few more secrets about tying beads, pay attention to the photo.
What to do if the threads are the wrong color?
When making a crown from threads of the wrong color, you shouldn’t be upset, you can paint it, but then you shouldn’t tie in beads, it’s better to sew them on later.

If you are knitting along the edge, another option is to put the beads on a loop, but if you want them to be on top of the product, then it is better to string them on a thread before knitting and knit them through a double crochet, so all the beads will lie on top. Single crochet, we show 2 knitting methods in the photo. 1 is an option on the Russian-language Internet, and 2 is an English-language option.
Now you are full of ideas and ready-made instructions for implementation, if you found our review useful, click on the buttons on social networks.
If you have a boy, then we offer you variations of crowns. So which crown will suit your knight? It's time to choose and make a crown with your own hands according to his order. Moreover, master classes with photo and video instructions.
And also New Year's costumes: squirrels, hedgehogs, bunny, for everyone who wants to look original and surprise their friends and those invited to the holiday.
And if you need more ideas for creativity and tips, then pay attention to this link l. Many will receive a prize for original costume! It's time to start right now and create your own version New Year's costume, because you are limited only by your fantasies.
Step-by-step master class on making a universal crown

This crown is ideal because it has no size and is simple, suitable for both a very young snowflake and an older one.
You will need: a thick elastic band or stretchable bandage, plastic cup, snowflakes, lace and all the beautiful sequins and half-beads for decoration.
- Cut out a shape similar to a tiara from a glass.
- Sew the elastic band to the plastic form on both sides.
- We cut off the bottom of the glass, where there is a curved sill, and decorate it with lace, sew it to the bottom with stitches using a needle and thread. We glue half beads on top of the lace to create the desired accents.
- We lay out a tiara from snowflakes and glue it using a hot gun or superglue.
How to make a universal crown for any size head for a snowflake, video master class:
Tiara crown
We will need: an old tiara, mesh with sequins, tulle of 2 densities blue and white, snowflake, scissors and threads, sewing machine.
- In order for our snowflake to be fixed and stay on the tiara, it is necessary to make a hard backing from tulle.
- To do this, measure the size of the snowflake, applying it to the tulle and make a cut with a margin. From the resulting piece we make a dense, dense assembly either with a needle or with a machine. The denser the base, the better, so we make assemblies frequently.
- The resulting volumetric part will not suit us; we need to make it flatter and evener using an iron with the tulle or guipure mode.
- We adjust the blue tulle onto white.
- The third layer is a thin white tulle, it will be the background for the snowflake. Therefore, we lay it in an uneven fold and then attach it.
- We cut off the lower uneven edge of the tulle, then glue the tiara to it on top, thereby covering the seam. Glue using a hot gun.
- Similarly, glue a snowflake in the center.
- We cut off all 3 layers giving the crown a shape similar to a diadem. We move from the sides to the center, where our snowflake is located. Check that it is symmetrical.
- Then use an iron to add volume and fluffiness to the back layer.
- The fairytale princess's crown is ready, it's time to try it on and go to a ball or matinee at school or kindergarten.
Video on creating a crown from an old tiara:
Beaded crown
Beaded crown with bezel
Crown of Autumn
Autumn crowns are another type of individual beautiful jewelry, with which it’s time to delight your girls in the fall, when there are especially many autumn leaves.
How is a crown made from leaves?
There are many options for creating autumn crowns:
- we weave a wreath from maple leaves;
- from maple leaves by darning the tips of adjacent leaves;
- we glue or screw the leaves onto a finished frame made of paper or wire;
- We cut out leaves from paper or other materials and glue or sew them in the desired sequence.
On a rim of leaves
Secure the leaves with tape
Another option with threads for attaching to the rim
Autumn paper crown
Leaf darning method
forest crown
A chic crown made of: hoop, wire, beads and roses.
Detailed video on creating a crown:
Have a great mood and inspiration for creating a costume with a crown.


